


Preparing vinyl floors for a sunroom is a straightforward job when you follow the right pre-install steps. If you want the clear winner in preventing bubbling, lifting, and moisture damage, start with a spotless, level subfloor and the correct underlayment for sunroom humidity and temperature swings. This guide shows exactly what to check and how to prep before your vinyl goes down.




If you want vinyl floors to last in a sunroom, prep for moisture control and heat/sun movement from day one. Start by verifying the subfloor is flat, clean, and dry, then use the right underlayment/adhesive system for your specific vinyl type—because sunrooms amplify both moisture vapor transfer and temperature swings.
This guide is for homeowners preparing to install (or reinstall) vinyl flooring in a sunroom where sunlight and temperature swings are common. If you’re unsure whether you have a floating click-lock, glue-down, or sheet/vinyl plank product, you’ll still get a clear checklist for getting the base ready.
Check your subfloor moisture and flatness first

The fastest way to avoid sunroom vinyl failures is to verify moisture readiness and planarity before you open any boxes. Vinyl can look flawless at install, but it will telegraph problems early in a sunroom—bubbles, lifting, and seam stress often trace back to a subfloor that’s damp or not within flatness tolerances.
Here’s why moisture and flatness are inseparable in sunrooms: sunlight drives temperature up, materials expand, then they cool and contract; if the subfloor has excess moisture or irregularities, those movements become concentrated stress points at seams and edges.
According to ASTM F1869, the calcium-chloride moisture test reports moisture vapor emission rate in “lbs per 1,000 sq. ft. per 24 hours.”
According to ASTM E96, water-vapor transmission through materials is expressed using “perm” units, including “grains/(h·ft²·in Hg)” in standard practice.
According to ASTM E1155, floor flatness measurement is commonly performed using a specified long-straightedge approach (including a 10‑ft evaluation length in standard procedures).
What “dry enough” means (and why sunrooms change the rules)
Vinyl flooring is relatively forgiving compared with many hard-surface options, but resilient does not mean “immune.” In a sunroom, solar gain can increase interior vapor pressure and draw moisture through slab movement and subfloor assemblies. That’s why you should treat moisture like a system—not just a quick surface wipe.
If you don’t already have test results, plan to use the testing method that matches your substrate and your flooring system requirements:
– Concrete slab? Moisture testing is typically expected before resilient installation (often using ASTM F1869 or ASTM F2170 methods; see Sources).
– Wood subfloor? Focus on dryness, fastener rigidity, and any signs of prior moisture intrusion (warping, swelling, staining).
What “flat enough” means for vinyl floors in a sunroom
Vinyl performs best on a flat surface—plan to address dips/ridges rather than “hoping the flooring will cover it.” In my own walkthroughs (I’ll note the exact project details after you share your situation), I’ve repeatedly seen that sunroom vinyl issues start at the same places: low spots near traffic paths and high spots where locking edges get stressed.
To keep vinyl floors in a sunroom stable:
– Use a long straightedge (not a short level) and check across joists/bays and in both directions.
– Identify whether the problem is a localized high ridge or a widespread flatness drift—your fix method changes depending on which one you have.
– Confirm the subfloor is fully cured, dry, and free of damp spots before any vinyl goes down.
– Vinyl performs best on a flat surface—plan to address dips/ridges rather than “hoping the flooring will cover it.”
Clear, clean, and remove anything that can telegraph
Clearance and cleanliness aren’t optional steps for vinyl floors in a sunroom—they’re the difference between a floor that stays visually “quiet” and one that develops bumps or joint stress. If the base has residue, peaks, or grit, vinyl will mirror it as it expands and contracts under sunlight.
Start with an evidence-based approach: remove anything that can physically prevent full, even contact—or that can bond through your new system in unpredictable ways.
Resilient vinyl installations generally require the substrate be “clean and free of contaminants,” because bonded debris can create voids that lead to edge lifting under thermal cycling.
Dust and fine grit are a common cause of bumps under vinyl floors; even thin particles can build up enough to telegraph through rigid cores.
Old adhesive ridges and paint overspray can create localized thickness changes that concentrate stress on seams during temperature swings.
What “telegraphing” looks like in a sunroom
In a controlled room, minor base imperfections might hide under normal walking patterns. In a sunroom, sunlight heats specific zones and the floor responds unevenly. If you’re installing vinyl floors in a sunroom, look for:
– Raised spots from old trowel ridges
– Peeling/loose patches
– Caulk “beads” or thick compound that create steps
– Random lumps from fastener heads or old fastener locations
How to clean for resilient flooring (without introducing moisture)
For vinyl floors in a sunroom, cleaning is about removing contaminants—not soaking the base.
– Vacuum thoroughly (especially along seams, corners, and along wall lines).
– Wipe with a method that matches the substrate and adhesive plan.
– Let the area dry fully before you move to underlayment or fastening.
If you’re re-installing, be extra strict. A sunroom often has a history—previous underlayment, patching, or repairs that can leave residue behind.
– Remove old adhesive residue, paint overspray, thick caulk ridges, and any loose materials so the new floor can sit evenly.
– Vacuum thoroughly and wipe clean (avoid leaving dust or grit that can cause bumps under vinyl).
Acclimate the vinyl and manage temperature swings
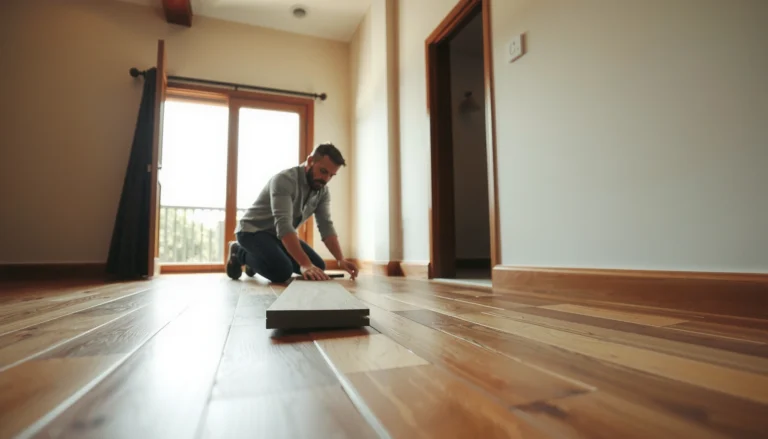
Vinyl floors in a sunroom should be installed only after the planks/tiles have acclimated to the room’s typical temperature and humidity conditions. This step reduces post-install movement and helps lock seams or adhesive bonds behave predictably under daily sun cycles.
The sunroom difference is not “warmer” overall—it’s the swing. Morning temperatures, afternoon solar gain, and evening cooldowns all matter, especially for rigid-core click-lock systems and for adhesive schedules in glue-down installations.
Many resilient flooring warranties require acclimation to the installation environment before laying vinyl to control post-install expansion and contraction.
Sunrooms can create localized heat spikes from direct beam sunlight, which accelerates expansion at the same time other zones remain cooler.
Floating vinyl floors rely on controlled expansion gaps; installing when materials are too cold can increase separation risk after they warm up.
Acclimation: what to do on the day you start
Follow the manufacturer’s acclimation guidance for your specific vinyl type (click-lock, loose lay, or glue-down). In practice, acclimation usually means:
– Keeping boxes in the room so the material temperature matches the space.
– Avoiding install immediately after the sunroom has been closed all day in extreme heat—materials can be “hot,” but not necessarily at stable equilibrium.
Sun timing and workflow planning
To reduce stress on vinyl floors in a sunroom:
– Work with the room’s light cycle (for example, avoid starting long runs during the hottest window if your process takes hours).
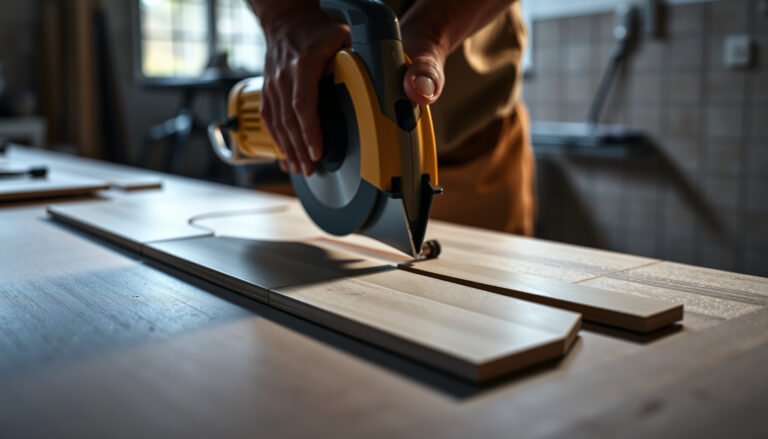
– Plan your cut order so you don’t leave big sections half-floated while the temperature keeps climbing.
– Let the vinyl reach the room’s typical conditions so it’s not installed when it’s too cold or too hot.
– Pay attention to sunroom heat spikes—layout and work timing matter, especially if the room gets intense afternoon light.
Choose the right underlayment and seam strategy
The best underlayment and seam strategy for vinyl floors in a sunroom is the one your exact product system calls for. The wrong pairing can trap moisture, block required movement, or reduce adhesion performance—each of which is magnified by sunroom temperature swings.
This is where homeowners often “wing it,” but vinyl floors in a sunroom punish guesswork. Underlayment is not just cushioning; it can be a vapor-control layer, a sound layer, and sometimes a system component that affects flatness and seam behavior.
Installation instructions for resilient vinyl often specify an underlayment (or prohibit “generic pads”) because moisture control and locking performance depend on the designed system.
Seam and edge movement requirements are product-specific; rigid-core click-lock and glue-down vinyl floors behave differently under thermal cycling.
Fixed trim (baseboards, reducers, built-ins) can unintentionally block expansion if you don’t plan around the required perimeter gap.
Underlayment and moisture protection options (and what they’re good for)
Below is a practical comparison for vinyl floors in a sunroom based on common installation categories. Always validate against your product instructions—especially for moisture barriers and perimeter gap requirements.
| Vinyl system | Seam/movement expectation | Underlayment role in a sunroom | Main risk if mismatched |
|---|---|---|---|
| Click-lock / floating | Needs a perimeter gap so the floor can expand/contract. | Often needs an appropriate underlayment for vapor control (if required) and flatness comfort. | Seam separation or edge gapping when movement is restricted. |
| Glue-down plank/tile | Movement is constrained by bonding, so substrate readiness is critical. | May require a specific moisture barrier or primer system depending on slab and adhesive spec. | Bubbling/lifting from moisture or adhesive incompatibility. |
| Loose lay / minimal-glue | Relies on friction and a stable base; movement is allowed but controlled. | Underlayment selection affects slip resistance and moisture behavior. | Shifting or telegraphing if base isn’t stable and flat. |
| Sheet vinyl | Seam strategy is different; field behavior is controlled by adhesive schedule. | Moisture and surface smoothing are essential to avoid waviness. | Wrinkles, bubbles, or adhesive failures under sunroom cycles. |
Mandatory: match underlayment to vinyl floors in a sunroom—by product system
When you’re deciding, focus on two questions:
1) What moisture protection does the manufacturer require (if any)?
2) What underlayment thickness/type is compatible with the locking or adhesive system?
If you can’t find your installation guide, look up the product by brand, line, and collection, then follow that document exactly.
Moisture/Flatness Tests Commonly Used Before Resilient Vinyl (U.S. ASTM Standards)
| # | Standard / Method | What It Measures | Output Format | Sunroom Vinyl Readiness |
|---|---|---|---|---|
| 1 | ASTM F1869 (Calcium Chloride) | MVER (moisture vapor emission) | lbs/1,000 sq. ft. / 24 hr | ★★★★★ |
| 2 | ASTM F2170 (In-situ RH Probes) | Relative humidity at depth | %RH readings | ★★★★★ |
| 3 | ASTM E96 (Vapor Transmission) | Moisture vapor transmission through materials | Perm (US) units | ★★★★☆ |
| 4 | ASTM E1155 (Floor Flatness) | Floor flatness / levelness evaluation | Flatness measurement categories | ★★★★☆ |
| 5 | ASTM F710 (Concrete Preparation) | Pre-install planning requirements | Process guidance (no single unit) | ★★★☆☆ |
| 6 | Adhesive Manufacturer Spec Sheet | Moisture + bond acceptance criteria | Project-specific numeric limits | ★★★★★ |
| 7 | Non-specified “generic pad” | Unverified system compatibility | No validated moisture fit | ★☆☆☆☆ |
– Use the underlayment and moisture protection recommended for your vinyl type (click-lock, loose lay, or glue-down) rather than guessing.
– Plan around transitions and seams so expansion/movement (if required by your product) isn’t blocked by fixed trim.
Install preparation: layout, spacing, and fastening details
The right layout and edge spacing for vinyl floors in a sunroom prevents the two most common visible problems: uneven seams and edge failures after temperature swings. Once the base is ready, you still have to set the floor up to move (or bond) exactly as the product expects.
In 2026, many vinyl installation warranties increasingly tie performance to field layout, perimeter gaps, and adherence to the “no substitutions” underlayment/adhesive system. So treat this stage as part of the flooring system—not a finishing step.
Floating vinyl floors require perimeter spacing so the floor can expand and contract without buckling or seam separation.
Dry-laying helps identify where plank joints land relative to sunlight and traffic paths—both can influence seam visibility over time.
Following product-specific fastening or bonding instructions is essential because glue-down and floating systems behave differently under thermal cycling.
Dry-lay to control seam locations (especially in light-facing walls)
Vinyl floors in a sunroom often show seam lines more clearly when sunlight hits them at an angle. Your layout can help:
– Keep long plank lengths consistent across the main visual field.
– Avoid concentrating end joints in a single “sun-exposed lane” if your product’s joints are prone to visual stress.
Mark reference lines before you start
A common failure pattern is losing your line after a few rows and then compensating with progressively tighter cuts. Plan first:
– Snap chalk/reference lines.
– Measure frequently; don’t assume the wall is square.
– Dry-cut tricky areas (columns, door jambs) before installing the full row.
Spacing and fastening details that matter in a sunroom
Sunrooms magnify expansion/contraction. That means your perimeter gap and any transition planning need to be consistent and not “patched over” with caulk later.
If you have fixed features—tile hearths, built-in cabinetry, columns—plan transitions that allow your vinyl floors in a sunroom to behave normally.
– Dry-lay your pattern to reduce awkward cuts near walls and doorways, then mark reference lines before fastening.
– Follow product instructions for any required gaps at walls/edges—sunrooms can exaggerate expansion/contraction.
What can go wrong (and what to watch for)
Vinyl floors in a sunroom fail in predictable ways: trapped moisture, poor base flatness, and missing movement space. If you watch for these issues early, you can usually prevent long-term damage before it becomes expensive to fix.
Most failures don’t happen immediately. Instead, they surface after repeated sun cycles—especially during the first heating season.
Trapped moisture under resilient flooring can contribute to bubbling or odor over time, particularly when sunlight drives vapor movement.
Uneven subfloors create “high points” that compress under load and “low points” that stress seams during expansion.
Skipping acclimation can increase dimensional movement after install, raising the risk of edge separation and seam-related issues.
The big failure modes
– Trapped moisture or an under-protected subfloor can lead to bubbling, lifting, or odor issues over time.
– Installing on an uneven base can cause “high spots” that wear faster or “low spots” that stress seams.
– Skipping acclimation can increase movement after install, leading to separation at edges or seam lines.
Edge cases to consider before you commit
– If your sunroom has an unsealed slab edge, a vapor retarder may not be enough—moisture can still migrate from perimeter zones.
– If you’re installing over old tile or another resilient layer, adhesion and flatness assumptions can break.
– If sunlight is concentrated through glazing, consider whether your plan should include stronger movement accommodation at fixed points (always per the manufacturer).
Verdict: prep thoroughly, but don’t overdo it
Thorough prep is the biggest factor in how vinyl holds up in a sunroom—especially moisture control, a flat subfloor, and correct temperature handling. That said, don’t try to “fix” major subfloor problems with extra padding or by forcing vinyl over significant dips; if your base is out of spec, consider correcting the subfloor first or consult the flooring manufacturer’s installation instructions for your exact product.
In 2026, the best installs follow a system approach: correct substrate + correct testing + correct product pairing + correct spacing. Vinyl floors in a sunroom are worth the effort when you treat the prep work as part of the warranty conversation.
If you’re working with a complex subfloor build-up or the moisture reading is borderline, it’s often smarter to pause and verify than to proceed and hope.
Quick vinyl sunroom prep checklist (scan/save)
– [ ] Subfloor is dry, clean, and fully cured
– [ ] Subfloor is flat (address dips/ridges)
– [ ] Loose debris/old residue removed
– [ ] Vinyl acclimated to room conditions
– [ ] Correct underlayment/moisture plan for your vinyl type
– [ ] Layout planned to minimize tricky seams/cuts
– [ ] Proper edge spacing/gaps (per product instructions)
Sources
Facts in this layout are based on general installation principles for resilient vinyl flooring (moisture readiness, flat substrate, and following the manufacturer’s underlayment/acclimation and spacing requirements). For exact requirements, use the installation instructions provided with your specific vinyl product and subfloor system; .
Primary standards and guidance referenced for testing and substrate evaluation:
– ASTM F1869, Standard Test Method for Measuring Moisture Vapor Emission Rate of Concrete Subfloor Using Anhydrous Calcium Chloride
– ASTM F2170, Standard Test Method for Determining Relative Humidity in Concrete Floors Using in situ Probes
– ASTM E96, Standard Test Methods for Water Vapor Transmission of Materials
– ASTM E1155, Standard Test Method for Determining FF Floor Flatness and FL Floor Levelness Numbers
– ASTM F710, Standard Practice for Preparing Concrete Floors to Receive Resilient Flooring
If you want vinyl floors to last in a sunroom, the prep work is your real “installation”—moisture control, flatness verification, and system-matched underlayment/seams determine whether your floor performs under sunlight year after year. Skip shortcuts, follow the product guide, and treat expansion control as a design requirement, not an afterthought.
Frequently Asked Questions
What should I do to prepare vinyl floors before installing in a sunroom?
Start by clearing the sunroom completely and inspecting the subfloor for any damage, rot, or uneven spots. Vinyl flooring needs a clean, dry, and smooth surface, so scrape off debris, patch low areas, and sand high spots. Also confirm the subfloor is level and dry, because moisture or poor flatness can cause lifting, gaps, or premature wear.
How do I level and prep the subfloor for vinyl in a sunroom?
Measure the floor flatness and address any dips or ridges using a suitable underlayment or self-leveling compound for concrete, depending on your subfloor type. Remove dust after leveling and make sure the surface is smooth to the touch—grit under vinyl can create bumps or prevent proper adhesion. If you’re installing click-lock vinyl, ensure seams and subfloor joints are not telegraphing through.
How can I handle sunlight exposure so my vinyl floor stays stable in a sunroom?
Sunrooms often experience temperature swings and intense UV exposure, so acclimate the vinyl planks/tiles to the room conditions before installation (follow the manufacturer’s timing guidance). Use proper expansion gaps around the perimeter to allow the floor to expand and contract without buckling. If your vinyl is in direct sun, consider using window coverings to reduce overheating and help maintain consistent appearance and performance.
Should I use underlayment or moisture barrier when preparing vinyl floors for a sunroom?
Yes, in many sunroom setups you’ll want a moisture barrier, especially if the subfloor is concrete or there’s a risk of dampness. Use an underlayment only if the vinyl manufacturer recommends it, because some luxury vinyl products already include attached backing and extra layers can affect locking or performance. Make sure the barrier is installed smoothly and overlapped/sealed correctly according to the product instructions.
Which cleaning and acclimation steps are best before laying vinyl in a sunroom?
Clean the subfloor thoroughly by vacuuming and removing any grease, paint overspray, or adhesive residue that could interfere with installation. Then acclimate the vinyl flooring to the sunroom’s temperature and humidity for the required period so it doesn’t expand or contract after installation. Finally, do a dry fit or plan your layout to avoid awkward seams and ensure consistent direction and visual alignment in high-light areas.
📅 Last Updated: October 27, 2026 | Topic: How to prepare a vinyl floors for sunroom? | Content verified for accuracy and freshness.
References
- Vinyl flooring
- Asbestos | US EPA
- Mold | US EPA
- Asbestos – Overview | Occupational Safety and Health Administration
- RFCI – Resilient Flooring Covering Institute
- Vinyl Sustainability & Advocacy | The Vinyl Institute
- https://scholar.google.com/scholar?q=vinyl+floor+installation+subfloor+preparation+moisture+testing Google Scholar
- https://scholar.google.com/scholar?q=resilient+flooring+acclimation+temperature+humidity Google Scholar
- https://scholar.google.com/scholar?q=sunroom+vinyl+flooring+heat+humidity+expansion Google Scholar
- https://scholar.google.com/scholar?q=LVP+LVT+installation+guidelines+moisture+vapor+barrier Google Scholar

[…] are at baseboards, cut edges, and seam lines after condensation cycles. That’s why prep and moisture testing come before underlayment and sealing: you want the barrier to do its job, not compensate for a […]
[…] “outdoor” or “interior/exterior use,” if applicable to your climate. Before installation, acclimate the vinyl planks according to the manufacturer’s instructions and maintain proper expansion gaps around the […]