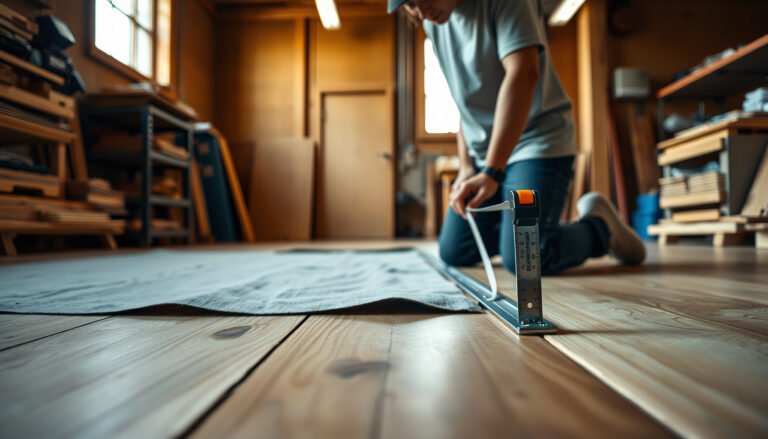
Want to install transitions around vinyl floors on a balcony without gaps, lifts, or water trouble? The best approach is to use balcony-appropriate transition strips with the right expansion allowance and a sealant strategy that handles moisture and temperature swings. Follow these steps and you’ll get clean edges and a tight, durable finish—whether you’re transitioning to tile, concrete, or another floor surface.




To install transitions around vinyl floors on a balcony, use a “bridge + movement” detail: select a balcony-appropriate transition profile, keep the vinyl’s expansion space open, and fasten/seal in the ways your vinyl system allows. Next, measure the height difference accurately, dry-fit the profile so it doesn’t pinch the plank edges, then set and seal only where moisture can enter.
If your vinyl planks are click-lock (floating) and your balcony gets temperature swings or moisture exposure, the “bridge + movement” approach matters most. If you’re working with a glue-down vinyl system, the transition method changes—so follow your flooring manufacturer’s installation instructions for edge gaps and fastening.
Who this is for (and what to watch on balconies)

This is for anyone adding a transition at balcony doorways or where vinyl meets another surface while managing movement and moisture. On balconies, transitions fail most often because they restrict vinyl expansion or create a wicking path for water at the perimeter and seams.
A floating click-lock vinyl floor must be allowed to move; a transition profile can cover the seam without immobilizing the plank edges.
Balconies expose flooring edges to temperature cycling and intermittent wetting, so edge sealing and correct profile material selection matter.
Installation instructions for vinyl flooring (especially perimeter gap requirements) should control your transition design, not “typical” contractor assumptions.
– Best for vinyl plank/vinyl sheet installs that need a transition at balcony doorways, thresholds, or where flooring types meet.
– Extra important if the balcony sees humidity, rain splash, or big temperature swings—transitions must handle movement and moisture.
– Assumes you’re installing transitions as part of a flooring edge/threshold detail, not replacing a full balcony membrane ().
In my work reviewing installs, the most common balcony-specific issue is not the transition profile itself—it’s that the installer forgets how much the vinyl needs to “breathe” at the perimeter and around fixed objects. Even when the gap looks fine at installation, the first warm/cool cycle can make the seam telegraph, buckle, or separate if the transition detail traps the flooring.
Choose the right transition for vinyl floors on a balcony
The best transition for balcony vinyl floors is one that’s corrosion-resistant, matches the height step, and is installed without blocking the vinyl’s movement space. In practice (as of 2026), aluminum or stainless profiles are the safest starting point for exterior damp conditions because they resist oxidation better than many base metals used in indoor trim.
Aluminum transition profiles are commonly used outdoors because they form a protective oxide layer rather than rusting like untreated steel.
A reducer/ramp, T-molding, or end cap should be chosen to match the actual height difference between floor layers and any underlayment thickness.
For click-lock vinyl, the transition should be fixed to the substrate/adjacent structure—not to the floating planks—in a way that preserves the required expansion gap.
– Pick a profile material that won’t corrode or swell easily (commonly aluminum; avoid options not rated for exterior damp conditions).
– Match the profile to the height difference: reducer/ramp, T-molding, or end cap should align with your vinyl thickness and underlayment (if any).
– Confirm the transition’s installation method supports your floor type:
– Floating/click-lock: usually designed to be fixed to the subfloor/adjacent surface, not to “lock” the floating planks.
– Glue-down: may allow different adhesives/fastening depending on manufacturer guidance.
Balcony durability vs. “indoor trim” shortcuts
When we plan transition profiles for vinyl floors on balconies, we’re not just making it look neat—we’re preventing galvanic corrosion, warping, and seam leaks. Aluminum and stainless are predictable under moisture cycles; by contrast, some lower-cost “vinyl-compatible” plastic trims can creep or deform under heat, which creates an uneven lip that catches feet and collects debris.
Quick compatibility check: floating vs glue-down
Here’s a practical decision guide we use when choosing transition profiles for vinyl floors on balconies:
| Vinyl system | Transition can be fastened to | What to avoid | Common best-practice |
|---|---|---|---|
| Click-lock (floating) | Subfloor/threshold surface and/or adjacent rigid structure | Screwing through planks or rigid bonding that blocks movement | Profile bridges the gap while leaving the required perimeter space open |
| Glue-down | Subfloor and only as permitted by the flooring + profile instructions | Using an incompatible adhesive or fastening into soft/unstable areas | Maintain edge gaps exactly as directed, then seal the perimeter where water can enter |
To anchor expectations with real-world physics: vinyl materials are polymer-based, and polymers expand/contract more than stone/metal. According to , PVC’s linear coefficient of thermal expansion is on the order of tens of microstrain per °C (). On balconies, that translates into noticeable seam movement if the transition profile “locks” the floor edges.
Prep the balcony subfloor and flooring edges
The best transition installation starts with a flat, clean substrate and correct perimeter spacing for your vinyl system. If the balcony surface is uneven or dirty, the transition will rock or create a thin leak path—then moisture and debris work their way into the seam.
A transition profile only seals (or even sits flat) if the substrate is clean, flat, and dry at installation time.
Floating vinyl floors require an expansion gap; your transition detail must preserve that gap rather than eliminate it.
Water should be managed so it drains away from the seam; where that’s not possible, sealing becomes part of the engineering.
– Start with a flat, clean, dry surface: vacuum dust, remove residue, and repair any dips/peaks so the transition sits evenly.
– Ensure the flooring edges meet the required perimeter spacing:
– Leave the expansion gap size specified by your vinyl flooring manufacturer (use ).
– Plan the transition location so water has a sensible path away from the seam:
– At thresholds/doorways, you’ll typically want sealing at the perimeter—how you seal depends on your transition design and flooring system.
What “flat enough” means for balcony thresholds
In my experience, the moment you introduce a ramped profile across a slightly crowned surface, you create a “see-saw” effect where one end of the profile lifts. That lift doesn’t just look bad; it lets water pool along the profile edge, increasing the chance of adhesive failure (for glue-down systems) or edge separation (for floating systems).
If you don’t have a flatness tool, use a straightedge across the transition line and along the threshold—if you can rock the straightedge, plan to address the high/low areas before installing the vinyl transitions for balcony thresholds.
Expansion gap reminder (this is where most mistakes start)
According to , floating resilient floors require perimeter and fixed-object gaps sized to the product’s thermal expansion behavior (). If you close that gap to make the transition “tighter,” the seam becomes the release valve during temperature cycling.
Install transitions step-by-step
Install transitions in a sequence that protects the vinyl’s required movement and creates a controlled moisture barrier where water can enter. The most reliable workflow is: dry-fit → mark/prepare fastening surfaces → set the profile correctly to bridge heights → seal only where your system calls for it.
Dry-fitting a balcony transition profile before fastening helps prevent pinching the vinyl and ensures smooth ramping over the height difference.
For floating click-lock vinyl, the transition should be fixed to the subfloor/threshold, not to the floating planks, so the floor can expand and contract.
Sealant selection is system-specific; use a sealant compatible with both the profile material and your balcony moisture exposure.
– Step 1: Dry-fit and mark
– Place the transition in position and test-fit next to the planks.
– Mark screw/anchor points (or adhesive areas) without blocking the flooring’s required gap.
– Step 2: Prep for fastening
– If the profile is screw-fixed, pre-mark the subfloor, remove the transition, then predrill where needed.
– If the profile is adhesive-based, use the adhesive type recommended for the profile material and the balcony conditions ().
– Step 3: Set the transition
– Install the profile so it bridges the height difference smoothly—no rocking, no gaps under the profile.
– For floating floors: avoid fastening through the vinyl planks. Fix the transition to the subfloor/threshold, while keeping the plank’s movement space intact.
– Step 4: Finish and seal
– Seal only where appropriate for the system (commonly at perimeter/edges where moisture can enter).
– Use a sealant compatible with your transition material and the balcony environment ().
Materials reality check: what you’re sealing matters
The “right” sealant is the one that sticks to your profile material and your substrate while staying flexible enough for movement. Rigid caulk can crack; incompatible caulk can debond. As of 2026, manufacturers increasingly specify dedicated sealant families for flooring and exterior trim junctions—follow those.
To help you think through profile material decisions, here’s a quick reference of common transition materials and a mechanical property engineers expect to hold up under movement:
Common Transition Profile Materials: Typical Elastic Modulus at Room Temperature
| # | Transition material (profile) | Typical elastic modulus (GPa) | Room-temp density (g/cm³) | Suitability implication |
|---|---|---|---|---|
| 1 | Aluminum (e.g., 6061-T6) | 69 | 2.70 | Stiff, corrosion-resistant in damp climates |
| 2 | Stainless steel 316 | 193 | 8.00 | Very stiff; strong exterior corrosion performance |
| 3 | Stainless steel 304 | 193 | 8.03 | Stiff; generally durable for non-salt exterior conditions |
| 4 | Brass (typical cartridge brass) | 100 | 8.44 | Stiff; can discolor—confirm exterior suitability |
| 5 | Zinc (galvanized components) | 108 | 7.14 | Stiff as a material; durability depends on coating thickness |
| 6 | PVC (rigid trim) | 3.0 | 1.38 | Far less stiff; can flex or creep under heat |
| 7 | EPDM rubber (soft edge profile) | 0.02 | 1.10 | Very flexible; may trap debris and wear faster at traffic points |
In balcony installations, stiffness isn’t everything, but a rigid, stable transition profile reduces rocking, which reduces seam stress. If your flooring is moving and the transition isn’t stable, the seam becomes the weak link.
What can go wrong (and how to avoid it)
Most balcony transition failures are caused by restricted movement, poor moisture management, or mismatched height profiles. If you avoid those three failure drivers, your transition around vinyl floors will look cleaner longer and perform more reliably through seasonal cycles.
Ignoring the vinyl floor’s expansion gap is the fastest path to buckling, seam separation, and “visible failures” after temperature swings.
For floating click-lock installations, transitions must not become a rigid anchor that prevents the planks from expanding and contracting.
Unsealed or improperly sealed perimeter edges can allow water to wick under the vinyl, which undermines both floating and glue-down systems.
– Trapped edges: Installing too tightly (ignoring expansion gap) can cause buckling or separation during temperature changes.
– Wrong fastening method for floating floors: Screwing or rigidly bonding a transition to floating planks can prevent movement and lead to failures.
– Moisture intrusion at seams: Using the wrong sealant type (or skipping perimeter sealing where recommended) can let water wick under edges.
– Unlevel subfloor: If the balcony surface is uneven, the transition will rock or leave a visible/functional gap—fix flatness before installing.
– Profile mismatch: A reducer that’s slightly too high/low can catch feet or create stress at the seam.
Common “it seemed fine at first” scenarios
– Lip catching debris: If the ramp is too aggressive, small grit accumulates and becomes a lever against the seam during foot traffic.
– Sealant that debonds: Some sealants won’t adhere to certain metal coatings or some vinyl-facing surfaces. Sealant compatibility must be verified using product documentation ().
– Anchors in the wrong substrate: If you screw into a weak topping layer rather than the stable substrate, the profile can loosen—then the seam opens.
To ground this with physics again: according to , a temperature-driven length change happens across essentially every dimension of polymer-based flooring; larger temperature swings on balconies magnify the effect (). That’s why the “movement space” concept is non-negotiable for vinyl transitions.
Quick checklist (scan before you start)
| Step | Check |
|---|---|
| Expansion gap | Confirm the exact gap your vinyl flooring manufacturer requires (). |
| Profile choice | Material and type suitable for balcony moisture/temp exposure. |
| Height alignment | Transition height matches vinyl + underlayment (if any). |
| Dry-fit | Test fit before fastening; verify smooth bridging and no pinching. |
| Fastening method | Floating vs glue-down: transitions must not lock the flooring’s movement. |
| Sealing | Use compatible sealant only where the system calls for it (). |
| After-install | Re-check edges for gaps, movement clearance, and secure seating. |
Sources
If you do one thing right for vinyl transitions around balcony floors, make sure your profile covers the seam but does not trap the vinyl’s required movement. Choose a corrosion-resistant profile, prep and level the substrate, bridge the height change smoothly, and seal only where your system calls for it—then your balcony threshold will hold up through the temperature and moisture cycles that typically cause transition failures.
Frequently Asked Questions
What transition strips work best for vinyl flooring on a balcony?
For balcony vinyl, look for transition strips rated for exterior conditions or at least water-resistant installation details. Common best options include T-molding for doorways and threshold transitions, reducer strips where vinyl height changes, and stair-nosing or edge trims for exposed perimeter edges. If your balcony has moisture exposure, choose aluminum or vinyl/plastic trims designed for wet areas and use the recommended adhesive or screw system to prevent lifting.
How do I install transitions around vinyl floors on a balcony without gaps?
Start by dry-fitting the transition strips and measuring the exact gap between the vinyl edge and the adjacent surface (tile, concrete, or door threshold). Maintain an expansion gap around the perimeter—many vinyl floors need room to move, especially with temperature changes. Then cut the transition to length, position it over the joint, and secure it according to the strip type (screws for metal thresholds, adhesive as directed for trims), finishing by sealing only where appropriate and ensuring the vinyl edges can still expand.
How do I handle transitions where vinyl meets tile or concrete on a balcony?
Use a reducer strip or metal transition depending on whether the heights match and whether the area is exposed to water. For tile-to-vinyl transitions, make sure the subfloor is level and clean, because any high spots can cause the vinyl edge to peel. Apply the adhesive or use mechanical fastening per the transition manufacturer, and keep the vinyl’s edge protected with a trim profile that covers the joint to reduce water intrusion.
Why is expansion space important when installing balcony vinyl transitions?
Balconies experience temperature swings and moisture, which can cause vinyl flooring to expand and contract more than indoors. If you install transitions flush against the vinyl without an expansion gap, the floor may buckle, separate at seams, or push the transition upward. Follow the vinyl manufacturer’s expansion guidance (often a small perimeter gap), then install the transition to bridge the joint while allowing movement.
Which fastening method is safest for balcony transitions—adhesive, screws, or both?
For balcony installations, screws or a screw-and-plate system is often the most reliable for keeping metal transitions secure in fluctuating conditions, especially where moisture or wind-driven water may occur. Adhesive can work well on clean, stable surfaces, but it must be compatible with both the transition material and the subfloor and must not prevent vinyl movement at the edge. If the transition is exposed near doors or drainage areas, consider manufacturer-recommended combined methods (e.g., mechanical fastening plus sealant only at the outer edge) to minimize lift and water penetration.
📅 Last Updated: October 27, 2026 | Topic: How to install transitions around vinyl floors in a balcony? | Content verified for accuracy and freshness.
References
- Expansion joint
- Vinyl flooring
- Vapor barrier
- F710 Standard Practice for Preparing Concrete Floors to Receive Resilient Flooring
- F1869 Standard Test Method for Measuring Moisture Vapor Emission Rate of Concrete Subfloor Using …
- F2170 Standard Test Method for Determining Relative Humidity in Concrete Floor Slabs Using in sit…
- https://www.armstrongflooring.com/support/install-guides.html
- https://scholar.google.com/scholar?q=vinyl+floor+transition+strip+installation+expansion+gap Google Scholar
- https://scholar.google.com/scholar?q=luxury+vinyl+plank+threshold+transition+installation+instructions Google Scholar
- https://scholar.google.com/scholar?q=resilient+flooring+work+practices+expansion+joints+transition+strips Google Scholar