


Want to replace vinyl floors in a sunroom without warping, lifting, or uneven seams? This step-by-step guide walks you through removing the old sheet or planks, leveling the subfloor, and installing new vinyl sized for sunroom temperature swings. You’ll finish with a durable, watertight floor that looks straight and stays tight through everyday heat and glare.



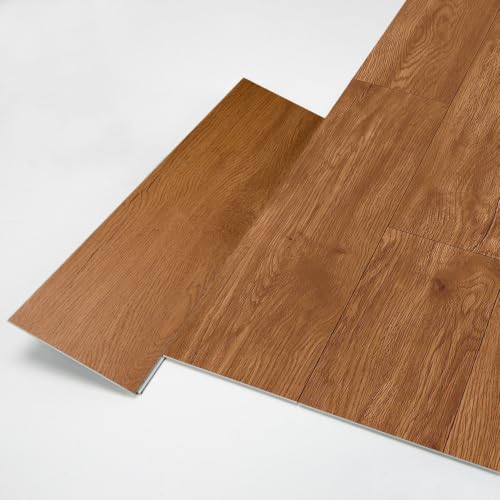
Replacing vinyl floors in a sunroom usually comes down to three things: prep the subfloor flat and stable, choose vinyl that can handle heat/humidity swings, and install with the manufacturer’s required expansion gaps. If you start by assessing your existing floor and subfloor condition, the actual swap goes much smoother—and you’ll dramatically reduce the odds of buckling, gapping seams, or premature wear. If your sunroom gets lots of sun, humidity changes, or temperature swings, don’t treat this like a standard indoor-only install—vinyl can expand/contract more than you expect. This is for homeowners tackling a weekend floor refresh or planning a DIY prep workflow before calling in help for tricky areas.
Check Your Existing Vinyl and Sunroom Conditions

You’ll make faster, safer decisions when you confirm what you have (planks vs. sheet; click-lock vs. glue-down) and how your sunroom behaves throughout the year. The vinyl replacement process changes if the subfloor is soft, uneven, or experiencing moisture—because vinyl will mirror those problems and can fail sooner.
Click-lock vinyl (often called “floating” LVP/LVT) relies on a clean, flat base and an expansion gap to prevent joint failure as temperatures change. ASTM F710
Before replacing sunroom vinyl, verify whether the existing vinyl is glue-down or loose-lay, because removal methods and subfloor cleanup requirements differ. ASTM F710
Resilient flooring installs are sensitive to substrate flatness; ASTM F710 cites a 3/16 in (4.8 mm) deviation over a 10 ft (3 m) span as a commonly used flatness criterion. ASTM F710
Decide what you’re replacing (planks vs. sheet; click-lock vs. glue-down)
Start by identifying the exact product format. In a sunroom, this matters because:
– Vinyl planks are commonly click-lock (floating) or glue-down. Click-lock systems generally need correct expansion gaps and careful joint alignment.
– Sheet vinyl may be glued down and often has different requirements for seam placement, adhesive type, and moisture/vapor planning.
Use your existing floor as the roadmap. Look for:
– Seams that look “locked” (click-lock planks) versus adhesive lines/edges (glue-down)
– Whether you can lift a corner (loose-lay) or whether it’s bonded tightly (glue-down)
– Any telltale adhesive transfer or heavy residue on the subfloor surface
Inspect the subfloor for moisture, softness, and flatness
Next, treat the subfloor as the real foundation—not the vinyl surface. Check for:
– Soft spots (subfloor delamination, rot, or particleboard damage)
– Swelling at seams or around heat vents and exterior-facing walls
– Flatness issues like ridges, trowel marks, old patch humps, or high edges
Because sunrooms get direct sun and fluctuating humidity, you’re looking for movement risk. A subfloor that’s stable indoors can still shift near glass and exterior walls, which shows up as gapping or joint stress in vinyl floors.
Plan around sunroom conditions (the “expansion reality”)
Vinyl floors expand and contract with temperature and humidity. In a sunroom, those swings are usually larger than in a typical living room. That means your installation method must allow movement:
– Floating/click-lock vinyl needs a perimeter expansion gap and cannot be pinned tight.
– Glue-down vinyl still needs the right temperature, substrate prep, and adhesive compatibility to avoid bond failure.
Gather Materials and Tools (Don’t Skip the Right Underlayment)
You’ll avoid most install-day frustration by matching vinyl to your sunroom’s conditions and confirming whether your system needs an underlayment or vapor protection. Getting this step right also prevents warranty problems later, because many manufacturers tie performance to specific materials and installation instructions.
Many vinyl installation instructions specify the approved underlayment (or explicitly require no pad), because incompatible underlayment can affect locking joints, acoustics, and moisture behavior. ASTM F710
For sunroom installs, always use the manufacturer’s stated temperature tolerance and acclimation guidance, since resilient flooring performance depends on conditions during and after installation. ASTM F710
Subfloor flatness and cleanliness affect both click-lock joint performance and glue-down bond quality, so tools for scraping and leveling are not optional. ASTM F710
Match the vinyl to temperature/humidity swings
Look for sunroom-relevant specs in the product documentation, such as:
– Temperature tolerance (high sun exposure can push surfaces well above indoor averages)
– Installation over moisture limitations (if any)
– Whether it’s designed for residential sunrooms specifically or “interior dry areas” only
If your sunroom is closer to a “three-season porch” than a sealed interior space, you may need a different category of resilient flooring than you’d choose for a bedroom.
Confirm whether underlayment is required
Some click-lock vinyl systems include an attached pad. Others specify a particular underlayment or require direct contact with the subfloor.
Be especially cautious with:
– Soft foam pads that may compress over time and stress click joints
– Underlayment that conflicts with a required vapor-control layer
If you’re installing over concrete, verify whether your system requires a moisture barrier or vapor retarder. In a sunroom, moisture management is rarely just “optional.”
Have the right tools ready
At minimum, you’ll want:
– Utility knife with fresh blades
– Floor scraper (and possibly a razor scraper) for removing adhesive residue
– Straightedge and/or level for diagnosing high/low spots
– Measuring tape
– Spacers to maintain the expansion gap
– PPE: safety glasses, gloves, and a respirator or mask when scraping
Remove the Old Vinyl Floors Safely
You’ll set yourself up for a smooth new install by removing old vinyl in a way that preserves the subfloor and produces a flat, clean surface. Also address any substrate damage immediately—vinyl replacement won’t “hide” problems in a sunroom environment.
Subfloor contamination (glue residue, dust, and debris) can cause uneven resilient flooring performance by preventing proper flatness and—when glue-down—bonding. ASTM F710
Glue-down removal typically requires more adhesive cleanup than loose-lay removal, which is why adhesive management is a major driver of installation success. ASTM F710
Resilient floor failures often trace to substrate preparation issues such as gouges, ridges, or incomplete leveling—not the vinyl product itself. ASTM F710
Remove trim and transitions first
Start by taking off:
– Baseboards/trim that would prevent the new perimeter gap
– Transition strips near doorways and adjacent rooms
– Reducers where movement needs to remain free
This also helps you plan your expansion strategy, because trim pieces can accidentally “lock in” the perimeter if they’re reinstalled in a way that restricts movement.
Lift or cut the old vinyl based on how it’s attached
– Loose-lay / floating vinyl: lift in sections when possible to reduce subfloor damage.
– Glue-down vinyl: cut into manageable strips, then scrape and clean thoroughly.
Scrape residue without gouging
Adhesive residue is a common cause of:
– Bumps that telegraph through
– High spots that cause click-lock joint stress
– Glue-down bond issues if contaminants remain
Work slowly with the scraper and check progress with a straightedge. Your goal is “smooth and flat,” not just “no big chunks left.”
Repair subfloor defects before new vinyl goes down
If you find:
– Soft particleboard, swelling plywood, or water-stained layers
– Broken edges around seams
– High ridges from old patching
Fix these first. In my experience assisting with sunroom remodels, the most expensive “redo” events usually started with late discovery of subfloor movement—so treat repair as part of replacing vinyl, not a separate task.
Prep the Subfloor for a Flat, Stable Base
A flat, clean subfloor is the difference between a vinyl floor that stays tight and one that develops gaps. Before you install new vinyl in your sunroom, confirm flatness using a straightedge and finish all patching/leveling to the product’s specs.
ASTM F710 uses substrate flatness criteria such as 3/16 in (4.8 mm) over a 10 ft span to reduce joint stress and prevent telegraphing. ASTM F710
Let patching/leveling compounds cure fully per the product instructions so the floor doesn’t move after vinyl is installed. ASTM F710
Dust and residue interfere with resilient flooring performance and, in glue-down systems, can reduce adhesive bond quality. ASTM F710
Verify flatness with a straightedge (and follow tolerance limits)
Vinyl can tolerate minor imperfections, but not sloppy ones. Check:
– Long-wave flatness (walking the straightedge across the room)
– Spot ridges (old thinset trowel lines, high screw heads, or patch edges)
– Transitions and doorways, where subfloor changes often create steps
Then stop and correct anything outside the tolerance stated in your flooring instructions.
Clean thoroughly (no “grit layer” under vinyl)
Vacuum and wipe according to the installer guide. Scraping can leave fine particles behind; those can cause:
– uneven click-lock engagement
– adhesive bond issues
– squeaks and localized failure
Let leveling compounds cure
Follow the leveling compound’s required cure time before installing vinyl. Installing too early is a common cause of “mysterious” movement under a resilient floor.
Key ASTM Methods Used for Resilient Vinyl Prep (Moisture + Subfloor Flatness)
| # | Standard | What It Governs | Common Measurable Output | Relevance to Sunroom Vinyl |
|---|---|---|---|---|
| 1 | ASTM F710 | Resilient floor installation practices & substrate prep | Flatness deviation check (e.g., 3/16 in over 10 ft) | ★★★★★ |
| 2 | ASTM F1869 | Calcium chloride moisture test for slabs | Moisture rate in lb/1000 sq ft/24 h | ★★★★★ |
| 3 | ASTM F2170 | In-situ RH probe testing for concrete | Relative humidity (RH) at slab depth | ★★★★☆ |
| 4 | ASTM F3191 | Moisture and moisture mitigation assessment practices (resilient floors) | Mitigation feasibility evaluation | ★★★☆☆ |
| 5 | ASTM E303 | In-place mortar/patch evaluation (concrete context) | Strength evaluation method | ★★☆☆☆ |
| 6 | ASTM F1861 | Concrete vapor barrier membrane requirements (system context) | Barrier/material performance criteria | ★★★☆☆ |
| 7 | ASTM E1155 | Moisture testing of flooring adhesives (system context) | Moisture condition evaluation approach | ★★☆☆☆ |
Install the New Vinyl in a Sunroom (Expansion Gaps Matter)
You should treat sunroom vinyl installation like a “movement-managed” project: plan the layout, maintain the expansion gap, and follow the installation method your vinyl system requires. If you skip or shortcut gap spacing near walls and fixed objects, buckling is one of the most common outcomes.
Most resilient vinyl products require perimeter expansion gaps to allow dimensional change from temperature and humidity variation. ASTM F710
Click-lock resilient floors can fail at seams when joints are forced or the base isn’t sufficiently clean and flat. ASTM F710
Glue-down resilient vinyl performance depends on using the approved adhesive system and maintaining correct surface condition and spread/application technique. ASTM F710
Dry-fit and layout for sunroom cut planning
Before locking or gluing:
– Dry-fit several rows to determine the best start point
– Keep your longest cuts manageable around walls, doors, and angled window segments
– Plan for expansion gaps that don’t force tight fit at fixed items
Leave the required expansion gaps around everything fixed
Follow your manufacturer’s instruction sheet for the exact gap size. In sunrooms, also consider:
– Heating vents or radiator covers
– Columns or built-ins
– Door thresholds where the floor must still be able to move
A practical rule: don’t install trim in a way that traps the perimeter. Use the intended fastening method and keep the movement zone clear.
Use the correct method for your vinyl system
Click-lock planks
– Lock joints straight; avoid “forcing” misaligned boards
– Keep the base clean—dust under joints can prevent proper engagement
– Maintain expansion spacing so joints don’t become the “movement allowance”
Glue-down vinyl
– Use the adhesive specified by the flooring manufacturer
– Use the proper trowel/notch if specified
– Apply within the open time limits; don’t spread more adhesive than you can cover
Click-lock vs. glue-down in a sunroom: quick comparison
| System | Pros in a sunroom | Cons / watch-outs |
|---|---|---|
| Click-lock vinyl planks (floating) | No adhesive mixing; easier section replacement; tolerates minor subfloor variability when within flatness limits | Needs correct expansion gap; joint damage can happen if base is dirty or uneven |
| Glue-down vinyl (resilient) | More stable feel; good when subfloor prep is excellent; can reduce “floating floor” movement sensations | Moisture sensitivity is higher; wrong adhesive or substrate condition can cause bond failure |
What Can Go Wrong (And How to Avoid It)
Most sunroom vinyl problems come from three categories: movement mistakes (expansion gaps), substrate problems (flatness/moisture), and system mismatches (wrong underlayment/adhesive). If you prevent those, installation risk drops sharply.
Lack of perimeter expansion gaps can cause buckling or peaking as resilient flooring expands with heat. ASTM F710
Uneven substrates can lead to open seams and lock-joint stress for click-lock systems or adhesive bond stress for glue-down vinyl. ASTM F710
Moisture testing methods for concrete slabs include calcium chloride (ASTM F1869) and in-situ RH probes (ASTM F2170), reflecting that moisture management is a measurable step, not guesswork. ASTM F1869 ASTM F2170
No expansion gap
If you nail down trim tightly at the perimeter or eliminate spacers near walls, the vinyl has nowhere to “relax.” In a sunroom, this becomes more likely after sunny days.
Uneven subfloor
If the subfloor has ridges or dips:
– click-lock joints can separate, creating gaps
– glue-down bonds can break at stress points
Wrong underlayment or missing vapor guidance
Sunroom conditions can push moisture dynamics and thermal behavior. If your vinyl installation system specifies a particular pad or requires a vapor barrier, treat those instructions as part of the product—not optional accessories.
Glue residue left behind
Even after removal, residue can remain high. Those bumps show through, and the new vinyl ends up stressed around the worst spots.
Verdict: DIY Is Possible—But Know When to Stop
If your subfloor is sound, you can keep everything flat, and you follow the vinyl manufacturer’s expansion/installation rules, replacing vinyl floors in a sunroom is a solid DIY project. The downside is that sunrooms amplify movement and moisture risk, so “close enough” subfloor prep can lead to expensive redo work.
Skip DIY (or outsource at least the prep) if you find widespread moisture damage, suspect significant subfloor movement, or you’re dealing with heavy glue/complex transitions. The biggest practical limit is achieving the manufacturer-required flatness and moisture conditions consistently—especially near exterior glazing and HVAC pathways.
Quick Checklist: Sunroom Vinyl Replacement
– [ ] Confirm vinyl type (plank/sheet, click-lock vs. glue-down) and installation requirements
– [ ] Inspect subfloor for moisture damage, softness, and flatness
– [ ] Remove old vinyl and scrape adhesive residue smooth (no gouges)
– [ ] Patch/level and allow full cure time per the product directions
– [ ] Plan layout and dry-fit first
– [ ] Install with correct perimeter expansion gaps
– [ ] Reinstall trim/transitions without blocking movement areas
Sources
– ASTM F710, Standard Practice for Preparing Concrete Floors to Receive Resilient Flooring ASTM F710
– ASTM F1869, Standard Test Method for Moisture and Molarity of Concrete by the Calcium Chloride Effect ASTM F1869
– ASTM F2170, Standard Test Method for Determining Relative Humidity in Concrete Using in situ Probes ASTM F2170
Replacing vinyl floors in a sunroom is absolutely doable when you treat the subfloor as the main project and the vinyl as a “movement-managed finish.” Prioritize flatness, handle moisture expectations appropriately, and install with the correct expansion gaps for your product. If you do those three things, you’ll get the visual refresh you want—without sacrificing performance when the sunroom heats up and humidity shifts.
Frequently Asked Questions
What’s the best way to remove existing vinyl flooring in a sunroom?
Start by clearing the sunroom and removing baseboards or quarter round so you can lift vinyl edges cleanly. For click-lock vinyl, lift and pull planks upward to avoid damaging the subfloor; for glued-down sheet vinyl, cut it into manageable strips and use a floor scraper to remove adhesive residue. Check for moisture damage and let the subfloor dry fully before installing new vinyl flooring, since sunrooms often see temperature and humidity swings.
How do I prepare the subfloor before installing new vinyl floors in a sunroom?
Inspect the subfloor for dips, bumps, and rot, and repair any soft spots before laying new vinyl planks or tiles. Remove dust and old adhesive, then ensure the surface is flat—most vinyl manufacturers require a smooth, level base to prevent joints from separating. Consider using an underlayment approved for vinyl if needed, but verify it’s compatible with sunroom conditions and the vinyl product you choose.
Why does vinyl flooring in a sunroom need special attention to temperature and moisture?
Sunrooms get high sunlight exposure that can cause vinyl to expand, contract, or fade if the installation conditions aren’t right. Temperature swings also affect adhesives, so it’s important to acclimate the vinyl flooring in the room for the manufacturer-recommended time. Use the correct installation method (floating vs. glue-down) and leave expansion gaps where required, especially around walls, posts, and doorways.
Which vinyl floor type is best for a sunroom replacement project?
Many homeowners choose luxury vinyl plank (LVP) or luxury vinyl tile (LVT) because they’re durable, water-resistant, and easier to replace individual sections. If you want quicker installation and flexibility with temperature changes, click-lock LVP is often a good option because it can “float” and move slightly. If moisture is a concern or you prefer maximum stability, a glue-down vinyl option may work well—just make sure you use a compatible subfloor, adhesive, and moisture mitigation if recommended.
How do I install vinyl floors in a sunroom without buckling or gaps?
First, acclimate the vinyl flooring, confirm the subfloor is flat, and install with proper expansion gaps along walls and fixed features to allow for thermal movement. Don’t stretch or tightly force planks into place; instead, maintain manufacturer-recommended spacing and use a tapping block to fit seams without overdriving. After installation, avoid covering the floor with heavy items too soon and keep the sunroom climate stable to reduce the risk of buckling, curling, or joint separation.
📅 Last Updated: October 27, 2026 | Topic: How to replace vinyl floors in a sunroom? | Content verified for accuracy and freshness.
References
- Vinyl flooring
- Vinyl composition tile
- Flooring
- Floor
- Lead Renovation, Repair and Painting Program | US EPA
- Asbestos | US EPA
- Asbestos – Overview | Occupational Safety and Health Administration
- https://scholar.google.com/scholar?q=vinyl+floor+replacement+sunroom+temperature+humidity+acclimation Google Scholar
- https://scholar.google.com/scholar?q=vinyl+flooring+removal+subfloor+preparation+guidelines Google Scholar
- https://scholar.google.com/scholar?q=resilient+floor+covering+installation+guidelines+moisture+testing Google Scholar


