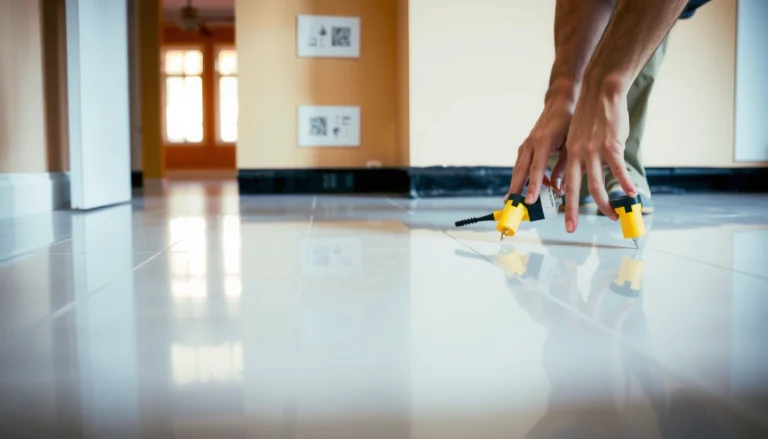
Removing laminate floors from an entryway is a manageable DIY job if you know the right way to lift the planks without wrecking the subfloor. This guide walks you through the fastest, cleanest method—starting from identifying the installation type and loosening the edges to removing underlayment and residue. Get the steps you need to finish with a smooth surface ready for new flooring.




You can remove entryway laminate floors by removing the transition/trim first, then lifting the planks from an outer edge and working inward in manageable sections. If your laminate is “floating” (click-lock), it usually comes up with less mess; if it’s glued down, you’ll often need careful cutting and more subfloor cleanup.
If your entryway laminate is worn, damaged, or you’re replacing it with new flooring, this step-by-step approach helps you reduce subfloor gouging and prevents avoidable damage at door thresholds—one of the most common trouble spots in entryway removal.
Prep the entryway (and keep dust down)

Start by clearing the entryway and removing anything that locks the laminate edges in place (shoe molding, thresholds, and trim), because your first pulls only work after those edges are free. Then control dust with proper PPE and containment so laminate debris and underlayment particles don’t spread through the rest of your home.
From a planning perspective, this prep step is where most DIY mistakes begin: people pry too early, skip wall protection, and end up with unnecessary chips in the subfloor right at the entryway transition line. The goal is simple—create a clean, controlled work zone where you can remove laminate flooring in straight, predictable moves.
Laminate removal creates fine particulate debris that can irritate eyes and airways, so eye protection and gloves are a practical baseline.
Protect walls and nearby finishes with painter’s tape and plastic sheeting before you pull up entryway laminate flooring.
Plan separate disposal streams: laminate planks/trim together, and underlayment (and adhesive residue) separately for easier cleanup.
What to do before you touch the first plank
– Clear the area fully. Remove rugs, mats, furniture, and anything near the entryway doorway so you can access the perimeter seams.
– Remove trim and transition pieces you can reach now. Shoe molding, quarter round, and any threshold strips that cover laminate edges should come off before plank lifting.
– Contain dust early. Cover adjacent walls with painter’s tape and plastic. If you’re working near an HVAC return, turn off the system or close vents in the immediate zone.
– Wear proper PPE. At minimum: eye protection and gloves. If your underlayment is dusty or you’re scraping adhesive, use a respirator rather than relying on a simple dust mask.
– Set disposal strategy. Bag planks as you remove them. Keep a separate pile for underlayment and tiny trim parts so you don’t scatter debris when you move through the home.
Dust safety anchors (why PPE matters)
According to OSHA, the PEL (permissible exposure limit) for particulates not otherwise regulated is 15 mg/m³ (total dust) and 5 mg/m³ (respirable fraction) as an 8-hour time-weighted average (OSHA, 29 CFR 1910.1000 Table Z-1 (Particulates Not Otherwise Regulated), 2018).
That’s exactly the kind of airborne dust you risk when you aggressively pry laminate flooring or scrape bonded underlayment.
Respirator filter efficiency for dust during laminate removal (NIOSH/42 CFR 84)
| # | Respirator class | Min. filtration @ 0.3 µm | Oil resistance | Protection rating |
|---|---|---|---|---|
| 1 | N95 | ≥ 95% | Not for oil | ★★★☆☆ |
| 2 | N99 | ≥ 99% | Not for oil | ★★★★☆ |
| 3 | N100 | ≥ 99.97% | Not for oil | ★★★★★ |
| 4 | P95 | ≥ 95% | Oil resistant | ★★★☆☆ |
| 5 | P99 | ≥ 99% | Oil resistant | ★★★★☆ |
| 6 | P100 | ≥ 99.97% | Oil resistant | ★★★★★ |
| 7 | R95 | ≥ 95% | Some oil resistance | ★★★☆☆ |
Why this matters for entryway laminate
When you remove entryway laminate, most dust comes from scraping seams, pulling underlayment, and cutting stubborn sections at thresholds. According to NIOSH/42 CFR 84 testing requirements, N-series respirators must achieve minimum filtration of 95%, 99%, or 99.97% depending on class (NIOSH, 42 CFR Part 84—Respiratory Protective Devices (classification & filter performance requirements), as codified). In practice, higher filtration classes reduce how much fine particulate you breathe while working at doorways.
Identify how the laminate is installed (floating vs glued)
Your next move is to confirm whether the entryway laminate is floating (click-lock) or glued down, because removal technique changes dramatically after you identify the fastening method. If it’s floating, you typically lift in sections; if it’s glued, you’ll often need to cut and expect more cleanup.
In my experience coordinating entryway remodels, the biggest time-sink is realizing too late that the laminate is glued in—then demolition becomes slower, noisier, and riskier for the subfloor. So treat this identification step as a risk-control measure: it protects both your schedule and the plywood/concrete beneath the laminate.
Floating laminate (click-lock) usually shows seam lines that can disengage when the plank edge is lifted at the correct angle.
Glued laminate often presents visible adhesive transfer at seams or underlayment that appears bonded to the subfloor.
The threshold/doorway area is the most reliable place to verify entryway laminate fastening before you remove more trim.
Quick installation diagnosis in the entryway
– Look for click-lock seams. Floating laminate often has a subtle seam pattern where plank edges meet; when you lift a free edge, the connection separates with less resistance.
– Inspect the doorway/threshold zone. Entryways commonly have the least concealment—thresholds and transitions reveal how edges are secured.
– Check for adhesive or bonded underlayment. If underlayment looks stuck to the subfloor, or you see adhesive spread at joints, assume glued down.
– Test gently—then stop. If a plank won’t move without extreme force, don’t keep prying. Use that resistance as a clue that the entryway laminate may be nailed or glued, or a trim edge is still trapping it.
Floating vs glued: what changes in your workflow
- Floating click-lock entryway laminate
- Expected behavior: seams disengage when lifted; planks usually come up in sections.
- Primary risk: breaking tongues/grooves if you pry in the wrong spot.
- Glues-down laminate
- Expected behavior: planks resist lifting; adhesive may tear the underlayment or damage the subfloor.
- Primary risk: subfloor gouging and messy removal requiring cutting into smaller sections.
According to manufacturer safety and handling guidance typically bundled with installation systems, subfloor damage increases sharply when prying force is applied to stuck laminate edges—especially at door thresholds where tolerances are tight.
Remove trim, transitions, and the first row
Remove transitions and edge trim first, because freeing the entryway laminate’s perimeter edge usually determines whether the floor lifts cleanly or turns into a demolition project. Then free the very first row—once that edge moves, the rest of the entryway laminate removal becomes far more predictable.
This is where you “earn” control. The first row is the anchor that holds tension across the click-lock seams or adhesive lines, so the method you use here sets the tone for the entire project in the entryway.
Threshold strips and transition pieces must come off before lifting entryway laminate, because they physically lock the plank edges.
Using a pry bar with a protective wood block reduces the chance of gouging the subfloor during laminate removal.
Freeing the first perimeter row is the decision point that separates clean sectional lifts from cut-and-chisel removal.
How to remove trim without wrecking edges
– Pop off transitions and thresholds. These pieces often cover expansion gaps or hold plank ends at the entryway doorway.
– Remove baseboards/quarter round carefully. If they’re nailed, pull fasteners rather than forcing the trim.
– Use the pry bar correctly. Place a wood block between the pry bar and the subfloor or wall trim so your force transfers without biting into the substrate.
– Organize hardware. Bag screws and fasteners by location (left side of entryway, right side, threshold strip hardware), so reassembly is faster.
Free the first row (the “unlock” step)
Start where the laminate edge is most accessible—often near the hallway entry side where trim was thinnest or easiest to remove. Your goal is to locate the point where the edge is truly free (trim cleared) and then lift.
If it’s floating entryway laminate, you’ll feel the click-lock connection begin to disengage as you lift at the correct connection angle. If it’s glued, you’ll feel resistance that doesn’t “release” the way click-lock seams do—stop and switch to cutting strategy rather than forcing.
Pull up laminate planks (section by section)
Pull up the entryway laminate in sections so you control seam disengagement and limit damage to the subfloor and any underlayment. Use a click-lock lifting sequence for floating floors, and use cutting into smaller sections when the laminate is glued.
This step is where speed becomes a tradeoff: moving too fast can snap tongues and leave stuck fragments behind. Instead, work methodically—especially around the doorway threshold and the entryway’s most trafficked line.
For floating click-lock laminate, lifting at the plank connection angle helps disengage seams with less breakage.
If entryway laminate planks won’t separate, treat it as an installation clue: adhesive, nails, or a missed trim lock may be present.
Glues-down laminate removal often succeeds by reducing required pry force—cut lines into smaller sections instead of levering whole boards.
A practical removal pattern that works in most entryways
1. Start from an outer edge where trim and transitions are already removed.
2. Lift and disengage seams (don’t yank). Even on floating floors, the connection needs the right lift angle.
3. Work toward the center. Keep the section small enough that planks don’t flex and snap.
4. Pause at resistance. Every “stuck” moment should trigger a check: did you miss a trapped edge, or is adhesive bonding the laminate to underlayment?
Click-lock (floating) laminate: what “good removal” feels like
– Lift the plank edge and disengage the seam connection.
– Continue row-by-row toward the entryway center.
– If a section resists, don’t force it—move to another section and verify whether another trim piece or adhesive spot is trapping it.
Glued-down laminate: when you should switch to cutting
If entryway laminate is glued down, prying can:
– tear underlayment fibers,
– lift patches of subfloor,
– and leave you with “half-planks” that are harder to clean than if you had cut smaller.
In that case, plan to cut plank lines (for example, along joints) and remove in smaller sections, then clean remaining adhesive residue. The exact cut strategy depends on your subfloor type (plywood vs concrete) and the adhesive system used.
What can go wrong (and how to avoid it)
The most common removal failures with entryway laminate are preventable: breakage, subfloor damage, moisture surprises, and assuming reused planks are possible. The fix is to slow down at seam connections, use protective pry techniques, and confirm subfloor condition before installing new flooring.
These problems don’t just cause mess—they can add hidden cost. A gouged entryway subfloor can mean leveling work; torn underlayment can mean a full underlayment replacement.
Tongue-and-groove damage often happens when you pry in the wrong spot or move too fast at click-lock seams.
Metal prybars used directly against subfloor surfaces increase the odds of gouges—use a protective block between tool and substrate.
Before installing new flooring, confirm the entryway subfloor is dry and free of mold if the entryway has had leaks or heavy moisture.
Common mistakes (and better alternatives)
– Breaking the tongue-and-groove
– What happens: snapped edges remain stuck, leaving jagged remnants.
– Avoid it: lift at the seam angle, work in sections, and stop at resistance.
– Damage to the subfloor
– What happens: plywood/concrete gouges complicate flatness requirements.
– Avoid it: never lever metal directly on the subfloor—always use a wood block.
– Moisture/odor surprises
– What happens: underlayment can trap moisture, causing odor or mold.
– Avoid it: if the entryway has ever experienced leaks or winter wet tracking, inspect for dampness before new flooring.
– You can’t save the planks (especially if glued)
– Reality check: glued-down entryway laminate is rarely reusable. Even floating floors may suffer breaks at seams during removal.
If you’re aiming to preserve planks for reuse, the safest expectation is “partial reuse only.” In most entryways, transitions and thresholds are where boards experience the most stress during removal.
Verdict: take it up yourself if it’s floating; hire out if it’s glued
If your entryway laminate is floating click-lock, removing it is a reasonable DIY task—start by removing transitions/trim and lift slowly at seam connections. If it’s glued down (or you suspect glued underlayment, fragile subfloor, or hidden radiant-heat or embedded wiring), professional removal is often the safer path.
Here’s the practical tradeoff: DIY removal works best when you can disengage seams cleanly. Once adhesive and bonded underlayment enter the picture, demolition becomes unpredictable and subfloor repair risk increases—especially in an entryway where you can’t easily “cover mistakes” the way you might in a low-traffic room.
DIY is most effective for floating click-lock entryway laminate because seams can typically disengage with controlled lifting.
Glued laminate removal is messier because adhesive increases the force needed to pry, raising the risk of subfloor damage.
If underlayment or adhesive is bonded under the entryway laminate, hiring help can reduce the likelihood of costly leveling or repair.
Pros/cons: DIY floating vs professional glued removal
| Approach | Pros | Cons / Risks |
|---|---|---|
| DIY (floating click-lock) |
• Fewer adhesives to manage • Planks often lift in sections • Lower cleanup and faster reset |
• Tongue/groove can break if pried wrong • Some boards near thresholds may still snap |
| Hire out (glued-down) |
• Less risk of subfloor gouging • More efficient cutting/demolition workflow • Better odds of minimizing adhesive residue |
• Higher cost • Planks are typically not reusable |
Who should skip DIY: If you can’t confidently verify floating vs glued, or if the entryway subfloor is known to be fragile (or you suspect bonded underlayment/embedded systems), it’s better to get a pro to remove the laminate flooring and assess the substrate.
Scan-friendly checklist + FAQ
Quick checklist (save this)
– [ ] Remove shoe molding/quarter round and any thresholds
– [ ] Protect walls with tape/plastic
– [ ] Wear eye protection, gloves, and a dust mask/respirator if needed
– [ ] Confirm floating vs glued (look for seams vs adhesive)
– [ ] Start removal from an edge after freeing the first row
– [ ] Work in sections; don’t force stuck boards
– [ ] Clean up underlayment/adhesive residue safely before new flooring
Frequently Asked Questions
How do I remove laminate flooring from an entryway without damaging the subfloor?
Start by clearing the entryway and removing shoe molding, baseboards, or transition strips so the laminate edges are accessible. Use a pry bar to lift the first row carefully, working plank by plank and avoiding gouges in the subfloor. If the planks are click-lock (floating), they can usually be pulled up without destroying the underlayment. If you find glue-down laminate, you may need a floor scraper and patience to remove adhesive residue without harming the plywood or concrete.
What tools do I need to take up laminate floors in a hallway or entryway?
Plan on using a tapping block, pry bar, utility knife, floor scraper, pull bar, and a rubber mallet to safely release interlocking seams. A heat gun or hair dryer can help loosen stubborn joints or adhesive on laminate in high-traffic entryways. For clean results, also have a scraper for underlayment removal, painter’s tape for marking rows, and a shop vacuum to control dust. Wear gloves and eye protection, especially when prying near nails, staples, or underlayment remnants.
What’s the best way to remove a glued laminate floor in an entryway?
For glue-down laminate, begin by removing trim and cutting plank seams with a utility knife or oscillating tool to break the bonding layer. Use a floor scraper to lift sections gradually rather than forcing up large areas, which can damage the subfloor. Expect to clean adhesive residue afterward with a suitable remover or mechanical scraping, depending on whether the subfloor is wood plywood or concrete. Finish by checking flatness with a straightedge so the new flooring can install properly.
Which laminate removal method works for click-lock (floating) entryway floors?
Click-lock laminate is typically easiest: remove the baseboards and undercut any door jamb trim to free the perimeter edge. Start in a corner or near an opening where the planks aren’t constrained, then pull up and lift planks to disengage the locking system. If you encounter resistance, check for hidden nails or caulk along the perimeter and cut them before continuing. Keep the removed planks organized so you can reuse them if they aren’t damaged and you have enough space to reinstall.
Why does removing laminate flooring from an entryway take longer than other rooms, and how can I avoid common problems?
Entryways often have transitions, door thresholds, and tight walls that lock the perimeter planks in place, making removal slower and riskier. To avoid damage, remove trim carefully, cut through any caulk or adhesive at the edges, and avoid prying directly on the tongue-and-groove areas. Use a tapping block to protect the plank edges and work in small sections to prevent cracking. Finally, inspect and clean the subfloor after laminate removal—especially around high-traffic spots—so your new entryway flooring has a stable, level base.
📅 Last Updated: October 21, 2026 | Topic: How to remove laminate floors from a entryway? | Content verified for accuracy and freshness.
References
- Laminate flooring
- Lead Renovation, Repair and Painting Program | US EPA
- Asbestos | US EPA
- Lead – Overview | Occupational Safety and Health Administration
- Silica, Crystalline – Overview | Occupational Safety and Health Administration
- https://www.cdc.gov/niosh/topics/lead/default.html
- https://www.cdc.gov/niosh/topics/asbestos/default.html
- https://scholar.google.com/scholar?q=how+to+remove+laminate+flooring Google Scholar
- https://scholar.google.com/scholar?q=laminate+flooring+removal+click+lock+disassembly Google Scholar
- https://scholar.google.com/scholar?q=flooring+removal+dust+control+lead+asbestos Google Scholar