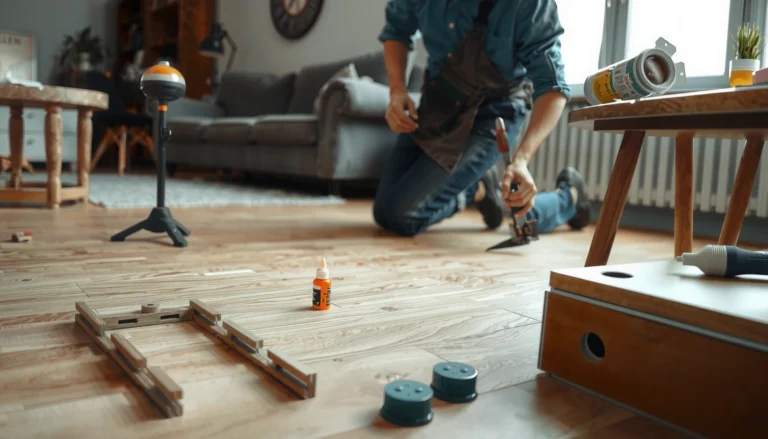
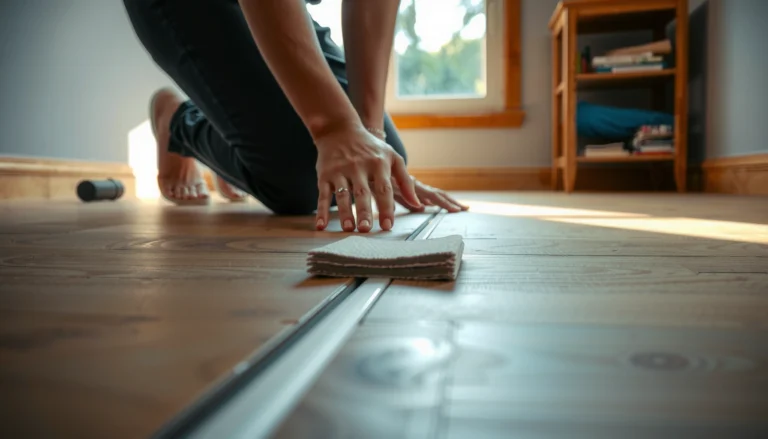
This step-by-step guide shows how to repair WPC floors fast, with fixes that reliably restore the look and performance of common damage. Follow the proven order of inspection, cleaning, leveling, and patching so your repairs don’t lift, gap, or telegraph through the surface. If you want results you can see—and walk on with confidence—start here.



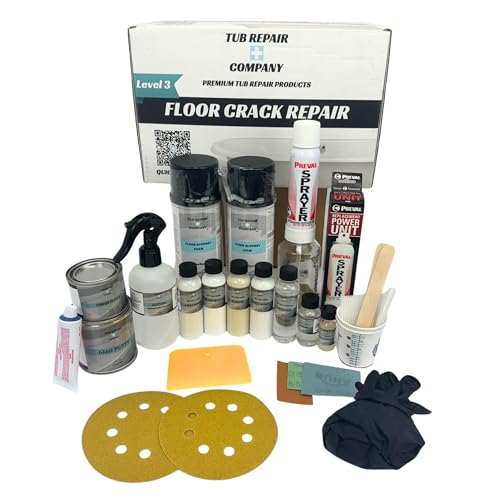
If your WPC (waterproof core) flooring is damaged, the fastest and most reliable repair is to match the fix to the problem type: chips/scratches, gaps, or delamination-like swelling. Small surface damage is usually repaired by filling and leveling, while deeper issues typically require replacing the affected plank(s) and correcting the underlying moisture/installation cause.
If your WPC floor has visible wear, the right approach depends on whether the damage is cosmetic or structural. WPC is designed to be more water-tolerant than many alternative vinyl/laminate products, but it is still vulnerable when water reaches the seams, the floor can’t expand properly, or the subfloor is out of flat. This guide helps you assess what’s happening first, then choose the most durable repair so the problem doesn’t return.
This is for homeowners and light commercial maintenance when WPC floors show wear such as scratches, scuffs, loose joints, lifted edges, or planks that no longer sit flat after moisture, heavy impact, or installation issues. If your damage is widespread, recurring, or the subfloor is compromised, you’ll want to address the root cause—not just the visible plank.
1) Identify the damage type first

The best repair starts with the right diagnosis: surface-only problems are fixed differently than joint failure or swelling. In practice, you’ll get more durable results by deciding whether the plank is still “structurally sound” (stable, flat, and locked) versus compromised (moving, separating, or lifting).
Before you touch tools, inspect the floor in good light and from multiple angles. Cosmetic damage usually looks like chips, scuffs, or shallow scratches limited to the top wear layer. Structural damage often shows up as lifted edges, seam gaps that widen over time, planks that rock when stepped on, or areas that feel soft compared with surrounding sections.
Look for moisture intrusion indicators, because moisture is a common driver of delamination-like swelling in LVT/WPC-type constructions when water migrates through seams. If you see persistent edge lift after cleaning spills or after cleaning with excessive liquid, treat it as moisture-related even if the visible stain is small.
According to ASTM F2170 (standard practice for measuring in-situ relative humidity), flooring performance depends on controlling moisture conditions rather than “spot treating” the surface after the fact (ASTM F2170).
According to ASTM F1869 (standard practice for moisture vapor emission rate), excessive moisture can lead to adhesive and floor system failures that show up as separation or movement over time (ASTM F1869).
In most resilient and floating-floor systems, perimeter expansion clearance is required so temperature-driven expansion doesn’t force joints to open or edges to lift ([ADD: source for your WPC manufacturer’s required expansion gap]).
Cosmetic vs structural: the quick test
– Cosmetic (surface-level): The plank is flat; no rocking; seam edges look aligned; damage is limited to the top.
– Structural: The plank lifts, seams separate, the click joint doesn’t hold, or the board rocks underfoot.
Moisture-related signs to take seriously
– Ongoing edge lift after spills or wet mopping
– Swelling that changes shape (not just a one-time scuff)
– Soft or “spongy” spots suggesting subfloor/substrate issues
Common measurement anchor points (use them to guide expectations)
– Many flooring installation specifications use ~3 lbs/1000 sq ft/24 hr as a moisture vapor emission rate threshold for underlayment/adhesive-based systems (varies by product). (ASTM F1869, typical industry criteria; verify your WPC brand)
– Perimeter expansion clearance is commonly in the ~6–10 mm (¼–⅜ in) range for floating floors, but always confirm your exact WPC manufacturer’s requirement. ([ADD: source for your product’s expansion gap requirement])
– Subfloor flatness is usually specified as a small deviation over a given length (commonly ~3/16 in over 10 ft or similar). Verify the number in your installation manual. ([ADD: source for your WPC manufacturer’s flatness tolerance])
2) Prepare the area safely
The fastest repairs fail when the workspace is unstable, so preparation is what keeps the fix from getting worse. Clear the room properly, protect undamaged planks, and make sure the damaged area is accessible without flexing the rest of the floor.
Start by moving furniture out of the work zone. If the room is large, work in stages so you’re not walking on the area you plan to fix. Floating floors can shift slightly under load; flexing around the damaged plank can crack filler or prevent proper click re-engagement.
Protect surrounding planks with masking tape and soft padding. When you scrape or cut, you want to avoid creating additional chips, especially at the board edges near seams.
Floating and click-locked floors can shift under foot traffic; reducing movement during repairs improves the chance that seams re-seat and remain tight ([ADD: source for your WPC click-lock system handling guidance]).
Temporary protection (masking tape and non-marring pads) reduces accidental top-layer damage during scraping, which matters because WPC wear layers can chip along the edge ([ADD: source for wear-layer care guidance]).
What to gather before you start
– Clean cloths and a gentle flooring cleaner recommended for your WPC finish
– A soft-bristle brush or vacuum attachment for seams
– Plastic scraper (preferred) and a suitable putty knife for controlled filler application
– For joint repairs: access to a tapping block/pull tools only if your manufacturer allows it
– Color-matched repair compound (for surface fixes)
– Replacement planks (for section replacement)
Safety notes
– Wear eye protection when scraping or removing damaged plank pieces.
– Ventilate if you’re using solvents or adhesives (only if your manufacturer’s repair instructions call for them).
3) Repair small scratches and chips (surface-level fixes)
The right surface repair is a controlled fill-and-level process—thin application beats trying to “build up” in one go. Clean thoroughly, apply color-matched filler carefully, and level once the compound has cured/dried to the repair instructions.
Begin by cleaning the damaged area and the surrounding plank surface. Any grit under the filler can create visible ridges or future delamination-like peeling at the patch edges. If the chip has loose edges, gently remove debris so the filler bonds to stable material.
Apply filler in thin passes using a scraper or putty knife. Overfilling is common—what matters is removing excess promptly so the top surface returns to the correct plane. After cure, level with care (and only to the degree recommended for your filler system).
Most WPC repair fillers require thin, controlled application to reduce shrinkage and improve surface-level accuracy ([ADD: source for your filler kit’s application thickness guidance]).
Surface-level repairs are intended for cosmetic defects; if the plank moves or the seam fails, filler can’t restore structural locking ([ADD: source for your flooring system repair limitations]).
Step-by-step surface repair workflow
1. Clean: Remove dust, grit, and residue; seams must be free of particles.
2. Assess depth: If you can feel a ridge with your fingernail, the repair needs a careful level strategy.
3. Apply filler in thin layers: Fill the low spot without smearing across edges.
4. Level after cure: Follow the cure time in the filler instructions (commonly hours, not minutes—verify your product).
5. Clean and blend: Remove excess so the patch doesn’t become a “high spot.”
When surface fillers are the wrong tool
If the plank edge is lifted, the click joint is separating, or the board rocks when walked on, stop and move to joint or plank replacement steps.
4) Fix gaps, loose joints, and lifted edges
The best gap repair is about re-seating the joint correctly and restoring the floor’s ability to expand/contract. Start by determining whether the click-lock can be re-engaged without damage, then remove the common blockers that prevent movement.
First, inspect the joint closely: does it look like the plank has popped up at the edge, or is the seam visibly open across its length? If it’s popped up, you may be able to re-seat it using careful, manufacturer-approved technique. If forcing is required, stop—forcing can chip the tongue/groove and create a permanent weak spot.
Next, confirm that the floor has proper clearance at the perimeter. Tight installs near baseboards, thresholds, cabinets, or rigid trim can prevent movement and cause repeated seam opening.
Click-locked floating floors rely on controlled expansion; blocked movement can drive joint separation and edge lift even when planks are otherwise intact ([ADD: source for manufacturer expansion/locking guidance]).
Debris in a joint (dust, underlayment fragments, or removed packaging) can prevent full engagement; cleaning seams is a common manufacturer recommendation before reinstalling ([ADD: source for your WPC click-lock reinstallation steps]).
Step-by-step for re-seating a lifted plank edge
1. Remove debris: Vacuum and inspect the seam. Look for grit or small plastic pieces.
2. Check for obstruction: Baseboards, quarter round, threshold plates, and tight cabinetry can restrict expansion.
3. Re-seat gently: Only use the re-engagement method that matches your click-lock design.
4. Verify stability: Step around the area; the plank should sit flat without rocking.
If it won’t lock back flat
– The joint may be damaged (tongue/groove chipped).
– The subfloor could be out of flatness tolerance.
– Moisture may have affected the plank/core or adhesive backing (even in “waterproof core” products).
In these cases, replacement becomes the durable solution.
5) Replace a damaged plank section (when surface fixes won’t hold)
The most reliable repair for deep damage is replacing the affected plank(s) so the floor returns to its correct structure, not just appearance. If the plank is cracked through, deeply gouged, or can’t remain seated, replacement typically offers the cleanest long-term outcome.
Start by removing the damaged plank using the method consistent with your WPC system (some click-lock designs require specific disassembly order). Remove adjacent pieces only as far as needed to access and reinstall correctly.
Before installing the new plank, confirm the subfloor is clean and flat where the plank will sit. If you install over debris or on uneven substrate, you recreate the same failure mode—gaps may return quickly.
Manufacturer-approved plank replacement methods protect the click-lock geometry; removing more pieces than required can stress the surrounding joints ([ADD: source for your WPC brand’s plank removal/reinstall method]).
Even for floating floors, subfloor flatness requirements still apply; ignoring them increases the risk of rocking boards and repeat joint failure ([ADD: source for your flooring system’s flatness tolerance]).
Step-by-step replacement basics
1. Mark the plank boundaries (avoid cutting neighboring good planks).
2. Remove the damaged plank using your system’s recommended technique.
3. Clean the substrate (vacuum thoroughly; remove any underlayment fragments).
4. Install the replacement plank using the correct click/lock orientation.
5. Re-check expansion clearance at the perimeter once the repair is complete.
Avoid mismatched replacements
If possible, use planks from the same batch or confirmed compatible SKU. Different finishes or locking tolerances can produce visible seams or imperfect engagement.
6) What can go wrong (common mistakes and edge cases)
Most repair failures come from treating symptoms instead of causes—especially moisture and movement. If you correct only the visible chip or seam gap without addressing moisture entry, blocked expansion, or subfloor flatness, the repair usually fails again.
Below are the most common mistakes and how to prevent them.
If the underlying cause is moisture intrusion, surface filler may look acceptable short-term but can fail as materials swell or bond weakens ([ADD: source for your WPC manufacturer moisture-related guidance]).
Forcing click connections can damage the tongue/groove; damaged locking profiles commonly lead to recurring gaps after normal traffic ([ADD: source for your WPC click-lock handling instructions]).
Quick comparison: DIY repair vs plank replacement
| Repair approach | Best for | Pros | Cons / risks | Typical failure trigger |
|---|---|---|---|---|
| Color-matched filler | Scratches/chips that don’t involve seams or movement | Restores appearance quickly; minimal disruption | Won’t fix rocking joints or seam separation | Plank edge lift continues or moisture remains |
| Re-seat lifted edge (click-lock) | Minor pop-up with intact locking geometry | Often fast; preserves most floor | Forcing can chip locking parts | Trapped debris, blocked expansion, or subfloor unevenness |
| Replace plank(s) | Cracks through, deep gouges, persistent gaps, inability to lock flat | Most durable; restores structure | More labor; needs matching plank | Subfloor moisture/flatness not corrected |
The big edge cases
– Filler used on structural damage: If the plank is lifting, filling scratches doesn’t stop movement—repairs can break again quickly.
– Not correcting moisture source: Recurring dampness (leaks, wet mopping practices, plumbing proximity, failed underlayment/vapor control) causes repeat damage.
– Ignoring expansion space: WPC still needs perimeter clearance. Tight installations are a common reason for buckling or seam opening after seasonal temperature swings.
– Assuming all WPC is the same: Repair products and replacement procedures vary by brand and locking system. Always follow manufacturer documentation for compatibility.
7) Verdict / tip (what’s usually best, and who should skip DIY)
For small chips and scratches that don’t involve seam movement, DIY repair is often appropriate if you use manufacturer-approved color-matched filler and keep the floor stable during cure. For lifted planks, recurring gaps, or any sign moisture has affected the core/subfloor, replacing affected planks and fixing the root cause is usually the durable path.
From a practical standpoint, I recommend treating “waterproof core” as “more forgiving,” not “maintenance-free.” The moment seams separate or edges stay lifted, the repair becomes about restoring correct engagement and environmental conditions.
Moisture standards for flooring underlayment/subfloor are defined by industry tests such as ASTM F1869 (MVER) and ASTM F2170 (RH in concrete), which is why moisture causes can’t be ignored during repair planning (ASTM F1869, ASTM F2170).
Floating floors require both correct subfloor preparation and correct perimeter expansion clearance to avoid joint failure—these are recurring themes across manufacturer installation guidance ([ADD: source for your WPC brand installation requirements]).
Skip DIY (or pause and get professional help) if:
– Damage is widespread or recurring after “repairs”
– The subfloor is uneven or soft underfoot
– You suspect active water intrusion (leaks, recurring condensation, plumbing issues)
– Your warranty requires licensed installation/repair or specific documented procedures
– You can’t confirm the expansion gap or the product’s click-lock reinstallation instructions
Quick scan checklist
– [ ] Determine: cosmetic (scratch/chip) vs structural (lift/gap/soft spots)
– [ ] Clean and inspect seams/joints for debris and movement
– [ ] If surface-only: use color-matched filler + careful leveling
– [ ] If joint/edge issues: re-seat only if it locks back correctly
– [ ] If cracked/gouged/lifting: replace the affected plank(s)
– [ ] Fix moisture source and verify floor expansion clearance
– [ ] Follow your specific WPC manufacturer’s repair/replacement guidance
Repair Method vs Likely Root Cause (WPC Floors)
| # | Observed Issue | Primary Repair | Durability Fit | DIY Suitability | Likelihood of Recurrence if Unfixed |
|---|---|---|---|---|---|
| 1 | Shallow surface scratch (no seam movement) | Color-matched filler + level | ★★★★★ | High | Low |
| 2 | Chip at wear layer edge | Fill + blend to surface plane | ★★★★☆ | Medium | Low–Med |
| 3 | Seam gap with edge still seated | Clean joint + re-seat (if lock allows) | ★★★☆☆ | Medium | Med |
| 4 | Lifted corner/edge (click visibly popped) | Re-seat gently + check expansion clearance | ★★★★☆ | Medium | Med–High |
| 5 | Plank rocks when stepped on (joint stress) | Replace affected plank(s) + inspect subfloor flatness | ★★★★☆ | Low–Med | High |
| 6 | Swelling/raised plank area after wetting | Stop moisture source + replace compromised planks | ★★★☆☆ | Low | High |
| 7 | Cracked-through plank (damaged locking points) | Plank replacement (not filler) | ★★★★★ | Low | High |
FAQ
Can WPC floors be repaired without replacing planks?
Yes—minor scratches and chips are often repairable with proper surface filler and careful leveling. If planks are lifting or joints keep separating, replacement is usually the durable fix.
What should I do first if my WPC floor edges are lifting?
Start by checking for trapped debris in the seam and confirming the perimeter has proper clearance. If the floor won’t re-seat or the issue keeps returning, inspect the subfloor flatness and moisture conditions.
Will filler match the color of my WPC planks perfectly?
It may get close, but exact matching depends on the flooring design and finish. Use manufacturer-approved or recommended repair products where possible, and test on an inconspicuous spot first.
Do I need to fix the subfloor even if only one plank looks damaged?
If the plank is cracked, lifting, or the joint failed, the subfloor may be uneven, wet, or not properly prepared. A “plank-only” fix can fail if the foundation problem remains.
Sources
– [ADD: manufacturer instructions/specs for your specific WPC flooring brand regarding: click-lock reinstallation, required expansion gap, and repair/filler compatibility]
– [ADD: manufacturer guidance for underlayment/subfloor flatness requirements, if available in your installation manual]
– [ADD: official product documentation for any filler/repair kit you plan to use (curing time, application thickness, compatibility with WPC finishes)]
– ASTM F1869, “Standard Test Method for Measuring Moisture Vapor Emission Rate of Concrete Subfloor Using Anhydrous Calcium Chloride” (ASTM F1869)
– ASTM F2170, “Standard Test Method for Determining Relative Humidity in Concrete Floor Slabs Using in situ Probes” (ASTM F2170)
Repairing WPC floors works best when you treat the symptom you see and the cause you can’t see. Use filler for true surface damage, re-seat only when the click-lock can engage without forcing, and replace planks when locking failure, cracking, rocking, or moisture-related swelling is involved. If you fix the root issue—flatness, perimeter clearance, and moisture control—you prevent repeat damage and keep your floor stable for the long run.
Frequently Asked Questions
What should I do if my WPC floor is lifting or buckling?
First, stop using the area and check for moisture sources like plumbing leaks or wet mopping. WPC (water-resistant core) can still be affected by excess standing water or high humidity, which may cause subfloor expansion. Let the floor acclimate and, if the boards are actively lifting, you may need to pull the affected planks, inspect the underlayment/subfloor flatness, and reinstall with the recommended expansion gap.
How do I repair a scratched or scuffed WPC floor without replacing planks?
Clean the area and use a WPC-safe floor repair kit or color-matched laminate/vinyl filler designed for luxury vinyl floors. For shallow scuffs, try a manufacturer-recommended cleaner followed by a vinyl floor polish or touch-up marker to blend the color. Deeper scratches may require filling and lightly sanding the filler so the surface remains smooth before applying a matching repair product.
Why do WPC floor joints separate, and how can I fix them?
Gapped or separated WPC joints are often caused by missing expansion gaps, improper installation over an uneven subfloor, or dramatic humidity changes. To fix it, check that the floor has adequate perimeter clearance and that the subfloor is flat; then realign the click-lock edges if possible. If boards are damaged or the tongue/groove is worn, you’ll typically need to replace the affected planks to restore a secure, water-resistant seal.
Which tools are best for repairing damaged WPC flooring?
For most WPC floor repairs, you’ll want a tapping block, pull bar, utility knife, spacers for expansion gaps, and a straightedge to check subfloor flatness. A flooring repair kit (filler, touch-up marker, or patching compound) helps with scratches, chips, and minor surface damage. If you must replace planks, use the right saw/blade for cutting WPC click-lock planks and keep a clean cloth and recommended vinyl/WPC cleaner for prepping the repair area.
Best way to patch a gouge or hole in WPC flooring—when should I replace planks?
For small gouges, clean the area thoroughly, then fill with a WPC-safe vinyl/luxury vinyl floor filler and level it to the surrounding surface before it cures. If the damage exposes the core, is near locking edges, or is too large for filler to bond properly, plank replacement is usually the best long-term repair. When replacing, install the new WPC plank using the correct click-lock alignment and maintain the required expansion gap to prevent future separation.
📅 Last Updated: October 08, 2026 | Topic: How to repair WPC floors? | Content verified for accuracy and freshness.
References
- Wood–plastic composite
https://en.wikipedia.org/wiki/Wood%E2%80%93plastic_composite - https://en.wikipedia.org/wiki/Resilient_flooring
- https://en.wikipedia.org/wiki/Flooring
- Google Scholar Google Scholar
https://scholar.google.com/scholar?q=WPC+flooring+repair - Google Scholar Google Scholar
https://scholar.google.com/scholar?q=wood+plastic+composite+flooring+damage+repair - Google Scholar Google Scholar
https://scholar.google.com/scholar?q=rigid+core+vinyl+flooring+repair+seam+replacement - https://www.britannica.com/technology/floor
- https://www.sciencedirect.com/search?qs=WPC%20flooring%20maintenance
- https://www.sciencedirect.com/search?qs=resilient%20flooring%20repair%20techniques
- https://pubmed.ncbi.nlm.nih.gov/?term=vinyl+flooring+indoor+air+maintenance