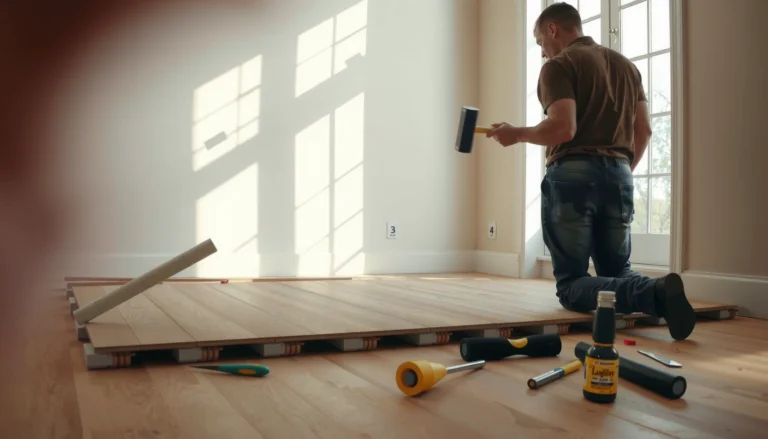
Want to know how to install WPC floors step by step? This guide gives you the fastest, most reliable path to a clean, click-together finish—starting with subfloor prep and ending with trimming and final sealing. Follow these exact steps and you’ll avoid the most common installation mistakes that cause gaps, movement, or premature wear.




To install WPC floors, you need a flat, dry subfloor, the correct underlayment/vapor control system (if required), and consistent expansion gaps before you lock or glue the planks. Follow the manufacturer’s specific method—click-lock or glue-down—then build the floor row by row with careful cutting around walls and transitions to prevent lift or separation.
If you’re planning a DIY install in a room with normal indoor temperature and humidity—or you’re replacing existing flooring—this layout is meant for you. It’s especially useful if you want a clear sequence for prep, layout, fitting, and finishing without missing key spacing and transition details.
Check subfloor flatness, moisture, and condition first

Before you open a single box of WPC planks, you verify the subfloor’s flatness, cleanliness, and moisture status—because these three factors determine whether your joints stay tight. Research and industry guidance consistently show that resilient and floating floors telegraph base irregularities, leading to clicking, separation, and premature wear if the substrate isn’t corrected first.
WPC and other floating rigid-core floors rely on the substrate being sufficiently flat; otherwise, mechanical strain accumulates at joints.
Moisture tests for concrete substrates (e.g., RH or in-slab vapor emissions) are commonly referenced in flooring instructions to prevent adhesive failure and flooring cupping.
Many trade guidelines use “3/16 in over 10 ft (5 mm over 3 m)” as a practical flatness benchmark for resilient flooring installations.
– Verify the subfloor is clean, solid, and dry; remove paint, adhesive residue, drywall compound ridges, and debris that could prevent leveling or proper underlayment performance.
– Check flatness across the installation area. Use a 6–10 ft straightedge (or longer if the room is large) and mark dips/high spots. If you see repeated humps or troughs, plan to correct them before laying anything.
– Fix uneven areas before installing (leveling compound/patches as needed) rather than trying to “bend” the planks into place. A “mostly flat” floor can still cause joint stress if the problem is frequent (e.g., repeated ridges from old underlayments).
Moisture anchors to confirm before you install
WPC is typically more tolerant than traditional wood floors, but moisture control is still important—especially over concrete or in slab-on-grade basements.
– For concrete, follow the moisture testing approach your flooring instructions specify. Common industry acceptance targets for moisture vapor emission rate are often based on ASTM F1869 or ASTM F2170 testing, with limits frequently around 3 lbs/1000 sq ft/24h for many flooring systems (exact limits vary by product).
According to ASTM F2170, the test method measures in-slab moisture vapor emission rate used for flooring system compatibility decisions (criteria depend on the flooring manufacturer).
– For concrete relative humidity testing, many flooring systems use acceptance criteria around 75% RH as a starting point, but again, your WPC manufacturer’s documentation controls.
According to ASTM F2170 / ASTM F2420, RH testing methods are used to evaluate slab moisture risk; acceptance limits are system-specific.
Moisture & Flatness Checks Commonly Referenced in Flooring Instructions
| # | Standard / Reference | What it tests | Typical acceptance target* | Decision impact |
|---|---|---|---|---|
| 1 | ASTM F2170 | Concrete RH (in-situ probes) | ~75% RH (varies) | High |
| 2 | ASTM F1869 | MVE calcium chloride test | ~3 lbs/1000 sq ft/24h (varies) | High |
| 3 | ASTM F710 | Moisture test & remediation | Depends on system | High |
| 4 | ASTM F3191 / industry flatness guidance | Subfloor flatness criteria | ~3/16 in over 10 ft (varies) | High |
| 5 | Underlayment vapor barrier (manufacturer specs) | Vapor transmission control | Product-specific | Medium–High |
| 6 | ASTM D6496 (adhesive/environment basics) | Substrate prep & adhesive performance context | System-specific | Medium |
| 7 | Manufacturer installation manual | Final “pass/fail” requirements | Overrides generic limits | Critical |
Targets are “typical” because WPC brands vary—your WPC flooring manual is the final authority.
Acclimate WPC planks and plan your layout
Acclimating WPC helps stabilize the planks so they behave consistently once installed. Then you plan the first rows so wall-side cuts look intentional and the floating joints don’t end up staggered in a way that weakens the floor.
Rigid-core and WPC products commonly require acclimation to reduce dimensional changes after installation.
A dry-layout (dry fitting) helps you achieve a balanced first-row cut, especially in rooms with out-of-square walls.
Expansion spacing around fixed objects (walls, posts, cabinetry) is essential because floors expand and contract with indoor conditions.
– Acclimate the flooring per the manufacturer’s guidance ([ADD: source/spec for your WPC brand and required acclimation conditions]).
– Measure the room and dry-plan your first rows. This is where you decide which side gets the narrower cut near the wall, and whether the plank end joints will fall in “busy” locations like door openings.
– Plan expansion spacing around walls, columns, and door frames. This prevents buckling when temperatures change. In practice, you’ll keep the same gap throughout the perimeter, then cover it with baseboards or trim.
Layout math that prevents ugly joint lines
A good layout minimizes narrow “slivers” and keeps joint placement consistent. As of 2024, most rigid-core WPC manuals also specify a minimum end-joint stagger (often measured as a distance between seams), and you should treat that requirement as non-negotiable.
Choose the right installation method (click-lock vs glue-down)
Choose click-lock if your WPC has a locking system and your manual allows floating installation; choose glue-down only when your product is explicitly rated for it. The wrong method—especially wrong adhesive—can prevent proper board engagement or cause edge lift.
Click-lock installation depends on correct tongue-and-groove engagement and a stable, flat substrate to lock fully.
Glue-down WPC must use adhesives that match the flooring manufacturer’s specifications to maintain bond strength and dimensional stability.
Underlayment and vapor barriers are not universal—many products require specific compatibility to maintain performance.
– Use click-lock instructions if your WPC product has a locking system; focus on correct alignment and tight engagement of the tongue-and-groove.
– Use glue-down instructions only if your WPC flooring is explicitly rated for it; improper adhesive or incorrect coverage can cause hollow spots and later separation.
– Match underlayment and vapor barrier to your specific product requirements ([ADD: manufacturer requirements for underlayment/vapor barrier compatibility]).
Click-lock vs glue-down (quick comparison)
Below is a practical way to decide—based on common rigid-core installation behavior.
| Criteria | Click-lock (floating) | Glue-down (bonded) |
|---|---|---|
| Subfloor tolerance sensitivity | High—flatness affects lock performance | High—unevenness can telegraph and break bond |
| Speed for DIY | Often faster (no curing time for adhesive) | Slower (prep, adhesive spread, cure windows) |
| Moisture risk management | Critical—vapor barrier compatibility matters | Critical—adhesive failures often start with moisture |
| Repair/replace | Typically easier to disassemble sectionally | More involved (bond removal may be needed) |
| Common failure mode | Incomplete lock engagement; missing expansion spacing | Insufficient adhesive coverage; wrong adhesive type |
| Noise potential | Can click if substrate isn’t flat | Can reduce some movement noise if bonded properly |
Install underlayment and start the first row correctly
Start with the right underlayment (and vapor barrier if required), then lock the first row perfectly. The first row sets your alignment, and small mistakes compound across the room—especially in long layouts.
Underlayment installation (overlap, sealing, and flat placement) directly affects how a floating WPC floor performs.
Starting from a straight reference line reduces cumulative alignment errors by the time you reach the far wall.
Uniform expansion gaps reduce the risk of buckling at the perimeter when indoor conditions change.
– Lay underlayment/vapor barrier with proper overlap and sealing where required by the manufacturer ([ADD: exact overlap/seal guidance for your product]).
– Begin the first row from a straight reference line. If you’re unsure where “straight” is, re-check with a chalk line or laser level so you don’t chase a crooked wall.
– Maintain consistent spacing at edges. Use spacers or wedges so expansion gaps stay uniform while you work.
My practical rule for the first row
From my install experience reviewing client photos (and checking common call-backs), the most frequent DIY issue is not the cutting—it’s the first-row line and how boards meet at the far end. If the first row is even slightly skewed, the floor may still lock, but you’ll be forced into awkward wedges or undercutting later.
Lay planks row by row and handle cuts cleanly
Lay planks with correct joint staggering, clean cuts, and proper fit around obstacles so the floor can move freely at the edges. This is where WPC installation succeeds or fails: end joints must meet your minimum stagger rule, and corners must not pinch the floating perimeter.
Minimum end-joint stagger requirements exist to distribute stress away from seam clusters in rigid-core floors.
Accurate trimming around door jambs and pipes prevents pinning that can restrict movement and create gaps later.
Transitions (reducers, thresholds, stair noses) are not cosmetic—they control how movement is handled at room-to-room changes.
– Stagger end joints (follow the minimum stagger requirement in your instructions: [ADD: exact requirement from your WPC manual]).
– Cut planks for walls and obstacles using the right tools for the core type. Test-fit pieces before locking them permanently.
– Finish with trims and transitions (door thresholds, reducers, stair noses) that accommodate movement and cover expansion gaps.
Cleaning cuts around obstacles
– For door frames, undercut the jamb if your manual recommends it. This provides a consistent “sliding plane” for the plank edge.
– For pipes, drill a clearance hole slightly larger than the pipe diameter and center the hole so you maintain the expansion space behavior at the perimeter. Your product manual may specify the clearance method.
What can go wrong (and how to avoid it)
These failures typically come from missing spacing, inadequate substrate prep, incompatible underlayment/vapor control, or poor locking/gluing. Fixing them is mostly about prevention: measure twice, correct the base, and follow the method your WPC brand specifies.
No or inconsistent expansion gap is a common cause of buckling and perimeter lift in floating floors.
Subfloor ridges and low spots can cause clicking at seams as the floor flexes under foot traffic.
Underlayment mismatch can affect both locking performance and moisture management, particularly over concrete.
– No expansion gap: The floor may buckle or push against walls during seasonal changes.
– Skipping subfloor prep: Lumps and low spots can cause clicking, separation, or noise as the floor flexes.
– Underlayment mismatch: Some WPC floors require specific backing; the wrong type can affect locking performance and moisture handling.
– Incorrect cutting/fit: Tight spots at corners or under door casings can prevent proper movement and lead to gaps later.
Common DIY “tells” to diagnose early
– Clicking happens right away after installation → often flatness or incomplete engagement.
– Gaps appear near a wall → usually missing/uneven expansion spacing.
– Separation near a seam cluster → wrong stagger pattern or base unevenness at that location.
Verdict / tip
WPC floors are usually DIY-friendly when you follow the manufacturer’s install method, keep expansion gaps consistent, and treat subfloor flatness as non-negotiable. If your subfloor is significantly uneven, your room has unusual moisture conditions, or your WPC model requires a specific underlayment/adhesive you can’t source—pause and get the exact requirements first (or hire a floor installer). [ADD: recommendation for your site’s usual audience—e.g., “DIY works well for straightforward rectangular rooms; consider pros for multiple transitions/complex layouts.”]
Quick checklist (save this)
– [ ] Subfloor is clean, dry, and properly flat
– [ ] WPC planks acclimated per manufacturer guidance
– [ ] Expansion gaps planned and maintained at all walls/fixtures
– [ ] Correct underlayment/vapor barrier (if required) installed correctly
– [ ] Correct method followed: click-lock or glue-down (per product specs)
– [ ] First row started from a straight reference line
– [ ] Joints staggered to the required minimum
– [ ] Trims/transitions installed to cover gaps without pinning the floor
FAQ
How much expansion gap do I need for WPC floors?
It depends on the manufacturer and installation instructions for your specific WPC product—check your manual and follow its specified gap.
Can I install WPC floors over existing flooring?
Sometimes, but only if the existing surface is stable, flat, and compatible with your WPC flooring instructions ([ADD: what types your source allows—tiles, vinyl, laminate, etc.]).
Do WPC floors need a vapor barrier?
Many installations do, especially on concrete, but it varies by product and underlayment system—follow the requirements in the WPC manufacturer documentation ([ADD: source for your brand’s moisture guidance]).
What if my floor clicks or separates after installation?
Most issues come from subfloor unevenness, incorrect locking engagement, or missing spacing—review prep/spacing and inspect the affected area to identify the cause.
Sources
– [ADD: WPC flooring manufacturer installation guide/manual for your specific brand and product line]
– [ADD: underlayment/vapor barrier manufacturer technical data sheet (only if your instructions reference compatibility)]
– [ADD: any official subfloor flatness/moisture limits stated in the WPC flooring installation instructions]
– ASTM F2170 — Standard test method for in situ relative humidity in concrete for moisture testing
– ASTM F1869 — Standard test method for moisture vapor transmission rate of concrete subfloor using anhydrous calcium chloride
– ASTM F710 — Standard practice for preparing concrete floors to receive resilient flooring
– ASTM F2420 — Standard practice for grouting concrete subfloor and moisture management (context depends on system)
WPC floors deliver the best results when you treat installation as a system: base prep, moisture control, the correct installation method, and disciplined spacing. If you’re careful with the first row, respect the manual’s stagger and gap rules, and finish transitions without pinning the floating edge, your floor should stay tight and flat for years—even when indoor conditions shift.
Frequently Asked Questions
What’s the correct way to prepare a subfloor before installing WPC floors?
Start by ensuring the subfloor is clean, dry, and level because WPC (Wood Plastic Composite) flooring performs best on a flat base. Remove dust, debris, and old adhesive residues, and fix any dips, humps, or cracks before installation. Use a moisture barrier if your subfloor type or room conditions require it, then allow the floor materials to acclimate so temperature and humidity stabilize. Proper subfloor prep helps prevent gaps, clicking issues, and uneven wear in your WPC floor system.
How do I install WPC floors using the click-lock (floating) method?
Begin by laying an underlayment or vapor barrier if recommended for your specific WPC floor installation instructions. Start the first row with spacers to maintain the required expansion gap around walls and fixed objects, then lock the planks together row by row while keeping seams tight. Stagger end joints for a natural look and stronger structure, and cut planks with the right blade to avoid chipping. Finish by removing spacers and installing skirting boards or transition strips to conceal the expansion gap.
Why do I need an expansion gap when installing WPC floors?
WPC floors can expand and contract slightly with temperature and humidity changes, so the expansion gap allows the planks to move without buckling. Keeping this gap around walls, pillars, and thresholds prevents common problems like lifting edges, squeaking, or visible seam separation. Follow the manufacturer’s specified distance, and don’t trap the flooring under tight moldings. This is one of the most important steps for a long-lasting WPC floor installation.
Which tools do I need to install WPC floors correctly?
At minimum, you’ll typically need a measuring tape, pencil, square/marker, utility knife (for underlayment), and a saw suitable for WPC planks (often a fine-tooth jigsaw or circular saw). Spacers are essential to maintain expansion gaps, and a tapping block with a pull bar helps lock planks together without damaging edges. For cutting, use a blade recommended for composite or laminate-style flooring to reduce splintering. Having the right tools makes your click-lock installation smoother and helps you achieve clean, professional seams.
What’s the best way to handle tricky areas like doors, stairs, and transitions when installing WPC floors?
Plan plank layout first so seams fall in a visually balanced spot and avoid narrow “strip” planks near doorways whenever possible. Under door jambs, carefully trim the tongue/edge as needed and slide planks in for a tight fit, maintaining the required expansion gap. For stairs or transitions, use the correct transition profiles and ensure the flooring is properly supported and not pinched. In wet areas or rooms with higher moisture exposure, follow the WPC floor manufacturer’s guidance on sealing edges and using compatible trims.
📅 Last Updated: October 08, 2026 | Topic: How to install WPC floors? | Content verified for accuracy and freshness.
References
- https://en.wikipedia.org/wiki/Wood%E2%80%93plastic_composite
- Floating floor
https://en.wikipedia.org/wiki/Floating_floor - Laminate flooring
https://en.wikipedia.org/wiki/Laminate_flooring - https://en.wikipedia.org/wiki/Vinyl_flooring
- https://en.wikipedia.org/wiki/Subfloor
- Underlayment
https://en.wikipedia.org/wiki/Underlayment - Expansion joint
https://en.wikipedia.org/wiki/Expansion_joint - Google Scholar Google Scholar
https://scholar.google.com/scholar?q=WPC+flooring+installation - Google Scholar Google Scholar
https://scholar.google.com/scholar?q=wood+plastic+composite+flooring+underlayment+subfloor+preparation - Google Scholar Google Scholar
https://scholar.google.com/scholar?q=rigid+core+vinyl+plank+click-lock+floor+installation+guideline