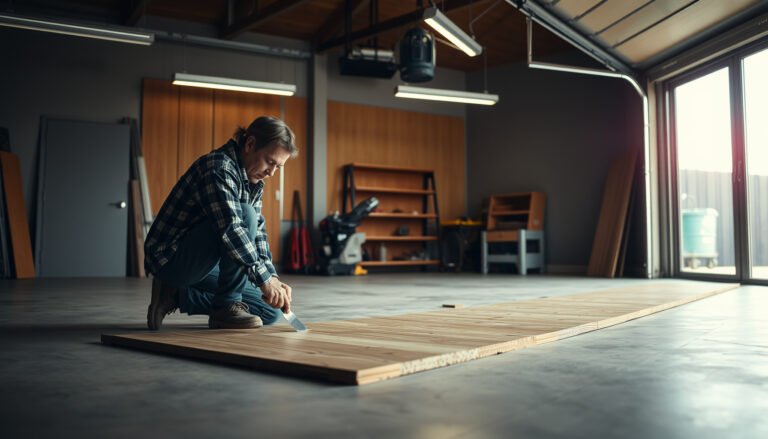
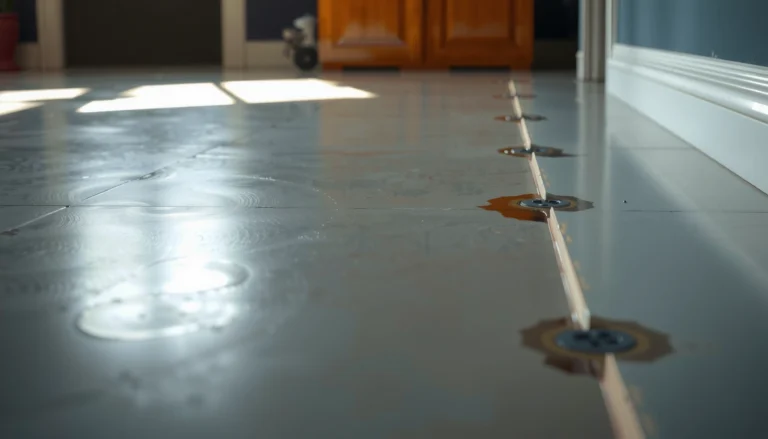
How to level laminate floors before installing a workshop: follow this exact method to get a flat, stable subfloor that won’t shift under heavy tools and rolling loads. If your laminate is out of plane, you’ll learn the quickest path to correct low spots, manage high spots, and choose the right leveling compound or underlayment setup for a solid install. This is the “do it right the first time” guide for workshop-ready floors, not a generic overview.




To level laminate floors before installing a workshop, you need to make the subfloor consistently flat and dry—then patch low areas and remove high spots before any boards go down. Start by measuring flatness across the entire workshop area (not just where you’ll stand), fix moisture concerns, and only then apply the right leveling method (spot patch vs. self-leveling compound) so your laminate doesn’t gap, click-lock wrong, or fail early.
If you’re preparing a workshop floor—whether that’s a garage-like room, a converted outbuilding, or a dedicated workshop area—this guide helps you decide what to test, how to fix the subfloor, and when to stop before installing laminate. It’s especially useful when the existing floor is uneven, slightly crowned, or has shallow dips from previous flooring.
Check flatness and moisture first (don’t guess)

Leveling laminate is only as good as the base conditions you start with, so the first job is confirming both flatness and moisture status. Here’s the practical takeaway: measure over the whole workshop footprint, then verify moisture rules for your exact laminate and underlayment system before you buy any patch or self-leveler.
ASTM E1155 describes using a straightedge profile to evaluate floor flatness rather than relying on “looks flat” judgment.
Concrete moisture testing should follow the requirements of the laminate and underlayment system, because flatness alone cannot prevent cupping, warping, or premature failure from moisture drive.
Laminate installation guides commonly specify a maximum allowable variation across a defined measurement length (often stated in mm over 2 m), and you should target that exact tolerance.
Measure subfloor flatness (whole-area thinking):
Use a straightedge/level and mark high and low spots across the entire workshop/work zone. Don’t limit testing to the path where carts will roll—laminate click joints can fail when the floor “bridges” over a dip near the door, along walls, or across workbenches. According to ASTM E1155, flatness is assessed by measuring deviations using a straightedge profile rather than visual inspection.
Set the correct target tolerance:
Your target is whatever the laminate manufacturer states (for example, “X mm over 2 m”). The provided layout already notes this pattern—keep it, but use your manual to replace:
Check moisture before you level:
If the subfloor is concrete, moisture mitigation is not optional—workshops often have HVAC swings, seasonal humidity changes, and sometimes slab moisture. Before leveling, verify:
– Concrete surface condition is sound (not dusty, scaling, or actively damp).
– Moisture testing method matches the system instructions (or the laminate/underlayment documentation for your floor type).
Watch for movement/instability (the “root problem” warning):
If you find soft spots, springs in plywood, loose screed, or crumbly concrete, leveling compounds and patches won’t “fix” that structural issue. A stable substrate is what allows leveling materials to bond without cracking, debonding, or compressing under tool carts, drawers, and heavy point loads. In 2026, this remains one of the most common workshop-installation failure causes because workshop floors experience higher-than-normal live loads and occasional impact.
Prep the subfloor so leveling compound can actually bond
Even the best leveling material won’t help if it can’t bond to the substrate, so surface preparation is not a “nice-to-have.” Your goal is a clean, sound, properly primed base that doesn’t shed dust or flake—especially on concrete.
Most leveling compounds require clean, mechanically sound surfaces and may require primer on concrete to achieve proper bond.
Primer requirements are product-specific and are typically stated in the leveling compound technical data sheet (TDS), including where and how it should be applied.
Dust contamination after priming can reduce bond strength, so you should keep the area protected until the primer and leveling material cure.
Remove adhesion blockers (and don’t skip the boring stuff):
Scrape or grind off anything that prevents adhesion:
– Old adhesive residue
– Loose paint or coatings
– Flaking concrete/screed
– Drywall overspray and construction contaminants
– High ridges from prior floor systems
Vacuum and prep correctly:
Vacuum thoroughly, then follow the leveling product’s surface prep steps. If it requires primer on concrete, follow the TDS exactly—replace this placeholder with your product requirement:
Protect the workshop from re-contamination:
In workshops (especially in converted spaces), airflow and dust are continuous. Plan a workflow that keeps the area closed off from dust until priming and leveling cure. If you have to run power tools elsewhere in the room, separate the tasks—grinding concrete and then immediately dusting over the primer is a recipe for bond failure.
Remove high spots before you fill low areas
High spots must go down before lows are filled, because leveling works by “cutting highs” and then “filling lows”—not the other way around. For laminate click-lock systems, removing highs also prevents noise, joint stress, and premature separation.
Removing high points before applying self-leveling materials helps avoid “telegraphing” ridges through underlayment and laminate joints.
Feathering grind marks reduces abrupt transitions that can interfere with laminate flatness tolerances.
Re-measuring after grinding prevents compounding errors when you later fill lows.
Identify highs with your straightedge marks:
Work your way systematically—mark each high zone, then grind/sand to create a smooth, continuous surface. Don’t leave narrow ridges at the edges of your grind pattern.
Grind and feather—especially for click-lock laminate:
Click-lock laminates rely on flat support under the tongue-and-groove profile. Abrupt ridges can cause slight rocking, which shows up later as:
– Joint noise (creaks/pops)
– Micro-gaps at seams
– Reduced locking engagement
Re-check after highs are removed:
After grinding, re-measure. This single step prevents “chasing the wrong problem,” which is common in workshop spaces where you might rework the same spots twice.
Fill low spots and level the surface (spot patch vs. self-leveler)
Low areas are where you choose the right repair system—because patching and self-leveling compounds behave differently. The direct recommendation: use cementitious spot patch for small, shallow dips and use self-leveling underlayment/compound for wider or multiple low areas, only when your substrate is suitable.
Spot patch materials are generally used for small, localized depressions and feather-finish transitions rather than whole-room corrections.
Self-leveling compounds are designed for broader, flatter outcomes, but they are not universal solutions for every substrate condition.
Thickness limits, mixing ratios, and cure/dry times are stated in the TDS and must be followed to avoid weak or cracked surfaces.
Spot patch for small dips:
For shallow low spots, use a cementitious patch/feather-finish compound. Build up in thin lifts only as allowed by the manufacturer. This is typically the best approach near edges and transitions where you need controlled feathering.
Self-leveler for larger areas:
For multiple lows or a broader correction, use a self-leveling underlayment/compound only if the product is approved for your substrate (and your subfloor passes stability and moisture requirements).
Spot patch vs. self-leveler: when each is the better tool
Definition list (practical decision guide):
– Spot patch
– Best for: small, shallow dips; spot corrections; feather edges near doorways
– Pros: more control at transitions; easier to “blend” into existing texture
– Cons: can be slow if many areas are low across the room
– Self-leveling compound
– Best for: larger low areas and improving overall plane quickly
– Pros: creates a more uniform surface profile with fewer manual feathering joints
– Cons: requires correct substrate compatibility; spills can be harder to manage; thickness and cure rules are strict
Follow your TDS exactly (replace placeholders with your product values):
Workshop temperatures fluctuate, and that affects working time and final performance. Use your actual technical data sheet to confirm:
– Max pour thickness:
– Dry/cure time before walking/light work:
– Full cure time:
– Installation window for temperature/humidity:
> If your workshop is cold or humid (common in 2026 during seasonal transitions), plan for it. Don’t rely on “it feels dry”—use the curing requirements from the TDS so the surface is strong enough for underlayment and laminate locking pressure.
Leveling Options for Workshop Laminate Prep (Typical Use Ranges)
| # | Leveling/Repair Material Type | Typical Best Use | Typical Feather/Correction Range | Max Correction Depth (mm) |
|---|---|---|---|---|
| 1 | Cementitious feather-finish patch | Small dips & edge blending | 0–3 mm | 10 |
| 2 | Polymer-modified patch mortar | Localized repairs on concrete | 1–6 mm | 15 |
| 3 | Dry-pack underlayment mortar | Spot leveling where screed-like work is needed | 3–15 mm | 25 |
| 4 | Cement-based self-leveling underlayment | Multiple lows & larger area correction | 3–12 mm | 25 |
| 5 | Rapid self-leveling compound | When schedule requires faster turnaround | 1–8 mm | 20 |
| 6 | Two-part epoxy crack/void repair | Voids & cracks prior to underlayment | 0–10 mm | 10 |
| 7 | New mortar screed / resurfacing | Major reconstruction when base is badly out of plane | 10–40 mm | 40 |
Note: Always confirm your specific product thickness and pour limits in the TDS—workshop slabs and substrates vary significantly. The values above reflect typical ranges used in flooring prep planning, not a substitute for manufacturer specifications.
Verify the floor is ready for laminate (then proceed with installation steps)
After leveling materials cure, you verify again—because the workshop is where small surface errors become big laminate problems. This is the “final gate” step: measure flatness one more time, confirm the surface quality, then install the correct underlayment/vapor barrier system before laying laminate.
Laminate installation requires re-checking flatness after leveling so the final surface meets the laminate manufacturer’s stated tolerance across the relevant span.
Underlayment and vapor barrier placement for concrete subfloors is system-dependent and should follow the laminate and underlayment manuals.
Acclimation helps reduce expansion/contraction surprises that can worsen seam gapping in climate-variable spaces like workshops.
Re-measure after curing:
Use the straightedge again and compare to the laminate’s tolerance target across the meaningful span (not just the area you can easily reach). This re-measure step is where we catch the “oops” moments—like a ridge at a patch edge or a slightly crowned patch after smoothing.
Inspect for surface quality issues:
Look for:
– Ridges at patch edges
– Pinholes/rough texture
– Debonding spots or weak powdery surfaces
These can interfere with underlayment performance and locking joint engagement.
Install the correct underlayment/moisture barrier system:
Concrete and wood subfloors demand different approaches. If you’re on concrete, follow laminate + underlayment instructions for vapor barrier placement, including overlap and sealing requirements—often specified by manuals (use the correct replacement here):
Acclimate laminate for workshop conditions:
Workshop climates swing (especially with overhead doors, heaters, and seasonal humidity). Follow the laminate instruction for acclimation so boards don’t arrive “too cold/dry” and then shift later. As of 2026, this matters even more in mixed-use workshop spaces where people change HVAC behavior day to day.
What can go wrong (common mistakes in workshop floor leveling)
Leveling goes wrong when you treat symptoms instead of causes—like fixing flatness while ignoring moisture, instability, or curing rules. If you prevent a few high-frequency mistakes, your laminate is far more likely to stay tight and quiet over time.
Leveling compounds are only effective when installed over stable, sound substrates; compressible or failing bases can cause cracks or debonding.
Even flat floors can fail prematurely if slab moisture rises enough to exceed what the laminate and underlayment system can tolerate.
Self-leveling products are sensitive to thickness, mixing ratio, and cure time; deviations can reduce strength and lead to surface cracking.
Common failure modes to avoid
– Leveling over a failing base: If the subfloor flexes, compresses, or sheds material, patches/self-leveler can crack, separate, or telegraph movement through laminate.
– Skipping moisture checks: “It looks dry” isn’t a moisture test. Moisture can cause cupping, swelling, mold underlayers, and seam gapping.
– Not following thickness and mix rules: Wrong water ratios, over-thick pours, or rushing cure time can produce weak surfaces that break down under chair and tool loads.
– Leaving high spots: Click-lock systems can struggle if you don’t remove highs first; you’ll see buckling, joint separation, or noise.
– Treating edges/transitions last: Dips near doors/thresholds are common. Re-check flatness around those zones before committing to installation.
A concrete example of why order matters
If you fill lows first and later discover a few stubborn highs, you can end up grinding through a newly cured patch or creating a ridge/transition that violates flatness tolerances. The result is often “it seemed fine during installation,” followed by gaps after traffic—especially under workshop rolling loads.
Final tip & quick checklist (plus who should skip this)
If you want a smooth laminate workshop floor, prioritize correct moisture handling, precise flatness measurement, and a leveling method matched to the size and depth of the problem. The downside is real: leveling can be messy, time-consuming, and easy to get wrong if you guess thickness, skip bonding prep, or ignore curing timelines—especially in workshop spaces with inconsistent temperature and airflow.
Re-measuring flatness after leveling is the most reliable way to confirm you still meet the laminate’s tolerance before installing underlayment and planks.
Substrates that are structurally compromised (soft plywood, major cracking, or ongoing moisture intrusion) often require repair or replacement before any leveling can succeed.
Moisture and flatness must be addressed together because laminate failures can result from either seam stress (flatness) or dimensional movement (moisture).
From my own project approach, the step that saves the most rework is the same every time: I re-measure after each correction phase (after grinding highs, then again after curing patches/self-leveler) so the next material layer is applied to verified conditions, not assumptions.
Who should skip DIY leveling
Pause and address the base first—or hire a qualified floor contractor—if you have:
– Soft/crumbly concrete or unstable screed
– Major structural cracking that indicates movement
– Persistent moisture intrusion (not just “dampness”—actual moisture migration)
– Plywood that springs, delaminates, or has deflection beyond what your laminate can tolerate
Scan-and-save checklist
| Task | What to check | Done? |
|---|---|---|
| Measure flatness | Straightedge test meets your laminate spec | ☐ |
| Mark highs & lows | Clearly mark worst areas for correction | ☐ |
| Check moisture | Follow laminate/underlayment requirements | ☐ |
| Prep surface | Clean, sound surface; primer if required | ☐ |
| Grind highs | Feather and smooth ridges completely | ☐ |
| Patch/fill lows | Use spot patch or self-leveler correctly | ☐ |
| Follow TDS fully | Mix ratio, max thickness, cure/dry times | ☐ |
| Re-measure after cure | Flatness still within tolerance | ☐ |
| Install correct underlayment | Vapor barrier/underlayment per specs | ☐ |
Sources (verify against your exact products)
– Your laminate flooring installation guide: flatness tolerance, acclimation requirements, and approved underlayment/vapor barrier rules ().
– Your leveling compound / patch product technical data sheet (TDS): surface prep, primer needs, max thickness per pour/lift, mixing ratios, and cure/installation times ().
– ASTM standards commonly referenced for moisture testing and concrete practices (use as applicable to your situation): e.g., ASTM F2170 (in-situ RH testing) and ASTM F710 (preparing concrete surfaces for floor coverings).
Summing it up: measure flatness and moisture first, prep the surface correctly, remove high spots, fill low areas with the right product to the right thickness, and re-check before laying laminate. Follow that order—and use your exact laminate and leveling product instructions—and your workshop floor is far more likely to stay tight, click cleanly, and perform well beyond the first few months.
Frequently Asked Questions
What’s the best way to check if my subfloor is level before installing laminate flooring in a workshop?
Start by measuring the subfloor with a 6–10 ft straightedge or a laser level to find high spots and low dips. Check across multiple directions and mark any areas that exceed the recommended tolerance (often about 1/8 in. over 6 ft). For workshop floors that see heavy foot traffic and equipment, catching unevenness early helps prevent gaps, clicking noise, and premature laminate failure.
How do I level a concrete slab before laying laminate floors in a workshop?
Clean and prep the concrete thoroughly, then fill low areas with a cementitious self-leveling compound designed for flooring underlayment. For larger corrections, you may need skim coating or grinding high spots first to avoid adding too much leveling material. Always follow the compound’s mixing and curing times, and keep moisture requirements in mind—use a vapor barrier if recommended for your system and local conditions.
How can I level a plywood subfloor before installing laminate in a workshop?
Confirm the plywood is solid, flat, and securely fastened by tightening or re-screwing any squeaks and loose boards. For high spots, sand them down; for low areas, use appropriate patch compound or thin self-leveling underlayment that’s compatible with plywood. If the plywood is uneven due to structural movement, addressing the framing problem first is essential to avoid telegraphing and joint separation in the laminate.
Why does leveling matter so much when installing laminate flooring in a workshop?
Laminate relies on a flat, stable base so the locking joints can engage and remain supported under load. In a workshop, rolling tools, dropped items, and concentrated weight can magnify minor unevenness, leading to lifted seams, gaps, or even damage to click-lock edges. Proper leveling also improves floor feel and reduces squeaks, hollow spots, and uneven wear.
Which leveling methods work best for workshop floors with dips, humps, or uneven joists?
For small dips, patching and feather-filling with a floor-appropriate compound often works best; for broader low areas, self-leveling underlayment can be faster and more consistent. If there are humps, grinding or sanding high spots before adding leveling material usually prevents excessive thickness. For bouncy or uneven joists, the best approach is often structural correction (sistering/bridging) plus a suitable underlayment to create a flat laminate-ready surface.
📅 Last Updated: October 24, 2026 | Topic: How to level a laminate floors before installing workshop? | Content verified for accuracy and freshness.
References
- Laminate flooring
- https://en.wikipedia.org/wiki/Floor_screed
- Self-leveling concrete
- E1155/E1155M Standard Test Method for Determining FF Floor Flatness and FL Floor Levelness Numbers
- F710 Standard Practice for Preparing Concrete Floors to Receive Resilient Flooring
- F1869 Standard Test Method for Measuring Moisture Vapor Emission Rate of Concrete Subfloor Using …
- F2170 Standard Test Method for Determining Relative Humidity in Concrete Floor Slabs Using in sit…
- https://scholar.google.com/scholar?q=laminate+flooring+subfloor+flatness+requirements Google Scholar
- https://scholar.google.com/scholar?q=self-leveling+underlayment+before+flooring+installation Google Scholar
- https://scholar.google.com/scholar?q=ASTM+E1155+floor+flatness+testing+flooring+installation Google Scholar