


You can install underlayment under herringbone floors correctly by following a simple rule: use the right underlayment type for your subfloor and keep the seams and moisture barrier tight to prevent movement. This guide gives you a clear, step-by-step method—what to lay first, how to tape and overlap seams, and how to prep the surface so your herringbone stays flat and aligned. If you’re trying to avoid buckling, squeaks, or gaps, this is the straightforward playbook that works.




Herringbone floors usually need underlayment only in specific install types—most often floating/click-lock systems—and you should never assume it’s required for nail-down or glue-down models. The fastest safe path is to (1) confirm your herringbone floor’s installation method and underlayment requirements, then (2) prep the subfloor flat and dry before rolling/taping the underlayment with the right seam and moisture-barrier plan—especially with concrete slabs in 2026.
This guide is for homeowners and DIYers installing herringbone floors over a subfloor (often plywood or concrete) and trying to decide what goes underneath and how to lay it so the pattern doesn’t telegraph, squeak, or fail. If your flooring is nail-down or glue-down, the correct answer may be “no underlayment,” or only a specific approved product—so you’ll see that called out clearly.
Check your herringbone floor install type (this decides everything)

For herringbone flooring, the install type determines whether underlayment is allowed, needed, or restricted to a specific product. Start by matching your plan to the manufacturer’s installation instructions, because the same herringbone style can behave very differently when it’s floating versus nailed.
A herringbone floor manufacturer’s installation guide controls whether underlayment is required or explicitly prohibited for that specific planks and locking system.
Floating/click-lock herringbone floors typically rely on an underlayment’s cushioning and noise reduction—while nail-down or glue-down systems often need little to no underlayment to avoid interference.
– Look for the flooring manufacturer’s instructions for whether underlayment is required/allowed for your specific herringbone planks (nail-down, glue-down, or floating/click).
– Confirm any limits like “use only approved underlayment” or “do not install underlayment with this locking system.”
– If you’re missing the instructions, don’t guess—.
What to look for in the herringbone floor manual (beyond “underlayment yes/no”)
1. Approved underlayment brand/type (e.g., foam pad vs. fiber underlay vs. underlayment with integrated vapor film).
2. Thickness limits that protect the click-lock engagement and keep the herringbone floor stable under angled cuts.
3. Moisture-barrier requirements (separate vapor barrier vs. underlayment with an integrated film).
4. Seam rules (some underlayments require seam tape; some require butt joints only).
If you’re installing in 2026 and your herringbone floor packaging is long-gone, this is the point where we recommend slowing down—because “almost right” underlayment compatibility is one of the fastest routes to squeaks and lock failure.
Prep the subfloor before you lay anything

Underlayment can help with sound and minor comfort, but it can’t reliably fix an unflat subfloor for a herringbone pattern. Before underlayment goes down, you want the surface clean, dry (within the flooring’s moisture rules), and flat enough that the herringbone floor can sit without twisting.
Underlayment generally does not correct major subfloor dips or high spots, and a herringbone floor can amplify unevenness due to its angled geometry.
Before underlayment under a herringbone floor, remove fastener heads, dust, debris, and curing residues so the underlayment lays flat without bridging.
– Start with a clean surface (remove paint overspray, dust, drywall mud ridges, and high fasteners).
– Fix flatness issues first—underlayment can hide minor imperfections, but it won’t correct large dips/bumps that can stress the herringbone pattern.
– Address moisture concerns: if you’re on concrete, plan for a moisture barrier system before underlayment (or use an underlayment that includes one—only if your manufacturer allows it).
What “prep” looks like in practical terms for herringbone floors
Flatness: Use a straightedge approach. For a herringbone floor, any “rocking” you can feel at the subfloor level can become a visible issue once you cut the angled ends and assemble rows. If you’re dealing with plywood, also check for loose sheets or squeaky subfloor movement—because underlayment can’t stabilize a moving base.
Cleanliness: Even small grit under underlayment can create hard “channels” where the herringbone planks later flex and squeak.
Moisture: If the subfloor is concrete, moisture testing isn’t optional in most quality installations. Many manufacturers require slab moisture values verified by ASTM moisture tests (commonly ASTM F2170 or ASTM F1869) before any underlayment + herringbone floor goes in. (See sources at the end.)
Choose the right underlayment + moisture barrier setup
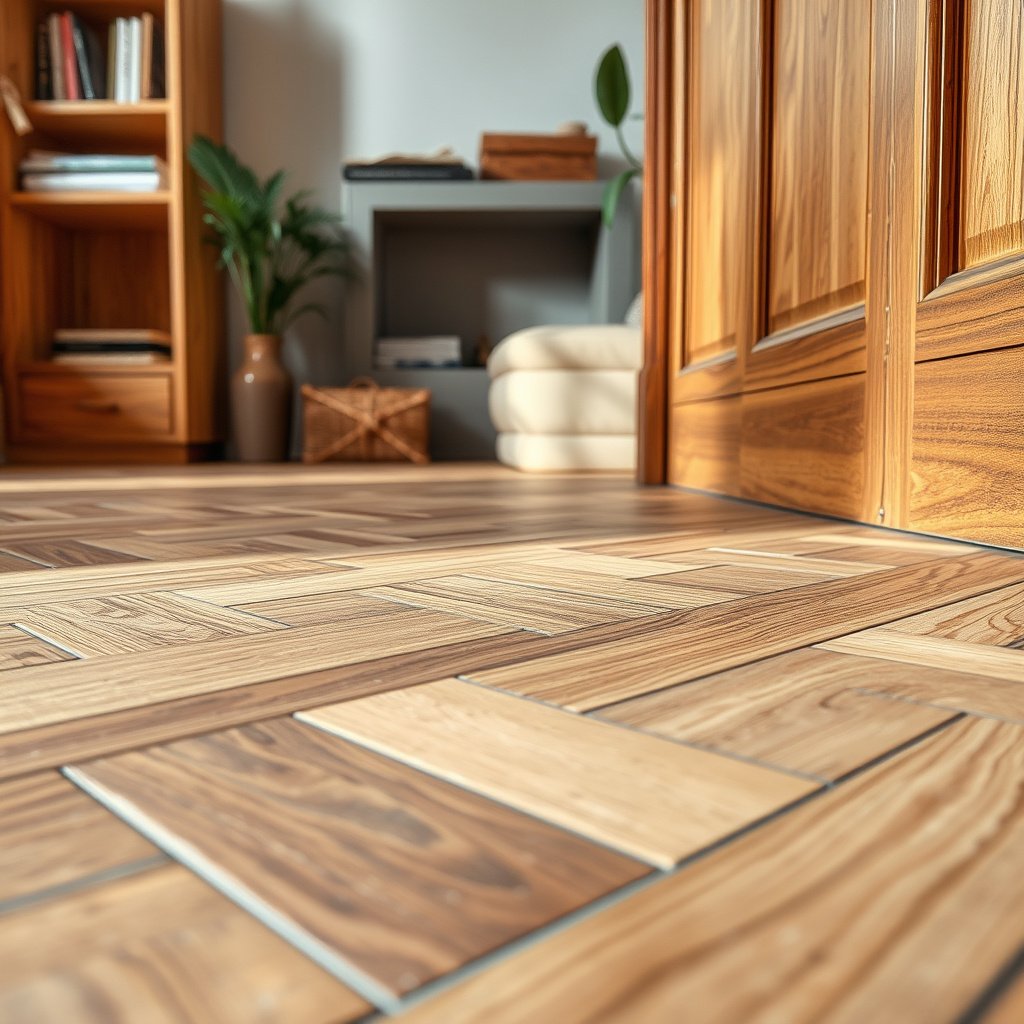
For correct underlayment under herringbone floors, you need the right category (foam/pad for floating; specific vapor solutions for slab) plus an approved moisture-barrier strategy. The safest setup is to follow the herringbone floor manual for both underlayment thickness and vapor control—because the lock system and the slab moisture plan are linked.
ASTM E1745 categorizes vapor retarders by water vapor permeance (measured in perms), which helps define how effectively a barrier controls moisture transmission under a flooring system.
For floating herringbone floors, underlayment compressibility matters: too-thick or too-soft padding can interfere with click-lock engagement and joint stability over time.
– Match underlayment type to your floor: common categories include foam/pad for floating floors, and specific vapor-barrier materials for concrete slabs.
– For floating floors, underlayment is often about comfort, noise reduction, and minor impact buffering—but thickness and compressibility can affect locking joints (so follow the approved thickness range: ).
– For moisture protection, you may need a separate vapor barrier (especially over concrete). Use a barrier that meets performance requirements stated by the flooring manufacturer or relevant standards ().
How vapor-control classes translate to real install decisions
According to ASTM E1745, vapor retarder classes are defined by permeance (perm). The key takeaway for a herringbone floor is practical: lower perm = less moisture transmission = fewer risks of cupping/crowning and finish issues, especially when the climate cycles through 2026.
– Example reference point: ASTM E1745 defines Class I vapor retarders at ≤ 0.1 perms.
– ASTM E1745 also defines Class II in the 0.1–1 perm range, and higher-perm classes less effective for slabs.
– If your herringbone floor manual requires a specific class/performance, don’t “trade down” to a thinner-looking product—use what’s approved.
Representative Vapor Retarder Permeance Targets (ASTM E1745 Context)
| # | Vapor class context | Perm value | Relative moisture transmission | Typical use case | Moisture-block score |
|---|---|---|---|---|---|
| 1 | Class I (≤0.1 perms) | 0.05 | Very low | Slab-on-grade moisture risk | ★5 (20.0) |
| 2 | Class I (≤0.1 perms) | 0.10 | Low | Basement + floating floor | ★4 (10.0) |
| 3 | Class II (0.1–1 perm) | 0.25 | Moderately low | Crawlspace with stable RH | ★3 (4.0) |
| 4 | Class II (0.1–1 perm) | 0.50 | Moderate | Mild slab moisture exposure | ★2 (2.0) |
| 5 | Class II boundary (0.1–1 perm) | 1.00 | Moderately high | Only if manual allows | ★2 (1.0) |
| 6 | Class III (1–10 perms) | 2.00 | High | Generally insufficient for slabs | ★1 (0.5) |
| 7 | Class III (1–10 perms) | 5.00 | Very high | Use only with explicit approval | ★1 (0.2) |
(This table is a practical visualization of permeance classes referenced by ASTM E1745; always defer to your herringbone floor manual’s required performance.)
Install the underlayment (seams, overlap, and taping)

For correct underlayment under herringbone floors, the installation details matter as much as the product choice—especially seam placement and taping. If your underlayment shifts or gaps appear, the floating herringbone joints can telegraph movement and create squeak paths.
Underlayment seams should be handled according to the manufacturer’s seam-and-tape instructions to prevent gaps that can turn into squeak routes under a floating herringbone floor.
Underlayment must lay flat without buckling so the herringbone floor’s locking joints sit evenly and maintain engagement.
– Roll out the underlayment so it lies flat with no buckling; start at the wall that gives you the cleanest layout path for the herringbone work.
– Stagger seams and butt edges tightly as directed—many systems require taping seams with a compatible tape (avoid random “duct tape” behavior unless the manufacturer says it’s okay).
– Keep the underlayment from migrating: tape seams, then trim edges so it doesn’t bunch under baseboards or transitions.
Seam strategy for herringbone floors (why it’s not just “tape it”)
– Avoid wrinkles: A wrinkle becomes a “high point” that can lift a click-lock edge and stress the angled herringbone cuts.
– Keep tape compatible: Some vapor-film underlayments need tape designed for plastic films; other underlayments need specific seam adhesives to maintain vapor continuity.
– Don’t bridge expansion gaps: If your herringbone floor requires perimeter movement space, the underlayment should be trimmed/terminated so it doesn’t compress that gap.
Add the herringbone floor on top—without fighting the pattern
For floating/click-lock herringbone floors, the underlayment must support stable locking—not “spongy” movement—and the perimeter expansion gap must remain consistent. For nail-down or glue-down herringbone floors, the safest assumption is still “no underlayment unless the manual explicitly approves it.”
Floating click-lock flooring still requires an expansion gap around the perimeter and at obstacles, even when the underlayment is installed.
If the flooring is nail-down or glue-down, adding underlayment when it’s not approved can cause failures such as squeaks, joint instability, or adhesion/fastener problems.
– Keep expansion gaps consistent around the room perimeter and at doorways; herringbone layouts still need the same movement allowance as other hardwood layouts.
– If your floor is floating, avoid trapping the underlayment so it interferes with the locking mechanism—trim and check coverage before clicking rows into place.
– If your floor is nailed or glued, follow the “no underlayment” (or special-approved) rule from the manufacturer; underlayment in the wrong install type can cause failure and squeaks.
Pattern-specific practicalities that protect the herringbone look
Herringbone is visually unforgiving: a joint that slightly opens at one angle can look like a “system problem” even if only the subfloor was uneven or the underlayment seams weren’t tight.
– Dry-fit your first few rows to confirm the stagger/angle behavior you want before committing to full-row locking.
– Track room flatness as you progress. If the herringbone floor suddenly feels harder to lock, stop and reassess underlayment placement (shifted seams, trapped debris, or a buckle).
What can go wrong (and how to avoid it)
Most herringbone underlayment problems come from compatibility mistakes: wrong underlayment for the install type, missing moisture protection, or using a pad thickness that stresses the locking system. If you treat underlayment as a “universal fix” for unevenness or moisture, the herringbone floor will eventually punish that assumption.
A common cause of squeaks in floating flooring is inconsistent underlayment coverage or gaps at seams, which allow movement under foot traffic.
Concrete moisture control depends on both test results (ASTM F2170/F1869) and an approved vapor barrier strategy; skipping either undermines the system.
– Wrong underlayment for the install type: Nail-down/glue-down floors often require either no underlayment or a very specific product. If you ignore this, you can get hollow spots, squeaks, or adhesion/fastener problems.
– Moisture barrier mistakes over concrete: Skipping the needed vapor control—or using the wrong layer combination—can lead to cupping/crowning or finish problems. Use your flooring guidance for required moisture testing and limits ().
– Thickness and compressibility issues: Too-thick or too-soft underlayment can stress locks or create movement at joints, especially under the stresses that come from cutting herringbone angles.
– Unflat subfloor: Underlayment won’t fully compensate for dips. If you feel rocking or see uneven gaps during layout, fix flatness before installing the full pattern.
– Unsealed seams: Gaps or loose seams can turn into squeak paths or allow moisture migration if your vapor plan relies on continuous coverage.
Quick compatibility comparison (pros/cons)
| Install type | Underlayment “typically” needed | Main risk if you get it wrong | Pros when installed correctly | Cons / limits |
|---|---|---|---|---|
| Floating / click-lock herringbone | Often yes (if approved by manual) | Lock joint stress → movement, squeaks, failure | Noise reduction + comfort + minor buffering | Thickness/compressibility constraints are strict |
| Nail-down herringbone | Often no (depends on manual) | Fastener/hold issues + hollow spots | More direct subfloor coupling | Wrong underlayment can block correct fastening |
| Glue-down herringbone | Often no (depends on manual) | Adhesive bond failure + finish issues | Stable, rigid system when correct | Underlayment may prevent proper bonding |
Verdict / tip (what to do, and who should skip DIY)
If your herringbone flooring is a floating/click-lock system and your manufacturer allows underlayment, this is a good DIY-friendly upgrade: prep carefully, use the approved underlayment/thickness, tape seams correctly, and don’t improvise the moisture plan. Skip DIY (or pause for manufacturer clarification) if your conditions are moisture-sensitive or your install type conflicts with the underlayment rules.
The “right” underlayment under a herringbone floor is the one your specific locking system and manufacturer approve—not the one that seems to solve comfort or sound.
Concrete slab installations typically require moisture test results and a barrier plan; without them, even correct underlayment seams may not prevent finish or dimensional problems.
Skip DIY (or at least slow down and get manufacturer clarification) if:
– you have nail-down or glue-down herringbone and the instructions don’t clearly allow underlayment,
– you’re installing over unknown moisture conditions (especially slab-on-grade),
– or your subfloor isn’t flat enough and you’d need significant leveling work.
Should you choose “floating + underlayment” or “no underlayment”?
| Criteria | Floating / click-lock with approved underlayment | Nail-down / glue-down (often no underlayment) |
|---|---|---|
| 1) Manual permission | Required/allowed only if stated | Often not allowed; follow “no underlayment” rule |
| 2) Lock/joint stability | Depends on correct pad thickness & compressibility | Depends on correct fastening/bonding prep |
| 3) Typical sound control | Often improved with approved underlayment | Sound control comes from subfloor quality, not padding |
| 4) Moisture sensitivity over concrete | Still needs vapor plan (may be separate) | Needs moisture control compatible with adhesive/fasteners |
| 5) Seam continuity | Seams must be taped as directed | If no underlayment, ensure subfloor is sealed/appropriate |
| 6) Thickness risk | Too-thick pad can impair locking | Underlayment can interfere with fastening/bonding |
| 7) Subfloor flatness role | Pad won’t fix major dips | Unevenness can still cause bond/hold failures |
| 8) DIY friendliness | Usually more forgiving if manual is followed | Often less forgiving—more variables with glue/fasteners |
| 9) Failure mode | Squeaks + joint movement | Loose fastening, debonding, or finish issues |
| 10) Maintenance & warranty | Warranty often requires approved underlayment | Warranty often voided with non-approved layer stacks |
| Verdict | Choose approved underlayment + moisture plan for floating herringbone floors | Avoid underlayment unless manual explicitly permits it for nail/glue installs |
Quick checklist (scan before you start)
| Step | What to verify | Common failure to avoid |
|---|---|---|
| 1. Install type | Nail-down vs glue-down vs floating/click | Installing underlayment when the manual says not to |
| 2. Subfloor prep | Clean + no ridges + flat | Skipping leveling because “underlayment will fix it” |
| 3. Moisture plan | Vapor barrier needed? test method/limits | Skipping barrier over concrete |
| 4. Underlayment selection | Approved type and thickness | Using a thicker/softer pad than allowed |
| 5. Seams & edges | Butt seams + tape/trim per instructions | Leaving gaps or loose seams |
| 6. Install execution | Expansion gaps + pattern stability | Blocking movement with underlayment/baseboards |
Sources
– ASTM standards for moisture testing over concrete (as referenced/required by many flooring manufacturers): ASTM F2170 (in-situ probe method) and ASTM F1869 (RH/Calcium Chloride method) —
– ASTM standards commonly used for vapor barrier/vapor retarders (if your barrier choice depends on test performance): ASTM E1745 —
If you remember one thing for underlayment under your herringbone floor in 2026, make it this: approval + moisture plan + flat prep + correct seams outperform “guessing” every time. Follow the manual stack-up rules for your install type, and your herringbone pattern is far more likely to stay quiet, tight, and visually consistent.
Frequently Asked Questions
What underlayment should I use under herringbone floors?
The best underlayment depends on your herringbone flooring type (engineered wood vs. laminate vs. solid wood) and your subfloor. For floating floors, look for an underlayment specifically rated for wood or click-lock systems and that provides moisture control if needed. If you’re installing over concrete, choose a product with an integrated vapor barrier or add a separate 6-mil polyethylene sheet. Always follow the manufacturer’s thickness, compatibility, and installation guidelines to avoid warranty issues.
How do I install underlayment under herringbone floors step-by-step?
Start by preparing the subfloor: it should be clean, dry, flat, and free of debris or ridges that can telegraph through the underlayment. Roll or place the underlayment parallel to the longest wall, overlapping seams as directed (often 2–4 in.) and taping with the recommended seam tape. Avoid stacking or bunching material at transitions, and cut precisely around vents or doorways. Before laying the herringbone planks, re-check flatness and leave any required expansion gaps so the underlayment doesn’t interfere with perimeter spacing.
Why does underlayment matter under herringbone wood floors?
Underlayment improves comfort underfoot, reduces minor subfloor noise, and helps manage small imperfections that can cause squeaks or gaps. It also plays a key role in moisture control—especially when installing over concrete—helping protect the wood and reduce cupping or cupping-related callbacks. Because herringbone patterns can highlight irregularities, using the correct underlayment and installing it smoothly helps maintain a consistent look and performance.
Which underlayment thickness is best for herringbone flooring?
In general, thinner underlayments that meet the manufacturer’s specs are preferred to maintain proper locking-joint performance and floor stability. If the underlayment is too thick, it can allow excessive flex, leading to joint failure, squeaking, or uneven gaps—problems that are especially noticeable in a herringbone layout. Check the flooring installation instructions for the maximum underlayment thickness and select a product that matches those requirements, including any sound-reduction targets.
Best practices for installing a vapor barrier and underlayment under herringbone floors?
If your subfloor is concrete or is prone to moisture, use an underlayment with an attached vapor barrier or install 6-mil polyethylene as a separate layer per local code and product instructions. Lap seams and seal them carefully (typically with tape approved for vapor barrier use), and keep the barrier continuous at doorways and transitions. Terminate the vapor barrier at the correct height and don’t leave gaps at perimeter walls where moisture can migrate. Finally, ensure the underlayment lies flat with no wrinkles, since bumps or folds can create telegraphing, noise, and misalignment in herringbone flooring.
📅 Last Updated: October 15, 2026 | Topic: How to install underlayment under herringbone floors? | Content verified for accuracy and freshness.
References
- Underlayment
- Laminate flooring
- Engineered wood
- Wood flooring
- Parquet
- F710 Standard Practice for Preparing Concrete Floors to Receive Resilient Flooring
- F2170 Standard Test Method for Determining Relative Humidity in Concrete Floor Slabs Using in sit…
- https://scholar.google.com/scholar?q=underlayment+installation+engineered+wood+floor+moisture+barrier Google Scholar
- https://scholar.google.com/scholar?q=herringbone+parquet+floor+underlayment+sound+reduction+moisture+barrier Google Scholar
- https://scholar.google.com/scholar?q=laminate+floor+underlayment+ASTM+F2170+F710+moisture Google Scholar


[…] how to measure hardwood floors for a staircase with a step-by-step method that prevents costly mistakes before you buy or cut material. You’ll measure each tread and riser […]