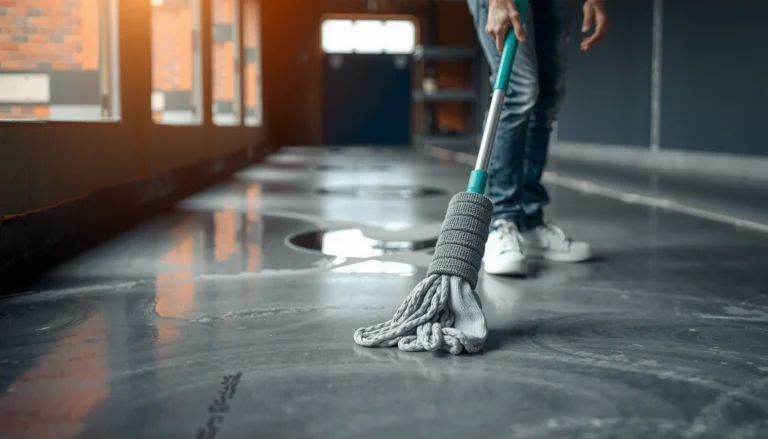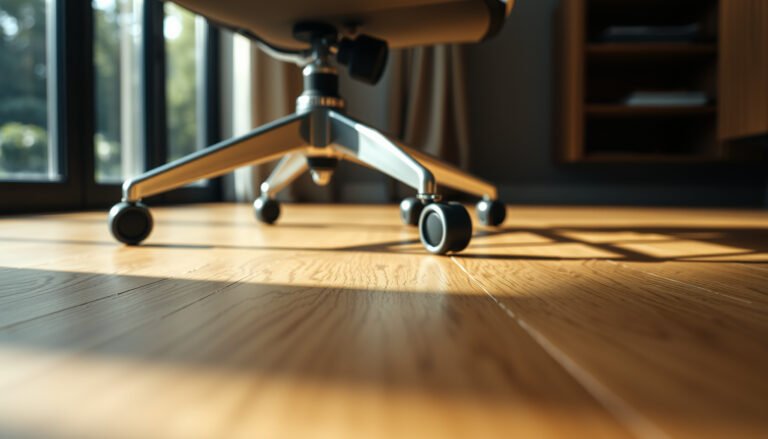

Get construction dust off hardwood floors safely with a step-by-step method that won’t grind grit into the finish. You’ll learn the quickest order of operations—from dry vacuuming to controlled wiping—so dust lifts cleanly without dulling or scratching. Follow these steps and you’ll know exactly what to do, what to avoid, and when the floor is truly ready.



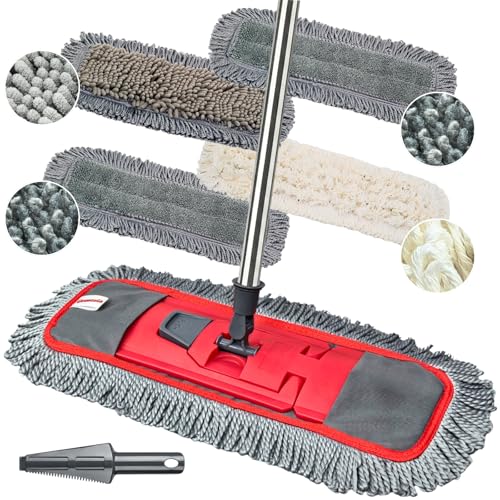
Construction dust on hardwood floors is best handled by dry removal first, then a gentle damp clean—never soaking the planks. Start with a vacuum using a floor brush (or a soft attachment) and thoroughly wipe up fine residue with a microfiber mop lightly dampened with water and a pH-neutral cleaner. For most renovation situations, that sequence prevents grit from being dragged into the finish and reduces the risk of dulling or haze on finished hardwood floors.
This guide is for homeowners dealing with new-build dust, sanding/grinding mess, or renovation cleanups where the wood needs careful treatment to avoid dulling, scratches, or finish damage.
Clear the dust safely (don’t grind it)

The fastest way to protect hardwood floors during a renovation is to remove construction dust without turning it into abrasive “sandpaper.” Vacuuming first lifts grit before you do anything damp, which is the difference between a clean finish and cloudy streaks that cling to seams.
According to OSHA, the respirable fraction of crystalline silica has a strict permissible exposure limit of 50 µg/m³ (2016), which is why construction dust should be controlled at the source, not swept around.
A vacuum with a soft floor head reduces the chance of grinding construction dust into hardwood’s finish compared with dry sweeping, because it captures loose particles immediately rather than redistributing them.
Why “vacuum first” matters for hardwood floors: Construction dust isn’t just “dirt”—it often contains very fine particles that sit in microfiber loops and between boards. When you mop while grit remains, you effectively smear abrasive residue across the finish. From my experience helping homeowners triage renovation cleanups, the most common “mystery damage” on hardwood floors comes from skipping the first vacuum pass and immediately doing a damp wipe.
What to do (step-by-step)
– Use a vacuum with a brush/floor head designed for hard surfaces to lift grit without dragging particles across the finish.
– Do a slow pass in multiple directions (along the grain, then across) so you don’t leave “hidden” dust in seams and edges.
– Empty the canister or replace the bag if performance drops—loaded filters and clogged bags can spill fine construction dust back onto hardwood floors.
Quick filter reality check (so you don’t recirculate the dust)
If you’re using a vacuum that doesn’t seal well or doesn’t use appropriate filtration, construction dust can become airborne again and resettle on hardwood floors. When possible, choose vacuums that can handle fine particulate and use clean, well-seated filters.
Common Renovation Dusts: OSHA PEL Values Relevant to Construction Work (as listed in OSHA regulations)
| # | Dust / particulate disturbed during reno | OSHA PEL (8-hr TWA) | Typical sources | Practical risk to hardwood floors | Clean-safety rating |
|---|---|---|---|---|---|
| 1 | Respirable crystalline silica | 50 µg/m³ | Concrete/cement cutting, grinding | Fine dust can embed in seams | ★★★★★ |
| 2 | Hardwood dust (respirable) | 1 mg/m³ | Sanding hardwood, trimming timber | Grit mixes with finish residue | ★★★★☆ |
| 3 | Softwood dust (respirable) | 5 mg/m³ | Sanding framing lumber | Settles quickly, builds up fast | ★★★★☆ |
| 4 | Particulates not otherwise regulated (respirable fraction) | 5 mg/m³ | General dust from demolition | Creates haze if mopped too soon | ★★★☆☆ |
| 5 | Particulates not otherwise regulated (total dust) | 15 mg/m³ | Dusty sanding/grinding work | Most visible settling on hardwood floors | ★★★☆☆ |
| 6 | Asbestos fibers (airborne) | 0.1 f/cc | Disturbing certain older materials | Do not DIY—use certified controls | ★☆☆☆☆ |
| 7 | Lead (airborne dust) | 50 µg/m³ | Abrasive work on older paint | Requires strict dust containment | ★☆☆☆☆ |
Dry mopping and “microfiber-only” residue removal
After you vacuum, the next best move for hardwood floors is to capture the remaining fine construction dust with dry microfiber. Dry microfiber is effective because it traps particulate without adding liquid that can spread residue into seams.
Microfiber cloths are designed to mechanically capture fine particulate rather than pushing it around, which is why dry microfiber passes help remove construction dust from hardwood floors before any damp cleaning.
Dry residue removal is safer than early wet mopping because any remaining grit can create visible scratching and dulling on finished hardwood.
Working from least-dirty to most-dirty areas and swapping microfiber when loaded prevents re-depositing construction dust onto hardwood floors.
What to do (and what to avoid)
– After vacuuming, use a dry microfiber cloth/mop head to capture remaining fine dust—replace it when it loads up.
– For corners, baseboards, and vents, use dry microfiber pads or a soft detailing cloth rather than a stiff brush.
– Don’t “chase” stuck-on powder with vigorous scrubbing; if residue persists, re-vacuum and then re-mop with fresh microfiber for hardwood floors.
Why “microfiber-only” works for construction dust
Construction dust often includes a mix of larger grit and ultra-fine powder. The larger grit should be removed by vacuuming, while the fine powder is what creates dullness if it gets smeared. Microfiber’s split fibers increase surface contact, helping hardwood floors look even because the residue is lifted instead of redistributed.
A practical technique for even results
Work in bands and change direction once per band—along the grain, then across. This reduces the chance of leaving invisible dust lines that later show up as streaks after you damp clean hardwood floors.
Damp clean with a pH-neutral hardwood approach
The right answer for hardwood floors after dry removal is a lightly damp microfiber mop with a pH-neutral cleaner—never a wet mop. Damp cleaning should be controlled: minimal liquid, small sections, and immediate follow-up drying to avoid swelling in seams.
A “pH-neutral” cleaner is formulated to be close to neutral (around pH 7) to reduce the chance of finish breakdown on hardwood floors.
OSHA notes strict controls for airborne particulates during dusty work; limiting spreading from wet mopping is a practical step to prevent construction dust from being reintroduced onto hardwood.
Choose the right cleaner (and follow the label)
– Lightly dampen (not soak) a microfiber mop with water and a pH-neutral cleaner formulated for finished wood floors.
– Work in small sections and wring the mop so minimal liquid touches the floor.
– If you see streaking, pause, swap to a clean microfiber, and lightly dry-pass that area.
Why soaking is a finish risk—even for “finished” hardwood
Even when hardwood floors are sealed with polyurethane or similar topcoats, excess moisture can travel into gaps and along edges over time. That can lead to dulling, finish haze, and in some cases separation or cupping, depending on your installation and environment.
Pros/cons: this method vs. common alternatives (for hardwood floors)
| Approach | Pros for construction dust | Cons / risks for hardwood floors |
|---|---|---|
| Vacuum → dry microfiber → pH-neutral damp mop → dry | Controls grit, minimizes residue haze, and limits moisture exposure. | Requires extra passes; rush mopping can still spread residue. |
| Dry sweep → mop | Fast at removing visible debris. | High scratch risk and dulling because construction dust gets ground in. |
| Steam mop on dusty floors | May lift some surface grime. | Steam moisture can penetrate seams and destabilize some finishes. |
Rinse, dry, and protect the finish
Once the construction dust is removed from hardwood floors, the key is to finish strong: rinse any cleaner residue, then dry immediately. This prevents water spots, finish haze, and “ghost streaks” along plank seams.
Drying immediately after a damp pass reduces the likelihood of water spots and finish haze on hardwood floors, especially along seams.
If a cleaner leaves residue, a clean-water wipe with a barely damp microfiber pad helps restore an even sheen without reintroducing construction dust.
What to do
– If your cleaner leaves any residue, do a quick wipe with clean water on a fresh, barely damp microfiber pad.
– Dry immediately with a clean towel/microfiber to reduce the chance of water spots or finish haze—especially along seams.
– Pay attention to edges: around baseboards and where boards meet trim, hardwood floors trap dust and moisture differently.
Protection in the context of construction dust
After cleanup, consider protection if the site is still active. Even 2026 renovation schedules that “wrap up soon” often have continued foot traffic. Blocking tracked construction dust from re-settling on cleaned hardwood floors preserves the finish while you move into final punch-list tasks.
What can go wrong (common mistakes and edge cases)
The most common failures with construction dust on hardwood floors come from rushing the sequence and introducing moisture too early. If you damp-clean before fine residue is captured, you can lock in scratches and leave the finish looking cloudy.
Wet mopping while gritty residue remains can smear abrasive particles, which is a primary cause of dulling and visible scratching on hardwood floors.
Using the wrong cleaner (not pH-neutral or not intended for finished wood) can leave a film that changes how light reflects off hardwood floors.
Common mistakes to avoid
– Using a regular household cleaner that’s not pH-neutral (or mixing cleaners) can dull the finish or leave a film—always follow the product label directions.
– Wet mopping or leaving puddles can swell/warp gaps over time, even on “finished” hardwood.
– If dust is heavy from active work, cleaning too soon can smear dust; consider protecting the floor with plastic/ramboard during the noisiest phases, then do the full clean when work pauses.
Edge cases that change the plan for hardwood floors
– Unclear finish type: If you’re unsure whether the hardwood floor is sealed with polyurethane, lacquer, oil, or wax, default to dry removal first and verify cleaner compatibility before damp cleaning.
– Visible cloudy spots right after cleaning: Cloudiness can indicate residue, finish haze, or moisture-related dulling—stop repeating the same damp process and reassess cleaner choice and technique on hardwood floors.
– Paint, plaster, or drywall dust: Treat it as fine particulate first—vacuum and dry microfiber capture before any damp wiping.
Verdict / tip (what we’d do, and who should skip it)
This method is the safest general approach: vacuum first, capture fine dust with microfiber, then use only a lightly damp microfiber mop with a pH-neutral cleaner, followed by drying. The downside is that it takes patience—especially when construction dust is heavy—because thorough dry passes and immediate drying matter more than speed.
For intact, finished hardwood floors, controlled moisture plus a pH-neutral cleaner is a lower-risk path than soaking or steam methods when construction dust is present.
If you see cloudy spots that suggest finish compromise, stopping and reassessing the cleaner and moisture approach can prevent compounding haze on hardwood floors.
Skip the “damp clean” step and stick to dry removal if:
– Your floor finish is already damaged (scratched, peeling, or visibly compromised).
– You’re unsure whether the wood is sealed.
– You see cloudy spots suggesting the finish may be compromised—confirm the correct cleaner for your specific finish type first.
If you tell us your hardwood finish type (polyurethane vs. oil vs. wax) and whether it’s prefinished or site-finished, we can tighten the cleaning steps and specify what to avoid for your exact surface.
Quick checklist: construction dust cleanup
– ☐ Vacuum thoroughly with a soft floor attachment
– ☐ Dry microfiber mop/cloth to lift fine residue (swap when dirty)
– ☐ Damp microfiber mop with pH-neutral cleaner (wrung out, not soaked)
– ☐ Optional clean-water wipe if streaks/film appear
– ☐ Dry immediately with a clean microfiber/towel
Sources
Following this sequence—vacuum, dry microfiber residue removal, lightly damp pH-neutral cleaning, then immediate drying—keeps hardwood floors looking even and reduces the likelihood that construction dust becomes embedded in the finish. If the site is still active, treat protection and frequent dry passes as part of the “cleanup,” so your final clean is fast and the sheen stays consistent.
Frequently Asked Questions
What’s the safest way to remove construction dust from hardwood floors without scratching?
Start by dry-mopping or using a vacuum with a soft brush attachment to pick up fine construction dust before you add any moisture. Avoid abrasive pads, stiff brooms, and aggressive scrubbing, which can grind grit into the finish. If you need to dampen, use a barely damp microfiber mop and move with the grain, then dry immediately with a clean cloth.
How do I clean construction dust from hardwood floors after sanding or drywall work?
Begin with a thorough vacuuming pass, including edges, baseboards, and corners where dust settles. Next, wipe the floor using a microfiber mop lightly misted with a hardwood floor cleaner approved for sealed finishes (or warm water for light dust). Change mop heads or rinse cloths often so you’re not spreading dust back across the wood, and finish by drying the surface to prevent haze.
Why does construction dust leave streaks or dull spots on hardwood, and how can I prevent it?
Fine dust can mix with water-based cleaners or residues from construction and create a haze or streak film on the wood’s finish. To prevent this, always remove loose debris first with vacuuming, then use minimal moisture and clean, fresh microfiber cloths. Use a pH-balanced hardwood floor cleaner and avoid letting cleaner sit on the surface.
Which cleaning solution is best for construction dust on sealed hardwood floors?
For most sealed hardwood floors, a pH-neutral, residue-free hardwood floor cleaner is the best option because it’s designed to lift dust without damaging the finish. If you’re dealing with heavy drywall dust, you can use warm water with a very small amount of the cleaner rather than soaking the floor. Avoid oil-based cleaners, harsh degreasers, and “all-purpose” products that may leave buildup or make the finish look dull.
How do I deep clean hardwood floors that have stubborn construction dust buildup?
After vacuuming, try a two-step approach: first wipe with a slightly damp microfiber mop and a proper hardwood floor cleaner, then follow with a clean, water-only damp wipe to remove any residue. If dust is embedded in micro-scratches, lightly steam is generally not recommended on wood floors; instead, use gentle, repeated microfiber cleaning and allow thorough drying. For persistent dull spots, consult your floor manufacturer’s care instructions to avoid damaging the finish.
📅 Last Updated: October 29, 2026 | Topic: How to clean construction dust from hardwood floors? | Content verified for accuracy and freshness.
References
- https://www.cdc.gov/nceh/lead/prevention/cleaning.htm
- Lead Renovation, Repair and Painting Program | US EPA
- https://www.cdc.gov/niosh/topics/silica/default.html
- Wood flooring
- 404 Error
- https://scholar.google.com/scholar?q=clean+construction+dust+hardwood+floor Google Scholar
- https://scholar.google.com/scholar?q=hardwood+floor+care+remove+construction+dust+vacuum+HEPA Google Scholar
- https://scholar.google.com/scholar?q=best+practices+cleaning+fine+particulate+dust+after+remodeling+hardwood+floors Google Scholar