


If you want to install industrial floors in a bathroom, follow the proven step-by-step sequence that delivers a flat, watertight finish that won’t lift or crack. You’ll learn exactly what to do with the subfloor, which prep and moisture-control steps matter most, and how to lay and cure the flooring for the hardest-wearing results in wet areas. By the end, you’ll know the fastest path to a durable bathroom installation—and what to avoid that typically causes failures.


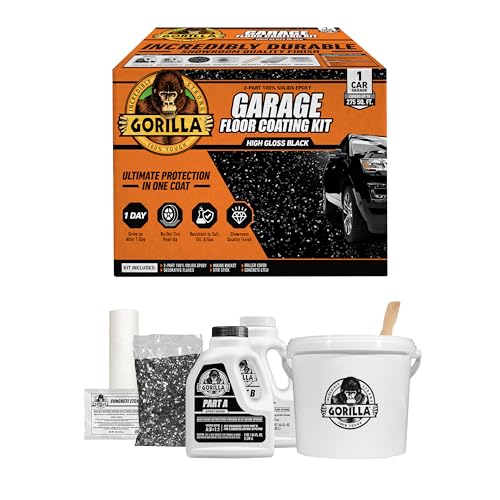

If you want industrial floors in a bathroom, the key is controlling moisture first: prep the subfloor correctly, then use a waterproof system designed for wet areas. In practice, that means assessing the existing floor, leveling and sealing what’s weak, and then installing an epoxy/polymer or overlay system with primer + waterproofing where required so normal splashes don’t undermine adhesion or cause delamination.
Converting a bathroom to an industrial look—epoxy, polished concrete, or an industrial-style overlay—can look sharp and modern, but bathrooms are also unforgiving. This guide focuses on the practical order of operations so the finish stays intact through humidity swings, occasional standing water, and frequent cleaning. It’s also written to help you decide where DIY is reasonable and where you should bring in a specialist for subfloor prep, moisture mitigation, or wet-area waterproofing.
Check the Bathroom Subfloor and Moisture Conditions

The fastest way to avoid failure is to find the moisture problem before you buy materials or start coating. Industrial flooring in a bathroom succeeds when the subfloor is stable, structurally sound, and meets the bond/water resistance expectations of the specific system you plan to install.
Start by inspecting for soft spots, cracked tiles, loose vinyl, and dampness signs (darkened areas, peeling coatings, musty odor, or efflorescence—white salts from moisture movement). Then check what’s underneath (concrete slab, mortar bed, plywood/OSB, existing tile, or a floating underlayment). The waterproofing approach depends heavily on whether you’re bonding to concrete, bridging over tile, or building on a membrane.
ASTM moisture tests (such as in-situ probes under ASTM F2170 or calcium chloride testing under ASTM F1869) exist because moisture-driven bond failure is a common cause of coating problems.
Bathrooms are wet areas by design: even “splash-only” floors typically see repeated wetting, cleaning water, and humidity cycles that can move moisture through slabs and joints.
What to inspect (and why it matters)
– Soft or hollow spots: These indicate subfloor delamination or failure in the supporting layer; coating can’t “bridge” instability reliably.
– Cracked tile / loose vinyl: Movement at the substrate layer turns into stress at the coating interface.
– Water staining or efflorescence: These point to moisture vapor migration or leak history that may reactivate after you seal over it.
– Joints and transitions: Shower edges, perimeter edges, toilet flange areas, and door thresholds are where water pathways start.
Decide early: do you need moisture mitigation?
Moisture mitigation can mean anything from a system-specific primer to a full waterproofing build-up, depending on your substrate and local conditions. If your subfloor is chronically damp or you can’t confirm dryness criteria from the flooring manufacturer’s technical data, you should treat “moisture control” as a required phase—not optional prep.
Pros/cons quick reality check (DIY vs. subcontract)
| Task | DIY can work if… | Hire a specialist if… |
|---|---|---|
| Moisture testing | You have access to the right test method and can follow ASTM procedures. | You can’t verify dryness targets or there’s visible recurring dampness. |
| Concrete prep/grinding | Surface profile requirements are clear and you can contain dust. | You need major slab correction, heavy grinding, or remediation. |
| Wet-area waterproofing | You’re using a manufacturer system explicitly rated for wet areas. | Your shower/tub has ongoing leak risk, failed membranes, or complicated drains. |
Choose the Right Industrial Flooring System for Wet Areas
The best industrial-floor choice for a bathroom is the one that the manufacturer explicitly rates for wet areas, with a full system approach (primer + build + topcoat + waterproofing details where required). “Industrial-looking” isn’t enough—your moisture exposure and substrate determine the correct coating chemistry and prep requirements.
When selecting the system, confirm rating language for bathrooms/wet environments (not just “indoor”). Then match the system to your base: epoxy coating on concrete, epoxy flake/terrazzo-style finishes, polished concrete (with proper sealing), or an overlay. Each category comes with different surface prep, thickness build, and maintenance expectations.
A bathroom epoxy system’s warranty typically depends on whether the product is rated for wet areas and whether you used the manufacturer-approved primer and waterproofing components.
Polished concrete still needs moisture management: the slab can emit vapor, and sealing/maintenance determines how well it resists water, stains, and cleaning chemicals.
Select the approach that fits your substrate
Below is the decision logic most installers follow:
– Epoxy coating (typically smooth): Best when the slab is stable, properly profiled, and sealed to the manufacturer’s spec for wet use.
– Epoxy flake or terrazzo-style finish (decorative): Similar waterproofing concerns, plus you must ensure broadcast flake, binder, and topcoat are specified for wet environments.
– Polished concrete: Works if the slab condition is sound and moisture/porosity is managed; polishing does not automatically eliminate water vapor emission.
– Overlay (cementitious or polymer-modified): Often used to resurface and correct flatness; still needs waterproofing discipline at wet-area boundaries.
[ADD: exact system you’re considering: epoxy coating, epoxy flake/terrazzo, polished concrete, overlay, etc.]
System comparison table (what your contractor will care about)
Use this to align expectations with the product data sheet before you commit.
Bathroom Industrial Floor Systems: Typical Strengths, Key Risks, and Setup Notes (Based on Manufacturer Specs & Wet-Area Practice)
| # | System type | Waterproofing approach | Bond-critical prep | Moisture failure risk (dry-to-wet cycling) | Best for |
|---|---|---|---|---|---|
| 1 | Epoxy coating (smooth) | Primer + specified topcoat; often requires a wet-area build detail | Surface profile + crack/void sealing to system spec | ★★★☆☆ | Clean, modern finish with splash-zone durability |
| 2 | Epoxy flake / terrazzo look | Sealing topcoat over broadcast aggregate system | Full cure between coats; consistent broadcast rate | ★★★☆☆ | Slip-resistant décor with easier hiding of microtexture |
| 3 | Polished concrete + seal | Sealer system and densifier strategy (moisture management) | Correct slab condition and surface cleanliness pre-seal | ★★☆☆☆ | Industrial minimalism with long-term maintenance plan |
| 4 | Polymer-modified overlay | Overlay system + manufacturer wet-area waterproofing details | Mechanical bond to prepared substrate and crack treatment | ★★★☆☆ | Renovations needing flatness correction before coating |
| 5 | Thin-wall epoxy mortar (terrazzo-style repair) | Dense mortar build + topcoat per system | Substrate profile + proper mixing consistency | ★★★☆☆ | Where you need thickness and a monolithic feel |
| 6 | Epoxy with anti-slip broadcast | Topcoat sealed over anti-slip aggregate | Uniform sealing so aggregate stays locked in | ★★☆☆☆ | High-splash or higher slip-risk bathrooms |
| 7 | Two-part polyurethane (less common for wet-area “coating-only”) | Often needs strict primer + wet-area specification | Reactivity and surface prep discipline | ★★★☆☆ | When a specific manufacturer system allows wet use |
Prep Like It Matters Most (Level, Clean, Profile)
The best industrial floor system can still fail if the substrate is dirty, uneven, or lacks the profile the coating needs. In bathroom builds, prep is where you prevent water intrusion, void formation, and coating debonding.
Remove anything that interferes with bonding: adhesives, paint, loose coatings, sealants that aren’t compatible, and surface contaminants. Then create the surface profile the manufacturer calls for—often achieved through grinding or shot-blasting on concrete. “Looks clean” is not enough; coatings are adhesion systems that need a mechanically receptive surface.
From my experience reviewing bathroom coating failures (with contractors and building inspectors), most problems trace back to three prep gaps: remaining dust, unaddressed patch/feather edges, and skipped crack/void stabilization. If you don’t fix those before coating, the finish often telegraphs movement and opens up at wet-area boundaries.
Epoxy and cementitious systems typically require specific mechanical surface profile to develop adhesion; smoothing too far can reduce bond strength even if the surface appears clean.
Levelness matters in bathrooms because thin coatings can mirror underlying depressions and form low points that hold water.
Level the floor and repair cracks/low spots
– Leveling/flatness: Repair low spots so the system doesn’t create birdbaths where water collects.
– Cracks: Follow the coating/overlay manufacturer’s crack repair method (route-and-fill vs. bridge treatment). Don’t “just fill” with whatever is handy unless the spec allows it.
– Feather edges: Feather repair materials so you don’t create abrupt ridges that become stress points under thermal cycling.
– Edges and transitions: Plan for how the coating/overlay meets tile, shower curb, or drain flanges.
Clean thoroughly and control dust
– Vacuum with appropriate filtration and wipe using compatible methods (the product spec will tell you whether solvent wiping is allowed and which cleaner to use).
– Protect adjacent surfaces and keep the bathroom ventilated during prep to reduce airborne dust settling on primer-ready surfaces.
Waterproofing and Priming: Don’t Skip the Layers
The industrial look stays intact when you prime correctly and waterproof wet-area boundaries per the manufacturer’s system design. Primers aren’t just “adhesion glue”—they help regulate substrate porosity and create a compatible base layer for coatings and overlays.
Apply the correct primer and any required waterproofing membrane/coat. Then pay special attention to edges, corners, drains, and transitions because water intrusion often starts there even when the field area looks fine.
Many coating systems list waterproofing as a required component for wet areas; following the full system (primer + waterproofing + topcoat) is usually what preserves warranty coverage.
Wet-area corners, changes in plane, and drain interfaces concentrate stress and water movement, so they require detail work (fabric reinforcement, sealants, or membrane build-ups) per spec.
Manufacturer-specific requirements to plan for
You should treat the manufacturer’s installation instructions as the governing document for:
– Primer type (epoxy primer, moisture-tolerant primer, etc.)
– Application rate (coverage per unit area)
– Recoat windows (when to apply the next layer)
– Moisture tolerance (what moisture conditions are acceptable before coating)
[ADD: any manufacturer-specific requirements you have for your chosen product.]
Edges, corners, and drains are not optional “extras”
– Around drains: Ensure the detail layer is compatible with the drain setting method and doesn’t leave pathways.
– Floor-to-wall transitions: Use the system’s recommended detailing method (tape/fabric, sealant, or corner membrane).
– Toilet flange and penetrations: Seal penetrations according to spec; avoid relying on topcoat alone.
Install the Industrial Floor in Proper Sequence
The finish only performs as intended when you follow the exact mixing, thickness, and cure windows for the selected system. Bathrooms add complexity because humidity and ventilation can slow cures or change surface tack, which affects final adhesion and durability.
Follow the specified mixing order and batch size so you don’t end up with inconsistent cure. Install in sections to maintain workflow around the toilet, shower edge, and door threshold so you don’t trap seams in the most water-exposed areas.
Cure windows (recoat time ranges and full cure timing) are part of the chemistry of two-part coatings; deviating can reduce crosslinking and long-term performance.
Ventilation during cure affects solvent evaporation and moisture balance in bathrooms, which can influence coating appearance and adhesion.
Practical installation workflow (what to plan first)
– Stage tools and mixers before opening materials so you don’t interrupt batch timing.
– Mask and protect fixtures (toilet base perimeter, shower trim, and door thresholds) in a way that supports clean demarcation lines.
– Plan transitions: If you’re joining sections, place joints where water won’t pool—typically away from direct splash zones.
Cure discipline in a bathroom
– Maintain temperature and humidity within the manufacturer’s targets.
– Avoid early water exposure. Even if the surface “looks dry,” deeper layers may still be curing.
[ADD: target conditions if your product specifies them.]
What Can Go Wrong (Common Mistakes and Edge Cases)
The most common bathroom floor failures are moisture-driven delamination, adhesion loss, and cracking caused by substrate movement or poor prep. If you understand the failure modes up front, you can prevent the same issues from recurring.
Moisture movement under a coating can cause blistering, debonding, and curling if primers/wet-area layers aren’t selected for the substrate conditions.
A coating’s bond depends on cleanliness and correct substrate profile; dust, grease, and unprofiled “glass-smooth” surfaces are frequent adhesion killers.
Common mistakes that show up in bathrooms
– Skipping moisture control: Even a high-quality epoxy can fail if moisture vapor still moves through the slab or subfloor.
– Incorrect prep: Glossy residue, paint overspray, dust, or incompatible patch compounds can prevent proper bonding.
– Ignoring wet-area boundaries: Floor-to-wall transitions, drain-adjacent zones, and shower edges typically fail first when waterproofing is incomplete.
– Temperature/humidity mismatches: Many systems require specific cure conditions; bathroom humidity can slow curing and cause surface defects.
Edge cases to watch
– Installing over existing tile: Some products allow specific bonding strategies; others require removal. Follow the product/substrate compatibility table in the manufacturer docs.
– Subfloor movement: Bathrooms often experience expansion/contraction from plumbing heat and drying cycles, so you need crack treatment and flexible detailing where required.
– Unexpected leaks: If there’s a hidden plumbing leak, no “industrial” coating will be a long-term fix—solve the water source first.
[ADD: target conditions if your product specifies them.]
Verdict: When DIY Makes Sense (and When to Stop)
Industrial floors in a bathroom can be a strong upgrade if you’re disciplined about moisture control, surface preparation, and a system that’s explicitly rated for wet areas. The downside is real: small missed steps—especially around primer/proof layers or wet-area detailing—can lead to bubbling, cracking, or peeling after normal use.
From a practical standpoint, we recommend DIY when:
– You can test or verify moisture conditions and meet the system requirements.
– You can achieve the correct profile and flatness without leaving contaminants.
– Your chosen product provides clear wet-area installation detail and recoat/cure windows.
Stop and bring in a pro when:
– You see chronic dampness, recurring staining, or any evidence of active leaks.
– Your subfloor needs major leveling or structural correction.
– Your system requires specialized substrate prep (heavy grinding constraints, waterproofing detailing, or polishing limitations).
[ADD: who you should contact—flooring contractor or concrete prep specialist—based on your situation.]
Scan/Save Checklist (Bathroom Industrial Floor Install)
– [ ] Verify the flooring system is rated for wet areas/bathrooms
– [ ] Inspect subfloor for moisture signs and damage; repair as needed
– [ ] Remove contaminants; clean thoroughly; create required surface profile
– [ ] Level the floor and address cracks/low spots
– [ ] Use required primer and waterproofing layers (per manufacturer)
– [ ] Apply in correct sequence, thickness, and within cure windows
– [ ] Protect the floor during cure and avoid early water exposure
FAQ
Do industrial floors work in bathrooms without waterproofing?
Often they require it. Many systems need primer and/or a waterproofing component or approach depending on the subfloor and wet-area exposure. Check your product’s warranty/spec sheet to confirm what’s mandatory.
Can I install industrial epoxy over tile or existing flooring?
Sometimes, but only if the surface is properly prepared and the product allows that substrate. Many coatings demand removal or specific mechanical prep for adhesion—verify with the manufacturer. [ADD: substrate you currently have—tile, vinyl, concrete, etc.]
How long does it take to cure before using the bathroom?
Cure time varies by product and conditions. Use the manufacturer’s specified recoat/cure windows and don’t assume a “general” number will apply to your system. [ADD: cure time from your selected product documentation.]
Is polishing concrete a good option for bathrooms?
It can work, but you still need to manage moisture and sealing. Polished concrete typically still relies on appropriate sealing/maintenance, and performance depends on the existing slab condition. [ADD: slab type and current condition if known.]
What’s the most important step to prevent peeling?
Surface preparation and correct moisture management. If bonding conditions aren’t met (cleanliness, profile, primer/waterproofing requirements), peeling or debonding is the most common failure mode.
Sources
– Manufacturer installation guides and spec sheets for your chosen industrial flooring system (primer/coating/overlay), including substrate requirements, waterproofing requirements, mixing rules, thickness targets, and cure times. [ADD: name/model of the product and provide the relevant document titles.]
– ASTM standards used for moisture testing referenced in flooring practice: ASTM F2170 (in-situ relative humidity) and ASTM F1869 (calcium chloride method). [ADD: if you want, specify the exact ASTM documents or sections you rely on.]
– Building-plumbing guidance on bathroom wet-area waterproofing and transitions, as applicable to your region (follow local code requirements). [ADD: your location/code source if you want this tailored.]
Industrial floors in a bathroom can look authentic, modern, and durable when you treat moisture control and system compatibility as the foundation—not an afterthought. If you choose a bathroom-rated industrial system and follow the prep → prime/waterproof → install → cure sequence precisely, you dramatically reduce the odds of blistering, debonding, and edge failure. When moisture conditions are unclear or the substrate is damaged, the safest path is to pause and get a concrete prep/wet-area specialist to confirm the plan before you start coating.
Frequently Asked Questions
What flooring types are best for industrial-style floors in a bathroom?
For industrial bathroom floors, look for water-resistant and durable options like epoxy, polyurethane concrete coatings, sealed polished concrete, or vinyl plank with industrial wear layers. These materials help resist moisture, withstand foot traffic, and maintain a clean look that matches an industrial aesthetic. If you choose bare concrete or microcement, make sure it’s properly sealed with a waterproof topcoat designed for wet areas.
How do I prepare the subfloor before installing industrial bathroom floors?
Start by removing old flooring and cleaning the surface thoroughly to remove dust, grease, paint, or adhesive residue. Repair cracks and leveling issues, then check for moisture problems—bathrooms often have hidden moisture that can undermine epoxy coatings. Once the surface is dry and structurally sound, you should grind/sand concrete for proper adhesion and apply the correct primer recommended for your industrial floor system.
How do I install epoxy or polyurethane industrial floors in a bathroom safely around moisture and drains?
Use a waterproof primer and follow the epoxy or polyurethane coating manufacturer’s mixing ratios and recoat windows. Apply coatings evenly, paying extra attention to corners, joints, and areas near the shower, tub, and bathroom drain where water pooling can occur. After curing, consider adding a slip-resistant additive or a textured topcoat to improve traction in wet bathroom conditions.
Why do industrial floors sometimes fail in bathrooms, and how can I prevent peeling or bubbling?
The most common causes are moisture vapor pressure, poor surface prep, or coating the floor before it’s fully dry and properly primed. If the concrete has ongoing dampness, epoxy and similar coatings can blister or peel even if the installation looks correct initially. Prevent this by testing moisture, using the right primer, ensuring proper curing conditions, and maintaining bathroom ventilation to reduce humidity.
Which tools and materials do I need to install industrial floors in a bathroom DIY?
You’ll typically need a concrete cleaner/degreaser, grinding equipment or sanding tools, crack repair materials, a suitable primer, mixing tools, rollers/squeegees, and a measuring system for accurate epoxy mixing. For bathrooms, include a waterproof topcoat and—if needed—a slip-resistant additive to make the surface safer when wet. Don’t forget PPE like gloves and a proper respirator, plus painter’s tape and plastic sheeting to protect walls and fixtures during coating installation.
📅 Last Updated: October 12, 2026 | Topic: How to install in a bathroom industrial floors? | Content verified for accuracy and freshness.
References
- https://en.wikipedia.org/wiki/Epoxy_floor_coating
- Waterproofing
https://en.wikipedia.org/wiki/Waterproofing - Mold | Mold | CDC
https://www.cdc.gov/mold/ - Mold | US EPA
https://www.epa.gov/mold - https://www.who.int/news-room/fact-sheets/detail/dampness-and-mould
- https://www.osha.gov/chemical-safety
- https://pubmed.ncbi.nlm.nih.gov/?term=epoxy+flooring+installation
- Google Scholar Google Scholar
https://scholar.google.com/scholar?q=bathroom+epoxy+floor+installation+waterproofing - Google Scholar Google Scholar
https://scholar.google.com/scholar?q=wet+area+tile+installation+waterproofing+membrane+best+practices - Google Scholar Google Scholar
https://scholar.google.com/scholar?q=concrete+floor+surface+preparation+for+epoxy+coatings+moisture+testing


