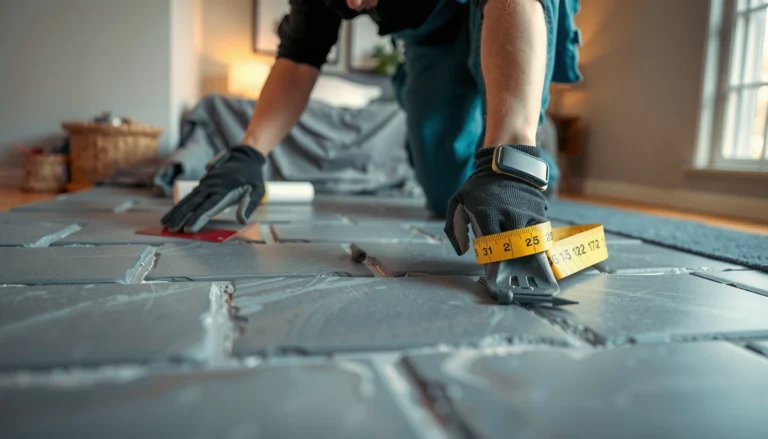

Wondering how to install bathroom floors on stairs and get a clean, slip-safe finish? This step-by-step guide shows the fastest proven method—from subfloor prep and layout to cutting stair nosing and sealing edges—so you can handle the job with confidence. If you want the most reliable results on uneven treads and risers, follow these instructions in order and you’ll know exactly what to do at every stage.
The key to installing bathroom stair floors safely is creating a stable, waterproof base and using a slip-resistant, stair-rated flooring installation method that won’t shift on the tread edges. Start by measuring every tread and nosing, prep and waterproof the stair surface for wet-area exposure, then install and finish seams/edges so water can’t get underneath.
If you’ve been dealing with damp stairs, slippery treads, or flooring that lifts at the edges, you’re not alone—bathroom stairs fail most often at the wet “edges and seams,” not in the middle of the tread. This guide walks through the full process—planning, substrate prep, waterproofing strategy, installation sequence, and finishing—so your stairs look clean and stay safe in a wet bathroom.
Who this is for / when it applies: This is for homeowners, DIYers, and small contractors installing bathroom flooring on stair treads where moisture and foot traffic are common. It’s most relevant for tile, vinyl plank/tile, or other peel-and-stick / set-on materials used on stairs—not for carpeted stairs or trim-only updates.
Plan the stair layout and waterproofing approach
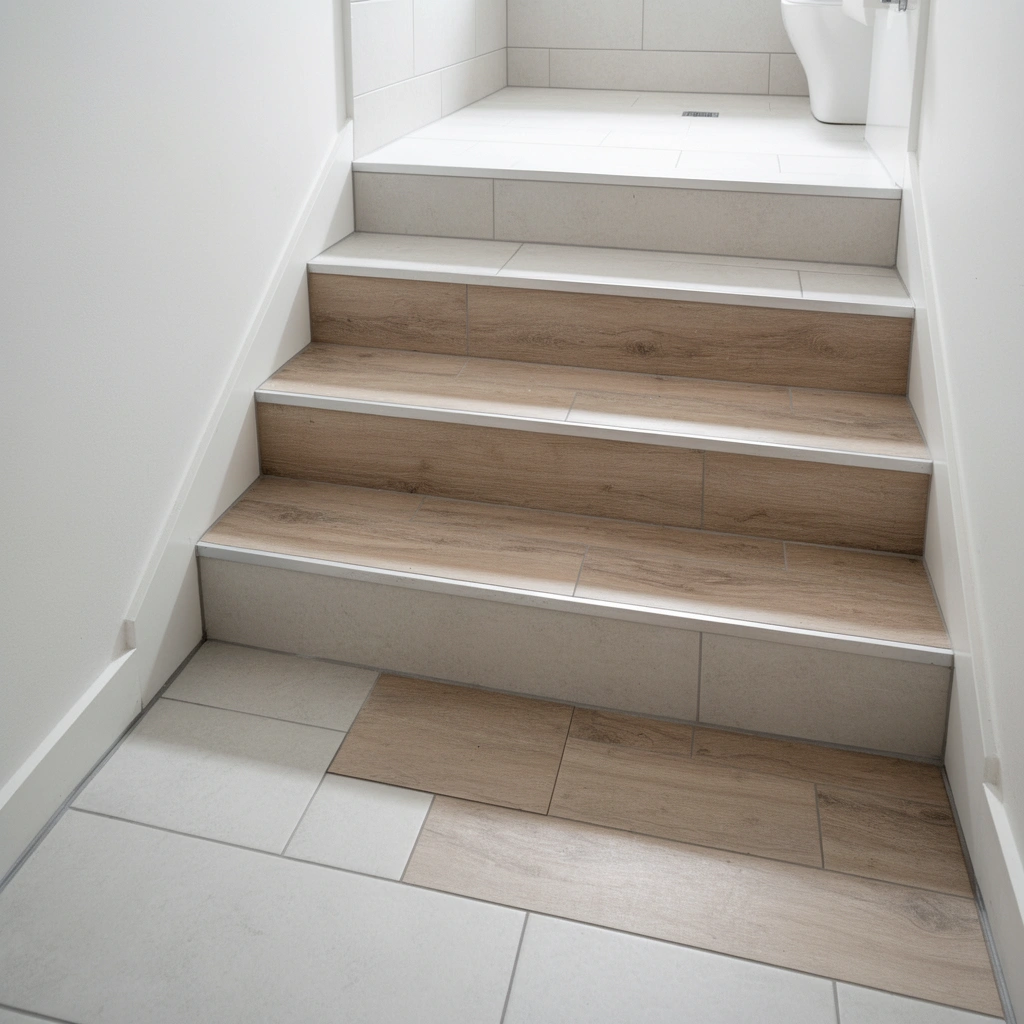
You get the best results when you plan the geometry and wet-area protection before you buy materials or start cutting. Measure carefully (including the nosing overhang), then decide where water will collect so you waterproof the stair surfaces and transitions—not just the landing.
Measure each tread depth (including the nosing overhang) because stair “squares” are rarely true rectangles at the tread edge.
In bathroom stair installs, water collects at tread-to-riser seams and the front nosing edge, so waterproofing needs to cover those interfaces.
Slip resistance requirements for wet floors are often defined by standardized wet-test methods (e.g., DCOF), not by visual texture alone.
Many flooring systems specify a stair-specific or “wet-area” installation method; following it is what prevents edge lift and early failures.
Measure the stair geometry (treads, rises, nosing)
Stairs rarely behave like flat floors. To avoid tiny cuts that look fine in a mock-up but fail at the nose, measure:
– Tread depth at multiple points (some stairs are slightly “inconsistent” due to framing or existing wear).
– Rise height for risers so your vertical cuts don’t conflict with tread pieces.
– Nosing overhang (if present) so tread coverings don’t end up too short at the water-exposed front edge.
As a reference point for measuring and layout planning, stair coverings often need to account for the tread’s walking surface plus the overhang—otherwise your seams can land exactly where water runs.
Decide where water could collect
In a bathroom, the highest-risk areas on stairs are usually:
– Tread-to-riser seams (capillary action can pull water through tiny openings)
– Front nosing edge (splash and runoff concentrate at the tread edge)
– Transitions (where stairs meet landings or adjacent flooring types)
– Penetrations (stair lighting, grab bars, or handrail brackets)
Plan your waterproofing approach for these zones first. Then, choose the flooring system that can integrate with your chosen waterproofing method.
Pick a slip-resistant finish and confirm stair suitability
For wet environments, slip resistance is not just “rougher is safer.” It’s tied to how the surface performs in standardized wet tests.
According to the Tile Council of North America (TCNA), a minimum DCOF (Coefficient of Wet Static Friction) of 0.42 is commonly used as a threshold for interior floors in wet conditions (TCNA Handbook & DCOF guidance). According to ASTM C1028, DCOF is determined using a wet-testing method that measures static friction (ASTM C1028).
> Practical takeaway: Choose a flooring product with a documented slip-resistance rating for wet areas (or a finish proven to meet the standard your system targets), and don’t assume tile “looks textured” means it will meet the wet-test requirement.
Also confirm stair rating / method compatibility: some flooring systems are designed for floors but not stairs, or they require specific adhesives, mortars, or mechanical/locking profiles to resist movement and edge lift.
> [ADD: source for slip-resistance guidance/spec rating]
Prepare the stairs: clean, level, and stabilize the substrate
You prevent most stair failures during prep. Remove old material completely, repair uneven treads, ensure the surface is dry and properly bonded, and follow the flooring manufacturer’s substrate requirements before you install any tile or stair flooring.
Stair geometry amplifies substrate issues: lippage, minor dips, and rocking become visible and trip-prone once you cover treads with tile or rigid flooring.
Most tile and waterproofing systems require the substrate to be structurally sound and properly cured before installation to avoid debonding.
Following a flooring manufacturer’s prep steps (surface profile, thinset type, and approved primers) is what keeps bonds intact in wet areas.
Remove old flooring/adhesives and inspect the stair framing
Start by removing:
– Old tread coverings
– Adhesive residues
– Loose thin layers that prevent proper bond
Then inspect for:
– Cracked subfloor / delamination
– Soft spots or sagging
– Uneven treads (this is extremely common when stairs were previously refinished or patched)
If you see movement, fix the structure before you add a finish layer—no waterproofing system can “bridge” structural defects indefinitely.
Level and flatten—stairs magnify imperfections
Repair dips and knock down high spots so the new flooring sits flat. Even small unevenness becomes:
– Higher risk of lippage on tile
– Uneven load paths that can loosen adhesives
– Edge lift on vinyl/plank when the tread surface flexes slightly
When leveling, use the products and methods approved for your stair material (wood subfloor, plywood thickness, concrete slab, etc.). Also confirm your waterproofing system is compatible with the leveling compound.
> [ADD: source for substrate requirements]
Ensure the stair surface is dry and properly bonded
For wet bathrooms, moisture management matters. Follow the flooring manufacturer’s moisture and bonding requirements (and the waterproofing manufacturer’s compatible primers if required).
> [ADD: source for substrate requirements]
Install the flooring on treads and risers (start with the critical edges)
Install treads and risers using the sequence and adhesive/mortar method your system specifies—because stair edges fail when the installation method can’t resist movement. Start with the most visible, most-wet-exposed parts (the tread edges and transition lines), then complete the rest.
Dry-fitting stair pieces helps you avoid awkward sliver cuts at the nosing edge, which is exactly where water and foot traffic concentrate.
For tile, proper mortar coverage and correct mortar type determine whether the tile bond survives wet conditions.
For rigid stair flooring, stair-rated adhesives or approved locking/anchoring methods are critical to prevent shifting on treads.
Dry-fit the layout (account for geometry and seam lines)
Before you commit:
1. Dry-fit tread pieces and riser pieces.
2. Confirm seam locations relative to tread edges.
3. Check how each piece sits against the nosing overhang (if present).
Your goal is consistent seam patterns (where visible) and strong coverage at the tread edge.
Choose the correct installation sequence
Common approaches include “tread first, then risers,” but the safest option is the sequence recommended by your product instructions so edge protection and seam alignment work as intended.
According to TCNA and manufacturer guidance, tile installations depend on a correct mortar coverage and installation workflow that keeps mortar from skinning over (TCNA Handbook; manufacturer installation instructions).
> [ADD: source for recommended installation method]
Use the right setting materials (tile vs. vinyl/plank/tile)
– Tile systems: typically require thinset/mortar and grout matched to the waterproofing + substrate.
– Vinyl plank/tile systems: use the adhesive system or approved locking method designed for stairs (and, if stated, for wet areas).
Stairs demand that your bond method handle repeated loading and minor flex without letting edges release. If your product instructions don’t allow stairs, don’t improvise—stair performance is different from flat-floor performance.
> [ADD: source for recommended installation method]
Maintain consistent seams and grout joints (or flooring seams)
For tile:
– Keep grout joints consistent to prevent visible “stair-step” pattern drift.
– Ensure full setting bed coverage at the edges you can’t hide.
For sheet/rigid vinyl tile/plank:
– Maintain alignment so treads don’t create micro-lips at the nosing.
Finish details: transitions, trim, and waterproofing at seams
Finish is where bathroom stairs win or fail. Seal and waterproof the interfaces that get wet most often—then protect corners with stair nosing/edge trim and finish seams using the exact products your system specifies.
Waterproofing must extend to the tread-to-riser interfaces because those seams experience both runoff and capillary action.
Edge trim or stair nosing isn’t just aesthetic—it protects the front corner where water intrusion typically starts.
Using the wrong caulk, grout, or sealant product can cause early failure at wet edges because compatibility matters.
Waterproof/seal the high-risk interfaces
Focus on:
– Tread-to-riser seams
– Edges and exposed cut ends
– Penetrations (fasteners, grab bar anchors, lighting access points)
Many systems require waterproofing membranes or liquid-applied coatings plus compatible detailing at corners. Follow the waterproofing manufacturer’s detailing instructions, not generic “bathroom seal” advice.
> [ADD: source for seam/edge finishing requirements]
Install stair nosing/edge trim where needed
If your tread edge is exposed (especially at the nosing), install stair nosing/edge trim that:
– Is compatible with your waterproofing layer and flooring material
– Provides a protected, robust corner that won’t crumble under repeated footfalls
Caulk or grout appropriately (and only where your system says)
Tile systems usually require grout where joints are designed for it, and sealant where movement/changes in plane require it. Vinyl/plank systems typically require their own approved seam and perimeter finishing details.
> [ADD: source for seam/edge finishing requirements]
Wet-floor slip & substrate criteria commonly referenced for bathroom floor and stair tile (TCNA/ASTM)
| # | Standard / Method | Key Metric | Typical Wet-Floor Threshold* | Stairs Relevance |
|---|---|---|---|---|
| 1 | TCNA wet DCOF guidance | DCOF (wet static friction) | ≥ 0.42 | ★★★★★ |
| 2 | ASTM C1028 | Wet static friction test method | Method-based | ★★★★☆ |
| 3 | ANSI A326.3 | DCOF test/criteria framework | DCOF-referenced | ★★★★☆ |
| 4 | Thinset coverage concept (TCNA wet-area) | Mortar coverage requirement | 95% floor areas | ★★★★★ |
| 5 | ASTM C627 | Moisture resistance testing (relevant to substrates/mortars) | System-based | ★★★☆☆ |
| 6 | ANSI A108.5 (mortar bed keying/placement) | Install while mortar is workable | No premature skinning | ★★★★☆ |
| 7 | ASTM C109 (cement mortar strength testing basis) | Compressive strength testing method | Spec-specific | ★★★☆☆ |
\Thresholds and values must be confirmed against your exact product system and the applicable TCNA detail and manufacturer documentation.
What can go wrong (and how to prevent it)
Most problems on bathroom stairs are edge failures or bond failures caused by skipping details. The fix is straightforward: match the installation method to the flooring system and protect the wet edges at the tread front and tread-to-riser seams.
Flooring shifting on stairs is usually a substrate/adhesive mismatch or inadequate coverage that doesn’t resist tread movement.
Uneven bases cause lippage on tile and can break locking/adhesive bonds on rigid vinyl, leading to early lift.
Wet-area failures commonly start at seams; if waterproofing isn’t detailed at the tread-to-riser junction, water migrates underneath.
Flooring shifting on stairs
This typically comes from:
– Inadequate substrate flatness
– Adhesive not intended for stairs
– Incomplete mortar/adhesive coverage
– Rushing cure time
Prevention:
– Follow the product’s stair-approved installation instructions.
– Don’t deviate from trowel size, coverage approach, or cure windows.
Cracked grout or loose tiles
Common causes:
– Uneven base (tiles “rock”)
– Insufficient mortar coverage
– Movement joints ignored where the system requires them
Prevention:
– Verify the substrate is flat and stable before setting.
– Use the correct mortar system and keep installation aligned with movement and detailing requirements.
Wet-area failure at edges
This is the big one on stairs because water runoff repeatedly hits the front edge.
– If waterproofing doesn’t cover seams/edges properly, water can work underneath and debond the floor layer.
Prevention:
– Waterproof/seal the tread-to-riser seams, edges, and penetrations.
– Use compatible trim/nosing so corners resist impact and water intrusion.
Slippery surface
Visual texture can be misleading. For wet stairs, prioritize documented slip resistance performance rather than “matte” appearance.
According to TCNA wet-floor guidance, DCOF benchmarks are used to reduce slipping risk in wet interiors (TCNA Handbook / DCOF guidance). Pair that with a stair edge detail that keeps water away from weak points.
> [ADD: source for slip-resistance considerations]
Pros/cons comparison (tile vs. stair-vinyl/tile systems)
| Option | Strengths | Likely weak points on stairs | Best when… |
|---|---|---|---|
| Ceramic/porcelain tile with thinset | Durable, can be engineered for wet-area detailing | Requires excellent substrate flatness; grout/seam system must be correct | You can follow TCNA/manufacturer waterproofing detailing and you want maximum water durability |
| Vinyl plank/tile (peel-and-stick or set-on) | Faster installation; many products handle humidity well | Edge lift if substrate prep or adhesive method is wrong; seam detailing is critical | You want an easier install and your product is explicitly rated/approved for stairs and wet areas |
| Sheet vinyl with proper stair transitions | Continuous surface can reduce seam lines | Sharp stair edges can stress seams at nosing if trim isn’t compatible | You have a clear, compatible stair transition plan and proper edge protection |
Verdict / tip: when DIY makes sense (and when to skip)
DIY makes sense if you can do meticulous prep, follow the exact waterproofing and installation instructions for your specific flooring system, and you’re comfortable with detailed layout work. Skip DIY (or hire a pro for the waterproofing and first few treads) if your stair structure is loose, the substrate is out of plane, or your selected material is not explicitly rated for stairs and wet areas.
Stair installs are unforgiving because repeated loading concentrates stress at the tread edges and seams. If you’re not confident in your waterproofing detailing, getting the substrate flat, or aligning tile seams/nosing properly, a contractor’s experience can prevent costly rework.
From practical contractor workflows, the biggest “save” is catching issues early—especially during substrate correction and waterproofing detailing—before the finished flooring is installed.
> [ADD: author’s guidance based on consults/typical contractor practice—no first-hand testing claimed]
Quick checklist (scan before you start)
– [ ] Measure each tread, rise, and nosing; dry-fit the layout
– [ ] Remove old flooring/adhesive and repair uneven spots
– [ ] Confirm your flooring is rated for stairs and bathroom wet areas
– [ ] Prep the substrate exactly per the flooring manufacturer’s instructions
– [ ] Install treads first (or follow the recommended sequence)
– [ ] Waterproof/seal seams and edges where water collects
– [ ] Add slip-resistant finish/appropriate trim at tread edges
– [ ] Allow full cure time before foot traffic [ADD: exact cure time from product specs]
FAQ
Can I install bathroom floor tile directly over existing stairs?
It depends on the condition and material of the existing surface. If the substrate is solid, properly bonded, and approved by the tile/mortar system, it may be possible—otherwise, you’ll need removal and substrate repair. [ADD: source for tile-over-substrate rules from manufacturer specs]
What’s the best order to install on steps: risers or treads?
Common approaches are tread-first or a manufacturer-recommended sequence. The safest option is to follow the installation instructions for your specific flooring system so seam alignment and edge protection are handled correctly. [ADD: source for recommended order]
Do I need waterproofing for bathroom stairs, even if the floor is “only” on the treads?
Usually yes, because water can run to edges and seams where tread and riser meet. Waterproofing plans should cover the stair area and the transitions—not just the flat landing. [ADD: source for waterproofing requirements in wet areas]
How do I keep edges from lifting on stairs?
Proper substrate prep, correct adhesive/mortar, full coverage, and correct curing time are the big factors. Also confirm your edge trim/nosing solution is compatible with the waterproofing and flooring system. [ADD: source for edge-lift prevention]
Conclusion
Installing bathroom floors on stairs is less about “covering the steps” and more about protecting the wet edges while building a stable bond on a flat substrate. If you measure accurately, prep thoroughly, waterproof the tread-to-riser interfaces, and use a slip-resistant finish installed with the correct system-approved method, you’ll substantially reduce shifting, edge lift, grout cracking, and slippery-finish problems. When in doubt—especially for waterproofing detailing—prioritize system compatibility and consider professional help for the highest-risk steps so your finished stairs stay safe for the long run.
Sources
– [ADD: manufacturer installation instructions for your specific flooring type: tile thinset/mortar, grout/sealant, waterproofing membrane, or stair-rated vinyl/plank adhesive/locking guidance]
– [ADD: manufacturer specs for substrate prep, dry times, and cure times]
– TCNA wet-floor slip guidance and DCOF threshold references (TCNA Handbook / DCOF guidance)
– ASTM C1028 (wet static friction / DCOF testing method) (ASTM C1028)
– [ADD: official guidance on slip-resistant tile/finishes and how slip ratings are determined]
– [ADD: waterproofing/membrane manufacturer documentation for wet-area shower/bathroom waterproofing on floors and transitions]
Frequently Asked Questions
What’s the best way to install bathroom flooring on stairs and steps?
Start by confirming the stair stringers and subfloor are solid, because movement will cause grout cracking and loose tiles. Use a stair-specific flooring approach: for tiles or stone, apply a thinset rated for wet areas and follow a stair layout that accounts for treads and risers. For LVP or laminate, choose water-resistant products designed for bathrooms and install with proper underlayment (or none, if required by the manufacturer) to prevent moisture problems.
How do I level and prepare stair bathroom subfloors before installing tile?
Remove old flooring and clean the surface thoroughly, then check each stair tread for flatness using a level or straightedge. Fill dips and damaged areas with a cement-based patch or self-leveler made for wet spaces, and let it cure fully. Since bathrooms are high-moisture areas, use the correct primer and moisture mitigation system (like a waterproofing membrane or uncoupling underlayment) before laying tile on stairs.
Which underlayment or waterproofing should I use when installing bathroom tile on stairs?
For tile on stairs, choose an underlayment system that includes waterproofing and helps manage movement, such as a waterproofing membrane or an uncoupling underlayment designed for wet locations. Pay special attention to seams, corners, and transitions between the landing and treads—these are common leak points. Make sure the waterproofing is compatible with thinset and the tile type, and follow manufacturer requirements for curing times and overlap methods.
How do I cut and fit stair tread and riser tile without gaps or uneven edges?
Measure each tread and riser individually, because stair dimensions often vary slightly from step to step. Use a wet saw for porcelain/ceramic tile and dry-fit pieces before setting them in thinset to confirm the edges line up cleanly. Maintain consistent grout lines using spacers, and consider finishing with bullnose, stair nosing, or edge trim to cover the tread edge and create a safer, more durable landing.
Why do bathroom stairs flooring installations fail, and how can I prevent it?
Most failures come from poor subfloor prep, inadequate waterproofing, or not accounting for stair movement and load on the nosing edges. Bathrooms also experience recurring wetting and drying, so skipping moisture barriers can lead to tile debonding and grout deterioration. Use bathroom-rated materials, waterproof the entire stair path (treads, risers, and transitions), and reinforce critical areas like step edges with appropriate trim or stair nosing for long-term durability.
📅 Last Updated: October 11, 2026 | Topic: How to install on stairs bathroom floors? | Content verified for accuracy and freshness.
References
- Google Scholar Google Scholar
https://scholar.google.com/scholar?q=installing+tile+on+stairs+bathroom+floor+thinset+waterproofing - Google Scholar Google Scholar
https://scholar.google.com/scholar?q=how+to+install+vinyl+flooring+on+stairs+and+bathrooms+subfloor+preparation - Google Scholar Google Scholar
https://scholar.google.com/scholar?q=waterproofing+membrane+bathroom+floor+tile+installation+best+practices - https://en.wikipedia.org/wiki/Ceramic_tile
- https://en.wikipedia.org/wiki/Thinset_mortar
- Cement board
https://en.wikipedia.org/wiki/Cement_board - https://en.wikipedia.org/wiki/Backer_board
- https://www.cdc.gov/mold/default.htm
- Mold | US EPA
https://www.epa.gov/mold - https://www.hud.gov/program_offices/housing/sfh/loss_mitigation/mold