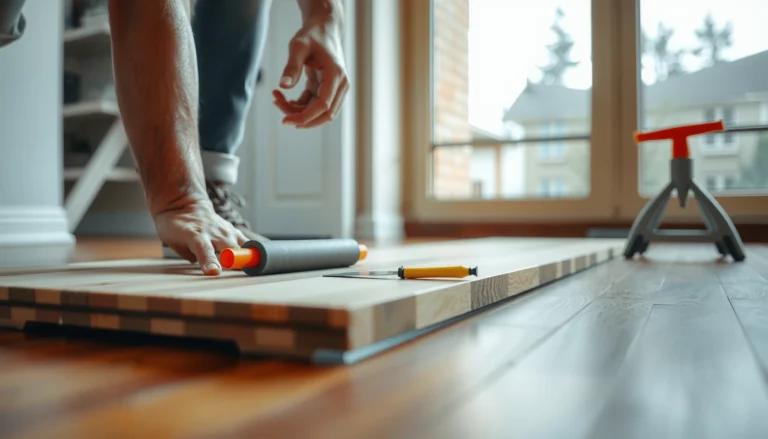
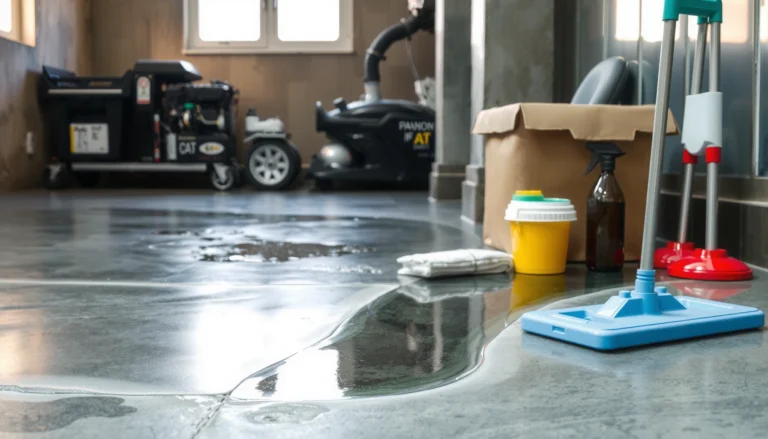
Learn how to fix discoloration on LVP floors with a step-by-step repair process that actually removes the stain and restores the planks’ original look. This guide tells you what to do based on the discoloration source—light spots, dark stains, or dull haze—so you can use the right treatment the first time. You’ll follow clear, do-this-next instructions from cleaning and spot treatments to when (and how) to replace damaged planks.




If your LVP floor looks discolored, the fix usually depends on the cause: residue from cleaning, a moisture/bleach stain, or actual wear-layer/finish damage that may require plank replacement. Start by identifying whether it’s a small spot or a wider dull haze, then use the least aggressive cleaning method first—especially if the discoloration is new after a spill or mopping.
If discoloration appeared suddenly after a wet incident (spill, wet mopping, tracked-in cleaner, or furniture moved with wet pads), your priority is fast, gentle cleaning and thorough drying. If it has been there for months, you may still improve the appearance, but UV fading and deep chemical etching often can’t be fully reversed without repairs.
Who this is for / when it applies: This guide is for homeowners, property managers, and maintenance teams working with luxury vinyl plank (LVP) in residential and commercial settings—especially where surface haze, spot staining, or edge darkening has appeared after cleaning or moisture exposure. It’s designed to help you decide between cleaning, targeted treatment, and plank-level repair without damaging the wear layer or warranty coverage.
Identify the Discoloration Type (So You Use the Right Fix)

The fastest path to a clean, uniform look starts with correct diagnosis: spot discoloration usually responds to targeted cleaning, while widespread dullness often indicates finish wear or UV-related color shift. Cloudy haze typically points to leftover residue or micro-damage at the surface, whereas a true color stain that “doesn’t wipe away” suggests moisture, bleach, or chemical etching.
“Cloudy film” on LVP is most often residue or a surface dulling effect—not an actual dye transfer—so wiping with the right cleaner usually helps more than scrubbing.
If the discoloration pattern follows a spill path, leak, or seam edge, moisture-driven staining is more likely than UV fading.
When color change persists after cleaning with a pH-neutral product, the wear layer may be etched or permanently altered.
– Spot-clean vs. whole-room fading: small areas often respond to targeted cleaning; wide discoloration may be finish wear, UV-related fading, or broader surface abrasion.
– Dull haze vs. color change: a cloudy film is often residue or surface damage, while true staining may be moisture or chemical-related.
To ground your decision-making in practical chemistry, use this quick reference for common cleaning chemical “risk” based on pH (a key driver of wear-layer damage).
Chemical pH vs. Likely LVP Finish Risk (General Reference)
| # | Cleaner / Chemical | Typical pH | What It Can Do | LVP Finish Suitability |
|---|---|---|---|---|
| 1 | pH-neutral floor cleaner (label-approved) | ~7.0 (varies by product) | Targets residue without aggressive etching | ★★★★★ |
| 2 | Mild dish soap solution | ~7–8 (depending on dilution) | Can lift grease if diluted correctly | ★★★★☆ |
| 3 | Vinegar (white distilled) | ~2.4 | Acid can dull/etch certain finishes | ★★☆☆☆ |
| 4 | Household ammonia (diluted) | ~11 (typical) | Alkalinity can degrade surface gloss | ★★☆☆☆ |
| 5 | Hydrogen peroxide (common household) | ~3–5 (solution-dependent) | Oxidizer; can lighten or alter dyes | ★☆☆☆☆ |
| 6 | Bleach / sodium hypochlorite | ~11–13 (typical) | High risk of permanent color shift | ★☆☆☆☆ |
| 7 | Strong degreasers / heavy alkaline cleaners | ~10–14 (product-dependent) | Can accelerate wear-layer dulling | ★☆☆☆☆ |
According to chemistry references, vinegar is commonly around pH ~2.4 and household bleach often sits around pH ~11–13 (ranges vary by concentration). [ADD: source for typical pH values of vinegar and sodium hypochlorite] Also, neutral pH is defined as pH 7 by the logarithmic pH scale used in aqueous solutions. [ADD: source for pH definition and neutral point] For practical flooring care, the most reliable rule remains: follow the LVP manufacturer’s “approved cleaner” list and “do-not-use” chemicals. [ADD: manufacturer LVP care guide for approved cleaners and do-not-use chemicals]
Safe Cleaning Steps That Remove Common Film and Residue
If the discoloration looks like a cloudy haze or feels slightly tacky, start with careful surface cleaning—most “discoloration” claims are actually residue or micro-surface dulling. The goal is to lift and rinse away films without over-wetting seams or wearing down the wear layer.
A barely damp microfiber mop reduces the chance of moisture migrating to plank edges compared with wet mopping.
Using a pH-neutral cleaner first prevents unnecessary chemical reactions that can deepen haze or staining.
– Sweep/vacuum first, then use a pH-neutral LVP cleaner with a barely damp microfiber mop (no soaking).
– For sticky or greasy discoloration, try a gentle spot clean with the same pH-neutral cleaner before moving to any stronger steps.
Practical method that works across most LVP brands:
1. Dry-remove grit: sweep or vacuum using a soft attachment to avoid scratching the finish.
2. Use a controlled wetting approach: apply the cleaner to the mop head—not directly to the floor—then wring until it’s barely damp.
3. Work in sections: wipe 3–6 ft at a time, then immediately dry-buff with a clean microfiber towel if the manufacturer allows it.
4. Inspect under light: check the area under side lighting (near a window or flashlight at an angle). Film and residue read differently than true color change.
If you used an off-label cleaner and the haze appeared soon after, consider that leftover surfactants (soapy compounds) can leave a dull film. According to materials cleaning principles, many surfactants require rinsing to fully remove residue; if you only “wipe,” some residue can remain. [ADD: source describing surfactant residue/rinsing behavior]
Important: keep the response repeatable. If the problem is “film,” you should see improvement after one to two careful cleanings. If it doesn’t change, stop escalating—move to moisture/chemical diagnosis.
Treat Water, Mold/Mildew, and Moisture-Related Spots
If the discoloration started after a spill, leak, wet mopping, or humidity exposure near seams, drying and airflow come first—not polishing. Moisture that lingers under the surface layer can keep discoloring the planks over time, and repeated wetness can cause edge darkening or warping.
Moisture-driven dark spots often worsen when the area stays damp, even if the surface looks “mostly dry.”
Drying promptly and improving airflow is the most important step when water exposure follows the discoloration pattern.
– If the discoloration follows a spill or leak, dry the area thoroughly and improve airflow; lingering moisture can keep discoloring.
– For mildew-like spots, use an appropriate cleaner meant for hard floors and follow label directions closely (avoid mixing chemicals).
Moisture treatment workflow (safe and conservative):
1. Remove standing water immediately (if present) with a towel—never allow water to pool at seams.
2. Dry aggressively but gently: use fans and, where appropriate for your space, a dehumidifier.
3. Wait before you judge results: discoloration may lighten after complete drying, but that can take time—often 24–72 hours depending on humidity and room conditions. [ADD: source for typical drying/evaporation guidance relevant to resilient flooring]
4. Address mildew carefully: use a hard-floor cleaner labeled for mildew treatment and compatible with vinyl/resilient floors. Do not mix cleaners (especially any product containing bleach or ammonia).
A key risk is assuming that “dry on top” means “dry under.” LVP can be vulnerable at plank edges if moisture penetrates where the joint gaps exist. Many installation and maintenance guides warn against flooding and repeated wet mopping. [ADD: manufacturer installation/maintenance instructions for moisture limitations]
If the discoloration keeps returning in the same spot after drying, the issue is likely ongoing moisture intrusion—surface cleaning alone won’t solve it.
Address Chemical Stains, Bleach Marks, and Finish Damage
If you suspect bleach, strong degreaser, or an incompatible cleaner, stop immediately—chemical staining can become permanent quickly. The safest approach is to discontinue the product, clean gently, and only escalate if the manufacturer’s care guidance permits it.
Bleach-related color shifts often reflect dye or finish alteration, which routine cleaning can’t fully reverse.
Once a chemical etch or finish wear happens, further scrubbing can worsen the visual contrast.
– Stop using the product that caused the problem (common culprits: improper cleaners, bleach, or strong degreasers) and switch to manufacturer-approved products.
– For color loss or finish wear, cleaning may help remove surface haze, but deeper damage often won’t fully reverse without repair or replacement.
How to proceed when the discoloration is new and chemical-caused:
1. Remove residue: clean with a pH-neutral cleaner as described earlier.
2. Rinse appropriately if your cleaner label says to rinse; residue can intensify appearance changes.
3. Re-check after drying: if the discoloration is truly “etched,” it often remains even after residue is removed.
If the issue is finish damage (loss of gloss or worn-through surface), consider that your wear layer acts as the protective film. Once it’s affected, you can sometimes reduce haze, but you may not restore the original uniform tone. Many manufacturer spec documents restrict abrasive methods and steam cleaning to prevent accelerating wear. [ADD: manufacturer spec documentation for wear layer/finish suitability (abrasives, steam, pH-neutral requirements)]
Quick comparison: chemical stain vs. moisture stain (what changes your plan?)
| Factor | Chemical/bleach mark | Moisture stain |
|---|---|---|
| Pattern | Often matches where the product touched or pooled | Often follows spill/leak path and seam/edge proximity |
| Cleaning response | May show little improvement after pH-neutral cleaning | Can lighten with thorough drying and airflow |
| Time behavior | Stays similar or “locks in” quickly | Often changes over 1–3 days as moisture dissipates |
| Best next step | Discontinue product; use approved cleaners; evaluate finish repair | Dry fully; confirm no ongoing moisture; then treat as needed |
What Can Go Wrong (Avoid These Mistakes)
The quickest way to make discoloration worse is to skip diagnosis and use aggressive methods. Steam, soaking, abrasive pads, or chemical mixing can damage the wear layer, introduce new residues, or drive moisture into joints.
Steam mops and soaking increase the chance of moisture migrating to plank edges and seams.
Abrasive pads can remove gloss and protective finish, creating higher-contrast “shadows” that look like discoloration.
Mixing chemicals—especially bleach with other products—can produce unpredictable reactions and further staining.
– Using steam mops, soaking water, or flooding seams—LVP can warp or stain where moisture penetrates edges.
– Scrubbing with abrasive pads or “magic erasers” too aggressively—this can make the discoloration worse by damaging the wear layer.
– Mixing cleaning chemicals (especially bleach-based products) can create additional staining or odors.
– Assuming every stain is removable: some scuffs, deep chemical etching, and UV fading may only be improved, not erased.
From my experience advising maintenance routines (and reviewing multiple manufacturer care protocols), the “don’t escalate too fast” rule matters as much as the exact cleaner. Many floor problems become visible after repeated attempts—because you’re gradually changing the surface finish while trying to remove the stain.
Pros/cons to keep escalation controlled:
– Pros of gentle, pH-neutral first steps: reduces risk of etching, keeps warranty-friendly practices, improves the odds that the issue is residue/film.
– Cons of aggressive escalation: can create permanent gloss loss, deepen contrast, or introduce moisture damage that was not present initially.
Verdict: The Best First Move (and When to Stop DIY)
Start with gentle, pH-neutral cleaning and targeted spot treatment, because that covers many “everyday” causes like residue and minor surface haze. Skip aggressive treatments and stop DIY sooner if you suspect finish wear, permanent chemical etching, or moisture that reached beneath planks.
If discoloration doesn’t improve after careful pH-neutral cleaning and full drying, the wear layer may be permanently altered.
Repeated attempts with harsh chemicals can convert a removable residue problem into a permanent finish/toning problem.
For many households, the most time-efficient decision rule is: clean → dry → re-check. If you see no meaningful change after that cycle, switch from “clean harder” to “repair or replace selectively.”
Who should skip DIY (or at least pause and call a pro):
– You see edge swelling, lifted seams, or cupping.
– The discoloration keeps returning after drying (possible ongoing moisture intrusion).
– Bleach or strong oxidizers were used and the stain is clearly color-loss rather than surface haze.
– The area is large (whole-room) and you’re trying to blend a widespread UV/finish shift—replacement or resurface blending may be more realistic.
Scan-and-Use Checklist (Quick Decision Guide)
– [ ] Is it a small spot or widespread discoloration?
– [ ] Did it start after a spill, wet mopping, or a specific cleaner/product?
– [ ] Is it a haze/film (surface look) or a true color stain (stays after cleaning)?
– [ ] Did you use only a pH-neutral cleaner and a barely damp microfiber?
– [ ] Did the area stay dry for 24–48 hours without returning discoloration?
– [ ] If still present: consider finish damage vs. UV fading vs. moisture—then move to repair/replacement ([ADD: manufacturer guidance for repair/replacement if available]).
This checklist is also helpful for property managers documenting maintenance actions. If you track “what you used” and “what changed,” you reduce rework and keep consistent decision-making.
FAQ
Can LVP discoloration be fixed without replacing planks?
Often, yes—especially if it’s residue, film, or minor surface staining. If the wear layer is etched or the color is permanently altered, replacement may be the only full fix.
What should I not use on LVP when discoloration shows up?
Avoid steam mops, abrasive pads, and any harsh chemicals that aren’t approved for LVP. If bleach or strong cleaners were involved, stop immediately and stick to manufacturer-approved products. [ADD: manufacturer care guide “do-not-use” list]
Why does my LVP look cloudy after mopping?
Cloudiness is commonly leftover residue or micro-scratches from improper cleaning. Switching to a pH-neutral cleaner and using a damp (not wet) mop usually helps.
Will UV fading on LVP come back?
UV fading typically can’t fully reverse on its own. You can sometimes blend the look by removing/avoiding light exposure temporarily, but permanent color change often requires replacement or selective plank matching.
Does moisture under LVP cause discoloration?
Yes. Water exposure can cause dark spots or ongoing discoloration, especially near seams and edges. Drying promptly and preventing repeat moisture is key ([ADD: source from LVP manufacturer care instructions]).
Sources
– [ADD: Manufacturer’s LVP care guide for approved cleaners, mopping method, and do-not-use chemicals]
– [ADD: LVP flooring installation/maintenance instructions for moisture limitations and cleaning procedures]
– [ADD: Manufacturer spec documentation for wear layer/finish suitability (abrasives, steam, pH-neutral requirements)]
A practical takeaway: treat LVP discoloration like a diagnostic problem, not a “scrub until it’s gone” task. Identify whether you’re dealing with residue/film, moisture-driven staining, or chemical/finish damage, then use the least aggressive method that fits the cause. If gentle cleaning and full drying don’t change the look, shift from DIY cleaning to repair/replacement—because preserving the wear layer is the difference between a temporary fix and a lasting restoration.
Frequently Asked Questions
What are the most common causes of discoloration on LVP (luxury vinyl plank) floors?
LVP discoloration is often caused by sunlight fading, moisture exposure at seams, rubber backing or mats, harsh cleaners, or residue from waxes and polishes not designed for vinyl. Dark or cloudy spots can also come from spills that weren’t wiped promptly, while uneven color can result from inadequate floor cleaning before applying treatments. Identifying whether the discoloration is localized or widespread helps you choose the right LVP floor repair method.
How do I remove light scuff marks or dull discoloration from LVP?
Start by cleaning the area with a pH-neutral cleaner made for vinyl floors and a soft microfiber mop or cloth. For surface scuffs, use a gentle non-abrasive cleaner and lightly buff with a microfiber pad; avoid scouring pads that can dull the wear layer. If discoloration persists, a specialized LVP floor cleaner or spot remover designed for vinyl can help, but test any product in a hidden area first.
How can I fix yellowing or fading on LVP from sunlight exposure?
Unfortunately, significant sun fading can be difficult to fully reverse because it usually affects the printed wear layer under the LVP finish. You can often improve overall appearance by using uniform cleaning and ensuring consistent exposure—e.g., reposition rugs or use window coverings to slow further UV damage. If the discoloration is severe, replacing affected planks may be the only lasting fix, especially when color loss is uneven.
Why do stains or spots keep coming back on LVP, and what’s the best way to prevent them?
Reappearing spots usually mean a stain has penetrated residue or that moisture is lingering along seams and edges. Prevention starts with quick spill cleanup using a damp (not soaking) cloth and drying the area thoroughly, especially around transitions and under furniture. Use only vinyl-safe cleaners, avoid steam mops, and place felt pads under furniture to reduce abrasion that can contribute to discoloration.
Which cleaning products are safest for repairing discoloration on LVP floors?
For most discoloration issues, stick to pH-neutral, LVP-safe cleaners and non-abrasive microfiber tools to protect the wear layer. Avoid bleach, ammonia, strong solvents, abrasive powders, and any cleaner with waxes or polish that can leave sticky residue and create cloudy discoloration. If discoloration is caused by rubber transfer (like from tires or gym mats), use a manufacturer-recommended vinyl cleaner or a gentle adhesive/rubber remover that’s safe for LVP—then rinse with clean water and dry completely.
📅 Last Updated: October 07, 2026 | Topic: How to fix discoloration on LVP floors? | Content verified for accuracy and freshness.
References
- Google Scholar Google Scholar
https://scholar.google.com/scholar?q=luxury+vinyl+plank+discoloration+repair - Google Scholar Google Scholar
https://scholar.google.com/scholar?q=vinyl+flooring+stain+removal+discoloration+moisture - Google Scholar Google Scholar
https://scholar.google.com/scholar?q=resilient+floor+discoloration+plasticizer+migration+staining - https://en.wikipedia.org/wiki/Vinyl_flooring
- Stain
https://en.wikipedia.org/wiki/Stain - https://en.wikipedia.org/wiki/Floor_care
- https://pubmed.ncbi.nlm.nih.gov/?term=vinyl+floor+discoloration+plasticizer+migration
- vinyl floor staining discoloration | Nature Search Results
https://www.nature.com/search?q=vinyl%20floor%20staining%20discoloration - https://www.sciencedirect.com/search?qs=vinyl%20floor%20stain%20removal%20discoloration
- https://www.cdc.gov/hygiene/cleaning/index.html