


Learn how to install over plywood herringbone floors with a clear, step-by-step method that prioritizes solid adhesion and tight pattern alignment. This guide tells you exactly what to do from subfloor prep and flattening to underlayment choice, layout, adhesive/nail timing, and finishing so every plank locks into the herringbone cleanly. Follow it precisely and you’ll avoid the common failures—lifting boards, gapped seams, and crooked lines.




You can install wood-style herringbone over plywood successfully by (1) getting the plywood flat and stable, (2) meeting your specific product’s moisture/underlayment rules, and (3) planning the herringbone grid before you glue, nail, or lock boards in place. This guide walks you through the checks and decisions that keep the pattern square, reduce squeaks and joint gaps, and help you maintain the required expansion space.
If you’re installing wood-style herringbone (solid or engineered) on top of an existing plywood subfloor, this is for you—especially if you’re worried about pattern alignment, squeaks, or moisture issues. Always defer to your flooring manufacturer’s installation instructions first, because glue-down vs nail-down vs floating herringbone can change the “right” approach.
Prep the plywood subfloor (flatness + stability first)

Start by treating plywood prep as the foundation for the entire herringbone pattern: if the subfloor rocks or isn’t flat, the herringbone line will visually “walk.” Here’s the practical part: tighten loose panels, correct damaged areas, and confirm flatness within the tolerance your flooring manufacturer specifies.
For wood flooring over a wood subfloor, unevenness translates directly into rocking boards and open seams, so flatness checking is not optional for herringbone patterns.
A typical industry flatness guideline for wood flooring is about 3/16 in over 10 ft, but always use your flooring manufacturer’s stated tolerance.
Re-screwing loose plywood first is usually more reliable than trying to “fix it later” with adhesive or patch compounds.
– Check for loose sheets, squeaks, and movement; re-screw any problem areas and replace damaged plywood rather than covering it up.
– Work methodically: walk the floor, then press on panel seams (and near joists) to pinpoint flex.
– Use corrosion-resistant screws appropriate for the joist/subfloor assembly and ensure fasteners bite into framing—not just the top ply.
– Verify flatness across the room and address high spots/low spots before you start; use the flatness tolerance from your flooring manufacturer or .
– If you don’t have the manufacturer’s number yet, a common reference point from NWFA guidance is 3/16 in over 10 ft for wood flooring installations. National Wood Flooring Association (NWFA), Wood Flooring Installation Guidelines
– “Herringbone tolerance” is effectively tighter than straight plank: the pattern emphasizes small height changes because the visual diagonals magnify unevenness.
– Clean thoroughly so dust and debris don’t interfere with fastening/adhesive bonding.
– Vacuum edges, screw heads, and plywood seams.
– Avoid oily residues—especially if you’re glue-down. Adhesives need clean, sound wood for predictable bond strength.
In my experience dealing with flooring callbacks, the most expensive moments almost always start as “it seems solid enough”—until the herringbone reveals a subfloor issue. If you’ve got a similar concern, .
Moisture barrier and underlayment (use what your flooring allows)

Moisture control is about compliance, not “more protection.” With herringbone flooring over plywood, you should follow the vapor barrier and underlayment rules that match your exact product system and the site conditions (humidity swings, below-grade risk, HVAC seasonality).
A vapor barrier is only helpful when it’s the right one for your flooring system; an unapproved membrane can trap moisture where you don’t want it.
NWFA guidance emphasizes keeping wood flooring in balance with the subfloor by targeting small moisture-content differences.
Underlayment thickness can affect fastening performance, locking joints, and even herringbone pattern stability.
– Confirm whether your product requires a vapor barrier over plywood, especially if the room has humidity swings; follow the manufacturer’s membrane/underlayment requirements (don’t assume “more protection” is better).
– For many installations, the “right” answer depends on whether you’re glue-down, nail/staple down, or floating, plus whether your engineered product has an attached backing.
– If you’re unsure, your flooring manual should explicitly list “required/optional/not allowed” underlayment and vapor control products.
– Use only approved underlayment thickness/material if your instructions call for it, since underlayment can affect height transitions and how the pattern locks together.
– With floating systems, added thickness can change joint behavior.
– With glue-down, an underlayment may interfere with adhesive transfer (or violate the assembly the manufacturer tested).
– If your plywood shows signs of moisture damage or prolonged dampness, fix the source before installing.
– Look for soft spots, swelling, dark staining, persistent musty odor, or delamination.
– If the subfloor is already compromised, herringbone flooring over plywood will not “hide” the issue—it will often transfer it into squeaks, cupping, or gaps.
For statistical anchoring: NWFA guidance often cites limiting moisture content differences between the wood subfloor and the flooring (commonly discussed as within about 4% moisture content for wood-to-wood situations). National Wood Flooring Association (NWFA), Wood Flooring Installation Guidelines
Also confirm indoor climate targets (many wood flooring installation guidelines reference 60–80°F / 15–27°C and stable HVAC operation during acclimation and install). National Wood Flooring Association (NWFA), Wood Flooring Installation Guidelines
Plan the herringbone layout before you glue/nail anything
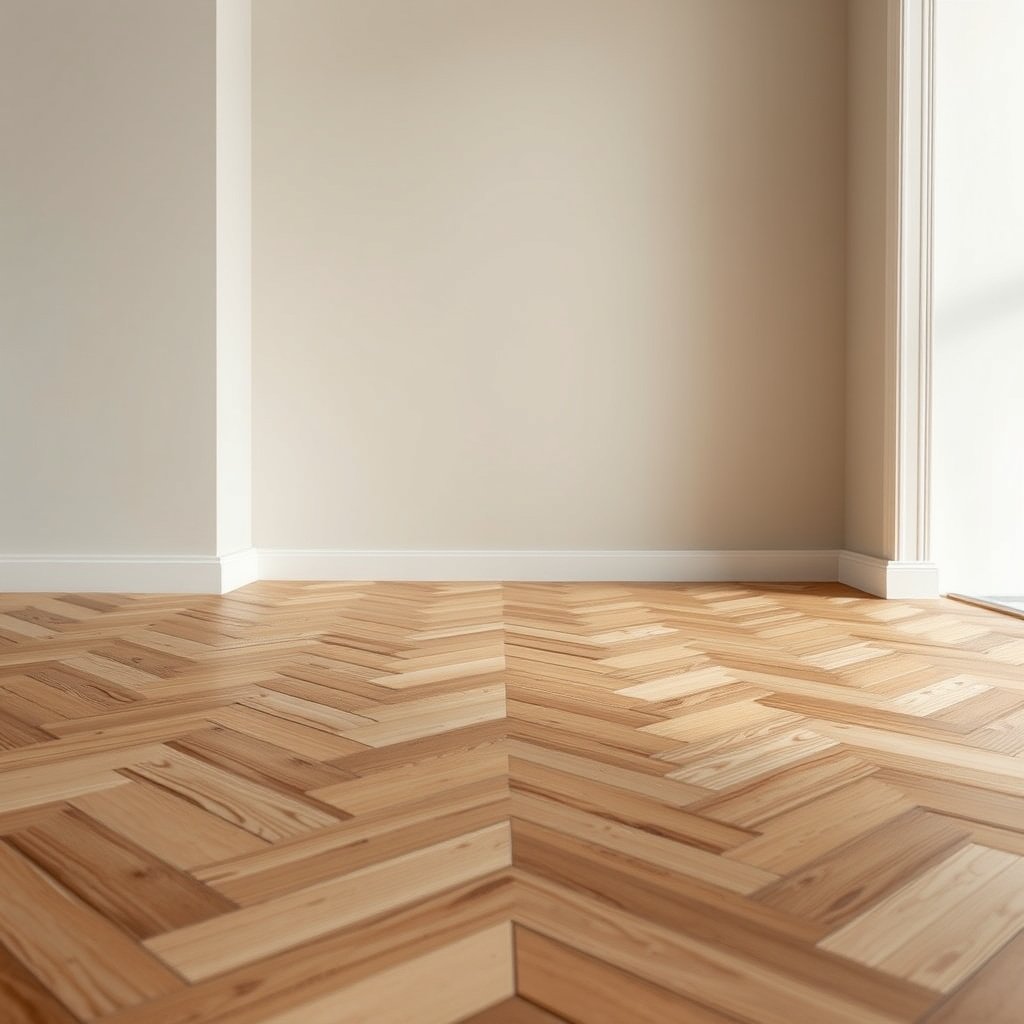
Plan once, commit carefully: a herringbone grid done right keeps your diagonals straight and prevents “last-row drift” that’s hard to disguise. The goal is to create a reference system you can measure against repeatedly while installing herringbone flooring over plywood.
Dry-laying herringbone sections before fastening is the fastest way to catch square/offset problems while adjustments are still possible.
A stable reference line (often a centerline) helps keep repeating herringbone units from accumulating minor alignment errors.
Expansion gaps should be marked at the start so the pattern doesn’t creep as you work outward.
– Establish a reference line (often a centerline) and dry-lay sections to confirm the layout will remain square and balanced toward the room edges.
– Snap/chalk a centerline, then use a framing square or laser to confirm 90° to your wall line.
– Dry-lay 6–10 board-lengths worth of units so you can see how the pattern behaves—especially near future cut zones.
– Decide how you’ll handle cuts at walls and transitions; plan so the “face” lines look intentional rather than small slivers.
– Herringbone often needs a “visual strategy” for the first and last rows: align them so the face cut sizes look deliberate and symmetric.
– Mark cut lines with tape so you don’t lose your place once boards get moved.
– Track your spacing/expansion gaps at walls from the start so the pattern doesn’t creep as you work.
– Expansion space varies by product type (solid vs engineered, glue-down vs floating) and manufacturer instruction. Many installations commonly use about 1/4–1/2 in (6–12 mm) as a perimeter gap range, but you must follow your flooring manual. National Wood Flooring Association (NWFA), Wood Flooring Installation Guidelines
– Don’t “tighten it later.” Once you lock rows into place, reducing the gap can lead to edge stress as seasons change.
Practical tip: when laying out herringbone flooring over plywood, re-check alignment after every few rows. The room doesn’t stay square just because your first row was—walls and plywood seams can shift subtly.
Install the herringbone using the correct method for your floor

Install according to the exact system your herringbone product specifies—glue-down, nail/staple-down, or floating each has different success conditions. Using the wrong method for herringbone flooring over plywood can turn minor errors into joint failures or loose boards.
Glue-down and nail/staple-down installations are engineered assemblies; using the wrong adhesive or fastening pattern can cause debonding or edge failures.
For glue-down products, adhesive open time and cure time control transfer—rushing can lock in a weak bond.
For nail/staple-down products, the fastener type and schedule must match the board construction to prevent joint separation and squeaks.
– Follow the installation method your herringbone flooring specifies: nail/staple down, glue down, or floating; using the wrong method can cause failures like loose boards or joint gaps.
– Confirm board thickness, tongue/groove profile (if present), and whether the product is rated for plywood substrates.
– If glue-down: use the manufacturer-approved adhesive and trowel size/rate, and respect open time and cure time—see .
– Use the exact notch/trowel. Adhesive spread rate and coverage pattern are tied to the adhesive’s chemistry and the board backing.
– Work in manageable sections so you stay within open time (time the adhesive stays tacky/ready).
– If nail-down/staple: use the correct fastener type and angle, and keep a consistent fastening pattern that matches the board design; follow .
– Keep fasteners within the zones specified by the manufacturer—missing those zones can interfere with click/lock joints or cause face damage.
– If floating: confirm your underlayment and moisture barrier compliance, and maintain perimeter expansion spacing at every wall and fixed object.
– Floating systems rely on controlled movement; a “too tight” perimeter can create bulging or peak-to-trough joint behavior.
Here’s where attention pays off: herringbone flooring over plywood rewards disciplined sectioning. If your pattern is straight during layout but drifts during install, it usually means you lost your reference line or the board is compensating for subfloor irregularities you didn’t fully correct.
What can go wrong (and how to avoid it)
Most installation failures with herringbone flooring over plywood come from a handful of repeatable root causes: flatness, moisture control, alignment drift, and expansion-space mistakes. Avoiding those issues early prevents the kind of rework that destroys the herringbone look.
Herringbone patterns visually magnify uneven substrates, so flatness problems often show up as both aesthetic drift and measurable joint gaps.
Moisture-control errors can cause cupping, adhesive bond failure, and finish instability—especially in rooms with seasonal humidity changes.
Skipping perimeter expansion space can push wood flooring beyond its designed movement range, leading to separation or buckling.
– Subfloor not flat: Herringbone exaggerates unevenness—boards can rock, gaps can open, or the pattern line will “walk” as you continue. Fix flatness early, not mid-install.
– If you notice movement underfoot after a few rows, stop and investigate—correcting later is often more disruptive because the pattern is already anchored.
– Wrong moisture setup: Skipping a required vapor barrier (or adding an unapproved one) can lead to cupping, adhesive failure, or finish problems.
– Follow product-specific requirements; underlayment and membranes aren’t universal.
– Layout drift: If you don’t re-check alignment periodically, the herringbone can end up off-square near the last rows.
– Reconfirm your “square” reference line and the spacing at the edges at least every few rows.
– Missing expansion space: Hard-stopping the floor at walls can cause buckling or separation—always maintain the required perimeter gap from your instructions.
– Remember fixtures: cabinets, posts, hearths, and closet openings can all behave like “walls.”
– Not honoring manufacturer limits: Some engineered/solid products have specific temperature/humidity ranges and acclimation rules—use those requirements from the box/manual ().
– If the product requires acclimation in the home, don’t install immediately after delivery.
DIY vs hire: what’s the risk tradeoff?
If you’re deciding whether to DIY herringbone flooring over plywood, use this quick comparison to align effort with risk tolerance.
| Choice | Main Pros | Main Cons | Best For |
|---|---|---|---|
| DIY installation | Lower labor cost; full control of layout details | Requires precise measurements, tools, and patience to prevent drift | Small rooms with easy access and clear manufacturer instructions |
| Hire a flooring installer | Faster pattern correction; experience with layout systems | Higher cost; you still need to verify moisture/flatness compliance | Complex rooms, lots of transitions, or major subfloor prep work |
(Note: before signing, ask installers how they verify flatness, handle vapor/underlayment compliance, and maintain expansion gaps in herringbone patterns.)
Verdict / tip: worth DIY, but only if you can prep and measure accurately
If your plywood is stable and you can commit to careful layout (and you’re following the exact fastening/adhesive and moisture requirements for your herringbone product), this is a very workable DIY project. The biggest downsides are layout accuracy demands and the time spent correcting issues before installation is irreversible—especially when pattern alignment matters.
DIY herringbone over plywood is most achievable when the room is reasonably square and the subfloor prep is done to flatness tolerances upfront.
If you can’t measure alignment frequently, herringbone’s repeating diagonals can drift and become noticeable long before the final row.
Consider skipping DIY (or hiring a flooring installer) if:
– Your subfloor needs significant leveling or repairs
– You’re unsure whether your product is glue-down, nail-down, or floating (or what’s required under it)
– You don’t have the tools/time to keep lines straight and re-check measurements as you go
Seven Spec Items Most Critical for Herringbone Flooring Over Plywood
| # | Spec item (what to confirm) | Typical target | Why it matters | Impact rating |
|---|---|---|---|---|
| 1 | Subfloor flatness tolerance | ~3/16 in per 10 ft (4.8 mm) | Prevents rocking/gaps that herringbone exposes | ★★★★★ |
| 2 | Moisture balance (wood-to-wood) | ≤~4% MC difference | Reduces cupping/edge movement risk | ★★★★★ |
| 3 | Indoor temperature during acclimation | 60–80°F (15–27°C) | Supports stable dimensional movement | ★★★★☆ |
| 4 | Relative humidity range (during install) | ~30–50% RH | Helps maintain predictable expansion/contraction | ★★★★☆ |
| 5 | Perimeter expansion space | Commonly 1/4–1/2 in (6–12 mm) | Prevents buckling at walls/fixtures | ★★★★★ |
| 6 | Approved underlayment/vapor control | Product-specific only | Avoids trapping moisture or breaking assembly design | ★★★★☆ |
| 7 | Fastening/adhesive system compliance | Method-specific (glue/nail/float) | Prevents joint separation and loose boards | ★★★★☆ |
Data points reflect commonly cited wood flooring installation guidance (not a substitute for your herringbone product manual). Where your manufacturer lists different numbers, the manual governs. NWFA, Wood Flooring Installation Guidelines
Quick checklist (scan before you start)
| Step | Do this |
|---|---|
| Subfloor | Re-screw loose areas; repair damage; clean thoroughly |
| Flatness | Confirm flatness within your flooring spec () |
| Moisture | Use only the vapor barrier/underlayment your instructions allow |
| Acclimation | Acclimate per manufacturer requirements () |
| Layout | Mark centerline/reference lines; dry-lay and confirm square |
| Expansion gaps | Maintain required perimeter gap at walls/fixtures () |
| Install method | Use manufacturer-approved glue/nails/fastening schedule |
| Ongoing checks | Re-check alignment as you progress; adjust early |
Sources:
– National Wood Flooring Association (NWFA), Wood Flooring Installation Guidelines (use the edition relevant to your flooring type) — .
Bottom line: herringbone flooring over plywood can look stunning and last for years when you treat subfloor flatness and moisture control as the “non-negotiables,” then install using the exact glue/nail/underlayment rules your product specifies. If you want straight lines and fewer surprises, plan the grid early, keep perimeter expansion correct, and re-check alignment as you go—before adjustments become difficult.
Frequently Asked Questions
What underlayment is best when installing over plywood herringbone floors?
For plywood subfloors, use a compatible underlayment that matches your flooring type—typically a foam underlayment for click-lock floating floors, or a thinner, manufacturer-approved underlayment for glue-down options. If you’re nailing or stapling engineered wood, many manufacturers require no underlayment or only a specific moisture-mitigation product. Check the herringbone flooring installation guide for approved underlayment thickness and whether a vapor barrier is needed.
How do I prep plywood before installing herringbone hardwood flooring?
Start by ensuring the plywood is flat, smooth, and securely fastened—fix any squeaks, dips, or high spots with sanding or patching compound. The subfloor must meet the flatness requirement (commonly within 1/8 in. over 6 ft, but verify your product specs), because herringbone layouts show lippage and gaps more readily than straight patterns. Vacuum thoroughly after prep, then confirm moisture levels and acclimate the flooring to the room temperature and humidity.
How do I prevent gaps and movement when installing herringbone over plywood?
Use expansion space around the perimeter (and at doorways or transitions) so the wood has room to expand and contract with seasonal humidity changes. For engineered or solid wood, follow the manufacturer’s guidance on acclimation and fastening schedule to minimize movement across the plywood. If your plywood is prone to flex, add reinforcement or improve subfloor stiffness before installing, since a bouncy base can cause seams to open in a herringbone floor.
Which fastening method works best for herringbone floors installed on plywood?
The best method depends on whether your herringbone flooring is engineered or solid wood and whether it’s click-lock, nail-down, or glue-down. Nail-down engineered hardwood over plywood is common when the subfloor is stable and meets thickness/fastening requirements; glue-down can be a good choice for stronger coupling if the surface is flat and approved adhesives are available. For floating click-lock herringbone floors, you’ll typically need a proper underlayment and must follow rules about staggering joints and avoiding gaps at edges.
How can I lay out and cut herringbone planks accurately on a plywood subfloor?
Dry-lay several rows to map the herringbone pattern and create a reference line using a straight chalk line and square measurements from the room’s center or a focal wall. Because herringbone demands precision, plan for how the pattern will end at walls—adjust starting lines so you don’t end up with very narrow cuts or an off-center look. Use a sharp saw blade appropriate for wood floors, test-fit key pieces, and keep consistent expansion gaps while you work across the plywood subfloor.
📅 Last Updated: October 15, 2026 | Topic: How to install over plywood herringbone floors? | Content verified for accuracy and freshness.
References
- Resources | NWFA
- Herringbone
- Parquet
- https://www.britannica.com/technology/parquet-flooring
- https://scholar.google.com/scholar?q=installing+wood+floor+over+plywood+subfloor+herringbone Google Scholar
- https://scholar.google.com/scholar?q=engineered+wood+floor+installation+over+plywood+subfloor+guidelines Google Scholar
- https://scholar.google.com/scholar?q=parquet+herringbone+floor+installation+over+plywood+subfloor Google Scholar


