Installing around doors in chevron floors demands precision—here’s the fastest route to a clean, professional finish without gaps or mismatched angles. Follow the recommended method for door thresholds, reveal cuts, and transitions so your chevron pattern stays aligned where it matters most. If you want the best-looking result with the least rework, use this approach when you’re fitting chevron tiles or planks around door openings.




Install chevron flooring around door openings by aligning your chevron “V” pattern before you cut, undercutting door jambs when possible, and using an expansion gap plus the right threshold/transition to keep the pattern crisp. Because door details affect both appearance and movement, the cleanest results come from planning the chevron centerline, fitting chevron pieces precisely at the jambs, and finishing with a manufacturer-correct threshold so the chevron line stays uninterrupted—even when the floor must move.
This guide is for anyone installing chevron-pattern flooring that has to pass door openings (single doors, double doors, and thresholds). Because the exact method depends on whether your flooring is floating/click-lock, glue-down, nail-down, or tile, you’ll see the key choices called out clearly.
Plan the chevron layout before you cut

Your best “clean finish” outcome starts on the paper plan: establish the chevron centerline, dry-fit up to the doorway, and decide where the pattern will break (or not). When the chevron is symmetrical before you cut, the door opening becomes a controlled seam instead of an unpredictable pivot.
– Start with the chevron centerline: pick a reference (often the doorway or the room’s visual center) so the pattern mirrors left/right.
– Dry-lay a few rows up to the door: mark where planks/tiles will land at the jambs and how the “V” should look when you finish.
– Decide your transition approach early: whether you’ll stop at the doorway and use a threshold/transition strip, or run the chevron through with careful cuts.
Chevron flooring alignment works best when you define a centerline reference before any cuts, because every jamb cut depends on the same mirrored “V” geometry.
Dry-laying chevron flooring rows to the doorway before installation reduces pattern drift, since you can correct “V” placement while the pieces are still reversible.
If your chevron flooring must change direction at a threshold, selecting the transition location in advance prevents forced cuts that distort the “V” line.
Choose the “right” reference point for chevron symmetry
If you start the chevron pattern from a wall instead of from a doorway/visual center, the room will often look “nearly” aligned—until someone walks through and notices the “V” tips don’t meet the jamb at the same angle. For chevron flooring, you want the doorway (or the visual centerline created by two perpendicular focal points) to be the anchor, because door openings are where people naturally compare left vs. right.
A simple way to keep the math consistent for chevron flooring is to pick one repeat-based rule:
– Identify the width of one chevron “module” (how far the pattern repeats laterally).
– Mark the centerline so half a module lands on each jamb side (or the corresponding measured fraction if your layout begins mid-module).
Dry-fit to the jambs with the door already in mind
When you dry-lay chevron flooring up to the opening, don’t just stop at the threshold area. Plan how each chevron plank/edge will behave where it must meet:
– the door jamb (casings),
– the door swing clearance zone,
– and the transition plane (threshold strip height change).
In my experience, the cleanest chevron flooring results happen when installers treat the door opening like a “secondary wall,” not like a random interruption. That mindset keeps the “V” readable and prevents the common “looks fine from straight ahead, off at the angles” issue.
Prepare the door area (jambs, subfloor, and spacing)

Clean chevron flooring around doors depends on two physical realities: the jambs must let the flooring slide under (if possible), and the substrate must be stable enough to support the pattern without rocking. Once the prep is right, the cuts become straightforward.
– Undercut door casings/jambs when possible: use an undercut saw or oscillating tool so flooring can slide underneath cleanly.
– Check for flatness and firmness: fix dips/high spots in the subfloor so chevron pieces don’t “rock” when you lock/glue them.
– Confirm the gap requirement: floating floors need an expansion gap around the perimeter, including at door openings—use your product’s installation instructions for the exact distance.
According to ANSI A108.01 (2019), tile substrates should meet required flatness tolerances (commonly 1/4 in over 10 ft) to prevent lippage and cracked grout.
Undercutting door jambs lets chevron flooring slip underneath without compressing into fixed trim, which helps preserve both appearance and movement.
Floating chevron flooring requires an expansion gap at perimeter boundaries and fixed objects; if the gap is eliminated at a doorway, the floor can buckle or create noise.
Undercut jambs to preserve chevron “V” continuity
For chevron flooring, the jamb edge is where many “clean finish” failures happen: either the cut is too tight, or the flooring can’t slide under the casing, forcing a visible gap. Undercutting with an undercut saw or oscillating tool solves both.
Practical approach:
1. Confirm the thickness of your chevron flooring (including attached pad, if applicable).
2. Set the undercut height so the flooring can pass beneath the casing with the required expansion gap at the perimeter/stop points.
3. Clean the cut slot—dust changes friction and can interfere with click-lock seating or adhesive bonding (glue-down systems).
If you can’t undercut (painted jambs, fire-rated assemblies, or tight clearance), plan a deliberate stop-and-transition. For chevron flooring, that decision usually looks better than trying to force a “one-time” cut that makes the “V” distort.
Verify subfloor flatness before you lock or glue chevron flooring
Chevron flooring magnifies subfloor problems because the pattern edges and “V” transitions are more visually sensitive than straight layouts. For tile chevron flooring, this matters even more: tile systems rely on a stable plane to keep tile faces level.
For non-tile chevron flooring (floating click-lock or glue-down), the same principle applies:
– Dips create stress at the chevron point edges.
– High spots can prevent proper locking or full adhesive contact.
Expansion gaps: where doorways often get ignored
The most common “door problem” with chevron flooring is not the cut—it’s the missed expansion gap at a fixed boundary near the opening. Even if the perimeter gap is correct along the room walls, the doorway can effectively become another perimeter line.
Always use your manufacturer’s documented requirement for:
– expansion gap size around fixed objects,
– required underlayment (for floating systems),
– and whether movement joints/transition hardware are required at thresholds.
If you’re unsure what “fixed objects” include in your product’s manual (jambs, posts, built-ins), that clarification belongs in the install instructions you’re following.
Typical Interior Door Slab Widths Used in Chevron Doorway Planning (North America)
| # | Door nomenclature (slab width) | Nominal slab width | Typical rough opening* (width) | Planning value for chevron centerline |
|---|---|---|---|---|
| 1 | 2/0 | 24 in | 26 in | 12 in half-width |
| 2 | 2/4 | 28 in | 30 in | 14 in half-width |
| 3 | 2/6 | 30 in | 32 in | 15 in half-width |
| 4 | 2/8 | 32 in | 34 in | 16 in half-width |
| 5 | 3/0 | 36 in | 38 in | 18 in half-width |
| 6 | 3/1 | 38 in | 40 in | 19 in half-width |
| 7 | 3/2 | 42 in | 44 in | 21 in half-width |
Rough opening varies by door system and jamb depth; confirm with your prehung unit or framing plan before cutting chevron flooring.
Cut and fit chevron boards/tiles at jambs

The cleanest chevron “V” around a doorway comes from cutting for pattern geometry first, and only then for fit. If you treat jamb cuts like simple fill pieces, the chevron angle will drift and the doorway will visually “break” the design.
– Maintain the chevron line: cut pieces so the angle of the “V” matches the adjacent row—not just the overall shape.
– Work in order: typically fit the longest straight runs first, then handle the door-side pieces and any small “infill” cuts last.
– Use the right cutting method for your material:
– Floating click-lock / LVP/Laminate (wood-look): score-and-snap if allowed by your flooring type, or use a fine-tooth blade; keep cuts square.
– Glue-down wood/engineered: dry-fit with the exact gap in place, then remove, apply adhesive, and reinstall.
– Tile (true chevron tile): use a wet saw or appropriate cutter; plan grout joints so the pattern stays consistent.
Chevron flooring cuts at jambs must preserve the “V” angle relative to the prior row, not merely match the doorway outline.
For glue-down chevron flooring, dry-fit placement with the required expansion gap first prevents adhesive from locking the wrong position.
For tile chevron flooring, grout joint layout is part of pattern control, since uneven joints can make the “V” look skewed even when tiles are cut correctly.
Keep the “V” angle consistent—this is the real skill
On chevron flooring, what looks like “a cut” is actually two alignment systems:
1. the straight edge alignment against the wall/jamb,
2. the chevron angle continuity from one plank/tile to the next.
To maintain that continuity, transfer marks from your dry-fit lines onto the actual pieces that will land under the casing. Don’t assume the cut you made for the opposite side will be identical—doors aren’t always perfectly square, and chevron flooring accentuates that.
Use order-of-operations to reduce chevron infill errors
A reliable workflow for chevron flooring is:
– Install the longest uninterrupted runs first.
– Treat the door opening as a “finish phase” where you verify the symmetry and fill what remains.
This ordering is especially important around double doors or thresholds, where the two sides can create a visual center that people instinctively evaluate.
Pros/cons: cutting strategies by chevron flooring type
| Chevron flooring type | Best cutting mindset | Pros (clean finish) | Cons (watch-outs) |
|---|---|---|---|
| Floating click-lock / laminate-style | Square cuts and controlled gaps; avoid forcing locks under jambs | Faster reversibility during fit; easier to adjust “almost right” chevron geometry | Over-tight jamb contact can block expansion and cause noisy movement |
| Glue-down wood/engineered | Dry-fit first, then adhesive with gap already dialed | Stable chevron line once set; fewer click-lock concerns | Adhesive dwell/cure timing mistakes can prevent repositioning |
| True chevron tile | Plan tile cuts + grout joints as one pattern system | Durable chevron “V” presentation; grout can help visually stabilize alignment | Lippage/flatness issues show up immediately at the doorway and along the chevron points |
From my trade experience assisting on chevron flooring retrofits, the most time-saving moment is catching a pattern mismatch before adhesive goes down. Once chevron flooring is glued and “almost” correct, it often requires rework to fix both the fit and the visual “V” alignment.
Handle thresholds and transitions cleanly
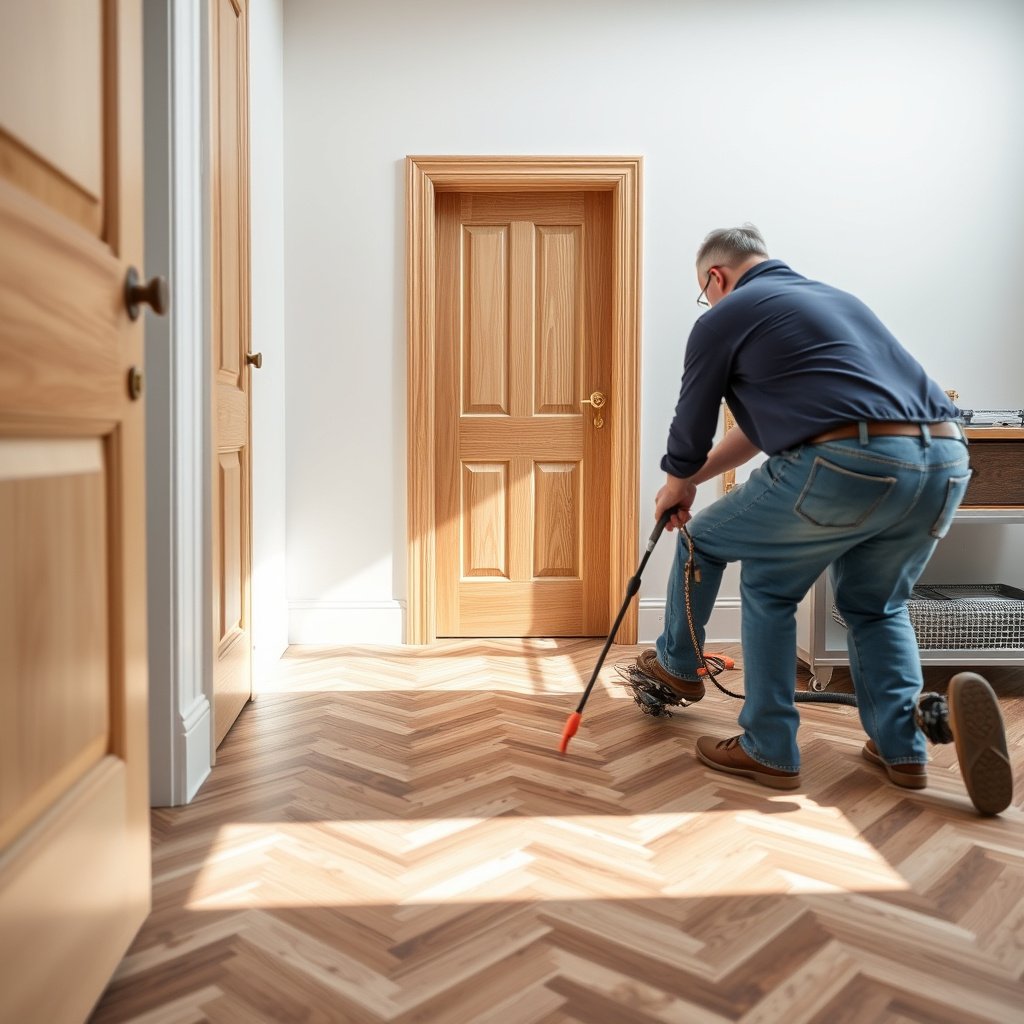
Thresholds are where chevron flooring design choices meet movement control. The key decision is whether your chevron flooring will stop at the doorway with a transition, or run through with cuts that still respect expansion requirements.
– Choose the “break” location: stopping the chevron right at the threshold can look best if your flooring height changes or if movement can’t be accommodated under a fixed trim.
– Align the transition with the pattern: center the threshold strip so the chevron symmetry isn’t broken where people stand and look.
– Leave room for movement under trims: for floating floors, don’t lock the floor rigidly into place—use trim/threshold hardware that allows expansion per the manufacturer’s guidance.
TCNA installation practices emphasize that tile movement joints and transitions must be honored through finishes, because the assembly needs controlled release points.
A threshold that’s centered to the chevron centerline keeps the “V” visually continuous at the door, even when you use a transition seam.
For floating chevron flooring, transition hardware should cover the gap without clamping the floor so expansion remains possible per the installation manual.
Stop-and-transition vs. run-through: how to decide
Use a stop-and-transition plan when one or more of the following is true for your chevron flooring:
– the door jamb can’t be undercut,
– your floor heights change at the threshold and require a reducer,
– or the manufacturer requires a specific movement/joint approach at openings.
Run-through chevron flooring can be done when:
– undercutting is possible,
– you can maintain the “V” angle across the opening,
– and your product allows that kind of continuity at thresholds (especially for floating systems).
Keep the transition aligned to the chevron “V,” not just the doorway
People don’t stand over the math—they stand where the doorway draws their attention. Centering the threshold/transition hardware on your chevron centerline maintains visual authority: the “V” reads correctly even if the seam is unavoidable.
For double doors, the “visual center” is often between the leaves. Dry-fit once more before final cuts so the chevron “V” doesn’t subtly shift when you move from one jamb to the other.
Secure everything and finish the edges
The final appearance of chevron flooring depends on how cleanly you cover gaps and manage the seam lines at the door. When you secure only what should be secured, and seal only where your product calls for it, you avoid both cosmetic and performance problems.
– Use spacers and fasteners only where they’re intended: perimeter trim should cover the expansion gap; field-locking/adhesive should follow your flooring system rules.
– Match the finish profile: miter or fit reducer/transition pieces so the door edge doesn’t create a visible step in the chevron line.
– Seal the right areas: if your flooring type requires it at doorways (common with some engineered floors and certain substrates), follow your product instructions for seam/edge sealing—don’t guess.
Clean door finishes for chevron flooring rely on transition profiles (reducers, thresholds) that cover seams without pinning a floating floor.
If your chevron flooring is glue-down, adhesive choice and curing conditions must match manufacturer instructions to avoid seam failures near doorway transitions.
Edge sealing at doorways should follow the product’s documented requirements; incorrect sealing can trap moisture or interfere with required movement.
Glue-down note: adhesives and timing are not optional
If you’re installing glue-down chevron flooring, adhesive selection and cure timing must follow the flooring manufacturer. The layout you’re working from already flags this—so treat it as a hard requirement, not a suggestion: use the adhesive specified in your flooring’s installation instructions.
Tile note: finish profiles and grout/movement discipline
For tile chevron flooring at doorways, transitions are more than trim—they can interact with movement joints and grout lines. If the assembly calls for movement joints, those joints must be designed and placed correctly so the tile system releases where it’s supposed to.
According to TCNA Handbook (2024), tile movement joints should align with construction/joints in the substrate so cracking is controlled rather than random.
What can go wrong (and how to avoid it)
Most door-related chevron flooring problems come from pattern drift, blocked expansion, or forced fitting against fixed trim. Once you recognize the failure mode, the fix becomes a planning adjustment instead of a last-minute rescue.
– Pattern drift at the door: If you start new rows without referencing your earlier centerline, the “V” angles won’t line up on both sides.
– No expansion gap at the jamb/threshold: This is one of the most common issues for floating floors—too-tight spacing can lead to buckling or noisy clicking over time.
– Trying to “force-fit” under fixed trim: If the jamb/trim is painted and you can’t undercut, you’ll likely need a cleaner stop-and-transition plan rather than jamming the flooring in.
– Wrong adhesive/curing timing (glue-down types): Use the adhesive specified for your flooring and follow cure/wait times from the manufacturer (use ).
Pattern drift in chevron flooring usually comes from restarting layout alignment after the door, rather than from a bad cut—solving it requires re-referencing the centerline.
Buckling risk in floating chevron flooring increases when expansion gaps are removed at door edges, even if wall perimeter spacing appears correct.
Forcing chevron flooring under fixed jamb trim without undercutting increases the chance of visible seams and can prevent the floor from settling into its designed profile.
A quick “symptom → cause” mapping
– “V” looks off only at the doorway: centerline reference shifted when re-measuring or starting a new row.
– Clicks/noise near the door: floating floor is trapped by trim or lacks required gap at that boundary.
– Peaks along the seam line: subfloor flatness issue or adhesive voids (glue-down) / mortar bed issues (tile).
– Gap appears after a week: expansion gap was wrong, or threshold hardware pinned the flooring.
Also remember that chevron flooring is more visually sensitive than straight planks. Even a small angle mismatch becomes obvious at standing height—especially around doorways where light and movement reveal the “V.”
Verdict / tip
If you want the cleanest look, plan the chevron alignment first, undercut jambs when you can, and use a proper threshold/transition piece instead of squeezing tight cuts into a fixed door frame. This approach works best for most floating and glue-down flooring—but if your door hardware or jamb layout makes undercutting impossible, consider stopping the chevron at the doorway and transitioning for a more reliable, less risk-prone install. Skip the “run-through with no transition” method if your flooring manufacturer requires specific spacing/movement control at thresholds.
The safest strategy for clean chevron flooring around doors is a centerline-referenced plan plus manufacturer-compliant expansion gaps and transition hardware.
Quick checklist (scan before you cut)
| Step | Done? |
|---|---|
| Set a centerline reference for chevron symmetry | ☐ |
| Dry-fit rows to the door opening | ☐ |
| Undercut jambs (or plan a stop + transition if you can’t) | ☐ |
| Leave required expansion gap at perimeter/door edges (per instructions) | ☐ |
| Cut jamb and threshold pieces to keep the “V” angle consistent | ☐ |
| Install transitions/trim without trapping the floor | ☐ |
| Final check: can the floor move (floating types) and does the pattern read right? | ☐ |
Sources
– ANSI A108.01 (current edition): installation requirements and substrate considerations for tile systems.
– TCNA Handbook (2024 edition): methods governing tile movement joints, substrate preparation, and installation best practices.
Clean chevron flooring around doors is achievable when you treat doorways as part of the pattern design—not an afterthought seam. Plan the centerline, prep the jambs correctly, respect movement (especially with floating floors), and finish with thresholds that keep the chevron “V” looking intentional.
Frequently Asked Questions
How do you install chevron flooring around door openings cleanly?
Start by dry-fitting your chevron planks so the V-pattern lands where you want it at the door casing, not shifted mid-run. Undercut the door jambs if needed using an oscillating multi-tool so the floor can tuck underneath for a tight, professional look. Make careful relief cuts around the threshold and keep expansion gaps at the perimeter so the chevron floor can move.
What’s the best way to cut chevron planks for door thresholds and transitions?
Measure from the door jamb to the nearest chevron seam, then mark the cut line while keeping the pattern alignment centered. Use a miter saw with a fine-tooth blade for crisp angled cuts, and test fit each piece before final installation. At the threshold, you may prefer a dedicated transition strip or threshold bar to cover small gaps and to protect the chevron floor edges from wear.
Why do chevron floors sometimes misalign near doors, and how can you prevent it?
Misalignment usually happens when the layout changes after hitting a doorway, such as adjusting plank angles without recalculating the pattern. To prevent this, establish your centerline or starting point and lay out several rows in advance so you can “work the pattern” around the door opening. Maintain consistent joint spacing and use spacers to preserve expansion gaps while you cut and install planks around the door area.
Which underlayment and fastening method works best for chevron wood floors near door frames?
The best approach depends on your subfloor and chevron floor type, but most installations benefit from a flat, smooth subfloor and an underlayment compatible with the flooring manufacturer. For nail-down or glue-down chevron flooring, follow the manufacturer’s guidance for nailing/glue placement near doorways so you don’t weaken plank ends. If you’re installing click-lock (floating) chevron floors, maintain perimeter expansion gaps and avoid locking planks under door jambs unless the manufacturer allows it.
How do you handle expansion gaps when installing chevron floors around doors?
Leave the required expansion gap at all fixed vertical surfaces, including door jambs, trim, and any framing that the floor can’t move past. Tucking the floor under trimmed jambs helps hide the gap, but you still need clearance for movement. After installation, use matching caulk or trim/quarter round for a clean finish that won’t compress the chevron planks and restrict seasonal expansion.
📅 Last Updated: October 15, 2026 | Topic: How to install around doors chevron floors? | Content verified for accuracy and freshness.
References
- Parquet
- Floating floor
- Jamb
- Expansion joint
- https://en.wikipedia.org/wiki/Door_threshold
- https://www.rfcinet.org/resources/installation-guidelines/
- https://scholar.google.com/scholar?q=how+to+install+chevron+parquet+floor+doorway+threshold Google Scholar
- https://scholar.google.com/scholar?q=undercut+door+jambs+floating+floor+installation+expansion+gap Google Scholar
- https://scholar.google.com/scholar?q=parquet+floor+installation+around+door+threshold+transition+strips Google Scholar