


Deep clean hardwood floors to remove sand quickly by using a dry vacuum-first method followed by a damp, cleaner-light mopping pass that lifts grit without grinding it in. This approach works best when the sand is surface-level and you can prevent excess water from wicking into the finish. Skip heavy scrubbing and soaking—those turn small sand particles into scratches.




If you want sand off hardwood fast without scratching, dry-vacuum first, then deep-clean with a pH-neutral hardwood cleaner using a barely-damp microfiber mop. Finish by drying completely so any remaining grit can’t act like sandpaper against your floor’s finish.
If your floors feel gritty underfoot—especially near doors, stairs, or mudrooms—this walkthrough will help you lift sand safely and avoid damaging the finish or swelling seams.
Hardwood sand cleanup is especially relevant if your home sees tracked-in debris (wet weather, construction dust, or beach/sports sand) and you’ve noticed roughness that makes shoes “catch” on the floor. The method below is designed for finished hardwood floors (sealed with polyurethane/UV-cure coatings), where the finish is the primary protection layer—but it also helps you minimize moisture exposure that can affect seams.
Pre-clean: lift loose sand before any water hits

The fastest way to prevent scratches on hardwood floors is to remove as much dry sand as possible before any mopping happens. Vacuuming first keeps the grit from turning into a gritty paste that can abrade the finish.
According to the National Wood Flooring Association (NWFA), hardwood floors are best protected by controlling moisture and using cleaning methods that don’t saturate the surface.
According to the USDA Forest Products Laboratory, Wood Handbook, wood dimensional change is strongly tied to moisture content—once moisture rises toward/above the fiber saturation point (about 28–30%), swelling can be significant.
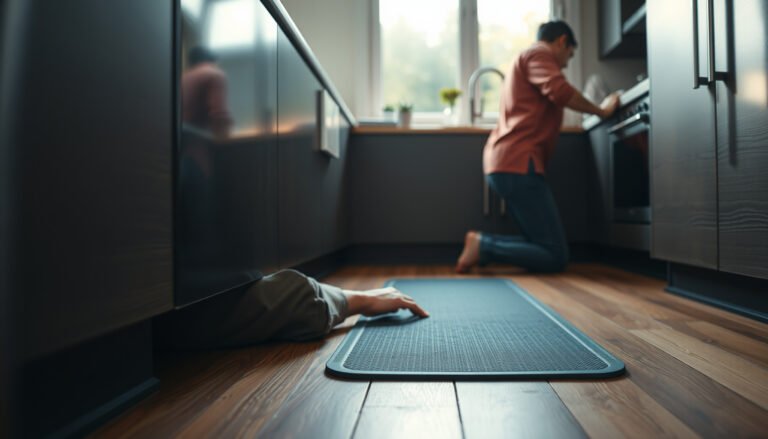
Start with a thorough dry vacuum using a soft brush attachment (or a hard floor head designed for wood). Go slowly and overlap passes so you’re not leaving a thin, invisible layer of grit—especially along baseboards, under door edges, and at the “landing zone” where shoes land when coming in. If you have micro-sand (fine grit that clumps less and hides better), spot work first: use a microfiber cloth that’s just slightly damp to blot the area, then immediately blot again with a dry cloth. This “spot blot” approach reduces how much sand you pull into the mop path.
Finally, do a second vacuum pass. That second pass matters because it removes loosened particles you couldn’t see after the first round—meaning your hardwood cleaner and mop head are less likely to redistribute grit.
Deep clean: wash in a way that won’t grind grit
A scratch-safe deep clean on hardwood floors is about controlling liquid and avoiding a sand slurry. Use a pH-neutral hardwood cleaner and a barely-damp microfiber mop so you clean the finish without dragging abrasive particles.
According to Bona’s hardwood care guidance, using the right cleaner (pH-neutral, formulated for hardwood) and limiting excess moisture helps prevent finish dulling and residue issues.
According to the NWFA, proper cleaning should not leave standing water; excess moisture is a common cause of damage in hardwood flooring assemblies.
Choose a cleaner labeled safe for hardwood floors and specifically “pH-neutral.” As of 2026, most brand-approved guidance still emphasizes pH balance and controlled moisture because the finish layer (not the raw wood) is what you’re trying to protect. If you grab “all-purpose” or anything strongly acidic/alkaline, you risk surface dulling or residue that can make sand feel more embedded over time.
Next, mop with a barely-damp microfiber mop head. Wring it out until it stops dripping; you want dampness for lifting soil, not wetting the seams between boards. Work in small sections (think a manageable lane you can complete while the surface stays only damp, not wet). Keep your mop head clean: as soon as you see that it’s picking up visible grit, rinse the mop head in clean water, wring it out again, and continue. In practice, the failure mode I’ve seen on real hardwood floors is simple: people “extend” a cleaning pass too long and end up smearing the remaining sand deeper into the finish texture.
Rinse/spot-clean (only if your cleaner requires it)
Whether you need a rinse depends on the product you choose—so the safest move is to follow the cleaner’s label instructions for hardwood floors. If your formula requires rinsing, do it promptly; if it doesn’t, focus on drying thoroughly.
According to manufacturer care instructions (e.g., hardwood cleaner label guidance), some pH-neutral hardwood cleaners are designed for “no-rinse” use, while others require a rinse step—checking the label prevents residue buildup.
According to NWFA care recommendations, preventing excess moisture from sitting in joints and between boards is critical to avoiding swelling-related damage.
For stubborn sandy patches—common near entry doors and along stair treads—use targeted spot cleaning rather than re-mopping the whole floor. Apply the cleaner to the cloth or mop head (not directly onto the floor), then wipe with light pressure and controlled strokes. If sand is still present after the first pass, repeat the cycle: spot clean with minimal moisture, then dry immediately with clean microfiber.
After any washing or spot cleaning, dry the entire cleaned area using dry, clean microfiber towels. Drying isn’t optional for sand: if any grit remains damp, it can bind with residues and later abrade the finish when you walk. As of 2026, the “dry completely” habit is still one of the most consistent recommendations across hardwood care guidance, because it reduces both physical abrasion and lingering moisture risk.
Quick pros/cons tradeoff (for hardwood floors):
– Pros of barely-damp mopping + controlled spot cleaning: reduces scratch risk, minimizes seam moisture, and avoids spreading grit.
– Cons / limits: you may not fully remove sand that’s deeply embedded, and repeated wet passes can still dull or disturb finish if you’re heavy-handed.
– Best use case: surface sand, everyday grit, and track-in debris where the finish is intact.
What can go wrong (and how to avoid it)
The main risk when cleaning hardwood floors with sand is turning abrasive grit into a grinding tool. The second risk is moisture exposure—especially around seams, stairs, and doorways—where water can contribute to swelling or finish separation.
According to NWFA and Bona care guidance, abrasive particles should be removed dry first (e.g., vacuuming) before any mopping to avoid finish wear.
According to the USDA Forest Products Laboratory, Wood Handbook, wood can swell as moisture content increases; minimizing excess moisture is a core protective strategy for hardwood floors.
Here’s what typically goes wrong—and how to prevent it:
| Mistake | What it causes | How to fix it |
|---|---|---|
| Mopping over visible sand | Scratches and a “worn” look as grit abrades the finish. | Dry-vacuum first, then use a clean, barely-damp microfiber mop head. |
| Using steam | Excess moisture and heat can stress finish and seams. | Avoid steam mops; stick to controlled, label-guided cleaning and thorough drying. |
| Leaving liquid in joints | Swelling risk near seams and cupping/finish issues over time. | Use “barely damp,” work in small sections, and dry immediately after washing. |
Also avoid harsh chemicals and abrasive scrubbers. Many hardwood care guides recommend avoiding steam and excessive moisture; additionally, sanding grit trapped under residue can make later cleaning feel harder, so the order of operations (vacuum → controlled cleaner → dry) is what keeps hardwood floors looking even.
Verdict / tip: the safest approach (with limits)
This method is the safest DIY route for surface sand and everyday gritty tracking because it prioritizes dry removal first, then controlled moisture cleaning with a pH-neutral hardwood cleaner. It also limits seam exposure by using a barely-damp microfiber mop and full drying.
That said, washing won’t “restore” a floor if the finish is already worn through. If you see dull patches where the coating seems thinned, if boards have gaps that changed after moisture exposure, or if sand has been ground for weeks (construction aftermath or repeated foot traffic), you may need refinishing or a professional assessment. Skip aggressive DIY deep-cleaning if your hardwood floors are improperly sealed, if you suspect water damage beneath the surface, or if the topcoat is peeling—adding moisture can worsen the problem.
One practical tip for hardwood floors: after you recover them, set a simple prevention loop—doormats at entries, shoes-off zones if possible, and a weekly “dry vacuum + microfiber touch-up” before grit embeds. As of 2026, this prevention-first approach remains more effective than frequent wet mopping for grit control.
Sand Grain Size Ranges and How Quickly They Can Abrade Finished Hardwood
| # | Grain fraction (Wentworth) | Diameter (mm) | Typical on-floor behavior | Dry-vac priority |
|---|---|---|---|---|
| 1 | Very fine sand | 0.0625–0.125 | Spreads easily, hard to see | ★★★★★ |
| 2 | Fine sand | 0.125–0.25 | Abrades finish texture | ★★★★☆ |
| 3 | Medium sand | 0.25–0.50 | Tracks deeper into micro-scratches | ★★★★☆ |
| 4 | Coarse sand | 0.50–1.0 | Quicker to vacuum, still abrasive | ★★★☆☆ |
| 5 | Very coarse sand | 1.0–2.0 | Less hidden, but still grinding | ★★★☆☆ |
| 6 | Granules (fine gravel) | 2.0–4.0 | Often visible; easier pickup | ★★☆☆☆ |
| 7 | Very coarse granules (coarse gravel) | 4.0–8.0 | Tracks less; impacts from shoes | ★☆☆☆☆ |
This size-based view explains why hardwood floors often feel gritty even when you only see “light dust”: very fine to medium sand (roughly 0.0625–0.50 mm by Wentworth-style ranges) is both hard to see and more likely to stay mobile on the finish. According to USGS/Wentworth-style particle size classifications, sand spans these diameter bands—so your best first move is still a careful dry vacuum.
Quick checklist: deep-clean sand from hardwood
| Step | What to do | Tools |
|---|---|---|
| 1 | Dry vacuum all sandy areas | Vacuum + soft brush attachment |
| 2 | Spot blot if needed | Microfiber cloth |
| 3 | Mop in small sections with barely-damp cleaner | pH-neutral hardwood cleaner + microfiber mop |
| 4 | Change/flip microfiber often | Clean mop heads/cloths |
| 5 | Dry thoroughly after cleaning | Dry microfiber towels |
Sources
– National Wood Flooring Association (NWFA) – wood floor cleaning/care guidance emphasizing pH-balanced products and avoiding excess moisture: NWFA, Wood Floor Cleaning & Maintenance guidance.
– Bona – Hardwood Floor Care/maintenance recommendations emphasizing proper cleaners and warnings about moisture/steam: Bona, Hardwood Floor Care & Maintenance.
– Manufacturer care guides (commonly emphasize pH-neutral cleaners and avoiding steam or soaking): Armstrong Hardwood Floor Care & Maintenance and Bruce/Armstrong Wood Care guidance.
If you remember one sequence for hardwood floors in 2026, make it this: dry-vacuum thoroughly to pull grit off the surface, deep-clean with a barely-damp microfiber mop and pH-neutral cleaner, then dry completely. This approach reduces both the scratch problem (abrasive sand) and the moisture problem (swelling risk at seams), giving you the quickest path back to a smooth, even finish.
Frequently Asked Questions
How do I deep clean hardwood floors to remove sand without damaging the finish?
Start by dry-sweeping or vacuuming with a soft brush attachment to pick up all loose sand before using any water. For the deep clean, use a hardwood floor cleaner diluted as directed, applied with a barely damp microfiber mop—never soak the wood. If sand is embedded in crevices, lightly scrub those areas with a microfiber cloth, then rinse with a minimal-water damp cloth to avoid leaving residue.
What’s the best way to remove sand grit from hardwood floors before mopping?
Vacuuming is usually the best first step because sand grit can scratch when it’s pushed around by mops. Use a vacuum attachment designed for hard floors and go over high-traffic areas multiple times, then follow with a dry microfiber dust mop. Only after the loose sand is gone should you proceed with a hardwood floor cleaner for a deeper clean.
Which cleaning solution works best for sand on finished hardwood floors?
A pH-balanced hardwood floor cleaner is the safest option for most finished hardwood floors and helps dissolve oily dirt without harming the finish. Avoid harsh degreasers, vinegar, or steam cleaners unless the manufacturer specifically approves them, as they can dull or damage finishes. For extra stubborn sand residue, use the cleaner in the recommended dilution and spot-clean with a microfiber cloth to lift grime safely.
Why does sand cause scratches on hardwood floors, and how can I prevent it during cleaning?
Sand acts like abrasive grit, so even small particles can grind into the wood’s finish and leave micro-scratches that build up over time. Prevent this by removing sand dry first (vacuum and dust mop) and using only a lightly damp mop during the wet-cleaning stage. Place doormats at entryways and consider a “no-shoe” rule to reduce future sand tracked onto hardwood floors.
How do I deep clean the edges, gaps, and corners where sand collects on hardwood?
Use a vacuum crevice tool or a soft bristle detail brush to lift sand from baseboards, floor seams, and corners. Then, dampen a microfiber cloth with hardwood floor cleaner and work along the edges to remove embedded grit without flooding the wood. Finish by wiping once more with a clean, lightly damp cloth to remove any cleaner residue, which helps the floor look uniform after deep cleaning.
📅 Last Updated: October 29, 2026 | Topic: How to deep clean hardwood floors to remove sand? | Content verified for accuracy and freshness.
References
- Wood flooring
- https://www.cdc.gov/coronavirus/2019-ncov/community/disinfecting-building-facility.html
- https://www.who.int/publications/i/item/cleaning-and-disinfection-of-environmental-surfaces-in-the-context-of-covid-19-interim-guidance
- 404 Error
- Hardwood | DIY Wood Flooring | Bruce
- https://scholar.google.com/scholar?q=hardwood+floor+cleaning+grit+sand Google Scholar
- https://scholar.google.com/scholar?q=impact+of+abrasive+particles+on+wood+floor+finishes Google Scholar
- https://scholar.google.com/scholar?q=surface+cleaning+wood+finish+microabrasion+detergent Google Scholar
[…] winner is a careful vacuuming routine followed by a barely damp microfiber mopping pass with a pH-neutral hardwood cleaner. You’ll also learn the one move to avoid—scrubbing dry grit—that turns sand into permanent […]