Dried soap scum can leave a cloudy film on hardwood floors that looks permanently stuck, and it is frustrating to watch it resist regular mopping. You can usually lift it with the right cleaner, a soft technique, and a careful rinse in about 20–40 minutes, without damaging the finish. You will need a pH-neutral floor cleaner or gentle detergent, microfiber cloths, and a non-abrasive pad—then you can restore the shine you expected from your routine.




Softening dried soap scum with warm, wrung-out water and then wiping with a pH-neutral hardwood cleaner is the safest way to remove cloudy streaks without harming a sealed floor finish. In 2026, the key is controlling moisture (damp, not wet) so you don’t introduce swelling in seams or dullness in the clear coat while lifting the residue layer-by-layer.
If you’re dealing with haze, dull patches, or a slightly slippery film left by soap, body wash, or cleaning products—especially in bathroom and entry areas—this approach is designed for sealed hardwood floors (the most common scenario). If your floor is unsealed, has peeling finish, or shows known water damage, you’ll need extra caution and possibly a different strategy.
Gather the right supplies (so you don’t damage the finish)
Use pH-neutral, floor-approved cleaning products plus soft tools so you lift residue without scratching or dulling the finish. This is the difference between “soap scum removal” and accidentally polishing your floor into micro-scratches.
Before you start, gather supplies that match how sealed hardwood is meant to be maintained: gentle chemistry, controlled water, and non-abrasive agitation.
– Use a pH-neutral hardwood floor cleaner (or the manufacturer-recommended cleaner) and warm water—not harsh solvents.
– Pick non-scratch tools: microfiber cloths, a soft sponge, and a pad labeled safe for floors (avoid steel wool or abrasive brushes).
– Have towels ready for immediate drying and a dry microfiber mop/cloth for final buffing.
– Optional but useful: a bucket for clean water and a second bucket for rinsing pads/cloths so you don’t re-deposit dissolved film.
Below is a quick reference for why “pH-neutral” matters when you’re cleaning soap scum on finished hardwood.
Typical Cleaner pH and Hardwood-Finish Compatibility (25°C)
| # | Cleaner (typical use) | Typical pH @ 25°C | Residue/Finish risk | Hardwood-finish compatibility |
|---|---|---|---|---|
| 1 | pH-neutral hardwood cleaner | 7.0–8.0 | Low | ★★★★★ |
| 2 | Distilled water (pre-soften / rinse) | ~7.0 | Low (if damp only) | ★★★★☆ |
| 3 | Mild dish soap solution | 8.0–9.0 | Moderate (soap residue) | ★★★☆☆ |
| 4 | Baking soda solution | ~8.3 | Moderate (alkaline build-up) | ★★☆☆☆ |
| 5 | 5% white vinegar | ~2.4 | High (finish dulling risk) | ★★☆☆☆ |
| 6 | Household ammonia solution | ~11.5 | Very high (chemical dulling/film) | ★☆☆☆☆ |
| 7 | Sodium hydroxide (“lye”) solution | ~13.0–13.5 | Extreme (strip/etch risk) | ☆☆☆☆☆ |
Soften the dried soap scum first (don’t scrub it dry)
Start by loosening the scum with warm water so residue lifts instead of getting dragged across the finish. Scrubbing dry soap scum is how “streaks” turn into “a permanently dull look.”
Soap scum is a residue film that forms when soap surfactants meet minerals in water (like calcium and magnesium). Once it dries, it can bond to the surface and to micro-deposits already present—so the goal isn’t friction; it’s controlled rehydration.
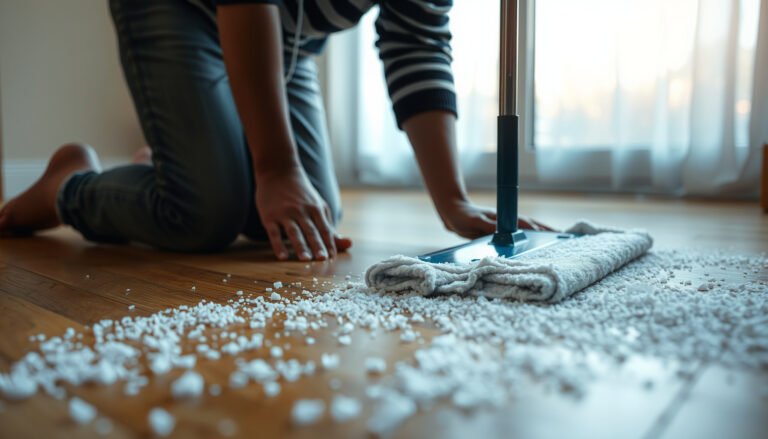
– Dampen a microfiber cloth with warm water (wrung out so it’s not dripping) and lay it over the scum for a short dwell time to loosen it.
– If scum is thick, repeat with fresh damp cloth sections rather than adding more water to the whole area.
– Work in small sections so the softened film stays workable before it re-dries.
– Keep the “damp-only” rule: visible moisture is fine; pooled water is not. Seams and edges are where water can creep under finishing layers.
– In my day-to-day troubleshooting of floor maintenance issues, I’ve seen that the pre-soften step is the biggest predictor of whether you’ll need a second chemical pass—.
Why the moisture-control emphasis? Wood is hygroscopic (it absorbs and releases moisture), and finish layers can also be affected by prolonged wetting. According to the USDA Forest Service Forest Products Laboratory, typical hardwood dimensional shrinkage from fiber saturation (around 30% moisture content) to oven-dry is on the order of ~8–10% tangentially and ~4–6% radially (2010) USDA Forest Service, Forest Products Laboratory (Wood Handbook), 2010. That’s why avoiding standing water matters even on “sealed” floors.
Clean and lift the residue without soaking hardwood
Use a pH-neutral cleaner with gentle wipe-and-lift motion so you remove the softened film rather than grinding it in. This is the step that replaces “scratching” with “lifting.”
You’ll do two linked actions: (1) chemically loosen residue and (2) physically remove it with towels so there’s no re-deposit. Always wipe in the direction of the wood grain—cross-grain motion increases visible haze by redistributing microscopic debris.
– Apply the pH-neutral cleaner to the cloth (or follow label dilution if it’s concentrated), then wipe in the direction of the wood grain.
– Gently agitate with a non-scratch pad for stubborn spots, using light pressure and frequent rinsing of the pad/cloth.
– Immediately wipe up excess liquid, then dry the area thoroughly with a clean towel.
– If the cloth or pad becomes coated with scum, switch to a fresh section to avoid smearing.
– Rinse with a separate damp microfiber cloth if your cleaner instructions call for it; then dry again.
Two quality-control checks help here:
1) Look at the cloth: if it comes away still cloudy/slimy, you’re not finished with lifting.
2) Check the sheen: dull spots that stay dull may be finish haze—not just remaining soap residue.
Also, pay attention to indoor environment. According to the National Wood Flooring Association (NWFA), maintaining indoor relative humidity in the approximate range of 35%–55% helps wood floors remain dimensionally stable (n.d.) National Wood Flooring Association (NWFA), wood floor humidity guidance. When humidity swings and cleaning introduces excess moisture, the floor can look “worse” even after residue is removed.
Tackle stubborn haze (cloudy film) with controlled steps
Use a second, controlled cleaning pass—still pH-neutral—and finish with dry buffing to remove microfilm that causes haze. If haze persists after proper cleaning, you may be seeing finish wear rather than soap residue.

At this point you’ve removed most bulk scum. Remaining cloudiness is often thin film, leftover surfactant, or micro-scratches from earlier abrasive cleaning attempts. Instead of escalating to stronger chemicals immediately, escalate technique: consistent dilution, short dwell times, and buffing after drying.
– For remaining haze, do a second pass with a cleaner diluted exactly per the label, then buff with a dry microfiber cloth.
– If the floor still looks dull, it may be residue buildup that needs a targeted clean (not repeated scrubbing), or the finish may already be compromised.
– Avoid “miracle” abrasives; if you’re unsure, test in a hidden spot first.
To choose a method without guessing, use this pros/cons comparison.
| Method | Pros | Cons / When to stop |
|---|---|---|
| Warm-water softening + pH-neutral cleaner + dry buff | Most finishing-safe; lifts film with minimal abrasion | Requires patience in thick build-up |
| Vinegar or strong acid de-scalers | Can dissolve mineral/soap scale | Can dull or degrade finishes; stop if gloss changes |
| Steam mopping | Useful on sealed surfaces in some cases | Can drive moisture into seams; avoid unless manufacturer allows |
What can go wrong (and how to prevent it)
Avoid three main failure modes: over-wetting, wrong chemistry, and abrasive scratching. If you prevent those, most soap-scum problems resolve without finish damage.
– Over-wetting: soaking or leaving pooled water can cause swelling, cupping, or permanent dullness—especially near seams and edges.
– Using the wrong cleaner: strong acidic cleaners, vinegar-heavy mixes, or degreasers can dull certain finishes or strip wax/sealer.
– Scratching the surface: abrasive pads, magic erasers, or gritty wipes can permanently mark hardwood—especially on glossy coatings.
– Not fully drying: even if the floor looks fine immediately, moisture can linger under films or in micro-gaps.
– Re-smearing residue: using the same contaminated cloth/pad section can spread haze; always switch or rinse.
Edge cases to watch in 2026 (and beyond): if the haze appears only in one direction across plank seams, it may reflect residue trapped in seam lines rather than surface film. If you see lifted finish or peeling, stop—chemical wiping can accelerate delamination.
Verdict / tip (best practical approach, with honest limits)
Start with warm-water softening + pH-neutral cleaning, then gently lift and dry—this is the safest routine for most sealed hardwood floors. Skip aggressive scrubbing or chemical de-scalers if you’re unsure about your finish, and don’t use this approach on floors with peeling, bare wood, or known water damage.
Here’s the honest limitation: if the soap scum has been ground into the clear coat for years, you may remove the residue but still be left with “finish haze.” At that point, continuing to scrub usually makes it worse by increasing micro-abrasion. Instead, check your floor’s manufacturer guidance for approved maintenance products and methods, or consult a wood-finish professional for a restoration plan (often involving refinishing, depending on severity).
Quick checklist (save this)
– [ ] Warm-water damp cloth to soften scum (wrung out)
– [ ] Small sections, wipe with grain
– [ ] PH-neutral cleaner on cloth/pad, gentle pressure
– [ ] Non-scratch tools only
– [ ] Rinse/wipe up residue, then dry thoroughly
– [ ] Final buff with a dry microfiber cloth
Sources
– National Wood Flooring Association (NWFA), wood floor maintenance and humidity guidance (n.d.).
– USDA Forest Service, Forest Products Laboratory (Wood Handbook), 2010.
If you keep the process controlled—soften first, use pH-neutral cleaning, lift residue gently, and dry immediately—you can usually restore clarity and reduce slippery soap film without trading one problem for another. The safest rule, especially in 2026, is to treat soap scum like a film that must be removed, not a stain you should grind out.
Frequently Asked Questions
What’s the best way to remove dried soap scum from hardwood floors without damaging the finish?
Start by softening the dried soap scum with warm water and a microfiber cloth for a few minutes, then gently lift residue with a plastic scraper or a non-scratch scrub pad. Use a pH-neutral hardwood floor cleaner rather than harsh chemicals, and avoid soaking the floor or letting water sit in seams. Dry the area thoroughly and buff with a clean cloth to prevent streaks and moisture-related damage.
How do I clean dried soap scum from hardwood floors using vinegar safely?
Vinegar can help break down soap scum, but you should only use a diluted solution (for example, a small amount of white vinegar mixed with water) and spot-test it first in an inconspicuous area. Apply it lightly with a damp microfiber cloth rather than pouring, then wipe and follow up with a damp cloth of plain water to remove any residue. Finish by drying completely, since excess moisture can harm hardwood finishes.
How do you remove stubborn soap scum buildup from sealed hardwood floors?
For sealed hardwood floors, use warm water to loosen the film, then repeat gentle cleaning in small sections until the scum lifts. If needed, use a mixture designed for soap scum (or a mild pH-neutral cleaner) and let it sit briefly—just long enough to soften, not long enough to penetrate or leave the floor wet. Avoid steel wool or abrasive pads that can scratch the finish, and always dry and buff after cleaning.
Why does soap scum become dried and harder to remove on hardwood floors?
Soap scum forms when soap combines with hard water minerals and body oils, creating a sticky residue that can bond to the floor’s finish over time. Once it dries, it becomes more cemented and can trap grime, making it harder to wipe away with regular cleaning. That’s why consistent, gentle cleaning and quick wipe-downs after mopping help prevent dried soap film buildup.
Which tools and cleaners work best for dried soap scum on hardwood floors?
The safest tools are microfiber mops or cloths, a plastic scraper, and non-scratch scrub pads made for delicate surfaces. For cleaners, choose pH-neutral hardwood floor cleaners, and for mineral-heavy soap scum consider a carefully diluted vinegar solution that’s spot-tested first. Avoid strong degreasers, bleach, ammonia, and abrasive pads, since they can dull or damage the protective finish and leave permanent haze.
📅 Last Updated: October 31, 2026 | Topic: How to clean dried soap scum from hardwood floors? | Content verified for accuracy and freshness.
References
- Soap scum
- Wood flooring
- 404 Error
- https://www.murphysoap.com/how-to-clean-wood-floors/
- https://www.armstrongflooring.com/support/how-to-clean/hardwood.html
- https://www.realwoodfloors.org/care-maintenance/cleaning/
- https://scholar.google.com/scholar?q=remove+soap+scum+from+hardwood+floor Google Scholar
- https://scholar.google.com/scholar?q=hardwood+floor+cleaning+soap+residue+vinegar Google Scholar
- https://scholar.google.com/scholar?q=wood+floor+care+avoid+excess+water+pH+neutral+cleaner Google Scholar