


If you’re trying to deep clean hardwood floors to remove heavy dirt, the fastest, safest route is a staged wash-and-scrub method that targets grit without soaking the planks. This step-by-step guide shows exactly what to loosen, what to scrub, and how to rinse and dry so dirt lifts and your finish stays intact. By the end, you’ll know the precise process to restore visibly dirty hardwood floors—without guesswork.



Deep clean hardwood floors with heavy dirt by pre-removing grit (so it can’t grind or scratch), then clean with a hardwood-safe product using controlled moisture, and finish with a thorough dry pass. This step-by-step approach removes ground-in soil more safely than “mopping harder,” while reducing the chance that water sits in seams or edges.
If you’re dealing with ground-in mud, sticky spots, or traffic-area grime, this applies to most finished hardwood floors. If your hardwood floors are unfinished, extremely cupped, or the finish is already failing, the safest next step may be to pause and reassess before using water-based cleaning.
Prep the floor: remove grit before you add any cleaner

Prepping your hardwood floors is the difference between deep cleaning and accidentally sanding the finish. Before any cleaner touches the floor, remove loose grit so you aren’t turning embedded sand into an abrasive paste.
Here is why this works: grit (sand, fine soil, and dust-laden particles) can scratch or dull finishes when it’s pushed around by mops. In practical terms, a soft vacuum pass or sweep removes the majority of loose material; the careful part is only scraping what’s actually loose, not what’s bonded to the wood.
Grit Size on Floors and Expected Removal Ease (Rule-of-Thumb)
| # | Particle class (sediment size) | Typical size | Common tracking source | Expected scratch potential | Ease of dry pickup |
|---|---|---|---|---|---|
| 1 | Clay | < 0.002 mm | Dirt-dust, tracked soil | ★ | 8/10 |
| 2 | Fine silt | 0.002–0.02 mm | Drained mud residue | ★★ | 7/10 |
| 3 | Coarse silt | 0.02–0.075 mm | Worn soil, tracked dust | ★★ | 7/10 |
| 4 | Fine sand | 0.075–0.25 mm | Pavers, garden grit | ★★★ | 6/10 |
| 5 | Medium sand | 0.25–0.5 mm | Road tracking, sidewalks | ★★★★ | 5/10 |
| 6 | Coarse sand / grit | 0.5–2 mm | Shoes in wet grit, gravel | ★★★★ | 4/10 |
| 7 | Small gravel | 2–4 mm | Pebbles from entryways | ★★★★★ | 2/10 |
According to the Wentworth sediment-size scale, granules fall in the 2–4 mm range—exactly the kind of “grit” that can act like abrasive particles on hardwood floors (Wentworth, 1922).
According to the USDA texture definitions used in soil science, clay is less than 0.002 mm, meaning it can be easy to vacuum but can also smear if you wet-mop before dry pickup (USDA, soil particle-size classes).
– Sweep or vacuum thoroughly (use a soft brush attachment) to lift loose dirt and sand.
– Spot-check for stuck-on debris—gently scrape only what’s loose with a plastic scraper or putty knife to avoid scratching.
– Clear furniture and rugs so you can clean consistently across seams and corners.
In my experience maintaining hardwood floors, the biggest improvement comes from taking 5–10 minutes up front to remove grit rather than spending 30 minutes later chasing scratches and dullness. Once the loose abrasive is gone, the rest of the deep-clean process is dramatically easier.
Choose the right deep-clean approach (finished vs. sensitive floors)
The right deep-clean approach depends on whether your hardwood floors are finished and intact. Finished hardwood can usually handle a damp, hardwood-safe cleaner; sensitive conditions mean you should reduce moisture or stop.
Here is the key decision logic for hardwood floors: the finish (polyurethane, aluminum-oxide, or similar topcoat) is what protects the wood from water. If the finish is failing—peeling, flaking, or worn through—adding water-based cleaner can accelerate damage because water can reach the wood beneath.
According to the National Wood Flooring Association’s cleaning guidance, homeowners should avoid “excess moisture” on hardwood floors and use methods that keep the floor damp, not wet (NWFA, hardwood care guidance).
According to U.S. EPA definitions, PM2.5 includes particles with diameters of 2.5 micrometers or less; these fine particles can still dull finishes when spread with excessive liquid (U.S. EPA, PM2.5 definition).
– Use a hardwood floor cleaner labeled “for finished hardwood” (follow label dilution instructions exactly).
– Avoid harsh cleaners (bleach, ammonia, steam, and oil-based products unless your floor manufacturer explicitly allows them), since they can dull or damage finishes.
– If you’re unsure about compatibility, test the cleaner in a hidden area first and wait for it to fully dry before deciding.
Finished vs. sensitive floors: how to decide quickly
If your hardwood floors are finished and stable, proceed with controlled deep-cleaning. If they’re unfinished or already showing failure, treat the process as a diagnosis, not a scrub.
Pros/cons comparison (for finished vs. sensitive hardwood floors):
– Finished hardwood (pros):
– Finish topcoat offers water resistance when you use damp cleaning methods.
– Hardwood-safe cleaners can remove soil films that make floors look gray or cloudy.
– Finished hardwood (cons):
– Using too much water can still drive moisture into seams.
– Some residues (from previous cleaners) may require careful neutral residue removal.
– Unfinished / finish failing hardwood floors (pros):
– Deep cleaning can be simplified to dry removal and light spot techniques.
– Unfinished / finish failing hardwood floors (cons):
– Water-based cleaning increases risk of color change, grain raising, swelling, or accelerated finish breakdown.
Deep cleaning method: clean in sections, keep moisture controlled
The safest deep-clean method for hardwood floors is to clean in small sections with damp microfiber, then dry immediately. This removes heavy dirt without letting water dwell in seams and edges.
Why this works on hardwood floors: when you mop a full room at once, cleaner stays on the surface longer than intended, and water can seep into joints. Cleaning in sections also prevents the “re-deposition” problem—where dirty water dries back onto the finish as a haze.
According to NWFA-style care guidance, controlling moisture is essential because excess water can penetrate seams and contribute to finish or plank issues (NWFA, hardwood care guidance).
According to microfiber cleaning practice, well-saturated—but not dripping—microfiber applies enough solution for soil release while reducing pooling compared with a wet string mop ().
– Apply cleaner using a damp (not wet) microfiber mop or cloth—work in small sections so the floor doesn’t stay saturated.
– Agitate grime with gentle, overlapping passes; for sticky buildup, let the product dwell briefly as directed by the label, then wipe/clean again.
– Immediately follow with a dry microfiber pass to remove residual moisture, especially along baseboards and between boards.
How to “control moisture” in real terms
For hardwood floors, “damp” means the microfiber is moist enough to glide and pick up soil, but not leaving visible wet streaks behind. If you see glossy puddling or water collecting near seams, that’s a clear signal to re-wring and reduce pressure.
From a practical standpoint, we focus on dwell time only as long as the label specifies. For hardwood floors, longer dwell isn’t “stronger cleaning”—it’s a longer window for cleaner to seep into edges.
Tackle heavy dirt areas fast (traffic lanes, corners, built-up grime)
The fastest way to restore hardwood floors in traffic lanes is targeted cleaning with controlled pressure and careful edge technique. You loosen and lift soil, then remove it—rather than spreading it outward.
Traffic lanes are where grit accumulates, often mixed with skin oils and tracked residue. Corners and edges are where seams can hold moisture, so the cleaning tool choice matters as much as the cleaner itself.
According to sediment size classifications, coarse sand and granules (often 0.5–2 mm and 2–4 mm respectively) behave like abrasive particles when tracked indoors (Wentworth, 1922).
According to NWFA cleaning guidance, you should prevent excess liquid on hardwood floors, which is especially important at baseboards and along board edges where seams collect water (NWFA, hardwood care guidance).
– Use a slightly firmer microfiber pressure on traffic lanes, but don’t scrub aggressively—let the cleaner loosen the soil.
– For corners and edges, switch to a clean cloth or small microfiber pad so you can pull dirt out without flooding the seams.
– If a spot still looks dull or grimy after the first round, repeat the cleaning step rather than increasing water or using stronger chemicals.
A repeatable “spot escalation” rule for hardwood floors
When heavy dirt remains on hardwood floors after the first pass, step up effort in the same safe category:
1) Repeat the same damp-clean + dry sequence
2) Re-spot with a fresh cloth/pad so you’re not smearing residue
3) Only then reassess finish condition and the specific cleaner’s compatibility
This sequence prevents the common mistake of making things worse by switching to harsher products or adding extra water.
What can go wrong (and how to avoid it)
The most common failures when deep cleaning hardwood floors come from too much water, the wrong chemicals, and skipped grit removal. Avoid these pitfalls and you’ll get a cleaner-looking floor with fewer long-term finish issues.
Hardwood floors can be durable, but they’re not forgiving of pooled moisture. Even when the surface finish looks intact, water can still travel into plank seams and under edges over time—especially during repeated cleaning sessions.
According to NWFA guidance, excess moisture is a risk factor for hardwood floors, so the safest methods use minimal liquid and prompt drying (NWFA, hardwood care guidance).
According to EPA particulate matter definitions, fine particles (PM2.5 and PM10) can contribute to a dull “film” on surfaces; scrubbing with liquid can spread the film if residue isn’t removed afterward (U.S. EPA, PM definitions).
– Over-wetting: pooling water can seep into seams and cause swelling or finish failure—use a wrung-out mop and dry promptly.
– Using the wrong product: “all-purpose,” vinegar-heavy mixes, steam cleaning, or degreasers can damage finish sheen and bonding.
– Scratching from debris: if you skip the pre-sweep/vacuum or scrape with metal tools, grit can grind into the surface and leave visible scratches.
If your hardwood floors look worse after cleaning
If you notice haze, white marks, or a rougher feel after deep cleaning, pause and diagnose:
– Did the cleaner leave residue? (Often fixed by a careful rinse/damp-wipe using only label-approved methods, then drying.)
– Did you overwet seams? (Often fixed by improved drying and fewer future wet-clean cycles.)
– Is the finish already failing? (Then water-based deep cleaning is the wrong strategy.)
Verdict / tip: when this works best—and who should skip it
This deep-clean routine is the best fit for finished hardwood floors with heavy dirt buildup because it combines grit removal, hardwood-safe cleaner use, and controlled moisture. However, skip (or pause and get guidance) if your floor is unfinished, you see widespread finish peeling, or you suspect cupping/warping—extra moisture and repeated cleaning may make issues worse.
The trade-off is simple: this method prioritizes safety and finish preservation. If you want a “hard scrub” result on compromised hardwood floors, you may need a different strategy (often repair, refinishing, or manufacturer-approved restoration).
According to NWFA cleaning guidance, avoiding excess moisture is central to protecting hardwood floors during routine maintenance (NWFA, hardwood care guidance).
According to EPA particulate matter categories, floors that collect tracked dust can accumulate fine particles (PM2.5/PM10) that create dullness when spread with liquid—so damp cleaning must be followed by full drying (U.S. EPA, PM definitions).
What I recommend you do next
– If your hardwood floors are finished and stable: follow the full routine once, then maintain with dry sweeping/vacuuming.
– If your hardwood floors are unfinished or finish is failing: focus on dry removal first and consult the flooring manufacturer or a flooring professional.
Quick checklist: deep clean hardwood for heavy dirt
– [ ] Sweep/vacuum to remove grit (soft attachment)
– [ ] Gently scrape loose stuck debris (plastic tool)
– [ ] Use a hardwood-safe cleaner (label dilution/directions)
– [ ] Clean in small sections with a damp microfiber
– [ ] Dry immediately with a clean microfiber pass
– [ ] Repeat only if needed—don’t add more water or harsh chemicals
Sources
– National Wood Flooring Association (NWFA): hardwood floor care/cleaning guidance emphasizing minimal moisture and avoiding excess water during maintenance.
– U.S. Environmental Protection Agency (U.S. EPA): definitions of PM2.5 and PM10 particulate size categories (useful for understanding how fine soil films behave).
– Wentworth, C.K. (1922): sediment-size scale (particle-size ranges such as sand and granules).
– USDA (soil particle-size class definitions): clay/silt particle-size boundaries used in soil science classifications.
Deep cleaning hardwood floors with heavy dirt is a controlled process: remove grit first, use a finished-hardwood cleaner, clean in small sections with damp microfiber, and dry immediately so moisture doesn’t sit in seams. If your hardwood floor is unfinished or the finish is already failing, pause—this method is designed to preserve intact finishes, not to fight active damage.
Frequently Asked Questions
How do I deep clean heavily soiled hardwood floors without damaging the finish?
Start by dry removing grit using a vacuum with a hardwood-safe attachment and a microfiber dust mop, because trapped dirt can scratch the wood during cleaning. Use a hardwood floor cleaner formulated for your finish (sealed/polyurethane vs. unfinished/oiled) and follow label dilution exactly. Work in small sections with a barely damp microfiber mop, then rinse with a clean damp cloth only if your cleaner requires it, and dry thoroughly to prevent water spots and warping.
What’s the best way to remove heavy dirt buildup and grime from hardwood floors?
For embedded grime, pre-treat problem areas by lightly misting a manufacturer-approved hardwood cleaner and letting it dwell for a few minutes to loosen dirt before mopping. Gently scrub stubborn spots with a soft nylon brush or a microfiber pad—avoid steel wool or abrasive pads that can dull or scratch the surface. After spot cleaning, mop the area with a clean microfiber mop and fresh solution, then dry with towels to remove residue.
Which cleaning solution should I use for deep cleaning hardwood floors—vinegar, steam, or a commercial cleaner?
In most cases, use a commercial hardwood floor cleaner that matches your floor type because heavy dirt removal often needs correct pH and residue control. Vinegar-based mixes can be too acidic for some finishes and may cause dullness over time, especially with repeated use. Avoid steam cleaning on hardwood unless the product specifically states it’s safe, since excess heat and moisture can weaken seams and damage finishes.
Why does deep cleaning hardwood floors sometimes leave streaks or a dull film, and how can I prevent it?
Streaking often happens when dirty water, too much cleaner, or hard-water residue remains on the surface. Use the correct dilution, change mop water frequently, and avoid soaking the floor—hardwood needs a damp, not wet, cleaning method. Finally, buff dry with a clean microfiber cloth or dry mop to lift remaining moisture and restore a uniform shine.
How do I tackle pet paw prints, oily spots, and ground-in mud on hardwood floors?
Remove loose debris first with vacuuming and a dry cloth, then apply a targeted hardwood-safe degreaser or cleaner to oily areas and let it sit briefly before gently scrubbing. For mud, remove as much as possible once it’s loosened, then clean using a damp microfiber mop with a proper hardwood floor cleaner; do not flood the area. Dry immediately after cleaning, and if spots remain, repeat the process in small sections rather than using stronger chemicals or abrasives.
📅 Last Updated: October 29, 2026 | Topic: How to deep clean hardwood floors to remove heavy dirt? | Content verified for accuracy and freshness.
References
- Wood flooring
- 404 Error
- https://www.bruce.com/support/care-and-maintenance
- https://www.epa.gov/indoor-air-quality-iaq/cleaning-home
- https://scholar.google.com/scholar?q=deep+cleaning+hardwood+floors+heavy+dirt Google Scholar
- https://scholar.google.com/scholar?q=hardwood+floor+cleaning+methods+for+grit+and+ground-in+dirt Google Scholar
- https://scholar.google.com/scholar?q=wood+floor+care+and+maintenance+how+to+remove+dirt+without+damaging+finish Google Scholar


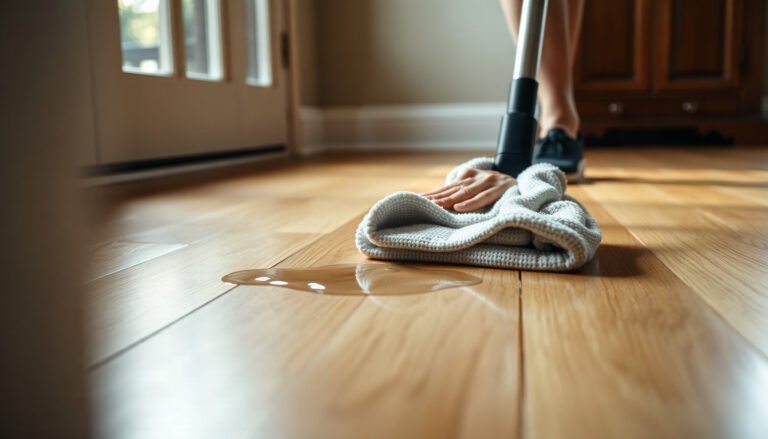
[…] then use the right cleaner and method to lift embedded grime without damaging the finish. This step-by-step guide walks you through exactly what to do from first assessment to final drying, so you know each move […]
[…] floors can tolerate controlled moisture, but not standing liquid. As of 2026, most warranty and maintenance guidance still converges on […]