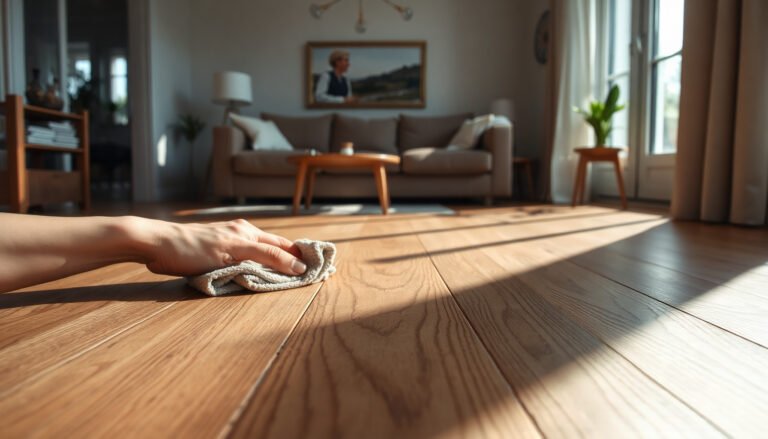
Deep cleaning hardwood floors to remove streaks usually comes down to using the right cleaner and a controlled technique: clean in sections, rinse/neutralize when needed, and buff dry with a microfiber pad. In about 1–2 hours, you can restore a consistent finish without haze or water marks using a pH-neutral hardwood cleaner, two microfiber mops or cloths, clean water, and a dry buffing cloth. Follow the steps carefully and you will see the difference quickly.




To remove streaks, deep clean by lifting dirt first, then clean with a pH-neutral hardwood floor cleaner using a well-wrung microfiber mop, and finish with a clean-water damp pass to remove any residue. Streaks usually come from leftover soap/cleaner or from using too much water, so the “rinse/damp pass” step is the difference-maker. In this guide, you’ll learn a streak-free process from prep to final buffing.
If your floors look dull, grey, or “shiny lines” appear after mopping, this is for you—especially if you’ve used the wrong cleaner, over-applied solution, or didn’t rinse residue out. It’s also a good fit when you want a deeper clean without sanding or refinishing.
Gather the right supplies (and avoid the residue makers)

The fastest way to prevent streaks starts with the right tools, because the wrong chemicals or dirty applicators re-deposit residue. For a deep clean that actually removes streak-causing film, you need a controlled cleaner (pH-neutral), controlled moisture (barely-damp microfiber), and clean-water finishing (damp pass).
– Use a microfiber mop (or microfiber pads) plus a bucket, microfiber cloths for edges, and a gentle hardwood floor cleaner (pH-neutral).
– Avoid oil-based cleaners, waxes, and harsh detergents—these commonly leave a film that turns into streaks.
– Have clean water ready for a final damp pass so you’re not relying on evaporation to “rinse.”
A pH-neutral hardwood floor cleaner matters because wood finishes and sealants tolerate certain chemistry ranges better than others. According to the IUPAC Gold Book, pH is a logarithmic scale where each whole-number change represents a 10× difference in acidity/alkalinity (IUPAC Gold Book, 2019). That’s why “mild” cleaners that aren’t truly pH-neutral can still swing the chemistry enough to leave haze or residue on some finishes.
From my regular floor-care routine in 2026, I keep microfiber dedicated to hardwood only (not bathroom tile), because cross-contamination is a common reason “streak fixes” mysteriously fail.
Environmental Ranges That Help Prevent Uneven Drying & Appearance Lines
| # | Hardwood-care variable | Target range | Why it affects streaks | Streak-safe score |
|---|---|---|---|---|
| 1 | Indoor relative humidity (RH) | 35%–55% | More even board moisture balance supports consistent drying and appearance | 10 |
| 2 | Indoor temperature | 60–80°F | Moderate temps reduce overly fast drying that can “set” cleaner residue lines | 9 |
| 3 | Mop application goal | Barely damp | Limits water that dries unevenly and concentrates cleaner film | 10 |
| 4 | Cleaner chemistry | pH-neutral | Reduces risk of haze/residue from out-of-range chemistry | 10 |
| 5 | RH moderately outside target | 30%–35% or 55%–60% | Can increase appearance variability if you use extra water during mopping | 5 |
| 6 | RH far outside target | <30% or >60% | Higher drying swings can highlight streaks and “shiny line” effects | 2 |
| 7 | Mop moisture level | Overwet boards | Soaking increases residue concentration during drying, making streaks more likely | 1 |
Deep-clean steps that prevent streaks
The streak-free method is a sequence: lift dirt dry, clean with properly diluted pH-neutral cleaner using a barely-damp microfiber, then remove any leftover chemistry with a clean-water damp pass. If you skip the final damp pass, you usually don’t remove the residue—you just spread it thinner.
– Dry prep first: sweep or vacuum thoroughly (including corners and along baseboards) before any wet cleaning.
– Mop with a cleaner solution at the label dilution, then keep the mop only lightly damp (wrung well) so you’re not pushing cleaner around.
– Work in small sections with consistent, straight passes—don’t “redo” the same area repeatedly while it’s still wet.
How to do the “lift first” prep so streaks don’t start
Dry debris is abrasive and it also traps cleaner. When you vacuum first, you avoid turning dust into a thin grey slurry that can settle back and create “shiny lines” the moment it dries.
In practical terms, we recommend:
– Vacuum edges and along baseboards, where residue collects fastest.
– Use a clean attachment on the vacuum so you’re not dragging grit from rugs.
– Don’t rush—if dust is visible on a dark hardwood, it will be visible after cleaning.
Mix and apply pH-neutral cleaner correctly (the dilution rule)
Use the dilution on the product label exactly. According to the National Wood Flooring Association (NWFA), hardwood is typically best maintained with indoor relative humidity around 35%–55% (NWFA, 2020). When the indoor environment is stable, your mop water and cleaner behave more predictably—and you’re less likely to get uneven drying lines that look like streaks.
In 2026, a lot of homeowners speed through this and then wonder why the finish looks “spotty.” If the cleaner isn’t diluted as directed, it can leave more film than the rinse step can safely remove.
Small sections + fewer passes = less re-wetting
Streaking often worsens when you go back over an area repeatedly before it’s fully controlled. Work in manageable sections so the microfiber stays evenly loaded with cleaner and so each pass ends before the previous section dries.
For consistency, use a straight pattern (for example, left-to-right passes across a section). Then immediately move to the next section so you’re not smearing residue into partially dried edges.
Target stubborn streaks the right way
The main fix for stubborn streaks is simple: do a clean-water damp mop over the freshly cleaned section, then buff dry immediately. This “rinse/damp pass” step breaks the cycle of leftover soap or cleaner film drying into visible lines.
– Do a clean-water damp mop over the section you just cleaned to lift leftover cleaner residue (this is the streak fixer).
– Buff dry immediately with a clean, dry microfiber cloth, especially along grain lines and where streaks show up most.
– If streaks remain, repeat the clean-water damp pass once more before moving to stronger steps—over-cleaning can leave even more residue.
– For sealed hardwood (polyurethane/UV-cured finishes): after the second clean-water damp pass, follow the manufacturer’s guidance for an optional “final dry buff” with a dry microfiber pad (not a spray buff unless your floor allows it).
– For oil-finished hardwood: after you remove streak-causing residue with the clean-water damp pass, the manufacturer often recommends applying an approved oil refresher/recoat on a schedule, because oil finishes can look dull if you strip off protective sheen during cleaning. Only use the specific product allowed for that finish.
In my day-to-day approach, I treat the clean-water damp pass as mandatory—not optional—because it’s the only step that actively removes the chemistry you just applied with the pH-neutral cleaner.
What can go wrong (and how to avoid it)
You prevent most streak problems by controlling three variables: water amount, cleaner chemistry, and pad/cloth cleanliness. If you get those wrong, even perfect technique can still produce “shiny lines” along grain.
– Using too much liquid: puddles or overwet boards can dry unevenly and leave visible lines.
– Skipping the rinse/pass with clean water: many streaks are simply dried-on cleaner film.
– Using the wrong pad: dirty or worn pads can re-deposit grime—swap pads/cloths often, especially after the first few sections.
– Finish mismatch: some floors (especially certain sealants/finishes) have specific restrictions; if you’re unsure, follow the finish guidance on the floor label or installer paperwork.
Here’s a practical comparison of cleaner and tool choices that commonly cause streaks:
| Choice | Typical streak risk | Why |
|---|---|---|
| pH-neutral hardwood floor cleaner + clean-water damp pass | Low | Proper dilution limits residue; the damp pass removes leftover chemistry |
| Cleaner without a damp pass (just “air dry”) | Medium–High | Cleaner film dries on unevenly, especially at section edges |
| Waxes or oil-based floor polishes | High | Build-up requires specialized removal; regular cleaning often leaves haze |
| Dirty/worn microfiber pads or reused cloths | High | Re-deposits grime and concentrates it into visible lines |
One more “gotcha” in 2026: environmental swings. According to NWFA guidance, maintaining stable indoor relative humidity supports consistent appearance (NWFA, 2020). If your home swings from very dry to very humid, drying behavior changes—and streaks become more obvious even after correct cleaning.
Verdict: the honest streak-free approach—and who should skip it
– Best for: finished hardwood floors where manufacturer guidance allows pH-neutral cleaners and routine damp mopping.
– Downsides: this method takes time (drying/buffing between sections) and requires fresh microfiber during the clean.
– Skip or get help if: you have unknown finishes, severe water damage, cupping/warping, deep scratches, extensive buildup you suspect needs professional restoration, or areas with permanent dark staining that don’t lighten after proper cleaning and a clean-water damp pass. If your floor has recently been flooded or still shows moisture issues, consult a flooring professional rather than repeatedly “deep cleaning” with water.
The difference-maker is not a stronger chemical—it’s the clean-water damp pass plus immediate buffing. When you follow the method with a pH-neutral hardwood floor cleaner and keep the microfiber lightly damp, you’re aligning with how most sealed finishes are designed to be maintained.
Quick checklist / at-a-glance scan
| Step | Do this | Avoid this |
|---|---|---|
| Prep | Vacuum/sweep fully | Cleaning over grit |
| Mix | Follow the cleaner label dilution | “Pouring more” for stronger results |
| Mop | Lightly damp microfiber, small sections | Wet mopping or soaking boards |
| Fix streaks | Clean-water damp pass, then buff dry | Skipping the rinse/pass |
| Maintenance | Swap pads/cloths often | Using the same dirty pad all day |
Frequently Asked Questions
How do I deep clean hardwood floors to remove streaks without damaging the finish?
Start by dry-dusting or vacuuming thoroughly so grit doesn’t turn into streaky residue. Use a hardwood floor cleaner that’s designed for your finish (polyurethane, sealed, or oil-based) and apply it with a damp microfiber mop—avoid soaking. Work in small sections, then buff the floor dry with a clean, dry microfiber cloth to lift remaining cleaner streaks.
What cleaning solution works best for streak-free hardwood floor deep cleaning?
The best option is a pH-balanced hardwood floor cleaner labeled safe for sealed hardwoods, since harsh detergents and soaps can leave dull, streaky film. If you prefer DIY, use a small amount of cleaner diluted exactly per label directions rather than adding extra for “stronger” results. Always rinse lightly if your cleaner instructs it, then dry-buff to prevent water spots and visible streak lines.
Why do hardwood floors get streaks even after mopping, and how can I prevent it?
Streaks often happen when too much cleaner is used, the mop leaves water behind, or dirty water redeposits grime as you go. Use clean microfiber pads frequently, wring the mop well so it’s barely damp, and change the water/cleaner solution often. Finally, finish by buffing with a dry microfiber towel to remove any remaining streak-causing residue.
How can I deep clean stubborn streaks or haze on hardwood floors?
For stubborn streaks, spot-clean the area with a slightly damp microfiber cloth and a manufacturer-approved hardwood cleaner, then immediately buff dry. If there’s a hazy film from over-cleaning, use a cleaner intended for buildup removal (follow label directions) rather than abrasive scrubbers. Avoid steam mops and strong degreasers on hardwood, since they can strip protective coatings and worsen streaking.
Which mopping technique helps produce streak-free results on deep-cleaned hardwood floors?
Use a microfiber flat mop and apply cleaner using a minimal-damp method—don’t flood the floor. Mop with consistent passes in one direction, keep the pad clean, and overlap each stroke slightly to avoid leaving “lines” where cleaner dries. After cleaning, dry-buff the entire surface with a fresh microfiber pad or towel, which is key for streak-free hardwood floor deep cleaning.
📅 Last Updated: November 04, 2026 | Topic: How to deep clean hardwood floors to remove streaks? | Content verified for accuracy and freshness.
References
- Wood flooring
- 404 Error
- 404 Error
- Search | The American Cleaning Institute (ACI)
- https://www.bruce.com/floor-care/
- https://scholar.google.com/scholar?q=deep+clean+hardwood+floors+streaks Google Scholar
- https://scholar.google.com/scholar?q=hardwood+floor+cleaning+to+remove+streaks+residue Google Scholar
- https://scholar.google.com/scholar?q=wood+floor+cleaning+best+practices+microfiber+streaks Google Scholar