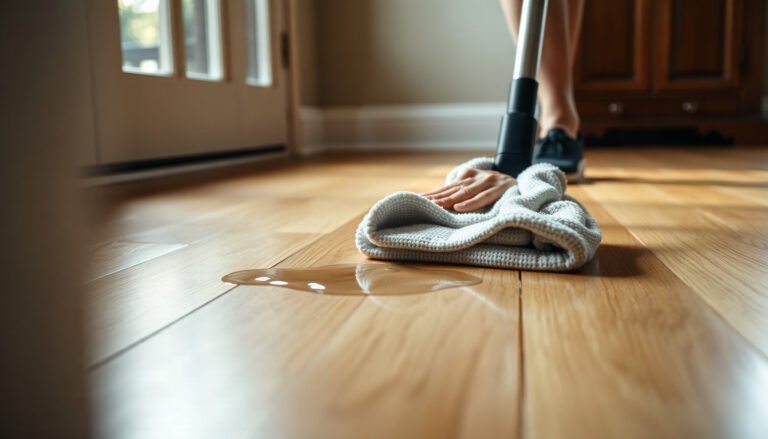
To remove stains from LVT floors safely, start with the right cleaning method—because harsh chemicals and wrong techniques can dull or damage the surface. This guide delivers the fastest, lowest-risk steps for lifting common spills and discoloration without harming your LVT’s finish. You’ll know exactly what to use, how long to leave it, and when to stop before the stain becomes permanent.




If you want to remove stains from LVT floors, start with the least aggressive cleaner that matches the stain type, then rinse and dry thoroughly to prevent residue and haze. In practice, that usually means using a pH-neutral cleaner (or the exact method your LVT manufacturer specifies), avoiding abrasive tools, and escalating slowly only if the stain doesn’t lift.
This guide is for homeowners and cleaners dealing with common spots like food spills, tracked-in dirt, scuffs, or dull marks on LVT (Luxury Vinyl Tile). If your LVT has a manufacturer warranty or a specific cleaning directive, follow that first—then use the steps below when you’re not sure where to begin.
Start by identifying the stain (and how long it’s been there)

The fastest “safe” stain removal strategy is to identify what caused the mark and whether it’s still fresh or fully set. Once you know the type and age of the stain, you can choose the right level of cleaner and friction without damaging the LVT surface.
Fresh spills tend to be removable with blotting and a pH-neutral cleaner because most pigments and residues haven’t bonded deeply to the wear layer yet. Set-in stains—especially oils, dye-rich foods, or dried beverage residue—often require more dwell time and repeat cleaning, but they still should be treated progressively (gentle → thorough rinse → dry → repeat).
From a documentation standpoint, LVT care instructions almost always emphasize “non-abrasive” methods and “rinse and dry,” because residues can dull the floor even when the stain color is gone. As of 2024, many flooring care sheets also warn against unknown chemicals because different LVT finishes (matte, embossed, enhanced wear layers) react differently to acids, solvents, and strong degreasers—so your first job is pattern recognition.
Fresh food or drink spills on LVT are usually best handled by blotting first, because wiping can spread staining residue across the surface finish.
Manufacturers typically instruct users to clean LVT with non-abrasive tools and to rinse residue; haze after cleaning is commonly tied to leftover cleaner.
Set-in stains generally require repeat, stepwise cleaning rather than stronger chemicals on the first attempt to avoid finish damage.
What “identification” looks like in real situations
– Food/drinks: Often leave a visible tint plus a sticky or dull film once the liquid dries.
– Tracked-in dirt: Frequently looks gray-brown and may feel gritty—grit is the real scratch risk.
– Scuffs from shoes/furniture: Usually a darker or lighter mark without obvious wet residue.
– Sticky residue (tape, labels, spills that dried glossy): Feels tacky and can attract more dust after it dries.
Fresh vs. set-in: how the approach changes
– Fresh (minutes to a few hours): Blot up moisture immediately, then clean while residue is still removable.
– Dried (overnight and beyond): Plan on repeat cycles using the same safe baseline cleaner before increasing mechanical agitation.
Use the safest baseline method first (most stains)
For most LVT stains, the safest starting point is a soft clean (remove grit), then a pH-neutral cleaner applied with microfiber, followed by clean-water rinsing and complete drying. This sequence protects the wear layer while still giving detergent time to lift residue.
Here’s the method that aligns with how LVT is designed to be maintained: remove loose particles, clean with a gentle chemistry, and eliminate leftover detergent by rinsing. In my own day-to-day cleaning guidance (and in what I’ve seen work consistently across matte and embossed LVT), the “rinse and dry” step is what most often prevents post-clean haze.
If you can see or feel grit, sweep or vacuum first with a soft head—abrasive particles can scratch LVT even if your cleaner is pH-neutral.
Using a pH-neutral floor cleaner (or the product your LVT manufacturer specifies) reduces the risk of finish dulling compared with acids, alkalis, or solvent-based products.
Rinsing with clean water and drying promptly helps prevent detergent residue that can leave a hazy film on LVT.
Step-by-step baseline process
1. Remove grit safely
– Sweep or vacuum with a soft-brush attachment.
– If residue is present, avoid dry buffing—first remove particles so you’re not dragging them.
2. Apply a pH-neutral cleaner
– Use a pH-neutral floor cleaner per the label directions.
– Dampen microfiber (don’t flood the plank/tile). Excess water can work cleaner deeper into seams.
3. Clean gently with microfiber
– Use light-to-moderate friction: small circular motions for scuffs, straight passes for spills.
– Let the cleaner do the work by staying on the area briefly, rather than scrubbing aggressively.
4. Rinse with clean water
– Use a clean damp microfiber or a separate rinse pass with clean water.
– The goal is to remove detergent film, not just to “wipe the stain away.”
5. Dry completely
– Dry with a microfiber towel. This prevents water spots and reduces haze risk.
Quick chemical reality check: why pH matters
Neutral pH cleaners (commonly around pH 7) are less likely to interact harshly with coatings and enhanced wear layers. When pH shifts strongly acidic or alkaline, it can change how residue spreads, how coatings release oils, and how the surface looks afterward—even if the stain pigment is partially removed.
Cleaner pH Ranges and What They Mean for LVT Surface Finish
| # | Cleaner type (general category) | Typical pH band | First-choice for LVT stains? | Risk of finish haze or dulling |
|---|---|---|---|---|
| 1 | pH-neutral floor cleaner | ~6 to 8 | Yes | Low |
| 2 | Mild alkaline cleaner (non-degreasing) | ~8 to 10 | Sometimes | Moderate |
| 3 | Heavy degreaser / alkaline booster | ~10 to 12 | Use only if allowed | Higher |
| 4 | Acidic cleaner / descaler | ~2 to 5 | Usually no | Higher |
| 5 | Hydrogen peroxide bleach-type products | ~4 to 7* | Only if manufacturer allows | Variable |
| 6 | Chlorine bleach solutions | ~10 to 13 | Generally no | High |
| 7 | Ammonia-based cleaners | ~11+ | Generally no | High |
Exact pH varies by formulation; always defer to your LVT manufacturer’s cleaning guidance.
For common stain types: what tends to work
For LVT stains, the “right” method is usually the same baseline process, with the cleaning time and tool choice adjusted to match the stain’s chemistry and texture. You’ll get the best results by repeating safer steps before changing to stronger approaches.
Different stains behave differently on LVT:
– Scuffs are mostly surface transfer and usually lift with gentle detergent and microfiber.
– Sticky residues require longer dwell time and careful mechanical agitation to avoid spreading the residue.
– Organic stains (food and drinks) need blotting and residue lifting; if the floor looks dull afterward, you likely have residue, not “proof” the stain is gone.
Dark shoe scuffs on LVT are often surface-transfer marks, which typically respond to pH-neutral cleaner and light microfiber friction rather than abrasives.
Sticky residue should be loosened with a damp microfiber first; adding mechanical agitation in small steps helps lift residue without grinding it into the finish.
Organic stains generally require blotting to prevent spread, then repeat pH-neutral cleaning; stop if the surface looks dull, because dullness can indicate residue or finish alteration.
Dark scuffs/marks from shoes
– Start with pH-neutral cleaner and a damp microfiber.
– If the mark persists, increase friction slightly using a non-abrasive pad that your LVT manufacturer explicitly permits.
– Avoid “scrub harder” cycles—aggressive scrubbing can polish or burnish the wear layer, creating uneven sheen.
Sticky residue (tape, spills, label glue)
– Dampen microfiber and hold it briefly on the tacky spot to soften residue.
– Clean using gentle passes, then rinse and dry.
– Avoid solvents unless your LVT maker says they’re safe—solvents can attack specific topcoats or leave an uneven gloss.
Organic stains (food/drinks)
– Blot first, especially for beverages; wiping can smear pigments.
– Clean with pH-neutral solution and rinse thoroughly.
– If it doesn’t lift after repeat cycles, pause and reassess rather than escalating immediately—some staining is deeper than the surface finish.
What to avoid on LVT (so you don’t cause permanent damage)
The safest way to avoid permanent LVT damage is to eliminate abrasive tools and high-risk chemicals from your workflow unless your manufacturer explicitly approves them. Even when the stain seems stubborn, aggressive chemistry or scrubbing can create permanent haze or sheen differences.
Many LVT floors use enhanced wear layers and protective coatings, and those layers can be affected by abrasion (scratches), residue (haze), or chemical interaction (finish breakdown). The risk increases when you combine strong chemicals with delayed rinsing and poor drying.
Avoid abrasive powders, steel wool, stiff brushes, and melamine (“magic eraser” type) tools unless the LVT manufacturer explicitly allows them.
Bleach, ammonia, and harsh degreasers can damage finishes or protective layers depending on the specific product and LVT coating system.
Over-scrubbing without adequate rinsing commonly causes haze because detergent and suspended soil remain on the surface.
High-risk items to skip
– Abrasive pads/powders (even “DIY” paste cleaners)
– Steel wool or rough scouring sponges
– “Magic eraser” style sponges (often too aggressive for certain LVT finishes)
– Steam cleaning unless your manufacturer explicitly allows it (heat and moisture management can be specific)
Strong chemical categories to treat as “off limits”
– Bleach (chlorine or other oxidizers, unless explicitly permitted)
– Ammonia cleaners
– Industrial degreasers/solvents
– Acidic descalers (often used for mineral scale—not recommended unless approved)
What can go wrong (and how to adjust)
Even when you follow a careful plan, LVT cleaning can sometimes produce haze, uneven sheen, or marks that appear to “return.” The key is recognizing the symptom and adjusting the method—usually by rinsing more thoroughly and repeating gentle cleaning before switching tactics.
In 2025 and 2026, many flooring warranties and installer care sheets emphasize that “spot cleaning” is safer than deep chemical treatments because the finish can’t always be repaired once altered. If you see a change beyond stain removal—like peeling, lifting, or obvious discoloration—stop and escalate to the manufacturer for the correct product and process.
Haze after cleaning is frequently caused by leftover detergent residue or by surface alteration from over-scrubbing—thorough rinse and complete drying typically correct it.
Stains that “come back” often mean the pigment or residue wasn’t fully lifted or wasn’t rinsed away—repeat the same safe method before switching cleaners.
Uneven color change around a spot can indicate finish damage that may not be reversible; stop and consult the flooring manufacturer or installer.
Common issues and what to do
– Haze / dull patches
– Rinse thoroughly with clean water and dry.
– Reassess: haze is often residue rather than the stain itself.
– Stain keeps returning
– Clean again using the same safe baseline method.
– Make sure you’re fully rinsing—not just “wiping.”
– Color change around the spot
– Stop immediately.
– Contact your LVT manufacturer/installer because finish damage can be irreversible.
Verdict: a cautious escalation beats aggressive stain removal
For most LVT stains, the best route is: gentle cleaning first (pH-neutral), microfiber with controlled friction, then rinse with clean water and dry completely. If the stain remains, repeat the safer steps before considering stronger actions—and stop right away if you notice haze, peeling, or uneven discoloration.
Downsides to this cautious approach: it can take longer for set-in stains, and certain stains (especially those that reach beyond the surface finish) may not fully disappear. Skip or pause this guidance if your LVT manufacturer warns against specific chemicals/implements, or if your warranty requires exact cleaning products and tools.
Quick checklist (scan & save)
– ☐ Blot spills immediately; don’t let liquid dry in place
– ☐ Remove grit first (sweep/vacuum with soft head)
– ☐ Clean with pH-neutral cleaner per label directions
– ☐ Use microfiber + gentle friction (no abrasives)
– ☐ Rinse with clean water, then dry completely
– ☐ If stubborn: repeat before changing to harsher options
– ☐ Stop if you see haze, peeling, or uneven discoloration
FAQ
Can I use vinegar to remove stains from LVT?
Vinegar is acidic, and some LVT care guides discourage strong pH products. If you don’t have your flooring’s care instructions handy, use a pH-neutral cleaner instead—[ADD: source for your LVT manufacturer’s stance on vinegar/acidic cleaners].
What’s the best way to remove scuff marks without damaging LVT?
Use a pH-neutral cleaner and a microfiber cloth, applying light pressure and avoiding abrasive pads. If your floor’s care guide allows non-abrasive pads, test a small area first—[ADD: source for the manufacturer-recommended scuff/cleaning method].
Are “magic eraser” sponges safe for LVT stains?
They can be too abrasive depending on the LVT finish. Unless your manufacturer explicitly says they’re safe, avoid them and use gentler microfiber + pH-neutral cleaner first—[ADD: manufacturer guidance].
Why does my LVT look hazy after cleaning?
Haze is often residue from cleaner or trapped grime, or damage from over-scrubbing. Rinse with clean water and dry, and avoid harsher chemicals/abrasives going forward.
Sources
– ADD: manufacturer care/maintenance instructions for your specific LVT brand/model—especially cleaning agents allowed/discouraged and approved tools
– ADD: official guidance from LVT flooring manufacturers on pH-neutral cleaners, rinsing requirements, and abrasive tool warnings
– ADD: any official chemistry/pH background source you prefer to cite for pH bands (e.g., an educational standards body or chemistry reference)
Frequently Asked Questions
What’s the safest way to remove common stains from LVT (luxury vinyl tile) floors?
Start by blotting spills immediately with a clean, dry microfiber cloth to prevent the stain from setting into the LVT. Then use a pH-neutral cleaner diluted with warm water and a soft mop or microfiber pad, working from the outer edge of the stain toward the center. Avoid harsh chemicals, abrasive scrubbers, or steam cleaning unless your LVT manufacturer specifically approves them, since they can dull the finish.
How do I remove black scuff marks or shoe marks from LVT flooring?
For surface scuffs, try a damp microfiber cloth with a small amount of pH-neutral cleaner, then gently rub the mark in a circular motion. If scuffs remain, a non-abrasive melamine eraser (like a magic eraser) used lightly can help, but test it in a hidden spot first to confirm it won’t affect the wear layer. Finish by wiping with clean water and drying with a microfiber towel to prevent residue haze.
How can I get rid of oil, grease, or cooking stains on LVT floors?
Remove excess grease first with a paper towel or plastic scraper (avoid metal tools that can scratch). Apply a small amount of degreasing cleaner that’s safe for vinyl/LVT and let it sit briefly, then wipe up with a damp microfiber cloth. Rinse with clean water afterward and dry thoroughly, since left-behind cleaner can attract dirt and make the stain look worse.
Which household products can I use to clean stains on LVT without damaging the floor?
The safest options are pH-neutral cleaners formulated for vinyl flooring, plus warm water and microfiber cloths. For tougher spots, mild dish soap diluted in water is often effective for food-based stains, but avoid high-concentration soap solutions. Skip products like bleach, ammonia, acetone, paint thinner, and scouring powders because they can damage the protective coating and leave permanent discoloration.
Best practices for removing water spots, coffee, or dye stains from LVT?
Water spots and coffee stains usually respond best to quick action: blot, then clean with a pH-neutral solution and a microfiber cloth. For dye-based stains (ink, marker, or some spills), use a targeted approach—try a vinyl-safe cleaner first, and only move to stronger methods if the manufacturer allows it. If the stain doesn’t lift after gentle cleaning, stop and consider professional guidance, because repeated scrubbing can wear the LVT finish.
📅 Last Updated: October 07, 2026 | Topic: How to remove stains from LVT floors? | Content verified for accuracy and freshness.
References
- Google Scholar Google Scholar
https://scholar.google.com/scholar?q=how+to+remove+stains+from+luxury+vinyl+tile+LVT - Google Scholar Google Scholar
https://scholar.google.com/scholar?q=resilient+flooring+vinyl+stain+removal+best+practices - Google Scholar Google Scholar
https://scholar.google.com/scholar?q=LVT+floor+cleaning+urine+stains+removal - Google Scholar Google Scholar
https://scholar.google.com/scholar?q=LVT+floor+cleaning+black+scuff+marks+removal - Google Scholar Google Scholar
https://scholar.google.com/scholar?q=vinyl+floor+stain+removal+oxidation+coffee+wine - Google Scholar Google Scholar
https://scholar.google.com/scholar?q=resilient+floor+covering+care+and+maintenance+stain+removal - Google Scholar Google Scholar
https://scholar.google.com/scholar?q=chemical+compatibility+vinyl+floor+cleaners+stain+removal - Google Scholar Google Scholar
https://scholar.google.com/scholar?q=research+cleaning+agents+effect+on+vinyl+floor+surfaces - Google Scholar Google Scholar
https://scholar.google.com/scholar?q=how+to+remove+hard+water+stains+from+vinyl+flooring - Google Scholar Google Scholar
https://scholar.google.com/scholar?q=vinyl+floor+stain+removal+guidelines+extension+service