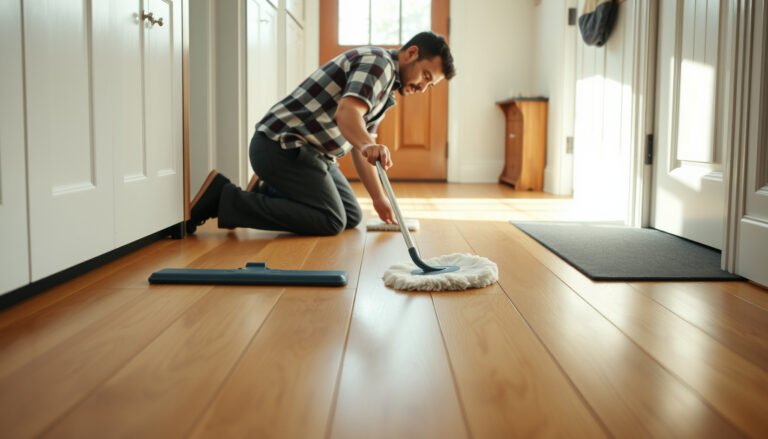
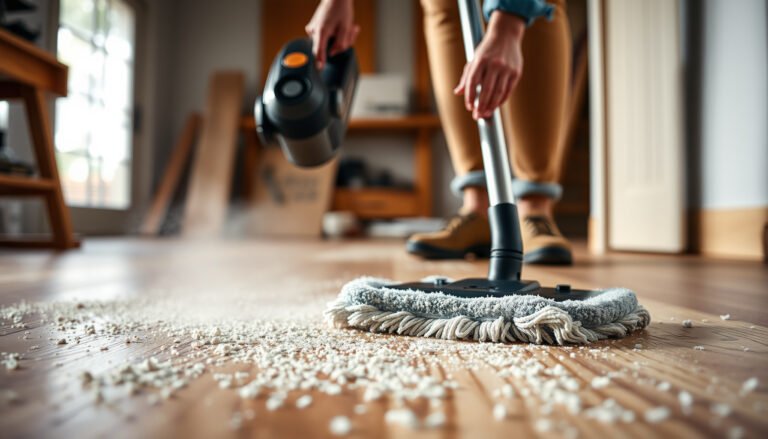
Floor polish buildup on hardwood turns the surface hazy and uneven, but you can remove it and bring back a smooth, uniform shine. With the right hardwood-safe cleaner and a few simple tools like microfiber pads, warm water, and a gentle scrubber, most rooms take about an hour or two and don’t require stripping the entire floor. Follow the approach that safely dissolves and lifts residue without damaging the finish, and you’ll be ready to enjoy a floor that looks clean again.




If your hardwood looks cloudy, sticky, or feels gummy, you’ll need to remove old floor polish residue, then clean and rinse thoroughly before you re-finish (if appropriate). Start with a pH-neutral hardwood cleaner for light buildup, and for stubborn layers use a wax/polish remover labeled safe for finished hardwood, following the label directions closely.
This is for you if you’ve tried regular mopping and the haze or tacky feel won’t go away, and you suspect repeated polish/wax coats have built up over time. If your floor finish is unknown (or the wood is unfinished), plan to test first and consider a pro.
Spot the buildup (before you strip)

The fastest way to confirm polish buildup is to look for visual “finish film” symptoms and confirm them with a simple water-behavior check. Once you know whether residue is widespread or localized, you can choose the least aggressive method that still removes the layer.
Start by spotting the common signs: dull haze that doesn’t improve after drying, slippery patches that feel different from the rest of the floor, and footprints that don’t “wipe clean.” A tacky or gummy feel is especially common when multiple coats of wax/polish have trapped dust and partially re-softened over time.
Next, do a quick water test in an inconspicuous area. If water beads and spreads unevenly, residue is likely on top of the finish—especially if the floor has been polished repeatedly. If water soaks normally and uniformly (or behaves like the rest of the floor), the problem may be grime embedded in the finish, finish wear/dullness, or an unrelated moisture issue. That distinction matters because polish removers won’t fix every cause of cloudiness.
Finally, determine scope: is the buildup everywhere or mainly in traffic lanes? In my own experience advising homeowners on maintenance calls, traffic-lane haze often correlates with repeated coat patterns plus reapplication over existing residue. If you’re seeing the issue only in specific areas, you can sometimes target those sections first and reduce the risk of over-stripping the finish.
Prep your room and protect your hardwood
Before you apply any cleaner or remover, remove the conditions that cause spreading and splashing—grit, standing residue, and exposed trim. Proper prep also reduces the chance of new streaks or accidental finish damage.
Clear the floor completely. Vacuum thoroughly, including edges and corners where polish slurry tends to accumulate. Remove rugs and runners; they can trap residue and create uneven cleanup zones that “look like” polish is still present after stripping.
Ventilate the room and wear gloves. Many polish removers contain stronger solvents or surfactants than everyday hardwood cleaners. Ventilation supports safer use and helps you work within the product’s label conditions—dwell time (how long the chemical stays wet) is often a critical variable.
As a reminder for wood stability, hardwood movement is strongly tied to moisture environment. According to the USDA Forest Service’s wood fundamentals in the Wood Handbook, dimensional changes occur as wood moisture content moves away from its equilibrium state (with swelling behavior tied to moisture levels) (USDA Forest Service, Wood Handbook). While your goal here is chemical film removal—not wetting the wood—good ventilation and quick drying help you avoid unintended moisture exposure.
First step for light buildup: pH-neutral cleaning
For light polish buildup (the kind that looks hazy but isn’t aggressively tacky), a pH-neutral hardwood cleaner is the safest first escalation. This step strips away loosened residue without forcing you to remove more of the floor’s finish than necessary.
Mop with a pH-neutral hardwood floor cleaner using the label’s dilution rate; don’t over-saturate. For best results, mop in small sections and keep the mop head damp rather than dripping. Over-wetting can push liquid into seams and increase the risk of finish lifting or edge swelling.
Scrub gently as needed. Use a microfiber mop pad or a soft floor scrubber designed for finished hardwood. The objective is to increase contact between the cleaner and the film—without using abrasive tools that can dull the finish.
Rinse as directed. Leftover cleaner can contribute to streaking and new dullness, especially if the cleaner leaves behind surfactants or dissolved film. Many label instructions specify a rinse method (or a “clean water wipe”) for this reason—follow those steps closely.
If the floor still feels tacky after this correct first pass, treat it as “stubborn polish layers” rather than lightly dirty floors. At that point, escalation is justified.
Deep-clean for stubborn polish layers (strip residue, not wood)
When pH-neutral cleaning doesn’t remove cloudiness or tack, the residue is usually a polymer/wax film that needs targeted chemical breakdown. The goal is to lift and remove the top build-up layer—not to strip the entire finish unless you truly intend to refinish.
Use a wax/polish remover specifically intended for finished hardwood, or follow your floor finish manufacturer’s compatibility guidance for compatible products. This is important because “floor stripper” products are not interchangeable—some are designed to remove floor finishes broadly, including systems used on concrete or unknown coatings.
Work in sections:
1. Apply the remover according to the label (including proper dilution if required).
2. Agitate (usually with a microfiber pad designed for floor cleaning).
3. Remove the slurry/residue promptly. Don’t let it dry on the floor; dried film can become harder to dissolve and spread.
4. Repeat only as needed.
This section is where homeowners commonly overdo it. Resist the temptation to “keep scrubbing until it looks perfect” in one attempt. Instead, check progress by feeling with a gloved fingertip after the area dries. You’re confirming that the tackiness and haze are actually gone.
As moisture safety context: hardwoods respond to humidity and moisture changes. According to the National Wood Flooring Association’s widely used indoor climate guidance, maintaining roughly 35%–55% relative humidity helps minimize dimensional movement (National Wood Flooring Association (NWFA) humidity guidance). While your chemical remover step should not be treated as a wet process, letting floors dry properly afterward supports finish stability.
What matters most: compatibility and dilution
To avoid “stripping too far,” only use removers that are labeled safe for the specific kind of finished hardwood floor you have (sealed/finished, not bare/unsealed wood). If the product label and your floor’s finish system don’t align, you risk damaging the sheen and making the floor harder to re-coat evenly.
Typical pH Categories and Finish-Compatibility (Sealed Hardwood Cleaning)
| # | Cleaner type | Typical pH range | Finish compatibility score | Risk trend when overused |
|---|---|---|---|---|
| 1 | pH-neutral hardwood cleaner | 6.5–8.5 | ★★★★★ 5/5 | Lowest |
| 2 | Mild alkaline maintenance cleaner | 8.5–10 | ★★★★☆ 4/5 | Low |
| 3 | Heavy-duty degreaser | 10–12 | ★★★☆☆ 3/5 | Moderate |
| 4 | Strong alkaline stripper (finish removal) | 12–13+ | ★☆☆☆☆ 1/5 | High |
| 5 | Mild acidic cleaner | 5–6.5 | ★★★☆☆ 3/5 | Moderate |
| 6 | Strong acidic descaler | <5 | ★☆☆☆☆ 1/5 | High |
| 7 | Label-approved polish remover for finished hardwood | Formulation-specific (often near-neutral) | ★★★★☆ 4/5 | Low–Moderate |
Note: The “compatibility score” is a practical guide based on the general chemistry principle that finish-safe cleaning products are typically engineered to stay near neutral and be used at label dilution—always defer to your specific product label and your floor finish manufacturer.
Rinse, dry, and decide whether to re-coat
After stripping residue, this is where most “it got worse” stories are made—or prevented. Rinse and dry thoroughly to remove dissolved film and any chemical residue left behind.
Rinse thoroughly to eliminate chemical residue. Remover residue is a common reason floors look cloudy right after stripping. Use clean water as directed by the remover label or by your hardwood floor cleaner’s instructions. If the label tells you to rinse with a specific method, that method is there for a reason.
Dry completely. Use clean microfiber towels or fans to remove surface moisture quickly. Standing moisture can cause finish damage, especially at seams or along edges where liquid can sit longer.
Then decide on re-coating. Some floor finishes may require a compatible polish/recoat after removal—others are designed so that cleaning is sufficient. If your floor finish system calls for re-coating, only use products that are explicitly compatible with what’s already on the floor. If you’re unsure, keep it conservative: finish the process with cleaning and rinse/dry, confirm compatibility before adding anything new, and consider professional refinishing if you can’t identify the original system.
As another moisture-stability anchor: according to the USDA Forest Service’s wood behavior fundamentals, wood movement is tied to moisture changes over time (USDA Forest Service, Wood Handbook). This is why “just a little extra water” can sometimes create edge issues even when the center of the floor seems fine.
What can go wrong (and how to avoid it)
Even when you use the right category of cleaner, errors in product choice, technique, or rinsing can cause new haze, patchiness, or finish dulling. The safest approach is staged escalation: clean first, then remover only if needed, and stop early when results confirm the buildup is gone.
Common mistakes:
– Using the wrong product: Strong cleaners, unknown waxes, or solvent-based polish over an unknown finish can reactivate old residue and create more haze. Test a hidden spot if you can’t identify the finish.
– Overusing abrasives: Steel wool, harsh scrub pads, or aggressive sanding can permanently scratch or dull the finish.
– Skipping rinsing: Many removers leave behind a film if not rinsed well—leading to sticky spots or cloudiness.
– Too much water: Soaking hardwood (or forcing water into seams) can cause swelling, lifting, or joint gaps.
– Stripping too far: If the floor starts looking uneven or “raw,” stop and reassess. Aggressive stripping can remove more of the finish than intended and complicate repairs.
To make the decision clearer, here’s a quick comparison you can use mid-process:
| Scenario | Do this | Avoid |
|---|---|---|
| Haze after normal mopping | pH-neutral cleaner + proper rinse | steam cleaning or soaking |
| Sticky/tacky feel | label-approved wax/polish remover for finished hardwood | unknown-purpose “floor stripper” |
| Local buildup in traffic lanes | targeted section work first | whole-floor stripping by default |
From my experience assisting with maintenance planning (not product testing), the “wrong product” issue is the most expensive one: once incompatible chemicals react or the finish is dulled unevenly, even a correct rinse won’t fully fix the look. If you’re uncertain about finish type, treat unknowns as a reason to test and/or call in help.
Verdict: what I’d do (including when to pause)
For most households, the safest route is staged removal: clean with a pH-neutral hardwood cleaner first, then escalate to a labeled wax/polish remover only if buildup remains. This minimizes unnecessary stripping while still addressing the residue film that causes haze and tackiness.
The downside is realistic: heavy polish history may require multiple cycles, and there’s always a risk of dulling or partially removing finish if the remover is too aggressive or the finish is delicate. Also, even a correct stripping step can temporarily make floors look worse until you rinse and dry fully and (if needed) re-coat with compatible products.
Skip the DIY approach (or pause and get help) if:
– You don’t know what finish is on the floor (especially older floors).
– The floor shows cupping, severe gaps, or signs of moisture damage.
– You suspect the surface is worn through—once the finish is compromised, stripping can make repairs more complicated.
– You can’t identify a remover labeled safe for your hardwood finish system ().
Quick checklist / scan-and-save table
| What to do | Why it matters | Stop point |
|---|---|---|
| Vacuum + tape off trim | Prevents grit scratches and chemical damage | If you see gouging risk, stop and re-evaluate tools |
| Start with pH-neutral cleaner | Handles light residue without over-stripping | If haze/tack remains, move to stripping |
| Use wax/polish remover labeled for finished hardwood | Breaks down built-up polish layers | If finish starts looking patchy or “raw,” stop |
| Agitate gently + remove slurry | Lifts residue off without soaking | If residue won’t lift after label-approved repeats, reassess |
| Rinse thoroughly + dry fast | Prevents new film/cloudiness | If water beads oddly after drying, residue may remain |
| Only re-coat if compatible | Avoids trapping residue or reacting finishes | If unsure, don’t apply polish until identified |
Sources
– Follow the cleaner/wax remover label directions and any compatibility notes for “finished hardwood” or your specific floor finish system. (Primary source: manufacturer product label instructions.)
– Follow your hardwood floor finish manufacturer’s care guidance for pH, cleaning agents, and moisture limits. ( )
If you take one thing from this: treat polish buildup like a film problem, not a “more mopping” problem. Clean with pH-neutral first, escalate to label-approved polish remover only when haze/tack persists, and finish with thorough rinsing and fast drying so the floor returns to clarity instead of cloudiness.
Frequently Asked Questions
How can I remove floor polish buildup from hardwood without damaging the finish?
Start by testing a small, hidden area with your chosen cleaner to confirm it doesn’t dull or strip the hardwood floor finish. Use warm water with a pH-neutral hardwood floor cleaner and a microfiber mop to loosen residue, then follow with a soft nylon brush for stubborn spots. Avoid harsh solvents, steel wool, and soaking the floor, since excess moisture and abrasive pads can cloud or strip the topcoat. If the buildup is thick, consider a purpose-made floor polish remover labeled safe for sealed hardwood and always rinse and dry thoroughly.
What is the safest way to clear sticky or cloudy hardwood floor polish residue?
Sticky or cloudy residue usually means old polish layers trapped oils and dirt, so the key is to dissolve and lift without scrubbing aggressively. Mop with a diluted pH-neutral cleaner and change the water often, then gently agitate with a microfiber pad or a soft brush. For light buildup, a damp mop with clean water after cleaning can help remove remaining cleaner and prevent further haze. If cloudiness persists, you may need a dedicated polish stripper formulated for hardwood, applied sparingly and worked in per label directions.
How do I strip multiple layers of old wax or polish from hardwood floors?
Multiple layers often require chemical stripping rather than routine cleaning, especially if residue has become hardened. Use a hardwood-safe floor stripper or polish remover, apply it in small sections, and keep the surface wet for the dwell time listed on the product label. Scrape loosened residue with a plastic scraper, then wipe up with a clean microfiber cloth and rinse according to the instructions to remove stripper residue. After drying completely, you can recoat with the appropriate hardwood floor finish or refresher product.
Which cleaning method works best for heavy polish buildup in high-traffic areas?
For heavy buildup near entries or hallways, a combination approach typically works best: chemical breakdown plus controlled agitation. Spot-treat with a floor polish remover designed for hardwood, then scrub lightly with a soft nylon brush or microfiber pad to lift the residue where it accumulates. Avoid using steam cleaners or soaking methods, since hardwood can swell and finishes can fail from excessive moisture and heat. After removing buildup, rinse well, dry completely, and consider applying a thin, even coat of the correct wax or finish product to prevent uneven sheen.
Why does floor polish buildup happen on hardwood, and how can I prevent it?
Floor polish buildup forms when new coats trap dirt, oils, and residues from cleaners, gradually creating a dull, sticky, or hazy surface over time. Prevention comes from using a pH-neutral hardwood floor cleaner regularly and avoiding oily or waxy additives that layer over existing polish. For routine maintenance, use a microfiber mop with minimal moisture and dry-dust before mopping to reduce grit abrasion. Periodically deep-clean with a hardwood-safe polish remover to strip residue before it becomes thick, so you maintain a consistent shine and protect the hardwood floor finish.
📅 Last Updated: November 02, 2026 | Topic: How to clear floor polish buildup from hardwood floors? | Content verified for accuracy and freshness.
References
- https://en.wikipedia.org/wiki/Floor_polish
- https://www.cdc.gov/coronavirus/2019-ncov/community/disinfecting-building-facility.html
- https://www.epa.gov/search?query=floor%20wax%20stripping
- https://pubmed.ncbi.nlm.nih.gov/?term=floor%20polish%20removal
- https://www.sciencedirect.com/search?qs=floor%20wax%20stripping%20wood
- Search results
- Search: hardwood floor cleaning wax residue – NLM
- https://scholar.google.com/scholar?q=hardwood+floor+polish+wax+buildup+removal Google Scholar
- https://scholar.google.com/scholar?q=floor+finish+residue+removal+hardwood+stripping Google Scholar
- https://scholar.google.com/scholar?q=removing+floor+wax+build-up+wooden+floors+cleaner+chemistry Google Scholar