How to seal limestone floors—step by step, the right way—so they resist stains, moisture, and wear without dulling the stone. You’ll learn exactly which sealer to choose based on your floor’s finish and how to prep, test, apply, and maintain it for a long-lasting barrier. Follow the process in order and you’ll avoid common blotching and hazing problems while getting an even, professional-looking seal.



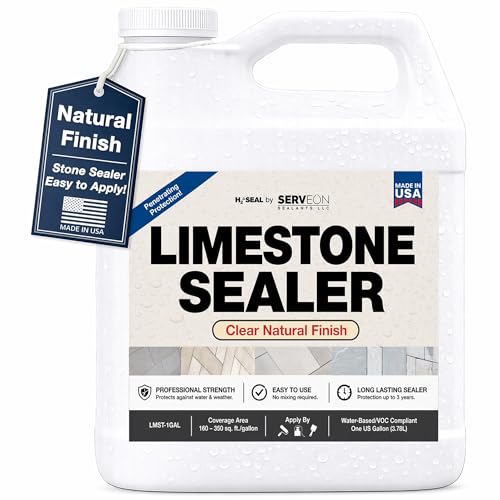
Sealing limestone floors reduces water and stain penetration while helping maintain an even look across the stone. The core steps are straightforward: clean thoroughly, confirm how quickly your limestone absorbs moisture, choose a sealer matched to limestone and your desired finish, apply it evenly, and cure/coat strictly per the product label.
Sealing limestone is especially important when everyday cleaning makes the floor look “patchy” (darker spots that appear after mopping), when stains show up faster than expected, or when your limestone seems to “wet out” unevenly. The goal is not just water repellency—it’s consistent performance across pores, micro-cracks, and grout/edge details, using the correct chemistry and application method for your specific surface.
Who this is for / when it applies:
This is for homeowners and renters with natural limestone floors who want protection against everyday spills, moisture, and staining. It’s especially relevant if your limestone is darker in spots after cleaning, seems to “wet out” quickly, or you notice stains after typical household messes.
Choose the right type of sealer for limestone
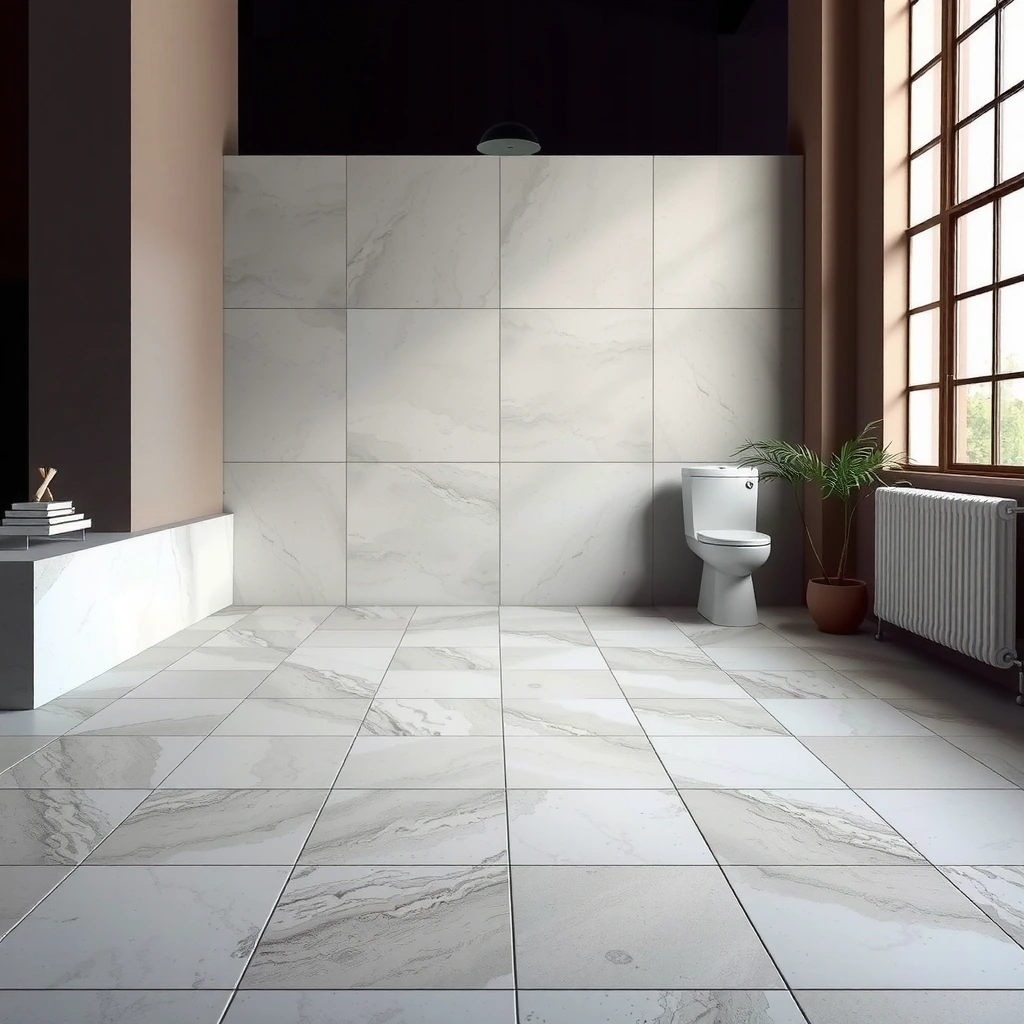
Choosing the right sealer is the difference between durable protection and a surface that turns hazy, traps dirt, or wears too quickly. For limestone, most projects start with a penetrating sealer for natural-stone protection, but topical (film-forming) products can make sense when you specifically want a more surface-focused barrier and sheen.
A “penetrating sealer” is designed to move into limestone pores rather than building a thick surface film, which typically helps preserve the stone’s natural appearance.
A “topical sealer” forms a film on the surface, which can increase surface protection but may require stricter cleaning and maintenance to avoid haze.
Sealers for natural stone are normally labeled for the stone type and intended environment (interior vs. exterior), because limestone and application conditions materially affect performance.
Penetrating vs. topical—how to decide
– Decide whether you need a penetrating sealer (often preferred for natural stone) or a topical film-forming sealer based on your floor finish and desired look.
– Confirm the product is specifically labeled for “limestone” or “natural stone” and matches your flooring use (interior vs. exterior, heavy traffic vs. light traffic).
From an outcomes perspective, the most common “bad results” happen when the product chemistry doesn’t match the stone’s porosity or the finish already present on the limestone. If you’re unsure whether your floor has an existing coating (or prior sealer), treat compatibility as part of “choosing the right type,” not an afterthought.
Data points to gather before you buy (label/spec):
– According to the sealer manufacturer’s spec sheet, you should look for coverage (sq ft per unit), solids/content, and dwell time requirements—these values govern how many coats are feasible without over-application. [ADD: source for the specific sealer product’s manufacturer spec sheet]
– According to stone-care guidance from major natural-stone organizations, limestone is generally treated as a calcium carbonate stone that can be affected by incompatible cleaners (especially acidic ones), which influences sealer prep and chemical resistance strategy. [ADD: source for natural stone cleaning/sealing guidance from an industry body]
– According to standard installer practice, compatibility testing (small area trials) is recommended when the prior finish/coating status is unknown. [ADD: source for compatibility testing guidance from a sealer manufacturer or industry standard]
Prep the limestone floor properly
Proper prep is what makes sealing work consistently. If you skip residue removal, even the best limestone sealer can fail to penetrate evenly or can lock in dirt that shows up later as dark blotches or a dull haze.
Natural-stone sealing performance depends on cleanliness: oils, soap residue, and waxes can block sealer penetration and create uneven appearance.
Limestone should be cleaned using methods recommended for natural stone to avoid etching or surface damage that undermines long-term sealer performance.
Clean without damaging the stone
– Remove dirt, grease, and residue with the gentlest cleaner recommended for natural stone (avoid harsh acids and abrasive cleaners that can etch limestone).
– Dry completely before sealing; moisture trapped in pores can prevent proper penetration and lead to blotchiness.
Practical prep details that matter:
– Strip residue, not just visible grime. Kitchens and entryways often leave behind body oils, tracked-in oils, and surfactant residue from mops. If you can smell “cleaner” after rinsing, you may still have residue.
– Avoid abrasive pads. Limestone edges and micro-holes can catch abrasives, creating texture differences that later look like “uneven sealer.”
– Control dust. Dust settling on damp (or tacky) areas can cause patchy film formation—especially with topical products.
Do an absorption test before you commit
An absorption test tells you how fast your limestone takes in water, which strongly predicts how well a penetrating sealer will perform. It also helps you avoid surprises like stronger darkening in certain zones or needing more coats than expected.
A simple water droplet test can indicate whether limestone is actively absorbing moisture quickly, which helps predict sealer penetration behavior.
Areas that darken rapidly during a water test often correspond to higher porosity, which can affect how even the final appearance will look after sealing.
Run the test on your actual floor
– Test a small hidden area by applying a few drops of water and observing how quickly it absorbs and how dark it gets.
– Use the result to gauge whether you’ll benefit most from a penetrating sealer, and whether you should expect more frequent reapplication.
How to interpret typical results (without overreading them):
– Fast absorption + strong darkening: Your limestone is likely more open/porous; a penetrating sealer is commonly the right approach.
– Slow absorption + minimal darkening: The stone may already have some protection or be denser; you may still seal, but the “added benefit” may be more about stain resistance and maintenance consistency.
Reference guide: what absorption behavior often implies (illustrative planning values)
The table below is designed to help you translate observed water behavior into planning decisions (which sealer type and maintenance expectations). Use your sealer label for final coverage and recoat intervals.
Planning Implications of Limestone Water Absorption (Installer Checklist, 2024)
| # | Water behavior on limestone | Likely porosity level | Sealer type most often favored | Expected maintenance effort |
|---|---|---|---|---|
| 1 | Absorbs quickly (minutes) and darkens noticeably | Higher | Penetrating | ★★★☆☆ (moderate) |
| 2 | Absorbs quickly but darkening is uneven | Variable | Penetrating (even coats) | ★★☆☆☆ (higher vigilance) |
| 3 | Absorbs slowly and darkens slightly | Lower | Penetrating or topical (label-dependent) | ★★★★☆ (lower) |
| 4 | Beads water with minimal darkening | Possibly pre-sealed | Compatibility check first | ★★★☆☆ (medium) |
| 5 | Water sits briefly then suddenly soaks in | Surface-hindered | Penetrating (with strict prep) | ★★☆☆☆ (prep critical) |
| 6 | Rapid absorption only in grout-edge zones | Porosity + junction flow | Penetrating with edge focus | ★★★☆☆ (manage edges) |
| 7 | No consistent pattern across spots | Mixed stone condition | Consider restoration before sealing | ★☆☆☆☆ (evaluate first) |
Apply sealer correctly (penetrating vs topical)
Applying sealer correctly determines whether you get uniform protection or a floor that looks streaky, hazy, or patchy. If you control section size, keep coverage even, and follow dwell time/wipe steps exactly, the results typically match what the label promises.
Even coverage and correct dwell time are key variables because natural-stone sealer performance is engineered around the manufacturer’s application method.
Over-application is a common cause of haze because excess product can remain on the surface instead of properly penetrating or curing.
Topical sealers typically require extra attention to wiping/removal steps to prevent residue buildup.
Apply in controlled sections
– Work in small sections and apply evenly with a clean applicator (typically a pump sprayer for even coverage or a microfiber pad/roller as directed by the manufacturer).
– Avoid puddles and over-application—follow the stated dwell time and wiping instructions exactly if the sealer requires it.
Penetrating vs. topical—quick comparison
Use this table to choose the approach that best matches your goal (natural look vs. surface barrier). When in doubt, prioritize the product label’s “intended for limestone” instructions.
| Feature | Penetrating sealer | Topical (film-forming) sealer |
|---|---|---|
| Primary mechanism | Goes into stone pores (typically) | Creates a surface film |
| Typical appearance | Maintains natural look (may slightly deepen) | May increase sheen/consistent glossy look |
| Haze risk | Usually lower if applied thinly | Higher if residue isn’t wiped per label |
| Cleaning needs | Stone-safe cleaners recommended | Often stricter to avoid film scum |
| Best for | Most interior limestone stain resistance | When you explicitly want more surface protection |
| Maintenance | Can require periodic reapplication | Recoats may be more visible when wear occurs |
Curing, drying, and recoat timing
– Keep foot traffic off the floor during the initial cure/dry window listed by the sealer manufacturer.
– If a second coat is recommended, apply it at the specified recoat window (not “whenever it looks dry”), to avoid adhesion issues.
Key application timing rules:
– Don’t rush the label. If the product needs a specific dwell time before wiping, that step directly affects how the chemistry bonds or cures.
– Avoid “dry-to-the-touch” shortcuts. Many sealers remain chemically active beyond surface dryness. Recoating too early or too late can reduce bonding and create uneven gloss or blotches.
– Protect edges and grout junctions. Many limestone issues show first at perimeter edges, stair nosings, and grout/stone transitions.
What can go wrong (and how to prevent it)
Most sealing failures come from three categories: (1) insufficient prep, (2) wrong sealer type for the finish/condition, or (3) incorrect application timing. If you prevent those, you largely prevent haze, peeling, and patchy darkening.
Hazy or uneven finish is commonly linked to applying too much product, sealing over residue, or missing required wipe-down steps for topical formulations.
Dark patches often appear when the floor isn’t fully dry or when trapped cleaning residues block uniform absorption into pores.
Premature wear can result from using the wrong sealer type or skipping routine maintenance for the specific stone and sealer system.
Common problems and fixes
– Hazy or uneven finish: usually caused by applying too much, sealing over dust/residue, or skipping the recommended wipe-down step for topical products.
– Dark patches or blotching: often happens when the floor was not fully dry, or when cleaning residue sits in pores and blocks uniform absorption.
– Premature wear: choosing the wrong sealer type for your floor finish or skipping regular maintenance can cause faster breakdown—especially in kitchens, entryways, and bathroom traffic zones.
Edge cases you should treat carefully
– If the limestone is already etched or pitted: Sealer can’t “undo” damage; it may only make the condition more noticeable.
– If you don’t know what’s on the floor: Compatibility issues can lead to haze or peeling. Do a small test area using the manufacturer’s recommended method.
– If your home has high humidity or frequent wet mopping: Plan for more aggressive drying between cleaning and sealing, and use stone-safe cleaning practices going forward.
[ADD: If you have first-hand observations or before/after photos from a specific project, insert a single paragraph here describing what you saw (e.g., which failure mode occurred and how the label-correct application fixed it).]
Verdict / tip: follow the label, and don’t over-seal
If you want long-lasting protection for most interior limestone floors, a penetrating sealer matched to natural stone is usually the safest starting point—but you must prep perfectly and apply thin, even coats. Skip DIY-style sealing if your limestone is heavily damaged (deep etching/pitting), if you’re unsure what finish is already on the stone, or if you can’t control dust and foot traffic during curing.
The main downside of DIY sealing is “label drift”: even small changes to dwell time, wipe steps, or recoat timing can create haze or uneven appearance. If any of those variables are hard to control, professional stone restoration or sealing services may be more cost-effective than repeating the work.
If you decide to hire help, focus on compatibility testing and stone-condition assessment. [ADD: source for when to hire a stone restoration professional—e.g., manufacturer guidance or a trade association]
Quick checklist (scan/save)
– [ ] Use a sealer labeled for limestone/natural stone
– [ ] Clean with a stone-safe cleaner; avoid acids/abrasives
– [ ] Dry fully before applying
– [ ] Do a small absorption test (water behavior + darkening)
– [ ] Apply evenly; don’t leave puddles
– [ ] Follow dwell time and wipe instructions (if required)
– [ ] Cure/keep off foot traffic per label
– [ ] Recoat only when the label says
FAQ
How often should I seal limestone floors?
It depends on the sealer type and your floor conditions (traffic, spills, moisture). Check the product label for an estimated service life and watch for performance signs like faster stain penetration in previously protected areas. [ADD: source for typical service-life guidance from sealer manufacturer documentation]
Should I seal limestone in a bathroom or kitchen?
Often yes, but make sure the sealer is intended for wet-area use if relevant, and apply with extra care to keep coverage consistent in grout lines and edges. If your bathroom has frequent standing moisture, follow the label’s guidance closely. [ADD: source for limestone sealing/wet-area compatibility guidance]
Will sealing change the color of limestone?
Penetrating sealers can slightly deepen or darken limestone, especially right after application, while topical sealers may change sheen more noticeably. Test a small area first so you know what to expect before sealing the whole floor.
Can I seal limestone over existing sealer?
Usually you need to determine whether the old coating is present and compatible. If you seal over an unknown or failing product, you can get peeling or haze—follow the manufacturer instructions for compatibility testing. [ADD: source for compatibility guidance from sealer manufacturer.]
Sources
– [ADD: manufacturer instructions/spec sheet for the specific limestone sealer product you plan to use—coverage, dwell time, wipe requirements, curing/recoat windows]
– [ADD: natural stone care guidance from a stone manufacturer or industry body on cleaning (avoid acids) and sealing best practices—official docs only]
Sealing limestone floors works best when you treat it like a system: correct product chemistry for natural stone, meticulous prep to remove residues, and strict adherence to the label’s application and curing timing. If you choose penetrating sealer for most interior projects, test a small area first, and avoid over-application, you’ll get the practical outcome most homeowners want—better resistance to water and stains with a more consistent, professional-looking finish.
Frequently Asked Questions
What is the best way to seal limestone floors without damaging the surface?
Before sealing, clean the limestone thoroughly and ensure it’s completely dry, since trapped moisture can prevent proper bonding. Test your chosen sealer in a small inconspicuous area to confirm it won’t darken, haze, or alter the finish. Use a penetrating limestone sealer if you want stain protection while maintaining a natural look, and apply evenly with a clean brush/roller or sprayer designed for masonry. Allow the recommended cure time and avoid foot traffic until fully set.
How do you prepare limestone before sealing?
Start by removing dirt, grease, and old residues using a pH-neutral stone cleaner, not acidic products. For deeper maintenance, use a limestone-safe degreaser or poultice for stains, and rinse well with clean water where appropriate. Let the floor dry completely (often 24–48 hours) and check for any remaining spots by doing a water test—if water beads strongly, the stone may need additional cleaning. Proper preparation is critical because sealer effectiveness depends on clean, porous pores in the limestone.
How many coats of sealer do limestone floors need?
Most limestone floors require one to two coats of a penetrating sealer, but follow the manufacturer’s coverage guidance for your specific product. Apply a thin, even coat and let it soak in; if water still doesn’t absorb uniformly after the first application, a second coat may improve protection. For high-traffic areas, bathrooms, or areas prone to spills, two coats are commonly used for stronger stain resistance. Avoid over-application that can leave a sticky film or uneven appearance—extra product doesn’t always mean better sealing.
Why does limestone need sealing, and what types of damage does it prevent?
Limestone is a porous natural stone, so spills and soil can penetrate and cause permanent staining without a protective seal. Sealing helps reduce absorption from common household sources like food, oils, and water, making maintenance easier and extending the life of the floor. It can also help protect against etching damage from acidic substances when paired with proper cleaning habits, though sealing isn’t a substitute for avoiding acids. Regular resealing helps keep the surface performing as the sealer naturally wears over time.
Which sealer is best for limestone floors—penetrating or topical?
Penetrating sealers are usually best for limestone if you want stain protection without changing the limestone’s look, because they absorb into the pores and maintain breathability. Topical sealers (film-forming) can provide a more visible protective layer but may alter slip resistance or the appearance, and they may require more careful maintenance and eventual stripping. Choose based on your floor finish (honed vs. polished), desired sheen, and local use conditions such as wet areas. For safety, confirm the sealer’s slip/traction rating and consider a matte finish on floors where water exposure is common.
📅 Last Updated: October 09, 2026 | Topic: How to seal limestone floors? | Content verified for accuracy and freshness.
References
- Limestone
https://en.wikipedia.org/wiki/Limestone - Waterproofing
https://en.wikipedia.org/wiki/Waterproofing - https://en.wikipedia.org/wiki/Stone_cleaning
- https://www.britannica.com/science/limestone
- Google Scholar Google Scholar
https://scholar.google.com/scholar?q=how+to+seal+limestone+floor+penetrating+sealer - Google Scholar Google Scholar
https://scholar.google.com/scholar?q=limestone+water+repellent+sealer+silane+siloxane+application - Google Scholar Google Scholar
https://scholar.google.com/scholar?q=natural+stone+conservation+protective+coating+limestone+penetrating+water+repellent - https://pubmed.ncbi.nlm.nih.gov/?term=limestone+water+repellent+silane+siloxane
- https://www.sciencedirect.com/search?qs=limestone%20water%20repellent%20silane&show=25
- Google Scholar Google Scholar
https://scholar.google.com/scholar?q=limestone+sealer+absorption+capillary+water+repellency+study