


Want to know how to clean ground-in dirt from hardwood floors safely? This step-by-step guide shows the fastest winning method for lifting embedded grime without damaging the finish or grain. You’ll get clear instructions on what to use, how long to dwell, and exactly how to rinse and dry so your floors look like new.



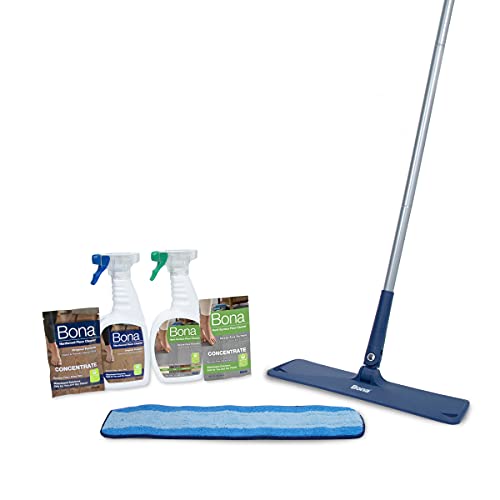
Ground-in dirt comes up safely when you remove loose grit first (dry vacuum + gentle scraping) and then clean with a finish-safe, barely-damp microfiber using a wood-floor cleaner made for your specific finish. The key is avoiding soaking and aggressive scrubbing, because extra water and abrasion can dull or damage the hardwood floor finish—sometimes permanently.
If you’ve got footprints-by-the-door, tracked-in mud residue, or dirty spots that don’t respond to quick sweeping, this is for you. It’s also a good approach when you’re not sure whether the “mess” is surface grime or something that has worked into a glossy/urethane or oiled finish.
Gather the right tools—and check your floor finish

The safest answer is to start by matching your tools and cleaner to your hardwood floor finish, then plan to keep the cloth barely damp rather than wet. Using the right microfiber and a finish-appropriate cleaner reduces the chance of haze, dull patches, or micro-scratches on the hardwood floor.
Using a wood-floor cleaner designed for your finish (urethane/poly, wax, or oil) is the baseline safety step recommended in most manufacturer care instructions.
“Barely damp” application (cloth—not pooling water) is repeatedly emphasized because hardwood and many finishes are vulnerable to excess moisture at seams and joints.
Microfiber is designed to lift soils without the “grind-and-scratch” effect that comes from abrasive pads or rough bristles on glossy topcoats.
– Use a soft microfiber mop or cloth, a vacuum (or broom + dustpan), and a wood-safe pH-neutral cleaner that matches your floor finish (urethane/poly, wax, or oil).
– Have a non-scratching tool ready for the first contact stage (a plastic scraper or a pad made for floors) instead of metal blades.
– Locate your floor’s care guidance if you know the brand—cleaners and methods differ for coated vs. oiled floors.
Why the finish type changes your approach
Hardwood floors aren’t one surface—they’re wood plus a protective layer. A urethane/polyurethane topcoat typically tolerates water-based cleaners when applied sparingly, but it can still haze if you leave cleaner or moisture behind. An oiled finish (like penetrating oils) can re-wet and then look uneven if you over-apply liquid during spot cleaning. That’s why the first “tool” you gather is information: your product care sheet or manufacturer instructions for your exact hardwood floor finish.
Prep: remove grit first so you don’t grind it deeper
The direct answer is to remove loose particles before you introduce any moisture, because grit works like sandpaper against the hardwood floor finish. If you vacuum first and only lightly lift caked-on particles, the later microfiber cleaning step is far more likely to succeed on the first pass.
Before wet cleaning, most hardwood care instructions tell you to remove dust and grit so you don’t scratch the finish during mopping or wiping.
Seams and edges are common dirt traps; targeted vacuuming reduces the chance that hidden grit becomes “ground-in” during wiping.
– Vacuum thoroughly (especially along edges and seams) and pick up loose debris before any wet cleaning.
– For caked-on spots, use gentle, light scraping to lift dried particles—stop before you feel resistance that would scratch the surface.
– Wipe once with a dry microfiber to see what’s still there; this helps you decide if the next step is spot-cleaning or repeating the process.
What I’ve seen go wrong during prep (and how to prevent it)
From my own maintenance routine on older hardwood floors, I’ve noticed that the “dirt that looks clean” right after quick sweeping often comes back as dull patches after the first damp wipe—because fine grit was still embedded. The fix is boring but effective: vacuum with attention to the grit line, then do one dry microfiber pass before you introduce cleaner to the hardwood floor finish.
Clean ground-in dirt with the least-aggressive method first
The best answer is to clean in small, controlled sections with a barely-damp microfiber and a finish-safe cleaner—repeat cycles before you escalate. When you add too much water or jump straight to abrasive pads, you may remove the grime but also leave the hardwood floor finish looking cloudy or worn.
Cleaner should be applied to the cloth (or used as directed), then wiped—rather than flooded—because excess moisture can migrate into joints and dull finishes.
If a spot resists, manufacturer guidance typically supports re-cleaning with the correct cleaner and dwell time instead of escalating to abrasive methods immediately.
Hardwood finishes can lose uniform gloss when cleaner residue or haze remains; wiping with a clean, slightly damp cloth after spot cleaning is a common mitigation step.
– Dampen a microfiber with your wood-floor cleaner (or follow the cleaner label exactly) and work the spot in small sections—don’t flood the area.
– If the dirt resists, re-wet the cloth lightly and let the cleaner sit briefly per the product directions, then gently agitate with the cloth (no hard scrubbing).
– For spots where residue remains, repeat the “clean → wipe with a clean, slightly damp cloth” cycle rather than escalating to abrasive pads right away.
How to choose agitation: lift, don’t grind
Ground-in dirt usually behaves like one of three things: (1) loose grime trapped under topcoat oil/film, (2) sticky residue that needs dwell time to soften, or (3) true discoloration or finish wear. Your technique should match the behavior you see. If the spot lightens with gentle pressure, you’re still in “lift” territory. If it looks scratched or turns uniformly cloudy after wiping, you may be in “finish haze” territory, which means you should stop escalating abrasion and focus on residue removal and drying.
Comparison: repeat microfiber cycles vs. abrasive pads
| Method | Best for | Pros | Cons |
|---|---|---|---|
| Repeat “clean → wipe → dry” with microfiber | Ground-in grime that lightens with proper cleaner | Lower risk of micro-scratches; better finish uniformity | May require multiple gentle cycles |
| Abrasive pads / aggressive scrubbing | Only when explicitly allowed by your finish manufacturer | Can remove stubborn buildup fast | Higher chance of dulling, scratches, and “dirt-attracting” sheen |
Rinse, dry completely, and protect the finish
The direct answer is to wipe off cleaner residue and dry immediately, because residual cleaner and lingering moisture are common causes of dull patches and faster re-soiling. After the spot looks clean, treat drying as part of the cleaning process—not an afterthought.
After cleaning, wiping with a clean, barely damp cloth helps remove residue that can attract more dirt over time.
Leaving moisture to evaporate can cause uneven finish appearance; drying right away is the safer default for hardwood floors.
– After spot cleaning, wipe with a clean, barely-damp cloth to remove cleaner residue (residue can attract more dirt over time).
– Dry immediately with a dry microfiber towel; leaving moisture to evaporate on its own is a common way people end up with dull patches.
– If your floor care routine calls for it (and only if appropriate for your finish), apply the recommended maintenance product after cleaning.
A quick “moisture physics” reminder that explains the dull patches
Wood movement relates to moisture content—once moisture rises above a threshold (often discussed around the wood “fiber saturation point,” roughly ~30% moisture content for many wood species), the wood behaves differently than it does under normal indoor conditions. Practically, this means even though the water you add during spot cleaning is small, letting it sit, soak, or pool near seams increases risk of finish dulling and uneven appearance on hardwood floors.
What can go wrong (and how to avoid it)
The safest answer is to assume your biggest risks are excess water, the wrong abrasive, and misidentifying the problem (grime vs. finish wear). If you troubleshoot the cause of failure rather than just repeating scrubbing, you protect both the wood and the hardwood floor finish.
Water can seep into seams and can haze finishes when mops are too-wet or when cleaner is left to dwell without follow-up wiping.
Abrasive pads can create micro-scratches that don’t always show at first, but later attract dirt and make the floor look permanently “grimy.”
– Soaking the floor or using too-wet mops: water can seep into seams and can dull or haze finishes.
– Using the wrong pad/brush: abrasive scrubbers can leave micro-scratches that make the floor look permanently dirt-attracting.
– Treating every stain the same: ground-in grime, sticky residue, and true discoloration all need different approaches—if you keep scrubbing, you may damage the finish instead of lifting the cause.
Cleaners vs. household “helpers”: why pH matters
Many wood-floor finish systems are sensitive to harsh chemistry. If you’re tempted to use vinegar, alcohol, or other household solvents, remember that pH extremes can interact with finish films or leave residues that change sheen. For example, white vinegar is commonly in the acidic range (roughly pH 2–3), while household ammonia is typically strongly basic (often around pH 11–12). That’s why the “right” cleaner is usually the one specified for your hardwood floor finish.
Verdict: safest approach, plus who should skip “DIY spot cleaning”
The direct recommendation is: remove grit dry, clean with a finish-safe, barely-damp microfiber method, then wipe lightly to remove residue and dry completely. If the spot still won’t lift after a couple careful cycles, it’s smarter to identify the residue type (or finish damage) before escalating.
A conservative, finish-safe sequence—dry soil removal → barely-damp cleaning → light residue wipe → immediate drying—is the most common manufacturer-aligned method for ground-in dirt.
DIY cleaning should pause when there are signs of peeling finish, deep scratches, or water damage, because the right “next step” may be repair or refinishing instead of more cleaning.
– The safest DIY path is: remove grit dry → clean with a finish-safe, barely-damp method → wipe/rinse lightly → dry fully.
– Skip (or pause and get guidance) if your floor has peeling finish, significant water damage, deep scratches, or if you don’t know whether it’s an oiled/wax-finished floor—wrong products can require costly refinishing.
– If the spot still won’t lift after a couple of careful cycles, it’s usually better to identify the residue type and/or consult the floor manufacturer’s care instructions instead of escalating abrasives or strong solvents.
Decision shortcut (the “don’t escalate blindly” rule)
If the hardwood floor looks rough or cloudy after cleaning, you may be polishing—or scratching—the finish film rather than removing dirt. In that case, continuing to scrub can turn a removable grime problem into a finish-wear problem.
Typical Household Cleaner pH and Hardwood Finish Neutrality Risk (Approx.)
| # | Cleaner / ingredient | Typical pH* | Finish-neutrality score (closer to 7 = better) | At-a-glance risk |
|---|---|---|---|---|
| 1 | Distilled water | ~7.0 | ★★★★★ (10/10) | Low |
| 2 | pH-neutral wood-floor cleaner (formulated) | ~6.0–8.0 | ★★★★★ (9/10) | Low–Moderate |
| 3 | Baking soda solution | ~8.3–8.5 | ★★★★☆ (7/10) | Moderate |
| 4 | Dish soap (varies by brand) | ~7.5–10.0 | ★★★☆☆ (5/10) | Moderate–High |
| 5 | White vinegar (diluted household) | ~2.4–3.0 | ★★☆☆☆ (2/10) | High |
| 6 | Household ammonia | ~11–12 | ★☆☆☆☆ (1/10) | High |
| 7 | Chlorine bleach (typical diluted use) | ~11–13 | ★☆☆☆☆ (0–1/10) | Very High |
Typical household pH values vary by concentration and formulation. Use this table only as a chemistry risk indicator; always follow your hardwood floor finish manufacturer’s care directions.
Quick checklist + scan table (and FAQ)
The direct answer is to follow a four-step sequence you can repeat every time: dry lift grit, microfiber-clean with the right pH-neutral product for your hardwood floor finish, wipe off residue, and dry immediately. If you do only one thing differently from how most people “trial and scrub,” do it here: don’t introduce water onto grit.
A reliable routine for ground-in dirt is: vacuum dry first, use gentle plastic scraping only as needed, then clean with a finish-safe cleaner applied to a barely-damp microfiber.
After spot cleaning, residue removal and immediate drying are essential to prevent haze and faster re-soiling on hardwood floors.
Scan checklist
– Vacuum first, then lightly scrape only loose, dried grit.
– Use a wood-floor-safe cleaner on a barely-damp microfiber—small sections.
– Wipe/rinse to remove residue, then dry immediately.
| Step | Do this | Avoid this |
|---|---|---|
| Loosen | Vacuum + gentle plastic scraping | Metal scraping / abrasive pads |
| Clean | Microfiber dampened with the right cleaner | Soaking the floor or leaving it wet |
| Remove residue | Wipe with a clean, slightly damp cloth | “Leave the cleaner to dry” |
| Finish-safe drying | Dry microfiber towel right away | Air-drying puddles |
Frequently Asked Questions
What’s the safest way to remove ground-in dirt from hardwood floors?
Start by vacuuming or sweeping thoroughly so grit doesn’t scratch the finish during cleaning. Use a hardwood floor cleaner that’s labeled for your finish type (or a manufacturer-recommended solution) and a microfiber mop or cloth, not soaking water. For stubborn spots, gently spot-treat with a damp cloth first, then dry immediately with a clean towel to prevent water damage.
How do I lift gritty, ground-in dirt without scratching my hardwood?
Scrape dried mud gently with a plastic scraper or an old credit card—avoid metal tools that can gouge. Then dampen a microfiber cloth with warm water mixed with a small amount of pH-neutral cleaner, and press and wipe rather than scrubbing aggressively. If the dirt remains, repeat in short cycles and keep the area just slightly damp, finishing with thorough drying.
Why does ground-in dirt damage hardwood finishes, and how can I prevent it?
Dirt and sand act like abrasives, wearing down the protective finish and dulling the wood over time. Prevent this by placing entry mats, using felt pads under furniture, and wiping spills promptly before grime hardens. For regular maintenance, dry dust or vacuum with a soft brush attachment and use only minimal moisture with an appropriate hardwood floor cleaner.
Which cleaning solution works best for tough ground-in grime on sealed hardwood?
For sealed hardwood floors, a pH-neutral cleaner formulated for hardwood is usually the best choice because it’s effective without harming the finish. Avoid harsh all-purpose cleaners, vinegar, or ammonia, which can strip or haze certain finishes. For extra buildup, use a two-step approach: dampen to loosen grime, then wipe clean and dry; if needed, repeat once or twice rather than soaking.
How can I clean ground-in dirt from hardwood floors in high-traffic areas like hallways?
Begin with vacuuming to remove loose grit, then use a damp microfiber mop with a hardwood-approved cleaner, working in small sections. For traffic-zone spots, pre-treat with a lightly damp cloth for a few minutes to soften grime before wiping. Once the area is clean, dry promptly and consider periodic maintenance like recoating or refinishing if the finish is worn thin.
📅 Last Updated: October 29, 2026 | Topic: How to clean ground-in dirt from hardwood floors? | Content verified for accuracy and freshness.
References
- Wood flooring
- Floor cleaning
- https://www.epa.gov/coronavirus/cleaning-and-disinfecting-your-facility
- https://www.cdc.gov/coronavirus/2019-ncov/community/disinfecting-building-facility.html
- 404 Error
- https://scholar.google.com/scholar?q=hardwood+floor+cleaning+ground-in+dirt Google Scholar
- https://scholar.google.com/scholar?q=wood+floor+care+maintenance+abrasion+cleaning+methods Google Scholar
- https://scholar.google.com/scholar?q=hardwood+floor+surface+cleaning+stain+removal+case+study Google Scholar


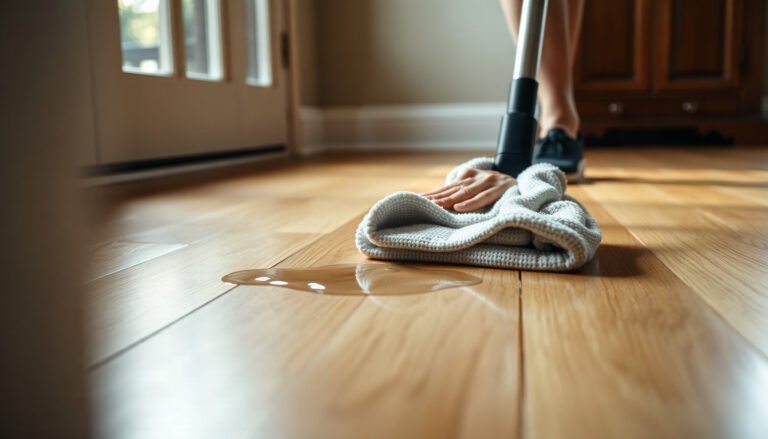
[…] Use a vacuum with a brush attachment (or a soft broom) to remove loose grit before any liquid hits the […]
[…] The good news is you can clean it safely with a few simple supplies—paper towels, cool water, a pH-neutral cleaner, and a soft cloth—and typically finish the job in under an hour. Start right away so the residue […]