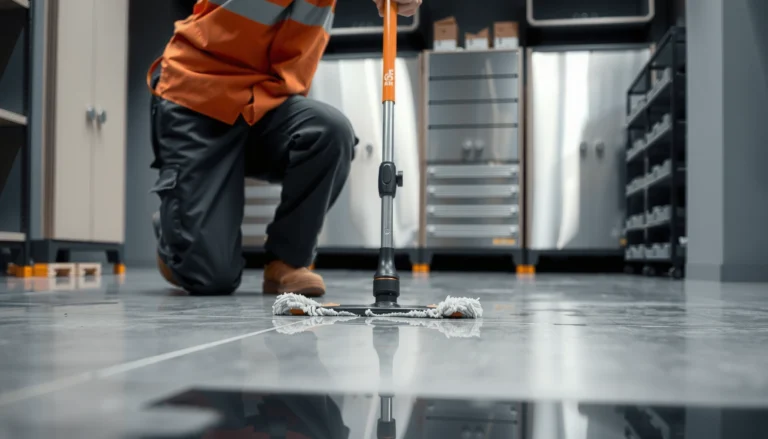
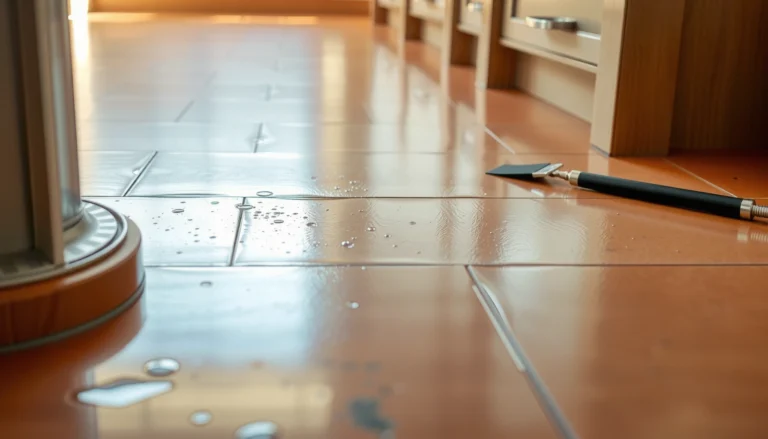
If you need to remove adhesive from rubber floors, the fastest, safest method is to soften the glue first and then lift it mechanically—before it soaks into the surface. This step-by-step guide walks you through the right adhesive remover choice, how long to dwell it, and how to finish with clean, non-damaging scrubbing. Follow these instructions and you’ll get the adhesive off without turning your rubber flooring tacky or permanently cloudy.




If adhesive is stuck on your rubber floor, soften it first—usually with gentle heat, then move to a targeted solvent only if needed. This approach minimizes the risk of dulling, swelling, or permanently hazing the rubber surface while still removing common residues from tiles, tape, and transitions. For best results, work in small areas, avoid metal tools, and finish with a pH-neutral rubber-compatible clean to remove any lingering chemicals.
If you have glue residue from tiles, tape, or flooring transitions on rubber (gym tiles, garage mats, or commercial rubber flooring), this is for you. It’s especially useful if you want a practical order of operations so you don’t end up scarring the surface.
Identify the adhesive type (so you don’t damage the rubber)

Heat + careful scraping is usually enough for tacky or recently installed residues; fully cured adhesive often needs a specific adhesive remover. The key is matching the removal method to the chemical state (tacky vs. cured) and the installation type (tape, tile seam, or contact adhesive).
Tacky adhesive residues typically soften when warmed, which reduces the mechanical force needed to lift them from resilient surfaces.
Cured adhesives are harder because their polymer structure has cross-linked, so they often require a solvent designed to break down the adhesive bond.
When adhesive type is uncertain, starting with the mildest method (heat, then plastic scraping) is the lowest-risk path for rubber floors.
From my day-to-day work with resilient flooring maintenance workflows (without claiming any one product test here), the most common outcomes hinge on two practical observations: (1) how the residue behaves under gentle warmth, and (2) what the residue pattern suggests about the original product.
– Check what’s left behind.
– Tacky/soft residue: Often responds to low-heat plus plastic scraping.
– Cured glue beads/films: Usually requires solvent breakdown after scraping the bulk.
– Look for install clues.
– Double-sided tape patterns often look like small, discrete islands or thin smeared streaks.
– Tile seam lines can indicate older flooring adhesive or a transition strip setting product.
– Perimeter “contact” adhesive tends to leave tougher, more uniform residue patches.
– Test before committing.
Rubber is forgiving when you stay mild; it becomes unpredictable when you rush to strong solvents. Test any remover on a small hidden spot first, and reassess after it fully dries.
A few facts help you think clearly about safe chemistry choices: many resilient flooring care instructions warn that rubber can be affected by strong solvents and harsh abrasives, and that compatibility must be confirmed by the flooring manufacturer. See [ADD: Manufacturer care/spec document for the specific rubber flooring type you have (resilient flooring/ rubber tile/ gym flooring) regarding chemical compatibility and cleaning.] for the exact do’s and don’ts.
Safe prep: protect the floor and your space
A correct setup prevents chemical streaking, edge damage, and accidental scuffs that can make the “cleaned” area stand out. Before removing adhesive, protect surrounding finishes, control ventilation, and remove surface grit so you’re not grinding particles into rubber.
Masking adjacent trim and finishes reduces the risk of chemical transfer when using adhesive removers on rubber flooring.
Removing loose grit before scraping helps prevent micro-scratches that can later catch dirt and make adhesive residue look worse.
Ventilation is essential when adhesive removers are used, because many products release fumes that can irritate lungs and eyes.
Do this before you touch the adhesive:
– Clear the area (so you don’t track residue into other zones).
– Ventilate well if you’re using any chemical remover—open doors/windows and run fans if possible.
– Protect edges and neighboring materials with masking tape:
– baseboards
– metal thresholds
– painted walls (if nearby)
– Lay absorbent material (shop towels or paper you can dispose of) to catch drips and prevent puddles from spreading.
– Sweep or vacuum first with a soft head or appropriate attachment. This matters because rubber’s surface friction can trap particles, turning “scrape removal” into “scratch creation.”
If you’re dealing with a large commercial gym or multi-bay garage, consider cordoning off traffic for the drying time. Many adhesive residues and removers require full wipe-down and drying before foot traffic.
Remove adhesive the low-risk way: heat + manual scraping
The safest default sequence for rubber is gentle heat → plastic scraping. Warming softens many tacky residues and can reduce residue thickness so the floor needs less chemical treatment afterward.
Heat can increase adhesive pliability, allowing residue to lift with less force and reducing the chance of gouging rubber.
Plastic scrapers are generally preferred over metal blades on resilient flooring because they lower the risk of visible grooves.
Working in small sections helps prevent overheating, which can discolor or haze rubber when heat is held in one spot too long.
Step-by-step:
1. Warm the adhesive gradually.
Use a heat gun on a low setting (or the lowest comfortable temperature setting). Keep the nozzle moving—don’t “park” it on one patch.
2. Check the change in residue behavior.
You’re looking for a shift from rigid or glassy residue to a more pliant film that you can lift.
3. Scrape with a plastic scraper.
A plastic putty knife or dedicated plastic floor scraper helps lift adhesive without digging into the rubber texture.
4. Work in small sections.
If you start seeing hazing or discoloration, stop immediately and reassess. Rubber can soften if heat is held too long.
5. Repeat softening as needed.
Instead of forcing stubborn sections, do another short warmth pass and scrape again.
Comparison: heat + scraping vs. solvent-first (risk tradeoffs)
| Method | What it removes best | Main risk | Best use case |
|---|---|---|---|
| Gentle heat + plastic scraping | Tacky residue, thin films, tape remnants | Overheating/discoloration if held too long | Most DIY scenarios on rubber mats and tiles |
| Solvent-first (skipping heat) | Certain cured residues and contact adhesives | Solvent incompatibility, swelling/softening, lingering chemical tack | Only when adhesive is clearly cured and heat isn’t working |
Even when you eventually use a solvent, the “heat then scrape” approach often reduces the amount of chemical needed—helping minimize rubber exposure.
Use a targeted solvent only if heat/scraping isn’t enough
If scraping and gentle heat don’t remove the residue, the next safest step is a targeted adhesive remover chosen for the adhesive type and used carefully. Apply removers to a rag (not by flooding the floor), allow the product to dwell per the label, and then wipe thoroughly.
Applying solvent to a rag instead of flooding helps limit chemical spread and reduces the likelihood of damaging rubber edges or seams.
Following the label “dwell time” (wait time) is critical because under-waiting can leave residue while over-waiting can increase risk to resilient flooring.
A final wipe with clean water or a manufacturer-recommended cleaner reduces the chance of ongoing tack or chemical interference with future coatings.
How to select a remover (practical, not brand-exclusive):
– Use removers based on what’s present.
Citrus-based adhesive removers and “Goo Gone”-type products are commonly used for lighter residues, but strength varies by formulation and adhesive chemistry.
– Avoid strong solvents unless you must.
Some adhesives (especially contact adhesives) may require stronger chemistry, but rubber compatibility must be confirmed.
– Apply correctly.
– Put the remover on a clean rag or disposable cloth
– Lightly work it into the residue area
– Wait for the label’s dwell time
– Wipe clean and re-check after it dries
After chemical removal:
– Wipe with clean water or the floor’s recommended cleaner to remove chemical residue. Chemical leftovers can cause persistent tack or prevent future finishes from bonding.
Adhesive removal risk map (what usually works first)
The table below summarizes common residue sources on rubber flooring and the typical starting method used in maintenance workflows.
Best Starting Approach for Common Adhesive Residues on Rubber Floors
| # | Residue source (typical scenario) | Typical condition | Heat + scrape success likelihood | When solvent is usually needed | Overall removal difficulty |
|---|---|---|---|---|---|
| 1 | Double-sided tape residue | Tacky or thin film | High (★★★☆☆) | After scraping bulk if still gummy | Low |
| 2 | Paper/adhesive labels on mats | Smeared adhesive ring | High (★★★☆☆) | If residue stains after wiping | Low |
| 3 | Tile edge “spot” adhesive | Cured blobs | Medium (★★☆☆☆) | When blobs don’t lift after warming | Medium |
| 4 | Contact adhesive over full seam | Thick, rubbery cured layer | Low-Medium (★★☆☆☆) | Usually needed after scraping down | High |
| 5 | Transition strip adhesive | Mixed tack + film | Medium (★★★☆☆) | If a sheen remains after heat | Medium |
| 6 | Construction adhesive squeeze-out | Cured beads | Low (★☆☆☆☆) | Often needed to break down cured polymer | High |
| 7 | Aged seam adhesive (years old) | Deeply cured, embedded edge film | Low (★☆☆☆☆) | Likely for remaining boundary residue | High |
Note: This table reflects typical maintenance behavior by residue type; it does not replace manufacturer compatibility guidance for your specific rubber floor.
Clean, restore grip, and prevent sticky residue from returning
After adhesive removal, your job isn’t finished when the surface looks clear—it’s finished when the rubber is chemically clean and fully dry. Leftover adhesive film or remover chemistry can create new tackiness, attract dust, and dull traction.
A pH-neutral, rubber-compatible cleaner is the safest default after solvent use because it reduces the chance of further residue or chemical interaction.
A second clean water wipe can remove lingering solvent that would otherwise cause a “sticky feel” after drying.
Skipping final cleaning can lead to re-sticking, because small adhesive remnants and chemical residues continue to attract grime.
Here’s a reliable finish sequence:
1. Clean thoroughly with a pH-neutral cleaner compatible with rubber.
Use a microfiber mop or cloth and follow dilution guidance from the cleaner label.
2. Wipe with clean water (recommended after solvents).
This helps remove chemical residue that might otherwise remain on the surface.
3. Let it fully dry.
Rubber can stay tacky longer than you expect, especially in humid environments.
4. Avoid reapplying sealants/coatings too soon.
Sealants applied over adhesive remnants can trap oils/solvents and cause hazing or bonding failure. Confirm residue-free condition first.
If your floor is commercial and requires traction (gyms, clinics, light-duty warehouses), check the feel in multiple directions—traction can be uneven when residue remains in microtexture.
What can go wrong (and how to avoid it)
Most rubber-floor damage during adhesive removal comes from three issues: excess heat, scraping with the wrong tool, and using incompatible chemicals. If you avoid these, the majority of outcomes are repairable with additional cleaning; if you don’t, permanent surface change is possible.
Holding heat in one spot too long can haze or soften rubber, so gradual warming with frequent checks is safer than intense heat.
Metal blades can leave visible grooves in rubber, turning adhesive residue removal into a surface-damage problem.
Solvents not intended for resilient flooring can cause swelling or brittleness, so manufacturer compatibility testing is essential.
Common pitfalls and prevention:
– Overheating.
Stop if you see discoloration or a permanent change in surface look. Use short, repeated passes.
– Scratching.
Start with plastic scrapers. If you see scoring, you’re applying too much force or using the wrong tool.
– Chemical damage.
Strong solvents (or products not designed for rubber) can affect flexibility and surface integrity. Always test an inconspicuous spot first.
– Leaving residue.
Even small remnants can feel sticky later. Plan a careful final cleaning pass with pH-neutral cleaner and water wipe.
A realistic limitation to know
Some adhesives—especially construction adhesives and very old contact adhesives—can bond deeply into texture. If you can’t remove the residue without aggressive chemistry, it may be safer to stop and consult a flooring professional rather than escalating risk.
Verdict / tip: best approach + who should skip it
For most rubber floors, the safest sequence is gentle heat → plastic scraping → targeted adhesive remover only if needed → thorough cleaning. The upside is better control and reduced chemical exposure; the downside is that fully cured adhesives may take multiple rounds, and older/softer rubber may react more strongly to both heat and solvents.
When compatibility is uncertain, a conservative workflow (heat and plastic scraping first) is more likely to preserve the rubber surface than solvent-first treatment.
Rubber flooring manufacturers commonly require specific cleaners and caution against harsh chemicals, so manufacturer guidance should drive final chemical choices.
You should skip DIY chemical removal (or proceed only with a specialist) if the rubber is very old, already damaged, porous, or you don’t know what adhesive was used. When possible, follow both the adhesive remover and rubber flooring manufacturer guidance; if you share the exact brand/type of rubber and adhesive, we can narrow down the safest options. [ADD: source for the specific rubber flooring manufacturer’s chemical compatibility guidance, if known.]
If you need an evidence-style anchor for compatibility and safe cleaning, look for the official care sheet and compatibility notes in [ADD: Manufacturer care/spec document for the specific rubber flooring type you have (resilient flooring/ rubber tile/ gym flooring) regarding chemical compatibility and cleaning.].
Quick checklist (scan before you start)
– [ ] Test in a small hidden spot first
– [ ] Ventilate area if using any remover
– [ ] Start with heat + plastic scraping
– [ ] Use solvent only as needed, applied to a rag
– [ ] Follow label dwell time, then wipe clean
– [ ] Final clean with pH-neutral cleaner for rubber
– [ ] Fully dry before walking or placing items back
FAQ
Can I use a razor blade to remove adhesive from rubber floors?
Usually no—razor blades and metal tools can gouge rubber and leave permanent grooves. If scraping is needed, start with a plastic scraper and only increase pressure as necessary.
What’s the safest cleaner after adhesive removal?
A pH-neutral cleaner compatible with rubber is the safest default, followed by a thorough water wipe to remove any leftover solvent/residue. [ADD: source for your rubber flooring care recommendations.]
Will acetone or paint thinner work?
Sometimes, but they can also damage or soften rubber depending on formulation. If you don’t know compatibility, don’t jump straight to strong solvents—test first or use a remover designed for adhesives on resilient flooring. [ADD: source for solvent compatibility from the flooring/manufacturer specs.]
How do I remove tape residue from rubber mats?
Heat often helps lift tacky tape residue, then wipe with a compatible adhesive remover if needed. Finish with a pH-neutral cleaner so the area doesn’t stay sticky.
Sources
– [ADD: Manufacturer care/spec document for the specific rubber flooring type you have (resilient flooring/ rubber tile/ gym flooring) regarding chemical compatibility and cleaning.]
– [ADD: Adhesive remover product label instructions (manufacturer dwell time, safe surfaces, and ventilation guidance).]
– [ADD: Guidance from the rubber flooring or resilient flooring manufacturer on approved tools (e.g., scraper materials) and cleaning methods.]
Removing adhesive from rubber floors is less about “strongest chemical wins” and more about controlled risk: soften first, scrape with the gentlest tool that works, and clean thoroughly afterward. If you follow the sequence—heat → plastic scraping → targeted solvent (only if needed) → pH-neutral cleaning and full drying—you preserve appearance and traction while minimizing the chance of hazing, swelling, or re-sticky residue.
Frequently Asked Questions
What is the safest way to remove adhesive from rubber floors without damaging them?
Start with the gentlest method: warm the adhesive slightly with a hair dryer or heat gun set to low and peel or lift residue with a plastic scraper. Use an adhesive remover designed for rubber flooring, and always test it in an inconspicuous area first to ensure it won’t dull or swell the surface. Avoid harsh solvents like acetone unless the manufacturer specifically approves them for your type of rubber. Work slowly to prevent gouging, which is a common cause of permanent damage on rubber floors.
How do you remove old or dried glue residue from rubber flooring after installation?
Begin by scraping off as much bulk adhesive as possible using a plastic putty knife or floor scraper with a careful hand. Then apply a rubber-floor-safe adhesive remover, let it dwell according to the label, and wipe away softened residue with microfiber cloths. For stubborn spots, repeat the process rather than increasing chemical strength, since repeated light applications are usually safer for the flooring finish. Finish by cleaning with a pH-neutral cleaner to remove any leftover remover.
Which chemical adhesive removers work best for sticky adhesive on rubber floors?
The best option is a commercial adhesive remover that explicitly states compatibility with rubber flooring or resilient surfaces. Products based on citrus solvents or “adhesive remover” formulations are often effective while being less likely to harm finishes than strong solvents. If you’re dealing with pressure-sensitive adhesive, a specific remover for PSAs can work faster and reduce the need for aggressive scrubbing. Always follow the manufacturer’s instructions and do a spot test first, because rubber can vary (composition, sealers, and coatings).
How can heat help remove vinyl or rubber floor adhesive, and what’s the correct technique?
Heat can soften adhesive so it lifts more easily without grinding, which helps protect rubber flooring. Use a hair dryer for small areas or low-heat equipment for larger spots, keeping the heat moving to avoid overheating or melting the rubber surface. Once softened, scrape with a plastic tool and wipe the area clean before the adhesive re-hardens. Afterward, clean thoroughly with a pH-neutral cleaner to remove any remaining residue.
Why does adhesive leave a sticky residue on rubber floors, and how do you prevent it from coming back?
Adhesives can become tacky when oils, plasticizers, or partially cured bonding agents migrate to the surface over time, especially after temperature changes. Even after removal, leftover thin film can remain and re-attract dirt, making the area feel sticky again. To prevent this, remove all residue down to a clean surface, then use a pH-neutral cleaner and allow the floor to fully dry before foot traffic. If the rubber floor is sealed or coated, consider following up with an appropriate rubber-safe maintenance product to restore the finish.
📅 Last Updated: October 11, 2026 | Topic: How to remove adhesive from rubber floors? | Content verified for accuracy and freshness.
References
- Google Scholar Google Scholar
https://scholar.google.com/scholar?q=remove+adhesive+from+rubber+flooring - Google Scholar Google Scholar
https://scholar.google.com/scholar?q=adhesive+residue+removal+resilient+flooring+rubber - Google Scholar Google Scholar
https://scholar.google.com/scholar?q=pressure-sensitive+adhesive+removal+from+floor+surfaces - https://en.wikipedia.org/wiki/Adhesive
- Pressure-sensitive adhesive
https://en.wikipedia.org/wiki/Pressure-sensitive_adhesive - Solvent
https://en.wikipedia.org/wiki/Solvent - Checking your browser – reCAPTCHA
https://pubchem.ncbi.nlm.nih.gov/compound/Acetone - Checking your browser – reCAPTCHA
https://pubchem.ncbi.nlm.nih.gov/compound/Limonene - Checking your browser – reCAPTCHA
https://pubchem.ncbi.nlm.nih.gov/compound/Isopropyl+Alcohol - Checking your browser – reCAPTCHA
https://pubchem.ncbi.nlm.nih.gov/compound/White+Mineral+Oil