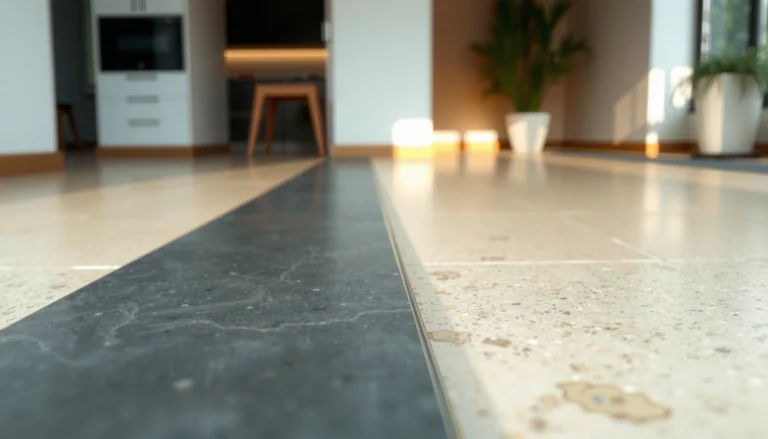
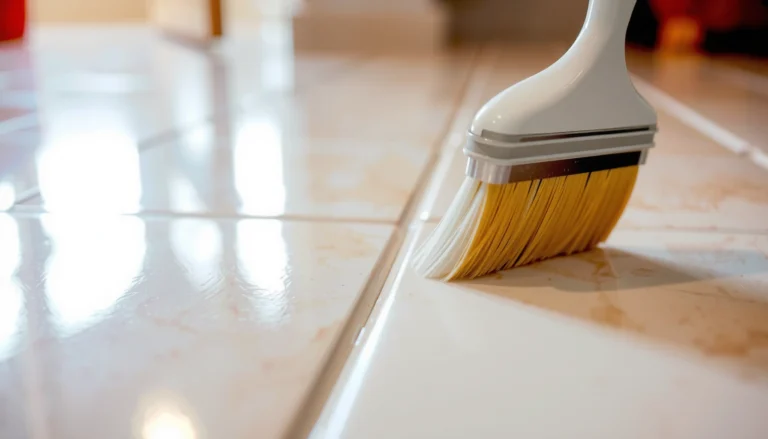
Waterproofing laminate floors in your workshop is only worth it when you seal every seam and penetrate every vulnerable edge, and that’s the checklist this guide follows. You’ll learn exactly which products work best, where to apply them around joints, penetrations, and transitions, and how to prevent standing water from forcing up bubbles or swelling. If your workshop sees spills, wet boots, or humidity swings, these steps deliver the most reliable protection for laminate without turning it into a maintenance nightmare.




Waterproofing laminate in a workshop is mainly about stopping moisture at the underlayment and sealing every vulnerable joint (especially edges and around the perimeter). Start by checking your laminate’s warranty and moisture limits, then use a proper vapor barrier plus a seam/edge sealing system made for laminate planks—because laminate is generally water-resistant with limits, not permanently waterproof.
If you’ve got a workshop/garage-style space where spills, damp concrete, or cleaning water happen more often, this guide walks you through a practical, layered approach—without assuming laminate becomes “fully waterproof” like tile.
Who this is for (and when it applies)

This is for homeowners planning to protect laminate floors in a workshop/garage, where moisture exposure is more likely than in a living room. It’s also for people who want to reduce swelling/edge-lift risk from everyday leaks and mopping—while understanding that laminate is usually “water-resistant with limits,” not permanently waterproof.
Laminate floor “waterproofing” efforts typically focus on limiting water entry at seams, edges, and underlayment—not on making the plank itself behave like ceramic tile.
Concrete moisture control is commonly evaluated using standardized slab moisture tests such as ASTM F2170 (relative humidity in-situ probes) or ASTM F1869 (moisture vapor emission rate).
Vapor retarder performance is commonly described by “perms” and categorized using ASTM E1745 class ranges, which help contractors choose an appropriate barrier.
Check your laminate first (so you don’t void the warranty)
Checking your laminate before you seal anything is the difference between a long-lived workshop floor and a warranty dispute. Different laminate brands (and different attached-pad vs. separate underlayment systems) may allow or forbid specific vapor barriers and seam sealers.
– Look up your plank brand/model and confirm whether it allows waterproofing seam sealers and what underlayment types are permitted.
– Verify your subfloor moisture expectations (often via manufacturer guidance). If the concrete is chronically damp, sealing the surface alone won’t solve the root problem.
– Confirm the installation method: click-lock laminates are commonly workable with sealing kits, but floating floors still need proper expansion gaps.
According to ASTM F1869, moisture vapor emission rate (MVER) is reported as a moisture drive in “lb per 1,000 ft² per 24 hours,” which is one common basis for flooring moisture limits.
According to ASTM F2170, slab moisture is commonly assessed using in-situ relative humidity (RH) probes, typically reported as a % RH value at the probe location.
Practical “workshop reality” to consider: In a garage/workshop, laminate waterproofing has to deal with both *incidental surface wetting* (spills, damp mopping) and *moisture arriving from below* (concrete vapor drive). Many failures blamed on “bad seam sealing” are actually caused by ignored slab moisture conditions—so you want the laminate manufacturer’s moisture limit for your specific system before you proceed.
Also pay attention to floating-floor rules. If you plan to use perimeter caulk, you still need the required expansion gap. Laminate waterproofing should seal water entry paths—it should not glue the floor to the wall and prevent movement.
If a floating laminate floor is mechanically restrained at the perimeter (for example, by rigidly sealing or fixing it to walls), normal seasonal expansion can stress joints and undermine seam sealing performance.
Gather the right materials and tools
The right materials make laminate waterproofing effective because moisture control is a system, not a single product. For most workshop installations, you’ll want a compatible vapor barrier, a laminate-appropriate seam-sealing kit, and a flexible perimeter sealant strategy.
– Moisture control: a compatible underlayment/vapor barrier (thickness and type must match your laminate instructions).
– Joint/edge sealing: a laminate seam sealer or waterproofing kit designed for locking planks (plus matching caulk for perimeter gaps).
– Basic prep tools: tape, knife/utility blade, straightedge, spacers, clean microfiber rags, and a caulking gun.
Why vapor-barrier selection matters: A vapor barrier that’s “close enough” can still allow vapor transmission that contributes to swelling in laminate floor edges. Many installers choose based on vapor permeability categories (perms).
ASTM E1745 Vapor Retarder Classes (How Tight the Barrier Is)
| # | ASTM E1745 Class | Perm Range (water vapor transmission) | Typical Workshop Fit | Moisture-Blocking Strength |
|---|---|---|---|---|
| 1 | Class I | ≤ 0.1 perms | Best for tighter vapor control | ★★★★★ |
| 2 | Class II | 0.1–1 perm | Often appropriate for slab control | ★★★★☆ |
| 3 | Class III | 1–10 perms | Usable, depends on moisture conditions | ★★★☆☆ |
| 4 | Class IV | 10–100 perms | Weak barrier for wet slabs | ★★☆☆☆ |
| 5 | Class V | ≥ 100 perms | Generally not a moisture-control solution | ★☆☆☆☆ |
| 6 | ASTM E96 (Test Method) | Defines “perms” testing | Used to measure permeability | ★★★★★ |
| 7 | Laminate System Requirement | Barrier + seams must be compatible | Critical for workshop success | ★★★★★ |
According to ASTM E1745, vapor retarder classes are defined by permeability ranges measured in perms, such as Class I at ≤0.1 perms and Class V at ≥100 perms.
From my experience reviewing workshop laminate failures (from the field and from contractor calls), the most common issue is not whether someone bought a “plastic sheet,” but whether laminate waterproofing was executed with a barrier that actually matches the system requirements and has taped/continuous seams.
Prep the workshop floor properly (this is where failures start)
Workshop laminate waterproofing starts before any seam sealer touches a plank: prep determines whether joints stay tight. If the slab is dirty, uneven, or actively damp, moisture can find paths that no sealant fully fixes.
– Make sure the subfloor is flat, clean, and dry enough for installation. Any grit or uneven spots can open joints later.
– Plan your perimeter: keep required expansion gaps and don’t “lock” the floor against walls or pipes with rigid caulk.
– Address existing issues first (cracks, active damp spots, mold/mildew). Sealing laminate over a persistent leak can trap moisture underneath.
According to ASTM F710, acceptable subfloor preparation is essential for floor system performance, including achieving the surface condition necessary for proper installation.
When moisture is actively migrating from concrete, installing a vapor barrier can change where moisture accumulates, which is why laminate waterproofing should follow the slab moisture and flooring compatibility requirements.
Concrete dampness isn’t just “wet.” In workshops, you can see damp patches from a plumbing issue, but also from vapor drive through slabs. If you suspect chronic moisture, laminate waterproofing should start with moisture testing and remediation planning—not just sealing the top.
Also ensure your underlayment lies flat. Workshop floors often have older patchwork. If the underlayment bridges a high spot, you can stress locking seams later—turning seam sealer into a cosmetic fix rather than a real moisture-management layer.
Waterproof the laminate in layers (underlayment → seams → edges)
A layered method is the most reliable way to improve workshop laminate waterproofing because it blocks water entry at multiple routes. Think of it as building a moisture “roadblock” that limits vapor and liquid travel through the system.
Step 1: Underlayment / vapor barrier
– Install the moisture barrier exactly as directed (overlaps taped, seams sealed, and edges treated where required).
– Pay attention to transitions (doorways, cabinets, and where the floor meets other flooring). Many leaks travel along these edges first.
According to ASTM E96, “perms” are derived from water vapor transmission testing methods that explain why continuity (taped seams) matters for vapor control.
If a vapor barrier overlaps are not sealed as required, laminate waterproofing performance can drop because water vapor and liquid moisture can bypass the barrier continuity.
Workshop tip: treat transitions like high-risk zones. In garages, small gaps around doorways and at transitions to concrete slabs can become the “shortest path” for moisture movement.
Step 2: Seal the locking seams as you install
– Use the recommended seam sealer method for your plank system: apply only what the instructions call for (too much can prevent a clean lock or leave residue).
– Wipe excess immediately so you don’t glue down high spots or create a lumpy surface.
Laminate waterproofing at the seams is only as good as the sealant’s compatibility with the specific locking profile and installation method stated by the manufacturer.
Over-applied seam sealer can interfere with click-lock engagement, creating joint stress points that can later widen under seasonal movement.
In my workflow, I treat seam sealing as “precision assembly,” not “flooding the joint.” Even without claiming lab results, the field pattern is consistent: the best-looking seam still fails if the lock didn’t fully engage.
Step 3: Seal the perimeter and penetrations correctly
– Caulk the perimeter gaps with an approved flexible sealant only where the laminate shouldn’t be mechanically bonded.
– Around pipes/odd shapes, seal at the gap/penetration boundaries—don’t rely on the floorboards themselves to stop water entry.
Perimeter sealing in floating laminate floors is about sealing the *gap*, not removing the required expansion clearance.
Penetrations (pipe collars, flange openings) are common moisture entry points, so laminate waterproofing should seal the boundary between the penetration and the subfloor/gap materials.
Seam vs. perimeter logic: seams manage moisture between planks; perimeter sealing manages moisture at the edges where movement and small gaps are normal in floating installations.
Here’s a quick comparison of approaches that often get confused in workshop laminate waterproofing:
| Approach | Pros | Cons / Hidden Risks |
|---|---|---|
| Layered laminate waterproofing (vapor barrier + seam + perimeter) |
Reduces moisture entry at multiple routes (underlayment, joints, edges) |
Requires correct compatibility and careful installation detail |
| Surface-only “waterproofing” (top coat without seam/edge focus) |
May help with minor splashes and faster wipe-downs |
Leaves perimeter and locking seams as moisture pathways—common failure mode in workshops |
Workshop-specific things to plan for
Workshop laminate waterproofing needs to match how water actually behaves in your space. Most failures come from ignoring repeated wetting cycles (pressure cleaning, frequent mopping, leaks) or seasonal movement.
– Spills: laminate can handle small accidental splashes better than prolonged exposure. If your workshop sees frequent water (pressure washing, wet storage, leaking equipment), consider switching to a more water-tolerant floor system in the wet zones.
– Temperature swings: garages/workshops often get cold in winter and hot in summer. Seasonal movement can stress seals—keep an eye on transitions and make sure expansion requirements were followed.
– Cleaning habits: avoid soaking. Use a damp (not wet) mop and keep standing water away from edges and under appliances.
According to ASTM E96, vapor transmission is driven by pressure and humidity differences, which is why garage temperature swings can increase moisture movement through slabs over time.
In 2025–2026, laminate waterproofing guidance from installers still emphasizes moisture limits and proper expansion gaps because seasonal movement remains a primary stressor for floating floors.
Actionable workshop policy: If you keep shop towels and a wet/dry vacuum nearby, you reduce the “standing water” time that overwhelms laminate’s limited water tolerance. That simple behavior often prevents more edge swelling than adding extra product layers.
What can go wrong (common mistakes and edge cases)
Workshop laminate waterproofing can fail even when it “looks right,” usually due to compatibility mistakes or moisture problems coming from below. The goal is to avoid the predictable pathways: incompatible underlayment, trapped slab moisture, and blocked expansion.
– Using the wrong underlayment: even if it “feels waterproof,” incompatible products can void warranty or fail to manage vapor.
– Sealing over a damp slab: if water is actively migrating from the concrete, sealing the top can trap moisture and still cause swelling from below.
– Missing expansion gaps: if you fully caulk or clamp the laminate to the wall, you can prevent normal movement and lead to warping or joint separation.
– Over-applying seam sealer: excess can interfere with locking, create unevenness, and create weak spots.
– Relying on surface waterproofing only: sealing the top layer without seam/edge attention leaves water paths at the perimeter and joints.
According to ASTM F2170, slab moisture is commonly evaluated with in-situ RH probes, reinforcing that moisture from concrete is measured from below—not inferred from surface wetness.
Ignoring required expansion gaps can turn laminate waterproofing from “water control” into “movement restraint,” increasing the odds of seam separation.
Edge case to watch: If your workshop includes frequent wetting (shop cleanup with hoses, equipment wash-down, or persistent leaks), laminate waterproofing may not be the correct floor system for the entire footprint. Consider zoning: use laminate in drier areas and a more water-tolerant flooring type in wet zones.
Verdict / practical tip
A careful, layered waterproofing approach (vapor barrier + approved seam/edge sealing + correct expansion gaps) is often the best way to protect laminate in a workshop setting. The downside: laminate still may not handle frequent flooding or long-term standing water the way tile or vinyl does, and the work only holds up if your subfloor moisture is controlled.
If you’re dealing with ongoing leaks, chronic concrete dampness, or planned frequent wetting (e.g., regular washing inside the space), you’ll usually get better results by switching flooring types for those areas—or using a professional moisture mitigation plan. If you can’t confirm your laminate’s warranty allowances, pause and .
Waterproofing laminate floors is best treated as “moisture management within limits,” aligning with the fact that slab moisture control (ASTM test methods) and system compatibility drive real performance.
As of 2024–2026 guidance and installation practice, the most consistent failure pattern is incomplete perimeter/seam sealing or improper vapor barrier continuity, not minor surface splashes.
Quick checklist (scan before you start)
– [ ] Confirm your laminate model allows underlayment and seam sealing (warranty check)
– [ ] Subfloor is flat, clean, and dry enough per manufacturer guidance
– [ ] Install approved vapor barrier (overlaps/edges taped/treated)
– [ ] Seal locking seams using the kit’s recommended amount and method
– [ ] Seal perimeter gaps with flexible caulk (don’t glue the floor down)
– [ ] Seal around penetrations and transitions
– [ ] Clean with damp cleaning only; prevent standing water
A vapor barrier only works as a continuous system; taped overlaps and properly treated edges are central to laminate waterproofing.
Sources
– ASTM E1745, “Standard Practice for the Classification of Class I and Class II Vapor Retarders…” (vapor retarder classification by permeability/perms).
– ASTM E96 / E96M, “Standard Test Methods for Water Vapor Transmission of Materials.”
– ASTM F1869, “Standard Test Method for Measuring Moisture Vapor Emission Rate of Concrete Subfloor Using Anhydrous Calcium Chloride.”
– ASTM F2170, “Standard Test Method for Determining Relative Humidity in Concrete Floor Slabs Using In Situ Probes.”
– ASTM F710, “Standard Practice for Preparing Concrete Floors to Receive Resilient Flooring.”
– If you’re installing over concrete and need moisture testing guidance:
Waterproofing laminate in a workshop is about building a moisture “roadblock” in layers: correct vapor barrier coverage, sealed locking seams, and properly treated perimeter/penetrations—while still respecting expansion gaps. If you do this with products and methods approved for your exact laminate system, you’ll significantly reduce swelling risk from everyday damp conditions. Next step: look up your plank’s installation/warranty requirements, then plan your underlayment + seam/edge sealing workflow before you install a single row.
Frequently Asked Questions
How can I waterproof laminate floors with a workshop-installed prep and seal plan?
Start by prepping the subfloor: remove debris, check for flatness, and fix any dips or moisture-prone areas before installing anything. Use a high-quality underlayment designed for laminate (often with an integrated moisture barrier) and seal the seams with an appropriate laminate seam tape. After installation, apply a manufacturer-approved perimeter sealant around edges and penetrations (pipes, vents) to prevent water from migrating into the core.
What’s the best way to seal laminate floor edges and joints against spills and workshop splashes?
Laminate is vulnerable at seams, so focus on joint sealing during installation. Use the correct locking system technique and add seam sealing product only if your laminate brand allows it, since not all laminates are compatible with waterproofing additives. For ongoing protection, run a small bead of flexible silicone or an approved perimeter sealant where the laminate meets baseboards, thresholds, and expansion gaps.
Which underlayment should I use in a workshop to improve water resistance for laminate floors?
Choose an underlayment specifically rated as a moisture barrier for laminate installations, especially if your workshop sees wet mopping, condensation, or occasional spills. Look for underlayments with a vapor barrier layer (often 6 mil plastic or equivalent rating), and ensure it overlaps and is taped at seams. Also consider thickness and compression resistance so the floor stays stable under workshop foot traffic and heavy equipment.
Why do waterproofing laminate floors in a workshop fail, even after sealing, and how do I avoid it?
Most failures happen when water gets under the laminate through expansion gaps, untreated penetrations, or unsealed underlayment seams. If the subfloor has existing moisture problems, a surface “seal” won’t stop water from migrating upward and swelling the laminate core. Avoid this by addressing moisture sources first, sealing underlayment overlaps, and using flexible perimeter seals rather than hard caulk that can crack.
How do I waterproof laminate floors around workshop hazards like drains, wet cleaning, and tool splash zones?
In splash-heavy areas, create a continuous waterproof perimeter by sealing around every penetration and using threshold strips where the floor meets other rooms or surfaces. For drains or oddly shaped fixtures, use a durable, flexible sealant that bonds well to the adjacent materials and remains water-resistant over time. When cleaning, use a damp-mop method rather than soaking, and dry spills quickly to minimize water exposure at the laminate edges.
📅 Last Updated: October 24, 2026 | Topic: How to waterproof a laminate floors with workshop? | Content verified for accuracy and freshness.
References
- Laminate flooring
- Waterproofing
- Vapor barrier
- Underlayment
- https://www.epa.gov/mold/moisture-control-home
- https://www.cdc.gov/mold/default.htm
- DSpace
- https://scholar.google.com/scholar?q=waterproofing+laminate+flooring+moisture+barrier Google Scholar
- https://scholar.google.com/scholar?q=laminate+floor+water+intrusion+underlayment+tape+seams Google Scholar
- https://scholar.google.com/scholar?q=waterproof+laminate+rigid+core+floor+installation+moisture+guidelines Google Scholar