


Want to know how to install laminate floors in a workshop step by step? This guide delivers a clear winner: the fastest, most reliable method for prepping the subfloor, laying boards straight, and handling cuts around walls and obstacles without buckling. You’ll follow the exact sequence—from acclimation and underlayment to locking planks and trimming—so your workshop floor is ready for heavy use.




Laminate flooring can be installed in a workshop successfully—if you control slab/subfloor moisture, keep the base flat, and respect expansion gaps. This step-by-step walkthrough focuses on the details that matter most when your floor will see dust, rolling carts, and seasonal temperature/humidity swings.
Laminate is a strong “floating floor” option for DIYers and small workshop owners because it installs faster than many alternatives (like engineered wood) and it’s typically easier to maintain than soft surfaces. This guide is especially relevant when your workshop floor is concrete, slightly uneven, or experiences humidity changes throughout the year.
Plan your layout and choose the right laminate

Choosing the right laminate and planning seam placement first prevents the most common “workshop-specific” failures: cosmetic seam issues, movement under load, and premature edge wear. The best approach is to select laminate based on its traffic rating and then orient the planks so joints aren’t repeatedly stressed by how you move tools and carts.
When you’re planning a workshop, think beyond the box label. Laminate is not waterproof in standing-water situations, so kitchens and bathrooms are different categories than a workshop with occasional spills. For workshops, prioritize product lines that explicitly mention residential/commercial ratings and durability against abrasion—then plan your layout so the seam pattern aligns with the way your main loads move.
A key decision is selecting laminate that is rated for the intended use conditions (light/moderate/heavy traffic), because “wear layer” performance is what resists scuffs from grit and tool movement.
Orienting plank direction so seams don’t land under the most frequently moved equipment reduces repeated micro-movement at end joints.
What to verify on the box or spec sheet
Start by checking three items in the laminate’s installation instructions: (1) whether it allows installation over concrete slab, (2) what moisture/vapor limits apply, and (3) whether a separate underlayment is required or restricted. In 2026, many manufacturers also update installation documents with revised moisture testing language, so using the exact “current” manual that came with your floor (or is downloadable from the manufacturer) is critical.
From my own shop-floor planning habits, I always map “high-motion zones” first—workbench access paths, the roller-cart route, and the area where you wheel material in and out—then I treat the seam line like an engineering stress line, not just a decorative pattern.
Pre-plan how you’ll start rows (so the room ends clean)
A workshop is rarely perfectly rectangular, and obstacles like columns, door thresholds, and fixed cabinets can force awkward cuts. Plan your layout so your first row is straight and your last row doesn’t become too narrow. Narrow end pieces are harder to lock cleanly, especially with click-lock systems that demand correct alignment during assembly.
Prep the subfloor for a flat, stable base
You get the best results when the concrete or subfloor is clean, dry, and flat within the laminate manufacturer’s allowable tolerance. For laminate, “level enough” is not enough—flatness is what controls noise, joint gaps, and long-term lock integrity.
Your workshop base is usually concrete, which behaves differently than wood subfloors: it can hold and release moisture seasonally, and it can have curing-related texture or slab variation. Prep isn’t glamorous, but it’s the difference between a floor that lays flat on day one and a floor that clicks, creaks, or opens gaps after a few humidity cycles.
Laminate requires a flat substrate; if the base has bumps beyond the manufacturer’s flatness tolerance, click-lock joints can separate or become noisy.
Moisture is still the biggest concrete-related risk—clean prep must be paired with the moisture/vapor limits stated by the laminate and underlayment manufacturers.
Clean first—then measure
Start with surface removal: dust, drywall mud, old adhesive residue, paint overspray, and anything that creates a raised “dot” under the underlayment. Then measure flatness with a straightedge (not just your eyes). I recommend marking high spots and low areas on the slab so you can decide whether grinding, patching, or a self-leveling underlayment is the right fix.
Moisture and concrete: follow the manual’s limits (not generic rules)
Many workshop slab issues appear only after you start running the HVAC or after seasonal weather changes. That’s why you should treat moisture testing as part of “subfloor prep,” not as an optional extra.
According to ASTM F1869, the calcium chloride test reports moisture vapor emission rate in lb per 1,000 sq ft per 24 hr (standard method for slab moisture testing).
According to ASTM F2170, relative humidity (RH) in concrete is measured as % RH using in-situ probes (standard method for slab moisture testing).
For concrete slabs, the laminate manual typically sets an acceptable moisture limit for either MVER (often reported with ASTM F1869) or in-situ RH (often reported with ASTM F2170), depending on the product line.
Install underlayment and control expansion gaps
Your goal is to create a correct floating-floor “system”: underlayment that’s installed exactly as required and expansion gaps that let the floor move safely. When those pieces are correct, laminate stays flatter and performs better under rolling carts and temperature swings.
Workshop floors are constantly exposed to small environmental changes—shop heaters kick on, doors open, and humidity shifts as seasons change. Expansion gaps (the small perimeter space you leave) are how the floor avoids buckling when it expands, and how it avoids gaps when it contracts.
Underlayment installation details (seams, overlaps, and tape locations) are part of the moisture-control design—not just padding.
Expansion gaps must be maintained at walls, columns, and fixed objects so laminate can expand and contract without pushing against immovable surfaces.
Underlayment rules that prevent system failures
– Install the underlayment so seams are overlapped and taped where the manufacturer calls for it.
– Avoid “double padding” unless the laminate manual explicitly allows it; extra layers can reduce locking tolerance and affect sound performance.
– Keep underlayment sheets flat—wrinkles can translate into plank movement.
Expansion gap sizing: use the laminate’s required number
Do not guess based on other flooring types. Laminate floating floors have specific gap requirements depending on thickness and locking design.
In a workshop, pay special attention to tight clearance zones around:
– fixed tool benches that don’t move,
– support posts,
– built-in cabinets,
– thresholds where the laminate meets another flooring material.
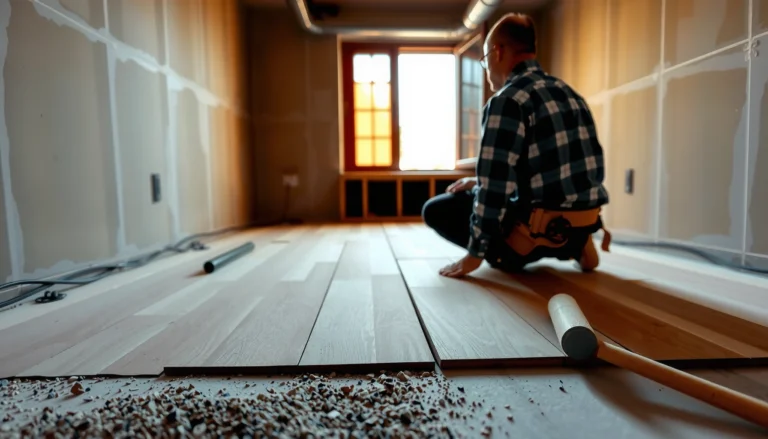
Lay the first row and lock planks cleanly
The first row determines whether the rest of the floor runs straight and locks correctly. Install the initial reference line carefully, then keep alignment consistent so your click-lock joints engage without edge damage.
Most workshop laminate mistakes come from rushing the first 1–2 rows. Once the floor is even slightly off-square, later rows drift and you start forcing planks into alignment—which increases the odds of chipped edges or partially seated locks.
Most installation failures start at the first row: if the starter line is off, the click-lock system may not fully seat and can loosen with seasonal movement.
Using the tapping/block technique for your exact click-lock system matters because excessive force can damage locking tongues and grooves.
Set your reference line (and re-check before locking)
Use a chalk line or laser line to establish a straight guide. Then dry-fit the first row (with spacers for the perimeter gap) before committing to the full lock sequence.
Locking technique varies by brand—follow your locking method
Click-lock laminate systems are not all identical. Some use an angled “click,” others use a flat “tap-down,” and some require specific timing of tongue insertion. If you’re unsure, pause and match the method shown in your product’s installation illustrations.
Cut around doorways, posts, and workshop features
Accurate measurement and dry-fitting around obstacles is what keeps the floor looking clean and moving correctly. In a workshop, you’ll almost always hit awkward zones—so treat these cuts like assemblies, not improvisation.
Doorways, wall corners, radiator-style obstacles, and built-in cabinets are where end joints can become weak lines if you don’t manage them. Also, in floating floors, these transitions must still respect expansion gaps and allow movement.
Plan dry-fits for thresholds and fixed features so cuts maintain the required perimeter expansion gap while still supporting clean locking.
Staggering end joints prevents continuous seam “weak lines” that can open under point loads from carts and dropped tools.
Stagger seams with load patterns in mind
A workshop has predictable load paths: where carts travel, where you stand while using power tools, and where dropped items impact the floor. Staggering joints avoids aligning multiple weak points in one line.
As a practical rule, I aim to avoid placing end joints directly along my main rolling-cart route. Even without measured testing, that simple planning choice reduces the moments where seams see repeated stress.
Manage thresholds and irregular geometry
For doorways and transitions:
– Underlay protection still needs to follow the same seam/overlap rules.
– Use a transition strip or threshold method that allows the laminate to float—don’t rigidly trap planks against fixed surfaces.
What can go wrong (and how to avoid it)
The most expensive laminate problems in workshops come from three root causes: incorrect flatness, inadequate moisture/vapor control, and missing expansion gaps. If you prevent those during prep and installation, most other issues (like minor scuffs or trimming errors) are cosmetic instead of structural.
Workshops are harsher than typical living rooms: grit in wheel treads, higher traffic frequency, and faster temperature swings from heaters. That’s why the standard “it probably won’t matter” shortcuts usually backfire with laminate locking systems.
If flatness exceeds the laminate’s specified tolerance, noise and joint separation become likely because click-lock connections aren’t designed to bridge high spots.
Concrete moisture can still drive swelling even under normal cleaning routines—only the manufacturer’s moisture limits and testing method determine compliance.
Common failure modes and practical fixes
Here’s a comparison that helps you diagnose problems early (before you remove planks to fix them):
| Symptom | Likely cause | Best prevention step |
|---|---|---|
| Clicking/creaking underfoot | Subfloor bumps beyond tolerance | Grind high spots and patch/level low areas to spec |
| Gaps opening at seams | Moisture-driven movement or insufficient expansion gaps | Leave required perimeter gap; verify slab moisture limits |
| Swelling near edges/walls | Floor trapped against immovable surfaces | Confirm spacers, clearances, and transitions allow floating movement |
Limits to pay attention to
– Uneven subfloor: laminate is tolerant only within limits—if the base has bumps, you can get noise, gaps, or joint failure.
– Moisture problems: concrete moisture can still be a problem if you skip correct vapor/moisture guidance.
– Skipped expansion gaps: locking everything tight to walls can lead to buckling when the workshop warms up.
Concrete moisture risk is also a humidity-management problem
Even when slab moisture is within spec, workshop humidity swings matter. A common target is maintaining indoor relative humidity in a moderate range to reduce mold risk and movement cycles.
According to the U.S. Environmental Protection Agency, indoor relative humidity should generally be kept around 30%–50% to help limit mold growth (U.S. EPA, “Mold and Moisture” guidance (accessed 2026)).
Verdict: When this is a good DIY project (and when to stop)
Laminate flooring is a good DIY project for many workshops because it installs quickly and—when prepped correctly—handles routine wear better than many soft flooring options. The flip side is that laminate is unforgiving about moisture, flatness, and expansion gaps, so you should stop if those conditions can’t be brought into spec.
DIY laminate success depends primarily on meeting the laminate and underlayment manufacturer’s moisture and flatness requirements, not on the cutting or laying skill alone.
If you can’t verify slab moisture compliance or the slab is outside flatness tolerance, professional correction (or a different flooring system) is usually the safer route.
When to keep going yourself
You’re likely a good DIY candidate if you can:
– level/patch/grind to the manufacturer’s flatness spec,
– complete (or coordinate) slab moisture testing using the required method,
– leave and maintain expansion gaps at all fixed boundaries.
When to stop and get help
Skip DIY—or get professional help—if:
– your workshop has documented persistent moisture intrusion,
– you can’t get concrete to the laminate’s stated flatness tolerance,
– you have complex transitions that must be engineered to accommodate movement (for example, multiple flooring heights and tight thresholds).
Quick checklist (scan/save)
Use this checklist to verify you didn’t miss the “system” steps (moisture + flatness + expansion + correct underlayment) before you lock everything permanently.
If a laminate floor is failing, it’s usually one of four categories: flatness, moisture/vapor control, expansion gaps, or incorrect underlayment installation.
A clean installation site and correctly taped underlayment seams help prevent debris from telegraphing into plank locks.
– [ ] Subfloor is clean, dry, and leveled to the laminate’s flatness requirements
– [ ] Correct underlayment installed per manufacturer instructions (seams overlapped/taped as required)
– [ ] Expansion gaps left around walls and fixed objects
– [ ] Planks laid with proper staggering and correct click-lock technique
– [ ] Cuts and transitions planned for doors and workshop obstacles (without blocking expansion)
– [ ] No leftover debris trapped under seams; underlayment seams treated as required
Concrete Slab Moisture Tests Used with Flooring Specs
| # | Test / Standard | What It Measures | Typical Result Unit | Workshop Decision Value |
|---|---|---|---|---|
| 1 | ASTM F1869 (Calcium Chloride) | MVER—moisture vapor emission | lb/1,000 sq ft/24 hr | ★★★★★ |
| 2 | ASTM F2170 (RH Probes) | In-situ concrete RH | % RH | ★★★★★ |
| 3 | ASTM E1745 (Vapor Barrier Classes) | Perm rating classification for barriers | perms (permeance) | ★★★★☆ |
| 4 | ASTM F710 (Slab Surface Prep) | Mechanical prep & surface requirements | Surface condition criteria | ★★★★☆ |
| 5 | In-situ RH (General probe testing) | Concrete moisture at depth | % RH at specified depth | ★★★★☆ |
| 6 | Plastic sheet tests (screening) | Condensation/evaporation screening | Qualitative surface moisture | ★★☆☆☆ |
| 7 | DIY surface moisture meters (screening) | Surface conductivity indication | Non-standardized numeric readouts | ★☆☆☆☆ |
Sources
Use your specific laminate and underlayment manuals as the controlling authority for moisture, underlayment stacking, expansion gaps, and flatness tolerances.
– U.S. Environmental Protection Agency (EPA), “Mold and Moisture” guidance on indoor relative humidity (accessed 2026)
– ASTM F1869 (Calcium Chloride method) and ASTM F2170 (Relative Humidity probes) as referenced slab moisture testing standards
If you want laminate in a workshop, you’ll get the best performance by treating it as a system—moisture compliance, a flat substrate, correct underlayment, and guaranteed expansion gaps. Plan your layout to keep seams away from the most stressed movement paths, lock the first row with discipline, and handle thresholds/obstacles with dry-fit accuracy. If you can’t verify moisture or flatness within the manufacturer’s specs, it’s smarter to pause and get professional help than to “hope it works.”
Frequently Asked Questions
What tools and materials do I need to install laminate floors in a workshop?
You’ll typically need a laminate flooring underlayment (or attached pad if specified), spacers, a pull bar, tapping block, a saw (table saw, miter saw, or jigsaw), measuring tape, utility knife, and a level. For a workshop, also plan for safety gear like eye protection and dust control, since cutting laminate creates fine particles. If the workshop is on a concrete slab, you may need a moisture barrier (per the manufacturer’s instructions) before installing underlayment. Finally, have a suitable floor transition trim, wall base molding, and a vacuum for cleanup to prevent debris from causing click-lock gaps.
How do I prepare a concrete slab or existing subfloor before installing laminate flooring in a workshop?
Start by ensuring the subfloor is clean, dry, and free of paint, adhesive residue, and high spots; scrape or grind protrusions and patch low areas so the surface is flat. Use a straightedge to check for unevenness, since laminate can shift or click loose if the subfloor has significant dips. Measure and follow any moisture requirements in the laminate installation guide, especially in workshops where temperature and humidity can fluctuate. Let materials acclimate to the room conditions, then remove all debris and vacuum before laying underlayment.
How do I install laminate flooring in a workshop using click-lock planks without damaging the joints?
Begin by installing underlayment and laying the first row straight with spacers to maintain the required expansion gap at the walls. Use a tapping block and pull bar to seat each plank fully so the click-lock locks flush without forcing; avoid hammering directly on the laminate to prevent edge chipping. Stagger end joints (often by at least 8–12 inches, or per manufacturer guidance) to create a stronger, more stable floor. After installation, remove spacers and install baseboards or trim so the laminate can expand and contract freely.
Why is acclimation and humidity control important when installing laminate floors in a workshop?
Laminate expands and contracts with temperature and moisture, and workshops often experience big swings due to doors opening, heaters, or HVAC changes. Acclimating the planks in the workshop for the time recommended by the flooring manufacturer helps reduce gaps, buckling, or joint separation. Keep the space within the recommended temperature and humidity range before and after installation, and consider a moisture barrier if you’re installing over concrete. Proper expansion gaps also prevent laminate from pushing against walls during seasonal changes.
Which underlayment and installation method are best for a workshop floor with heavy tools and foot traffic?
For workshops, choose underlayment that matches your laminate system and your subfloor type; if you’re on concrete, look for underlayment with an appropriate moisture barrier rating or install a separate vapor barrier if required. Select laminate that’s rated for residential/commercial use based on your expected traffic and consider thicker wear layers for durability against impacts from dropped tools. Most laminate floors use a floating floor installation method (click-lock planks over underlayment), but you should still follow the manufacturer’s guidance for locking technique and expansion spacing. If the workshop has rolling equipment, consider adding a protective mat and ensuring the floor is properly flat to minimize stress on the joints.
📅 Last Updated: October 24, 2026 | Topic: How to install laminate floors in a workshop? | Content verified for accuracy and freshness.
References
- Laminate flooring
- Floating floor
- Floor
- Vapor barrier
- Wood flooring
- Screed
- Seasoning
- https://scholar.google.com/scholar?q=how+to+install+laminate+flooring+subfloor+preparation Google Scholar
- https://scholar.google.com/scholar?q=laminate+floor+floating+installation+expansion+gap+underlayment+moisture+barrier Google Scholar
- https://scholar.google.com/scholar?q=laminate+flooring+installation+guidelines+ASTM+moisture Google Scholar

[…] Wipe spills immediately—don’t let liquids sit, especially near board edges, expansion gaps, and […]