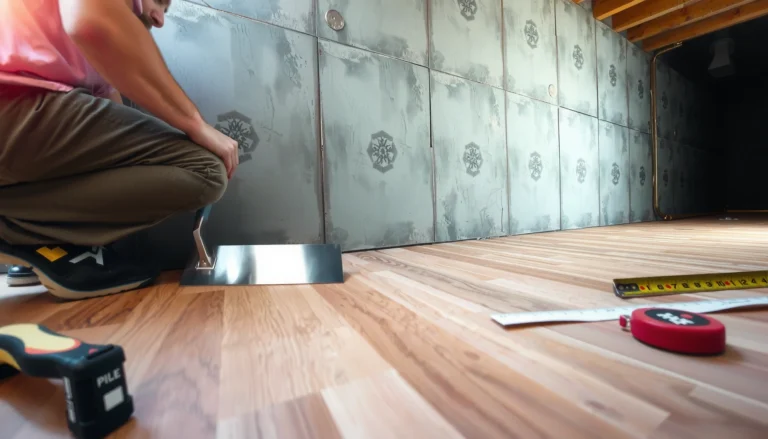
If you’re installing transitions around laminate floors in a warehouse, the best approach is the one that matches your traffic load and movement risk: rigid transitions for tight, stable seams and flexible expansion-style trims where the floor can expand or shift. This guide shows exactly how to measure gaps, prep subfloor edges, and fasten the transition so it stays flush under forklifts and rolling carts. Get it wrong and you’ll invite trip hazards and edge separation—get it right and the finish will hold up long after the first deliveries.




Fasten the right transition profiles to the subfloor while leaving the laminate’s required expansion gap—especially at warehouse doorways. Install the right transition profile, leave the laminate’s required expansion gap, and fasten the transition to the subfloor (not the floating laminate planks) using the method your transition system calls for. In a warehouse, this prevents buckling at doorways and aligns board edges where foot traffic and carts concentrate. This guide walks you through choosing, measuring, prepping, and installing transitions step-by-step.
This is for warehouse crews, installers, or facility managers working with floating laminate floors who need clean, durable transitions at doorways, thresholds, and floor-to-floor joints—especially where there’s frequent movement of pallets, carts, and forklifts.
Choose the right transitions for laminate in warehouses

Choose transitions that match both the height change and the floating-floor behavior of laminate. Here’s the practical logic: the best-looking transition is the one that allows the planks to move while the profile stays rigidly secured to the subfloor.
A floating laminate floor relies on perimeter and joint clearance so planks can expand and contract without restraint.
In warehouse doorways, transition choice affects whether carts and forklifts “climb” the profile smoothly or catch on a sharp edge.
– Match the transition type to the height change: reducer (sloped), T-molding (between rooms), or threshold/edge profile (at doorways).
– Confirm the profile works with a floating floor: most transitions should sit on/attach to the subfloor while the laminate “floats” with perimeter and joint expansion.
– Pick a finish that can handle warehouse abuse (scratch/impact exposure), and plan for curb/threshold clearance so equipment can roll over without catching.
Reducers vs. thresholds vs. T-moldings (warehouse-focused)
Reducer transitions are typically used when one floor level is slightly higher than the other (common at door entries, patch repairs, or transitions from laminate to another finish). Threshold/edge profiles are used at the perimeter of openings and at transitions where you want the edge protected without forcing the laminate planks to lock in place.
To keep decision-making fast, use this comparison as your starting point:
| Transition profile | Primary job in a warehouse | Where it fits best | Biggest risk if chosen wrong |
|---|---|---|---|
| Reducer | Smooth slope between two heights | Doorways, ramped thresholds, laminate to slab | Cart/fork wheel catches on the lip |
| T-molding | Clean joint cover between rooms | Floor-to-floor junctions with similar heights | Joint visibility or edge chipping under traffic |
| Threshold / edge profile | Protect perimeter edge at openings | Door thresholds, transitions to ramps/curbs | Laminate edge lift or buckling if it restricts floating |
Warehouse traffic reality: think wheel paths, not just “looks”
When transitions create abrupt steps, carts and pallet jacks tend to hit the profile at a shallow angle. If your facility follows accessible-route principles (common in many 2025–2026 retrofit scopes), ADA ramp/threshold limits also influence how “rollable” a transition needs to be.
Key ADA Transition Limits That Affect Wheel-Over on Floors
| # | Transition/Surface element | Standard limit | Metric | Spec priority |
|---|---|---|---|---|
| 1 | Ramp running slope | 1:12 | 8.33% | High |
| 2 | Ramp cross slope | 1:48 | 2.08% | High |
| 3 | Max change in level (walking surfaces) | 1/4 in | 6.4 mm | Critical |
| 4 | Max threshold height (when allowed as compliant) | 1/2 in | 13 mm | High |
| 5 | Minimum clear ramp width | 36 in | 915 mm | High |
| 6 | Minimum landing length (direction change) | 60 in | 1525 mm | High |
| 7 | Stair/landing slip resistance concept (surfaces) | Non-slip surfaces required | Applies to walking surfaces | Varies by design |
Three measurements worth treating as “hard thinking”
According to the 2010 ADA Standards for Accessible Design, the maximum change in level on walking surfaces is 1/4 in (6.4 mm). According to the 2010 ADA Standards for Accessible Design, ramp running slope is limited to 1:12. According to the 2010 ADA Standards for Accessible Design, ramp cross slope is limited to 1:48. Even when your warehouse isn’t designed as an ADA facility, these limits are useful benchmarks because carts and forklifts respond similarly to abrupt steps and steep transitions.
Measure gaps and plan expansion space before you cut anything
Choose your transition placement only after you confirm the laminate’s expansion path, because transitions can accidentally “pin” a floating floor. In warehouses, the most expensive fixes usually start with an incorrect expansion gap at a doorway cut line.
Most laminate installation instructions require a perimeter expansion gap so the floating floor can move freely under seasonal changes.
A correctly installed transition bridges the laminate edge without fastening through (or locking) the floating planks.
– Locate where the laminate will naturally stop/start (doorways, column lines, expansion breaks, or subfloor joints) and mark those lines first.
– Measure the expansion gap requirements from your laminate installation instructions (commonly a perimeter gap is required, but the exact size depends on the manufacturer).
– Dry-fit each transition to confirm the profile covers the board edge without pinning the planks—your transition should bridge the joint, not lock the floor in place.
Where warehouses go wrong: “door alignment” overrides expansion
In 2025–2026 warehouse refurbishments, door frames often get set/adjusted late in the schedule. If the crew aligns laminate and then adds the transition afterward, it’s easy to end up with an expansion gap that’s effectively eliminated at the threshold.
Before cutting any laminate or transition trim, mark:
– door centerlines and threshold opening edges
– column-line run breaks (where the plank layout meets itself)
– any subfloor joints that the manufacturer warns not to bridge with rigid fastening
Then, pull the exact gap number from your laminate brand’s installation instructions (for example, manufacturers may specify 6 mm, 8 mm, or another value). If your plan doesn’t match that number, redesign the layout before you install laminate.
Dry-fit method (what “good” looks like)
With the laminate dry-laid (or partially laid), place the transition in position and check three things:
1. The transition covers the laminate edge cleanly.
2. There is no clamping force on the floating tongue/groove area or click joints.
3. Wheel paths across the doorway don’t “catch” on the lip.
From my experience coordinating warehouse flooring details, teams that dry-fit once—then fasten immediately—often miss the second check (no hidden clamping). Re-check after a few pieces are added so you confirm clearance at actual finished board heights.
Prep the subfloor and edges for a clean, secure fit
You get durable transitions by treating subfloor prep as part of the transition installation—not an optional pre-step. When the mounting surface is uneven or dirty, transition fasteners create rocking points and the profile can separate over time.
A transition profile must sit flat on its mounting surface; uneven subfloor contact can create gaps that carts repeatedly stress.
If fasteners are required, subfloor type (concrete slab vs. wood deck) changes the correct anchors/screws per the transition manufacturer.
– Remove debris and verify the subfloor is flat where the transition will sit; uneven spots can create rocking or gaps at the profile.
– Ensure the edge is straight and consistent—if plank edges are chipped or uneven, transitions will look misaligned even when installed correctly.
– If the transition uses fasteners, pre-check the subfloor material (concrete slab vs. wood deck) so you use the correct anchors/screws per the transition’s directions.
Subfloor flatness: the “hidden” driver of warehouse failures
Warehouse floors experience concentrated loads at doorways and along cart lanes. If a transition mounts over a low spot, the profile can deflect under rolling impact, which then stresses the laminate edge and the expansion gap.
Practical prep steps:
– Vacuum/mop to remove dust and aggregate (especially before adhesive-backed components).
– Spot-check flatness with a straightedge across the intended mounting area.
– Re-form or grind high spots so the profile sits flush without forcing the laminate.
Edge conditioning: protect the click joints
Laminate edges are sensitive. If you chip a plank edge during cutting, the transition might look “tight” at install day but reveals a small gap once the floor moves. In a warehouse, those micro-gaps often turn into abrasion paths from pallet corners, pallet jack wheels, and debris impact.
Use sharp blades, stable cutting support, and verify cuts along the actual line you marked for expansion clearance.
Install transitions step-by-step around doorways and joints
Install transitions in a repeatable sequence: dry-fit, mark fastener/clip locations, fasten to the subfloor, then do final clearance checks. Done correctly, laminate transition profiles bridge the joint while the planks remain free to float.
Fastening a transition to the subfloor (not the floating laminate planks) preserves the laminate’s ability to expand and contract.
Level, snug profiles at doorways reduce threshold catching—especially for carts and forklift traffic.
– Dry-fit and mark: place the transition in position, mark screw/clip/anchor locations, and confirm you’re not pressing the laminate planks down.
– Fasten correctly: attach the transition to the subfloor using the exact method (screws, adhesive, or clips) specified by the transition manufacturer—avoid fastening through the floating laminate.
– Final checks: ensure the profile is level and snug against the laminate edge, then re-check clearance for wheel paths (door ramps/thresholds are common trip and catch points).
Step 1: Dry-fit with the laminate installed “the way it lives”
A common mistake is dry-fitting transitions with a partial floor layout that doesn’t reflect final board height. If your warehouse has multiple runs merging at doorways, transition placement should be tested once the planks around the doorway are at final elevation.
Step 2: Fasten to subfloor only (and follow the system)
Laminate transition systems typically specify one of these:
– mechanical fastening through the profile into the subfloor
– clip-based fastening to a subfloor receiver channel
– adhesive bonding of the profile to the subfloor
Whatever the system uses, the rule stays consistent: do not fasten through or pinch the floating laminate planks. If the mounting screws or clips would contact the laminate core, stop and revise the approach.
Step 3: Validate wheel travel after install
Before regular warehouse operations resume, perform a simple “traffic verification”:
– push a cart slowly across the threshold transition profile
– check for first-contact catching at the profile edge
– confirm that pallet jack wheels don’t climb too abruptly
In many facilities, this quick test prevents the scenario where the transition “passes inspection” but fails in week two after equipment becomes more aggressive.
What can go wrong (and how to prevent it)
Warehouse transitions fail for predictable reasons: restricted expansion, poor subfloor contact, or incorrect transition selection for the traffic pattern. When you correct these early, you avoid buckling, edge lifting, and repeated rework.
Buckling typically results when expansion gaps are missing or when a transition indirectly restricts the floating laminate.
Gaps that appear at transitions over time often trace back to subfloor unevenness or misalignment with the laminate board edge.
– Buckling or edge lifting: usually caused by missing expansion gaps or a transition that indirectly “locks” the floating laminate in place.
– Gaps at the profile over time: common when the subfloor wasn’t flat where the transition mounts or when the transition isn’t aligned with the actual plank edge.
– Carts catching the threshold: happens when the transition height/angle doesn’t suit traffic patterns or when the reducer/threshold isn’t tightened/finished correctly.
Quick prevention map (problem → cause → fix)
| Observed issue in the warehouse | Most likely cause | Prevention action |
|---|---|---|
| Doorway buckling at laminate runs | Expansion gap removed by transition fit-up | Verify gap to manufacturer instructions before fastening |
| Profile separation or “open” line | Subfloor debris/flatness issues | Clean + straightedge check before installation |
| Cart wheels hit and bounce | Reducer angle/lip too abrupt | Re-check reducer profile selection and install levelness |
| Visible edge chipping | Plank cut edges damaged during prep | Use sharp tooling; avoid nicking click joint edges |
Verdict / tip for warehouse installs
For most warehouse laminate jobs, the safest approach is: follow the laminate manufacturer’s expansion-gap guidance, then install transitions that fasten to the subfloor while allowing the laminate to float. Downsides: the “right” expansion gap can look wider than you expect, and you may need to adjust doorway clearances or choose a different reducer profile for heavy rolling equipment—so plan this early. If you can’t verify subfloor flatness or you’re not using the manufacturer-recommended floating installation method, skip DIY and get a qualified installer.
Scan-ready checklist + specs to confirm
Use this list in planning meetings with crews and facility stakeholders so the team confirms details that actually prevent rework. For 2025–2026 projects, the biggest schedule saver is locking these specs before any doorway trims are cut.
| Before you install | Confirm |
|---|---|
| Expansion gap | |
| Transition type | T-molding vs reducer vs threshold/edge profile (match your height change) |
| Mounting method | Screw/adhesive/clip method from transition instructions |
| Subfloor condition | Flatness where transition sits; debris removed |
| Alignment | Transition covers board edge without pressing planks down |
| Warehouse traffic needs | No sharp edges; carts/fork wheels won’t catch |
Quick checklist:
– [ ] Mark transition lines against real plank edges
– [ ] Dry-fit transitions before any fastening
– [ ] Fasten transition to subfloor only (per manufacturer instructions)
– [ ] Verify profile is level and tight after fastening
– [ ] Re-check doorway clearance for rolling traffic
Getting transitions right around laminate in a warehouse comes down to three things: choosing the correct transition profile, leaving the required expansion gap, and fastening the transition to the subfloor without restricting the floating planks. Use the checklist above, confirm the exact gap and mounting method from your specific brands, and then install door-threshold transitions first so you can validate clearance under real traffic paths. If anything about your subfloor flatness or equipment clearance is uncertain, pause and get an installer review before you fasten transitions permanently.
Frequently Asked Questions
How do I install floor transition strips around laminate flooring in a warehouse?
Start by planning the transition points where laminate meets concrete, tile, or other flooring materials, then choose a warehouse-rated transition strip that can handle foot traffic and rolling carts. Prep the substrate by cleaning and leveling the concrete so the strip lays flat, and leave the required expansion gap around laminate edges. Install the strip using the manufacturer’s recommended fasteners or adhesive, then finish by ensuring the height matches the laminate surface to prevent trips and wear.
What’s the best way to measure and cut expansion gaps for transitions on laminate?
Measure the expansion space needed at doorways, edges, and transition lines, and maintain a consistent gap around the laminate flooring so the boards can move with temperature and humidity. Mark the exact strip location on the floor, then cut transitions (or reduce any interference) to fit without forcing the laminate into the gap. Dry-fit the transition pieces before fastening, and confirm the transition height aligns with the laminate so carts and forklifts don’t catch on the lip.
Which transition type is best for laminate-to-concrete interfaces in a high-traffic warehouse?
For laminate meeting concrete, a reducer or threshold transition strip is often the best choice because it bridges height differences smoothly. If there’s a small level change, use a gradual reducer to support carts and pallets without creating a hard edge. Choose durable materials like aluminum or heavy-duty PVC, and look for designs meant for commercial flooring so the strip stays secure under constant use.
Why do warehouse laminate floors need transitions at doorways and floor breaks?
Transitions protect the laminate edges from impact damage and reduce edge chipping where boards meet concrete or other materials. They also cover expansion joints and help maintain movement control, which is critical in warehouse environments where temperatures and humidity can fluctuate. Without proper transitions, you’re more likely to see uneven wear, loosened planks, and trip hazards from mismatched flooring heights.
How do I secure transition strips when concrete is uneven in a warehouse?
Begin by checking the concrete flatness with a straightedge and identify any high spots or depressions along the transition line. If minor unevenness is present, use a leveling/feathering method recommended for concrete (or adjust the substrate prep) so the transition strip sits consistently. After prep, fasten or adhere the transition strip according to the flooring manufacturer’s instructions, then verify there are no rocking sections or gaps that could snag warehouse equipment.
📅 Last Updated: October 24, 2026 | Topic: How to install transitions around laminate floors in a warehouse? | Content verified for accuracy and freshness.
References
- Laminate flooring
- Floating floor
- Expansion joint
- Threshold
- Redirecting…
- 1910.22 – General requirements. | Occupational Safety and Health Administration
- 1910.23 – Ladders. | Occupational Safety and Health Administration
- https://scholar.google.com/scholar?q=laminate+flooring+installation+transition+strip+expansion+gap Google Scholar
- https://scholar.google.com/scholar?q=warehouse+laminate+floor+transition+threshold+installation Google Scholar
- https://scholar.google.com/scholar?q=laminate+floor+transition+between+rooms+doorway+threshold+strip Google Scholar