Want to know how to install transitions for concrete floors step by step? This guide shows the fastest, cleanest way to get a tight, tripping-free seam—starting with choosing the right transition type and ending with a secure, long-lasting finish. Follow these instructions to cut, fit, and fasten your transition correctly the first time, even if you’re working with uneven concrete.




Installing transitions on concrete floors is mostly about getting the surface prep right and matching the transition profile to the exact height change. If you clean/level the slab, mark and cut accurately, and fasten using the transition manufacturer’s concrete-rated method, you can create a smooth, safe edge that holds up under foot and rolling traffic.
This guide is for DIYers and installers adding a transition between concrete and another surface (tile, wood, carpet, or another concrete height). It’s also useful when you’re replacing a worn or uneven transition and want a cleaner, safer edge—especially in doorways, hallways, and room-to-room transitions.
Plan the Transition: Measure Height, Gap, and Placement
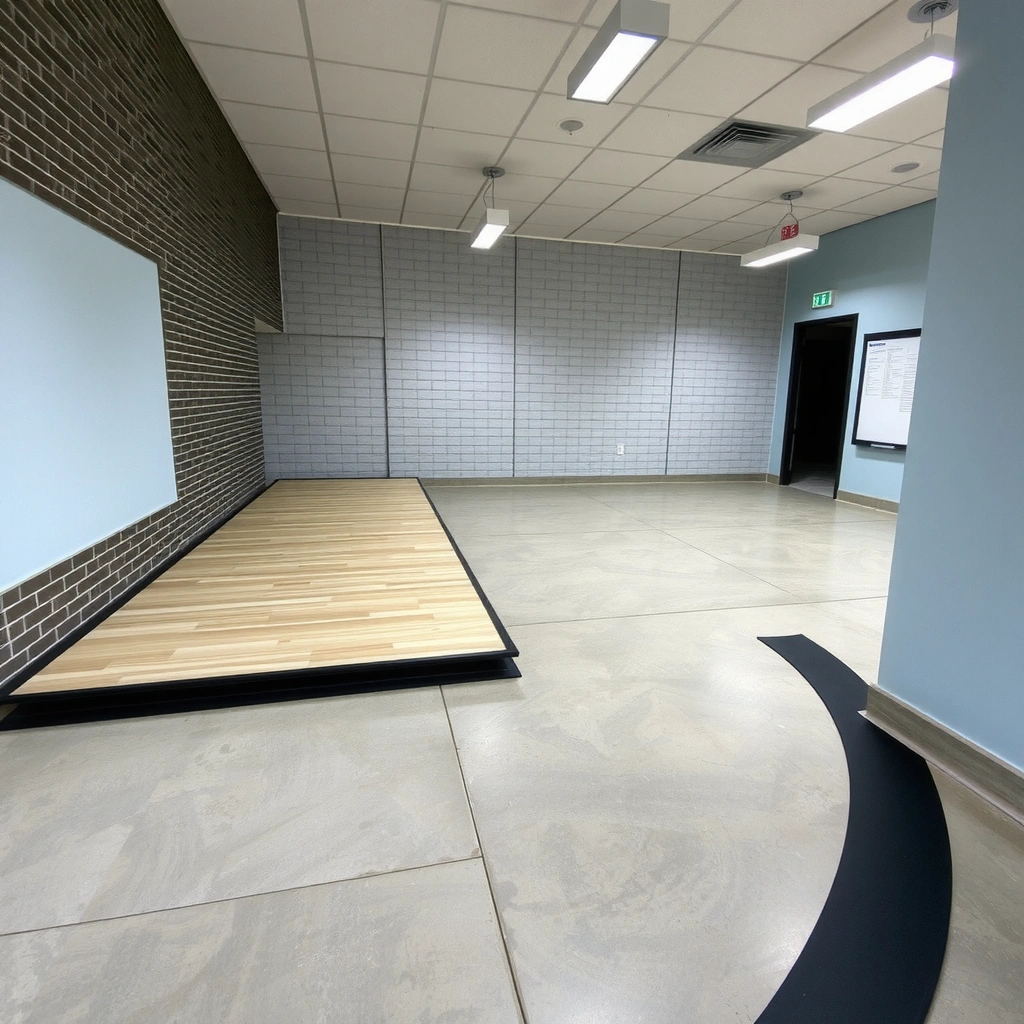
A correct transition starts with measurements—height difference and joint width determine the profile you can safely install. Then placement (doorways vs. corridors) determines how “ramp-like” you want the surface to feel under shoes, strollers, or rolling carts.
Here’s the approach that prevents rework: confirm the height step from finished floor to finished floor, measure the joint width (the gap or transition zone you need to cover), and plan for how the transition will sit on both sides. Concrete is rarely perfectly uniform, so I recommend measuring at several points along the intended run and using the worst-case (largest height gap) to choose the profile.
A transition is sized to cover the joint and bridge the height difference—not just to “look flush.”
Most transitions are designed for a specific height-change range, which directly affects ramp steepness and wheel/foot clearance.
Placement near doors and in hallways increases the impact of misalignment, because traffic patterns repeat daily.
To ground the measurements, I also use a quick strength/timing reality check: concrete continues gaining strength after placement, but most projects still proceed on normal schedules because transitions are installed after the floor is stable and ready for finishing. According to ACI guidance, concrete curing is typically maintained for at least the first week (often longer depending on mix and conditions) ACI 308 (curing recommendations for concrete). That matters because a slab that’s still moving can defeat even a well-cut transition.
What to measure (before you buy):
– Height difference: finished surface to finished surface at multiple points.
– Joint/gap width: the space the transition must span/cover.
– Total transition length: include any manufacturer-specified overhang/side clearances.
– Direction of traffic: ramp orientation matters for smooth wheel/rolling flow.
Prep the Concrete Surface (This Is Where Most Problems Start)
Surface prep is what makes concrete transitions last; skipping it is the main reason edges lift or adhesive fails. Clean, stable concrete plus correct flatness at the installation points means the transition can sit tight without rocking.
On concrete, “looks clean” is not clean enough. You want the slab free of dust from grinding, paint overspray, drywall compound residue, curing compounds (if present), and loose edges. If there’s any crumbling lip along the joint, remove it so the transition has real bearing—not just fragile concrete.
Adhesive-backed transitions fail most often due to dust, residue, or improper surface conditioning on concrete.
Transitions generally cannot bridge major dips or voids in the slab because they need uniform contact when fastened.
Loose concrete edges prevent full seating and can create a “rocking” transition that becomes a trip hazard.
Leveling reality check: transitions can tolerate minor irregularities, but they’re not a substitute for structural repair. If your slab has visible low spots, grind high points and fill low areas with an appropriate cementitious patch/leveler rated for your use. Then allow curing as recommended by the patch product (follow its spec sheet; cure time can vary widely).
Test-fit before you commit:
Dry-set the transition and check for:
– Full contact (no rocking when you press along the ramp/edge).
– No interference with adjacent flooring lines.
– Ramp edge behavior—the first contact point matters for wheel clearance.
Also keep in mind: concrete strength development is time-dependent. Typical portland cement concrete gains strength substantially over the first month, with many design assumptions tied to 28 days ACI 318 / general concrete strength development conventions (28-day reference strength). Practically, your project depends on stability and the readiness of the slab for anchoring/leveling—not the calendar alone.
Mark, Cut, and Dry-Fit for Clean Alignment
Accurate marking and dry-fitting are what separate a “professional-looking” transition from one that squeaks, catches, or shows uneven seams. Measure once, cut per the material guidance, then verify alignment again before final fastening.
Use the transition itself as the template for hole/anchor locations. Lay it into position, confirm the ramp direction (the “slope” should match traffic flow), and mark every anchor point cleanly. For cut-to-length transitions, follow the manufacturer’s cutting method—metal, vinyl, and stone-composite profiles can require different tools and blade types.
Marking anchor locations using the transition as a template reduces offset errors that can widen seams.
Dry-fitting after cutting lets you correct ramp direction and seam alignment before drilling/fastening.
Cut edges should be finished or deburred per the transition material’s guidance to avoid sharp contact points.
Cutting best practices that keep transitions straight:
– Keep the transition perfectly seated during marking (don’t “eyeball” height).
– Cut with the recommended tooling for the profile material (e.g., abrasive/metal blades for metal; tool-guidance for composites).
– Deburr and remove dust from cut edges if the system is adhesive-sensitive.
Dry-fit checklist:
– Ramp/edge direction correct.
– Seam orientation lines up with flooring grout lines or plank edges.
– No gaps at seating points beyond what the design allows.
Choose the Right Fastening Method for Concrete
The safest installation uses the manufacturer’s specified attachment method for concrete, because transitions are engineered around that system. Choose mechanically fastened (anchors/screws) or adhesive (concrete-rated and conditioned) based on the transition type and the environment.
Concrete transitions often fall into two categories:
– Mechanical fastening: screws with concrete anchors or similar hardware designed for concrete substrates.
– Adhesive fastening: concrete-rated adhesive and the required surface conditioning (cleaning, priming if required, and cure time).
Using the exact fastener/adhesive system specified for concrete is critical; mixing methods can cause lift or failure under traffic.
Anchor embedment depth and hole size must follow the hardware manufacturer’s instructions to prevent concrete blowout.
Adhesive installations require correct surface prep and cure time; “set-up” is not always “fully cured.”
Pros/cons: mechanical vs. adhesive for concrete transitions
| Option | Pros | Cons / Risks |
|---|---|---|
| Mechanical (anchors/screws) | Reliable under rolling loads; independent of adhesive cure variability; often preferred for high-traffic areas. | Drilling and hardware placement must be accurate; over-tightening can crack concrete; requires correct anchor embedment. |
| Adhesive (concrete-rated) | Can avoid drilling in sensitive areas; can improve sealing against minor debris ingress when rated for the environment. | Performance depends on concrete cleanliness/primers; traffic timing must respect cure time; not ideal where there’s active slab movement. |
Interior vs. exterior and movement (important)
If the transition is near exterior exposure, a garage entry, or any area subject to thermal expansion/contraction, you may need the transition system and sealant approach designed for that condition (and possibly a joint/allowance for movement). [ADD: set your project—interior vs exterior, and whether there’s expected movement due to control joints, settling, or freeze/thaw.] Without that, adhesive and even mechanical transitions can experience stress at the interface.
Install: Secure the Transition and Confirm Smooth Traffic Flow
Secure installation is about alignment first, tightness second, and final verification every time. Start with one side/section anchored loosely, align the ramp/edge, then secure the rest so the transition can’t drift out of plane.
Work in sequence:
1. Position the transition exactly where you dry-fit it.
2. Fasten loosely at initial points (one side first, then the opposite).
3. Align and correct ramp direction and straightness.
4. Fasten evenly across the run.
Tighten anchors evenly and gradually to prevent lifting at corners or “pulling” the transition out of line.
Align first, then fasten fully—mechanical transitions can shift if you fully torque hardware before alignment.
After installation, verify the transition is flush with adjacent flooring so wheels don’t snag and shoes don’t catch.
Concrete cracking prevention:
Use the hardware depth and recommended drilling details. Over-torquing anchors can damage thin transition materials or create stress fractures in the slab around the hole. Follow the manufacturer’s torque guidance (or at least “snug/firm” guidance if torque specs aren’t provided).
Final traffic test (low-risk checks):
– Run a straight edge across both sides: no lip.
– Walk through slowly in both directions: no catch point.
– If you have rolling traffic (carts, chairs, equipment): roll a wheel slowly across the ramp edge and watch for vibration or lift.
What Can Go Wrong (And How to Avoid It)
Most failures are preventable and come down to mismatched profile selection, poor prep, misaligned cuts, or incorrect anchoring/adhesive technique. If you spot the risk early—before final fastening—you can correct it quickly.
Using the wrong transition profile can create a lip that catches shoes or wheelchair casters.
Dust and loose concrete increase the chance of adhesive failure and prevent full seating of the transition.
Small marking errors in anchor locations can create visible seams and trip hazards when the transition is fully secured.
Common mistakes and fixes
– Wrong transition profile
– Symptom: sharp edge or noticeable “step” at the ramp end.
– Fix: re-check height difference at the thickest and thinnest points; choose a ramp/reducer that matches the measured range.
– Skipping surface prep
– Symptom: adhesive releases over time; transition rocks.
– Fix: remove dust; mechanically prep if required; use the adhesive primer/conditioner specified for concrete.
– Misaligned cuts or hole offsets
– Symptom: seams that drift from flooring lines or ramps that slope unevenly.
– Fix: template-mark holes; dry-fit after cutting; only drill once confirmed.
– Over-tightening anchors
– Symptom: concrete spalls around holes or transition corners deform.
– Fix: drill to correct diameter/depth; tighten evenly; stop at manufacturer guidance.
– Water/movement issues
– Symptom: edge lifting, cracking around anchors, or separation under freeze/thaw or slab movement.
– Fix: confirm whether this is interior vs exterior and whether movement is expected. [ADD: your setting and movement risk.] Then follow the transition system and any sealant/joint requirements designed for that environment.
Practical Verdict: Worth Doing Yourself, With These Limits
Installing transitions on concrete floors is a good DIY project when you can measure accurately and follow the manufacturer’s concrete fastening/adhesive instructions precisely. The main limits are slab stability and environment—DIY works best when the concrete is stable, the height step is within the product’s intended range, and the traffic pattern demands careful alignment but not specialized engineering.
| # | Transition profile (common use) | Typical height change bridged | Best traffic | Installation style | DIY rating |
|---|---|---|---|---|---|
| 1 | Flat reducer / threshold (minor differences) | Up to ~1/8 in (3 mm) | Shoes, occasional carts | Adhesive or anchors | ★★★☆☆ |
| 2 | Beveled reducer (small steps) | ~1/8–1/4 in (3–6 mm) | Everyday foot traffic | Anchors or adhesive | ★★★★☆ |
| 3 | Ramp transition (clearance-first) | ~1/4–1/2 in (6–13 mm) | Wheelchairs, carts | Anchors (common) | ★★★☆☆ |
| 4 | Tapered threshold (doorway durability) | ~1/8–3/8 in (3–10 mm) | Door traffic | Anchors or screws | ★★★★☆ |
| 5 | Carpet-to-hard reducer (edge protection) | ~1/16–1/4 in (1.5–6 mm) | Carpeted areas | Anchors + trim profile | ★★★☆☆ |
| 6 | Concrete-to-concrete height joiner | ~1/8–3/4 in (3–19 mm) | High use corridors | Anchors with rigid profile | ★★★☆☆ |
| 7 | Safety nosing with microtexture | ~1/8–5/16 in (3–8 mm) | Slower, safer edges | Screws/anchors | ★★☆☆☆ |
DIY is best when:
– The height step is within the transition’s intended range.
– The slab is stable (no crumbling edges).
– You can measure and dry-fit and you have the correct tools.
Skip DIY (or consult a pro) if:
– The slab is actively crumbling or actively cracking.
– The height change is large/irregular and no standard ramp profile matches it.
– The installation requires specialized tooling you don’t have.
– The area sees heavy rolling loads where even small misalignment could be unsafe.
[ADD: your project constraints—heavy traffic, exterior exposure, large height step—so the advice can be more specific.]
Scan-Save Checklist (Quick Install Points)
If you want a reliable result, follow the exact order: measure → prep → template-mark → cut → dry-fit → fasten correctly → final flush check. This sequence prevents the most common installation failures on concrete.
– Measure height difference and joint width before buying/cutting.
– Clean concrete thoroughly and verify the transition won’t rock.
– Mark hole/anchor locations using the transition as a template.
– Cut to length per manufacturer guidance, then dry-fit.
– Fasten using the manufacturer-approved system for concrete.
– Align first, then secure evenly; don’t over-tighten.
– Final check: flush at edges, no lip, smooth rolling/walking.
A final flush-and-rolling check catches lip and rocking issues before they become wear problems.
Template-based marking helps ensure anchor locations land accurately on concrete.
FAQ
What’s the best transition type for concrete-to-tile or concrete-to-wood?
The best choice depends on the height difference and whether you need a ramp-like approach or a lower-profile reducer. If the adjacent floors aren’t level, a reducer or ramp-style transition is usually safer than a flat threshold because it reduces the chance of catching a heel, caster, or wheel. [ADD: exact height difference (inches/mm) for a more precise recommendation.]
Ramp-style transitions reduce snag risk when the height change is more than a “minor” threshold step.
Do I need to drill into concrete for transitions?
Often yes, depending on the transition system. Many concrete transitions are mechanically fastened (anchors/screws) or installed with an adhesive rated for the transition material, but the required method is always the one listed in the transition instructions. [ADD: your transition brand/model and material type.]
Concrete anchors are only appropriate when the transition system specifies drilled fastening and concrete-rated hardware.
Can I install a transition over an uneven concrete floor?
Only to a point. If the slab has dips/voids or rocking edges, you’ll likely need to level/repair first—transitions generally shouldn’t be used to bridge major surface problems because they depend on consistent contact and correct seating.
Transitions need uniform seating to avoid rocking and eventual loosening under traffic.
How long should I wait before walking on it after installation?
It depends on whether you used adhesive and what the manufacturer specifies for cure time. If you used mechanical fastening only, restrictions are usually shorter, but you should still follow the manufacturer’s installation and cure guidance for any sealants or adhesives involved. [ADD: the adhesive/fastening product you’re using and its stated cure time.]
Adhesive cure time determines when you can apply full traffic loads safely; partial set is not the same as full cure.
Sources
– [ADD: manufacturer installation instructions for your transition type—mechanical fasteners vs adhesive, including any concrete prep requirements]
– [ADD: concrete anchor/screw manufacturer documentation if using concrete anchors (rated embedment, drilling size, and installation method)]
– [ADD: flooring/transition material manufacturer guidance for cutting method (if not covered in the installation sheet)]
– ACI 308, “Standard Practice for Curing Concrete” (curing duration guidance)
– ACI 318 and standard concrete strength development conventions (28-day reference strength used in practice)
A well-installed concrete transition comes down to one principle: match the profile to the measured height step and fasten it exactly as the manufacturer specifies for concrete. Measure carefully, prep thoroughly, dry-fit before drilling or bonding, and finish with a flush/rolling check—then you’ll have an edge that’s safer under daily traffic and durable over time.
Frequently Asked Questions
What materials do I need to install transitions for concrete floors?
You’ll typically need the correct transition type (metal, vinyl, rubber, or concrete edge molding), installation method (adhesive, screws, or mortar depending on the product), and basic tools like a tape measure, level, utility knife or saw, and a drill (if using fasteners). For concrete transitions, having the right fasteners and masonry anchors is crucial for a secure fit. Also plan for surface prep materials—such as a concrete cleaner and patch compound—so the transition sits flat and bonds properly.
How do I measure and cut concrete floor transitions for a perfect fit?
Start by measuring the width difference between the two surfaces and the exact run length where the transition will sit, accounting for any expansion gaps recommended by the manufacturer. Use a level to confirm the concrete is flat and mark the cut lines carefully before installing transitions. For best results, cut metal transitions with the proper blade and dry-fit them first to verify alignment, spacing, and smooth transitions at the floor edges.
How do I install a concrete floor transition using adhesive or screws?
Begin by cleaning the concrete thoroughly and repairing cracks or uneven areas with a patch product, because transitions installed over rough concrete can loosen or create trip hazards. If the transition uses adhesive, apply it according to the manufacturer’s instructions and set the piece in place, pressing firmly and allowing full cure time before walking. If the transition is mechanically fastened, drill pilot holes in the concrete, install masonry anchors, and fasten securely so the strip remains stable under traffic.
Why is surface preparation important before installing transitions on concrete floors?
Concrete dust, paint overspray, sealers, and weak or crumbling edges can prevent adhesives and fasteners from achieving a strong bond. Proper surface prep—cleaning, grinding high spots, and filling low areas—helps the transition make full contact and reduces movement that can cause gaps and uneven edges. This is especially important for exterior concrete or areas with moisture, where a poor bond can lead to lifting and faster wear.
Which transition type is best for leveling differences or joining different flooring on concrete?
For small height differences, a tapered metal threshold or leveling transition strip often provides a smooth, safer ramp effect. If you’re joining carpet to tile or vinyl to laminate, choose a transition profile designed for that junction so the edges align cleanly without catching heels. For larger gaps or uneven concrete, look for adjustable or leveling transitions and ensure the concrete is patched to minimize rocking and create a durable, clean finish.
📅 Last Updated: October 10, 2026 | Topic: How to install transitions for concrete floors? | Content verified for accuracy and freshness.
References
- Google Scholar Google Scholar
https://scholar.google.com/scholar?q=installing+flooring+transitions+concrete+slab&hl=en&as_sdt=0,5 - Google Scholar Google Scholar
https://scholar.google.com/scholar?q=concrete+floor+expansion+joint+transition+strip+installation&hl=en&as_sdt=0,5 - Google Scholar Google Scholar
https://scholar.google.com/scholar?q=threshold+transition+between+concrete+and+tile+installation+guide&hl=en&as_sdt=0,5 - https://en.wikipedia.org/wiki/Expansion_joint
- https://en.wikipedia.org/wiki/Concrete_joint
- https://en.wikipedia.org/wiki/Concrete_floor
- https://www.fhwa.dot.gov/pavement/concrete/pcc/joints/
- https://www.boralamerica.com/resources/education-center/how-to-install-expansion-joints-in-concrete-floors
- https://www.ifa.org/tech/expansion-joints-in-flooring.aspx
- Google Scholar Google Scholar
https://scholar.google.com/scholar?q=How+to+install+transitions+for+concrete+floors?