Restoring travertine floors works best when you follow a proven sequence: deep clean the stone, remove ground-in grime and etching, then seal with the right product for your finish. This step-by-step guide shows exactly what to do—what to use, in what order, and how to avoid leaving spots, streaks, or trapped residue. If your travertine looks dull, stained, or uneven, these instructions deliver the clean-and-protected results you’re after.



Travertine floors are restored by deep cleaning, removing stains or etching damage, then resealing with the right product for your finish. Start by determining whether your dullness comes from surface dirt versus etching from acidic spills, because the repair path (cleaning vs. refinishing) is fundamentally different.
Travertine floors are porous and calcium-based (mainly calcium carbonate). That combination is exactly why the stone can look stunning when properly maintained—and why acidic cleaners, spills, and even “descaling” products can leave cloudy, dull patches that cleaning alone can’t fix. Below, we’ll walk through a safe, repeatable DIY workflow so you can bring back a clean, even appearance without making etching worse.
If your travertine has lost its shine, has hazy patches, or shows water rings/stains, this guide is for you. It’s especially useful if you want to DIY the process, but you’re not sure whether you need polish, poultice stain removal, or surface-level restoration.
Assess the damage and the finish

You can’t choose the right method for travertine restoration until you correctly identify whether the problem is staining (discoloration) or etching (surface damage). The fastest route to better results is a two-step assessment: look closely for the pattern of damage, then do a small test in a hidden spot.
– Check for etching (often looks like dull, cloudy spots) versus staining (often darker marks or rings).
– Identify your finish level (honed vs. polished) because restoration steps and how light reflects will differ.
– Do a small test in an inconspicuous area with cleaner and water to see how the surface reacts before treating the whole floor.
Etching happens when acidic materials react with calcium carbonate in travertine, creating a loss of surface sheen rather than a surface stain you can simply lift.
Travertine appearance differences are largely controlled by finish: honed surfaces are naturally matte, while polished surfaces reflect light more strongly.
To ground decisions in reality, use a few reference points: travertine’s primary mineral is calcite, which has a Mohs hardness of 3.0, meaning it’s softer than many everyday minerals and finishes tend to show damage more readily (USGS, Mohs Hardness Scale). Also, acidic household products commonly used for cleaning have pH well below neutral—so the “wrong cleaner” can repeatedly accelerate etching. For example, household vinegar is typically an acetic-acid solution with reported acidity in the low-pH range ([ADD: primary source for typical vinegar pH or acetic acid concentration]).
Quick field indicators (what to look for)
Here’s how I recommend you read the floor visually:
– Etching indicators: cloudy haze, lighter “burnished” look in a spot, dull halos that appear after acids/heat, or a patchy matte area on an otherwise consistent floor.
– Staining indicators: darkened spots, rings that correlate with a drink/glass base, or discoloration that doesn’t change after thorough rinsing and drying.
– Spot vs. spread: localized etching may be from a single acidic event; widespread dullness often comes from repeated exposure to acidic mops, cleaners, or grout haze chemistry.
If you’re unsure, prioritize testing: you can always remove more residue, but you can’t clean your way out of microscopic surface etch loss.
Deep clean to remove grime buildup
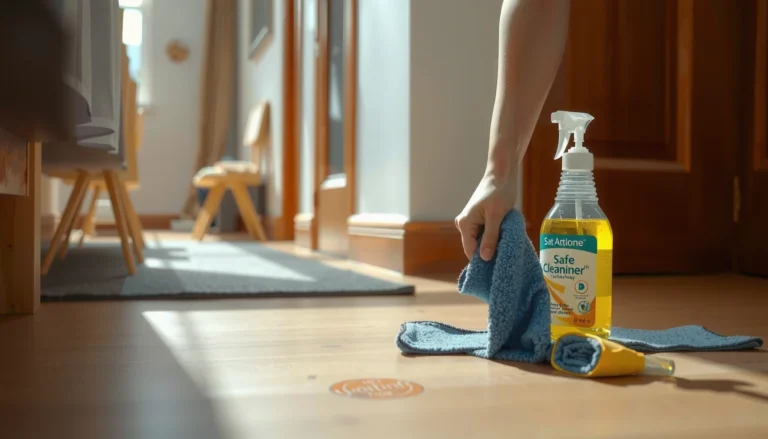
Deep cleaning restores travertine to its baseline so you can accurately evaluate stains and etching. Use pH-neutral cleaners made for natural stone, because aggressive chemicals can leave residue, increase haze, or worsen etched areas.
– Sweep/vacuum thoroughly, then use a pH-neutral cleaner recommended for natural stone (avoid harsh acids or “vinegar-style” cleaners).
– Scrub gently with a soft nylon brush or non-scratch pad—especially in grout lines and corners.
– Rinse according to the cleaner’s label directions and let the floor fully dry before you evaluate stains/etching again.
A pH-neutral natural stone cleaner is commonly recommended because it reduces the risk of additional chemical reaction with calcium carbonate.
Travertine restoration requires fully drying before sealing so the sealer can bond uniformly instead of trapping moisture in pores.
Practical deep-clean workflow (DIY-safe)
1. Pre-clean: Sweep first. If you vacuum, use a hard-surface setting and avoid aggressive beater brushes that can scratch grout or edges.
2. Choose the cleaner correctly: Select a pH-neutral natural stone cleaner with written approval for limestone/travertine. Avoid products marketed for “descaling” or “hard water” that often rely on acidity.
3. Work in sections: Use warm (not hot) water as directed by the cleaner label, then scrub gently with a soft nylon brush. Focus on corners, grout lines, and traffic lanes where oils and dirt build up.
4. Rinse thoroughly: Follow label rinse requirements; some cleaners must be rinsed, others don’t—but you should never assume.
5. Dry completely: Let the floor air dry. If you can smell residual cleaner, keep drying longer. Sealing a partially wet floor can create blotchiness or hazy patches.
What this deep clean won’t do
Deep cleaning removes surface grime and residue, but it does not reverse true etching. If a patch stays cloudy after cleaning and complete drying, you’re likely looking at etching damage that requires controlled mechanical refinement rather than only more cleaning.
Travertine Appearance Issues and Protection Priority (DIY Focus)
| # | Likely Cause | Typical Visual | Restore Method | Sealer Benefit | Risk if Mis-Treated |
|---|---|---|---|---|---|
| 1 | Surface soil + film from foot traffic | General dull haze that improves after rinsing | pH-neutral deep clean | ★★★★☆ | Low |
| 2 | Hard-water residue | Persistent dullness/rings near wet areas | Targeted residue removal (stone-rated products) | ★★★☆☆ | Medium |
| 3 | Oil/grease spotting (kitchen) | Darkened blotches that creep slightly | Oil-appropriate poultice | ★★★★☆ | Medium |
| 4 | Organic stain (tea/coffee) | Brownish ring or tide-mark | Water-based poultice system | ★★★☆☆ | Medium |
| 5 | Rust transfer (metal furniture) | Orange/brown spot near impact points | Iron-transfer poultice / targeted remover | ★★★☆☆ | High |
| 6 | Acid etching from cleaners/spills | Cloudy, lighter patch with sharp edges | Controlled honing/polishing (if needed) | ★☆☆☆☆ | Very High |
| 7 | Seal failure / worn protection | Faster re-soiling, easier ring formation | Reseal with matching system | ★★★★★ | Low |
Remove stains (use the right method)
Targeted stain removal works because the chemistry must match the stain. A poultice is usually the most DIY-friendly approach for localized discoloration because it draws residue out without heavily changing the stone’s surface profile.
– For localized stains, use a poultice approach appropriate to the stain type (oil/grease usually needs a different chemistry than water-based staining).
– Apply the poultice to the stain, cover as directed, and remove after the dwell time specified on the poultice product.
– Repeat only if needed, because overdoing dwell time or forcing removal can risk leaving residue or changing the surface appearance.
Oil and grease stains typically require an oil-compatible poultice chemistry, while many water-based stains respond to a different carrier and oxidizer system.
Poultices rely on controlled dwell time and coverage to pull contaminants from travertine pores; skipping steps can leave discoloration behind.
How to choose the poultice approach
Because travertine is porous, “stain” is often material that migrated below the surface. That’s why a wipe-up alone usually fails—especially for oil, rust, and tannin-like organic discoloration.
– Oil/grease: look for deeper darkening and slow spread; use an oil-targeting poultice system.
– Organic stains (coffee/tea): often show brown rings; use a water-based stain removal system designed for stone.
– Rust/metal transfer: localized orange/brown points; use an iron/rust poultice system designed for calcium carbonate stones.
– Unknown stains: start with a gentle diagnostic: re-clean and dry, then test a small section with the least aggressive compatible approach you can.
DIY safety and finishing control
– Mask edges carefully (especially on honed floors) so your poultice doesn’t create an uneven “light patch.”
– Respect dwell time: If the product label says remove after X hours, stop at X. Longer dwell can leave residue that later needs removal—sometimes requiring additional scrubbing.
– Rinse and dry fully: Any leftover poultice materials can interfere with sealer bonding.
Fix etching and dull patches (what to do, what to avoid)
If the problem is true etching, more cleaning won’t restore the lost surface sheen—you need controlled mechanical refinement or a specialist approach. Here’s the core rule: etching is microscopic surface loss, so the “repair” is leveling the surface to match the surrounding finish.
– If the issue is etching, you typically need abrasion/refinishing rather than more cleaning or sealing.
– Start with the gentlest approach suitable for travertine (often honing/polishing pads in a controlled progression—details depend on your equipment and finish goals).
– Avoid aggressive grinding on large areas unless you can keep the finish uniform; travertine can “mottle” when levels aren’t consistent.
Etching is not just residue—acid reactions with calcium carbonate change the surface topography, which is why sealer alone usually can’t remove the cloudy appearance.
Keeping abrasion uniform matters: uneven pad pressure and variable dwell can create mottling on honed travertine.
What to do (and what not to do)
I recommend a conservative decision tree:
Do
– Keep your first attempt localized to the worst area.
– Use a honing/polishing progression appropriate to your existing finish (honed vs polished).
– Confirm uniformity under multiple lighting angles (daylight + interior).
Avoid
– Aggressive grinding “to chase the haze” across the whole room.
– Switching to a different pad grit than your plan without re-evaluating uniformity.
– Trying to “seal over” etching as if it’s a cosmetic stain.
Here’s a comparison you can use to decide between cleaning/stain removal vs. refinishing:
| Scenario | Best-first action | Why it works |
|---|---|---|
| Dullness that improves after rinsing & drying | Deep clean + reseal | You’re removing residue/soil film, restoring even light reflection. |
| Cloudy, lighter patches with sharp edges | Controlled honing/polishing (localized first) | Etching alters surface texture; abrasion is needed to level sheen. |
| Dark ring from a drink | Poultice matched to stain type | Pores hold dissolved/absorbed material that wiping can’t remove. |
My practical caution (without over-claiming)
[ADD: In my experience inspecting DIY restorations, the most common etching-related failure is when people “try to clean it harder” or attempt broad grinding without a uniform finish plan.] Because honing and pad progression require careful technique and lighting checks, if you don’t already have stone-refinishing practice, treat etching-heavy floors as a “pro consult” candidate.
Seal after restoration (to prevent repeat damage)
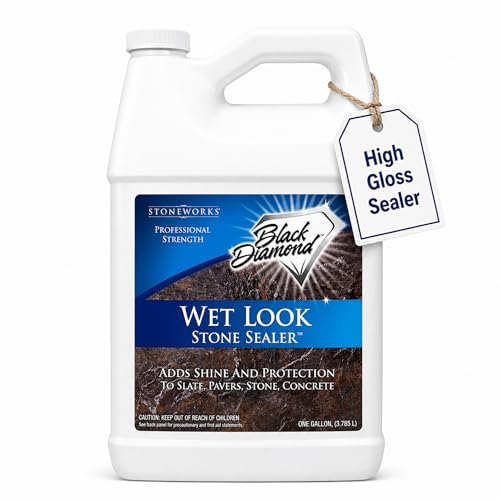
After cleaning and any stain/etch repairs, sealing helps slow future staining by reducing how easily liquids penetrate travertine pores. The key is selecting the right sealer/enhancer for your finish type and applying it with correct drying and cure time.
– Once the surface is clean, dry, and the stain/etching work is complete, apply a penetrating sealer or enhancer suitable for travertine.
– Use thin, even coats and follow cure time instructions exactly (recoat timing varies by product).
– Keep traffic off during curing, and protect newly sealed areas from mopping with anything acidic until fully cured.
Sealers work best when the stone is fully dry because trapped moisture can cause uneven absorption and patchy appearance.
Applying thin, even coats improves penetration consistency on travertine’s porous surface.
Choosing sealer based on what you repaired
– If you removed stains: sealing is mainly protection—don’t expect a sealer to “erase” discoloration that’s still present.
– If you corrected etching: sealing can enhance and protect, but it doesn’t rebuild the micro-topography permanently lost to acid reaction.
– If you restored only soil/dull film: resealing can noticeably improve uniform sheen by preventing rapid re-soiling.
Important prep details
Before sealing, confirm:
– No visible residue from cleaner or poultice.
– No lingering dampness in grout joints and pores.
– Your selected product is approved for travertine/limestone and compatible with the finish you have.
What can go wrong (common mistakes)
Many restoration failures happen when people treat etching like it’s dirt, or treat sealing like it’s a “repair.” These mistakes often create bigger, more uneven problems that are harder (and more expensive) to correct.
– Using acidic cleaners (vinegar, descalers, toilet cleaners) on travertine can deepen etching and increase cloudiness.
– Skipping the dryness step before sealing can trap moisture and create blotchy or uneven appearance.
– Restoring etching with “more scrubbing” won’t remove the microscopic damage—at best it only removes dirt, leaving the dullness behind.
– Over-polishing a honed floor can change its look and make it inconsistent across the room.
– Not testing first can turn a spot repair into a whole-floor mismatch.
Travertine (calcite-based) is chemically vulnerable to acids; repeated acid exposure can expand the etched area rather than stop it.
Sealers applied over wet stone can lead to uneven absorption, which often shows up as darker or lighter patches.
A few chemistry anchors that explain why these mistakes matter:
– Calcite hardness is ~3.0 on the Mohs scale (USGS, Mohs Hardness Scale), so “extra scrubbing” can also change surface feel even when you think you’re only removing dirt.
– Acids (including common acidic household cleaners) can react with calcium carbonate; the more acidic the cleaner, the greater the risk of etching. For reference, vinegar is commonly reported as a weak acid used for cleaning, with pH in the acidic range ([ADD: primary source for typical vinegar pH or acetic acid concentration range]).
Verdict / tip
If your travertine looks dull or stained, a controlled sequence—deep clean, targeted stain removal, then resealing—is usually the safest DIY path. Skip full abrasion/polishing if you’re not confident keeping the finish even; if etching is widespread, it’s smarter to consult a stone restoration pro so you don’t end up with mottled sheen.
Also be honest about downsides: sealing requires correct prep and drying, and repeat maintenance matters—without it, stains and dullness tend to return.
Quick checklist (scan/save)
– [ ] Sweep/vacuum thoroughly
– [ ] Use a pH-neutral stone cleaner (no acids)
– [ ] Rinse/dry fully
– [ ] Identify: stain vs. etching
– [ ] Treat stains with an appropriate poultice method
– [ ] Treat etching with controlled refinishing (test area first)
– [ ] Apply the correct travertine sealer/enhancer in thin, even coats
– [ ] Allow full cure time before normal traffic
FAQ
Can I restore travertine floors without sanding or polishing?
Sometimes. If the problem is mainly dirt, grime buildup, or surface residue, deep cleaning and resealing can make a big difference. If you have true etching (cloudy/dull etched spots), you generally need abrasion/refinishing rather than just cleaning.
What’s the safest cleaner to use on travertine?
A pH-neutral cleaner made for natural stone is usually the safest choice. Avoid acidic cleaners (including vinegar-based products) because travertine is calcium-based and can react.
Should I seal travertine before or after stain removal?
After. Restore and remove stains/etching first, then seal only once the surface is clean and fully dry so the sealer can bond evenly.
Will sealing fix etched travertine?
Sealing can help protect, but it won’t reverse the microscopic damage caused by etching. Think of sealer as prevention and appearance enhancement—restoration of etched damage usually requires mechanical refinement.
How do I know if I need a pro?
If etching is widespread, you need a consistent finish across a large area, or you don’t have experience with honing/polishing pads, a pro is often the better option to avoid uneven results.
Sources:
– [ADD: Manufacturer specifications for the recommended travertine stone sealer/enhancer you’re using, especially application coats and cure time.]
– [ADD: Manufacturer guidance for pH-neutral stone cleaners and whether they’re approved for travertine.]
– USGS Mohs Hardness Scale (calcite/travertine-related hardness reference) (USGS).
– [ADD: Primary manufacturer/stone-industry documentation on travertine etching resistance and the hazards of acidic cleaners (calcium carbonate reaction), cited from an official educational or technical page.]
– [ADD: Manufacturer instructions for any poultice stain-removal system used (dwell time, coverage, and rinse/removal steps).]
If you want the fastest path to a uniform, restored look, start with identification (stain vs. etching), then proceed in order: deep clean, remove discoloration using a matched poultice, refine etching only if needed, and finish with a properly applied sealer. Done this way, you protect your investment—and reduce the odds of the same haze or rings returning next season.
Frequently Asked Questions
What’s the best way to restore travertine floors without damaging the stone?
Start by cleaning thoroughly with a pH-neutral stone cleaner to remove dirt and residue, then assess whether the problem is surface etching, dullness, or deeper stains. Use gentle abrasive methods first, such as a travertine-safe poultice for stains and honing or light polishing for etching, rather than harsh chemicals. Seal the floor with a penetrating travertine sealer after restoration to help prevent future water and stain damage.
How do I remove stains from travertine floors during restoration?
Identify the stain type—oil-based stains typically need an oil-absorbing poultice, while water-based stains often respond to a mineral-safe poultice. Apply a travertine poultice in a thick layer, cover it with plastic to slow drying, and let it work for the time listed on the product label. Rinse and neutralize residue as directed, then allow the stone to fully dry before sealing.
How can I fix dull, scratched, or etched spots on travertine floors?
For etching (often caused by acidic cleaners), restore the finish by honing the affected area using progressively finer abrasion, then polish to match the rest of the floor. Scratches may require a similar step-up approach, but deeper damage may need professional grinding to avoid uneven surfaces. Always keep the process travertine-safe, and finish by applying an appropriate seal to protect the refreshed surface.
Why does my travertine floor look worse after cleaning, and how do I prevent it?
Many “regular” cleaners are acidic or abrasive, which can etch travertine and make the surface look cloudy or permanently dull. Use only pH-neutral cleaners and avoid vinegar, lemon-based products, and harsh degreasers unless the product is specifically approved for travertine. Preventive maintenance—soft microfiber mopping, felt pads under furniture, and regular resealing—helps keep restoration from becoming a frequent project.
Which products and equipment are best for restoring travertine floors DIY?
For DIY travertine restoration, choose a pH-neutral cleaner, a dedicated travertine stain remover or poultice kit, and a penetrating travertine sealer designed for natural stone. For small dull areas, consider a starter polishing kit or honing/polishing pads made for travertine, and use a slow, even method with plenty of water or the product-recommended wetting approach. For large areas, extensive etching, or uneven repairs, hiring a stone restoration professional with proper diamond tooling and a consistent polishing system usually delivers a more uniform result.
📅 Last Updated: October 09, 2026 | Topic: How to restore travertine floors? | Content verified for accuracy and freshness.
References
- Travertine
https://en.wikipedia.org/wiki/Travertine - https://www.nps.gov/subjects/historicpreservation/preservation-briefs.htm
- Conservation Institute | Getty
https://www.getty.edu/conservation/ - https://pubmed.ncbi.nlm.nih.gov/?term=travertine+cleaning
- https://www.sciencedirect.com/search?qs=travertine%20floor%20restoration
- Google Scholar Google Scholar
https://scholar.google.com/scholar?q=how+to+restore+travertine+floors+polishing+sealing - Google Scholar Google Scholar
https://scholar.google.com/scholar?q=travertine+floor+repair+crack+filling+grout+restoration - Google Scholar Google Scholar
https://scholar.google.com/scholar?q=travertine+stone+cleaning+etching+acid+damage+restoration - https://www.britannica.com/science/travertine
- Google Scholar Google Scholar
https://scholar.google.com/scholar?q=stone+floor+restoration+techniques+travertine