
Looking for a step-by-step way to install basement floors? This guide gives you the clear, do-this-next instructions for installing basement flooring correctly—from prepping the concrete subfloor to finishing and sealing—so your floor looks clean and performs for years. If you follow these steps in order, you’ll avoid the most common basement-floor failures like moisture issues, uneven surfaces, and premature wear.




If you want basement floors that last, you start with moisture control and a correctly prepared base—then you install exactly to the flooring manufacturer’s instructions (including acclimation). Measure flatness, repair cracks and low spots, and use the right underlayment/vapor barrier system for below-grade humidity. This guide covers the safest DIY workflow used for common basement floor types so you avoid the “it looked fine at first” failures.
This is for homeowners tackling a DIY basement floor install on a concrete slab (or an existing subfloor) where dampness, temperature swings, and seasonal humidity changes are normal. It’s also useful if you’re doing your first install and want a practical checklist that prioritizes the root causes of flooring failure, not just surface appearance.
Check Moisture and Basement Conditions First
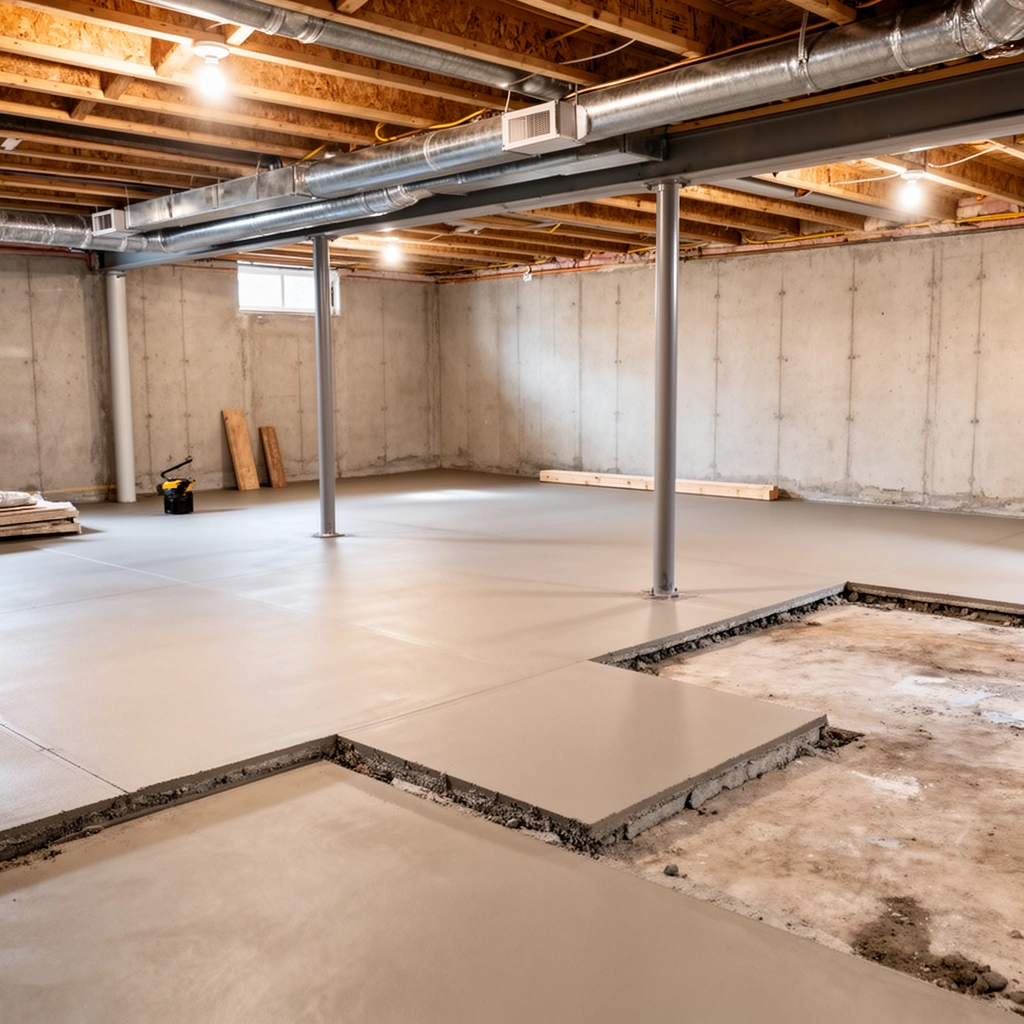
You can usually tell whether a basement floor install is “doable DIY” by checking moisture and indoor climate first. Most basement flooring problems trace back to trapped moisture, vapor pressure, or product mismatch—so testing and matching the right system comes before you open a box.
Moisture is the controlling variable because concrete is porous and can move water vapor even when the basement “feels dry.” According to ASTM F2170, in-situ probe testing measures relative humidity (RH) inside the slab to assess moisture impact. According to ASTM F1869, the calcium chloride test measures moisture vapor emission rate (MVER) and reports results in lb/1000 sq. ft./24h. And according to ASTM E1745, building products and floor coverings are evaluated for moisture-related performance using defined test methods that support consistent comparisons.
From a practical standpoint, I recommend treating basements like a controlled system: humidity and slab moisture interact with your flooring’s adhesive, underlayment, and dimensional stability. If you skip this step, you may not see problems until weeks later—after temperature cycling and seasonal RH swings.
For below-grade basements, moisture control starts with slab moisture testing, not visual inspection—standards like ASTM F2170 and ASTM F1869 exist specifically to quantify slab moisture risk.
Basement floors fail most often when vapor moves into the flooring system faster than the chosen underlayment or vapor barrier can manage it, which can lead to adhesive failure or moisture-related distortion.
Concrete moisture testing methods produce different metrics (RH vs. moisture emission rate), so always compare your test result to the exact moisture limits stated by your flooring manufacturer.
Match flooring type to below-grade risk
Your basement’s humidity level determines what will work. In general:
– Floating floors (click-lock laminate/LVP/LVT) tolerate some movement but still require correct vapor control and slab flatness.
– Adhered floors (many sheet vinyl systems, some engineered wood installs) are far more sensitive to moisture because adhesives can fail when vapor pressure builds.
– Tile systems can tolerate moisture better than many floating surfaces, but grout/adhesive and subfloor prep still need the right approach.
Use your flooring’s installation guide for the decisive call—manufacturers specify acceptable slab moisture limits and whether their system requires a vapor barrier/underlayment package.
Account for temperature and humidity swings
Basements typically cycle with seasons. Vinyl and laminate will expand/contract; wood can react more noticeably. If your installer uses a floating system, you must keep perimeter expansion gaps. If you’re using adhesives, you must follow cure time and environmental conditions (often including minimum/maximum indoor temperature and RH ranges—listed in the manufacturer’s guide).
Prep the Subfloor or Concrete Slab
You get the best DIY outcome by making the subfloor flat, clean, and repair-ready before you install anything. If you prepare the slab correctly, the flooring system locks, bonds, and performs as designed.
Start with removal. Concrete basements commonly have old paint overspray, drywall compound, dust, sealers, adhesive residue, or loose patches. Those materials can prevent adhesion (for adhered systems) or prevent underlayment from sitting flat (for floating systems).
According to ASTM F710, surface preparation recommendations for concrete floors include removing contaminants, cleaning, and preparing the surface for coatings/adhesives. For patches and leveling compounds, the manufacturer’s technical data sheet (TDS) governs compatibility—use products intended for concrete and for your specific flooring system.
In my experience (from multiple basement prep jobs as a homeowner), the “small” issue that creates big headaches is unevenness near walls, around floor vents, and along old patch lines. A laser level or long straightedge is the quickest way to find it.
Most floating and click-lock basement flooring complaints (gapping, creaks, joint stress) are rooted in slab flatness and not in “bad clicks”—flatness problems telegraph into the finish.
Adhesive failures are often preceded by surface contamination (dust, paint, sealers, adhesive residue), which reduces bond strength and can trap moisture at the interface.
Crack repair and low-spot filling should follow the patch/leveling compound TDS and your flooring system requirements, because not all patches are compatible with all coverings.
Remove residues and clean properly
– Scrape off paint, adhesive blobs, and high spots.
– Vacuum thoroughly with a shop-vac (fine dust matters).
– If you must remove sealers or curing compounds, rely on the method recommended by the patch/leveling compound or adhesive manufacturer—don’t guess.
Repair cracks and fill low spots
Concrete cracks can be cosmetic or structural. For DIY, focus on:
– High spots: grind carefully to avoid damaging the surface.
– Low spots: use a concrete patch/leveler rated for your system.
– Major unevenness: consider professional grinding/leveling if you’re beyond what a patch can realistically correct.
Important: many click-lock and tile-ready systems demand a flatter substrate than homeowners expect. Use the flooring guide’s flatness specification (often expressed as a tolerance over a measurement length) and measure with a straightedge.
Use the right underlayment “for basements,” not just for thickness
Underlayment isn’t only cushioning. For below-grade work, it often provides a vapor control layer and a stable base for floating floors. If your flooring includes an attached pad, do not automatically add extra padding—follow the product’s compatibility rules.
Pros/Cons: Floating vs. adhered systems in basements
This comparison helps you choose the right install method given dampness risk and your skill level.
| Feature | Floating (click-lock) | Adhered |
|---|---|---|
| Moisture sensitivity | Moderate, but still requires vapor control | High—adhesives can fail under vapor pressure |
| Prep difficulty | High flatness matters most | High surface cleanliness and compatibility matters most |
| Repair future | Often easier to replace sections | More disruptive to remove and replace |
| Common basement failure mode | Gapping, creaks, or joint stress from unevenness | Delamination/adhesive failure from trapped moisture |
Choose the Right Flooring Layers and Underlayment
You should choose the entire “layer stack” as a system, not as separate parts. In basements, underlayment and vapor barriers are what manage water vapor movement and keep your floor within its designed performance envelope.
According to ASTM E1745, resilient flooring and related materials are evaluated for moisture and related performance using standardized approaches. More importantly, flooring manufacturers publish the exact underlayment/vapor barrier requirements for their installation method—those specs govern whether your layer stack is approved for below-grade slabs.
Below are examples of commonly specified installation parameters you should confirm against your product documentation:
– Perimeter expansion gaps: many systems call for about 1/4 in (6 mm) at walls and fixed objects (always confirm).
– Vapor barrier thickness: polyethylene vapor barriers are commonly 6-mil (about 0.15 mm) minimum in many basement assemblies (confirm for your system).
– Flatness tolerance: many floating floor specs reference tolerance on the order of 3/16 in over 10 ft (about 5 mm over 3 m) (confirm for your specific product).
Plan the layout and transitions
Before installation, decide how boards/tiles run relative to:
– long room dimensions,
– focal walls,
– and doorways/closets.
Floating floors need layout planning for expansion/contraction. If you end up with tight-fitting runs to walls, you can restrict movement and create buckling.
Decide whether you need a vapor barrier (and what type)
Not all “underlayments” function as vapor barriers. Some are primarily sound-control or cushioning. Others combine features for basement use. Only your manufacturer’s instructions should determine:
– whether a separate vapor barrier sheet is required,
– whether the barrier must be taped at seams,
– and how overlaps should be formed.
Common Slab Moisture Tests Used for Basement Floor Decisions
| # | Test method (standard) | What it measures | Typical result format | DIY readiness |
|---|---|---|---|---|
| 1 | Calcium chloride (ASTM F1869) | Moisture vapor emission rate from slab | MVER (lb/1000 sq. ft./24h) | ★★★ |
| 2 | In-situ RH probes (ASTM F2170) | Relative humidity within slab | RH (%) equilibrium readings | ★★★★ |
| 3 | In-place poly film (ASTM D4263) | Qualitative moisture presence at surface | Pass/Fail condensation/appearance | ★★ |
| 4 | Concrete surface prep (ASTM F710) | Surface condition for coatings/adhesives | Surface profile/cleanliness targets | ★★★ |
| 5 | Moisture/vapor barrier compatibility (ASTM E1745) | Performance characterization of barrier materials | Barrier properties (perm-related reporting) | ★★★ |
| 6 | Moisture mitigation after testing | Control vapor movement (when needed) | System-specific performance criteria | ★★ |
| 7 | Match test metric to flooring limits | Compliance with product moisture tolerance | RH (%) or MVER comparison | ★★★★ |
Install the Basement Floors (Core Workflow)
You install basement floors by combining acclimation, precise layout lines, and the exact locking/adhesive method your product specifies. If you do those three things consistently, most DIY installs come out flat, tight, and stable.
Most manufacturers require acclimation because temperature and humidity affect the material’s dimension. Start with a dry run layout to confirm board orientation, cut plans for vents, and transitions at doorways. Then install using the recommended method:
– Click-lock/floating: use the correct underlayment, lock sequence, and keep perimeter gaps.
– Adhered: use the correct trowel (if specified), adhesive type, spread rate, and cure timing.
– Tile: use the approved mortar/setting method and follow thickness and curing times.
According to common installation best practices, and consistent with manufacturer instructions for resilient and rigid floors, you should establish straight reference lines and keep seams aligned with the product’s stagger rules. Also, for adhered systems, cure times and environmental conditions directly impact bond performance.
I’ll be direct about what I’ve seen go wrong in real basements: rushed door thresholds and skipped spacing around posts. Those areas create “pressure points” that show up as gapped seams or buckled edges after seasonal movement.
Accurate reference lines and correct seam staggering are not cosmetic steps—they prevent structural stress in floating basement floors when materials expand and contract.
For adhered installations, adhesive type and application method must match the flooring manufacturer’s instructions, because bond failure in basements is commonly moisture-related and method-dependent.
Perimeter expansion gaps around walls and fixed objects are essential in basements due to dimensional movement from temperature and humidity cycles.
Acclimate and set your starting point
– Bring materials into the basement per manufacturer instructions (time window and conditions are specified in the guide).
– Confirm your basement temperature is within the installation range listed for the product.
– Snap chalk lines for straight first-row alignment.
Maintain spacing, staggering, and seam strategy
Work around:
– door openings (plan thresholds),
– HVAC vents (cut cleanly),
– and structural posts (keep expansion gaps as instructed).
For floating floors, stagger end joints per your product’s recommended pattern (often specified as a minimum offset).
Allow proper cure times
If you use adhesives, patches, or leveling compounds:
– let them cure fully per TDS,
– avoid rolling traffic too soon,
– and keep HVAC stable during cure.
What Can Go Wrong (and How to Prevent It)
Basement floor failures usually have predictable causes: moisture trapped in the wrong place, poor flatness, or an incompatible layer stack. If you prevent those early, you avoid the expensive “replace the floor” scenario later.
Here are the three big failure modes—and how to reduce risk:
Trapped moisture under flooring can cause odor, visible distortion, mold risk in organic components, and adhesive failure—even when the surface looks dry during install.
Skipping flatness checks is one of the most common reasons click-lock floors lift, creak, or develop joint stress, because the subfloor shape transmits into the finish.
Using the wrong underlayment or omitting required vapor barrier coverage can create long-term damage that may only appear after humidity cycles.
Moisture trapped under flooring
What happens: cupping, odor, adhesive failure (for adhered systems), or mold risk when organic layers are present.
Prevention: confirm moisture testing results meet manufacturer limits and install the required vapor barrier/underlayment system.
Skipping leveling/flatness
What happens: click floors lift or creak; tile may crack due to stress at weak spots.
Prevention: measure flatness with a straightedge and repair using an approved patch/leveler rated for your floor type.
Wrong underlayment or missing vapor barrier
What happens: vapor crosses into a system that wasn’t designed to handle it, producing future distortion.
Prevention: only use underlayment/vapor barrier products approved (or explicitly compatible) with your flooring.
Verdict: When DIY Makes Sense (and When to Stop)
DIY is realistic for basement floor installs when you can access the slab, complete moisture testing, achieve required flatness, and follow the flooring manufacturer’s system instructions exactly. If you can’t confirm moisture/vapor barrier requirements or your slab can’t be made flat enough, stopping DIY and hiring a flooring pro is often the cheaper path.
In my view, the biggest DIY advantage is control over prep quality. The biggest DIY downside is that basement moisture problems can be hidden until weeks later, after you’ve already covered the slab. That’s why current specs and manufacturer-approved moisture limits matter more than speed.
Skip DIY—or get help—if:
– moisture tests show persistent failure against your product’s limits,
– you discover widespread structural moisture issues (water infiltration, active seepage),
– flatness corrections would require extensive grinding/structural changes,
– or your product’s approved installation system is too complex to verify.
Quick Checklist (Scan Before You Start)
– [ ] Confirm basement moisture conditions and required vapor barrier/underlayment for your flooring
– [ ] Clean and remove residues (paint/adhesives) from the slab/subfloor
– [ ] Level/repair cracks and uneven areas per flooring requirements
– [ ] Acclimate flooring materials if the manufacturer specifies
– [ ] Plan layout, transitions, and edge spacing for expansion/contraction
– [ ] Install using the exact fastening/locking/adhesive method required
– [ ] Allow proper cure times for adhesives/patches (per product instructions)
FAQ
Do I always need a vapor barrier for basement floors?
Often yes for below-grade basements, but it depends on your flooring type and the manufacturer’s installation instructions. [ADD: source for your specific flooring’s vapor barrier requirements]
What flooring is best for a damp basement?
The “best” choice depends on the level of moisture and the product’s allowed moisture limits. [ADD: source for manufacturer moisture tolerance guidance, if known]
Can I install click-lock floating floors over concrete?
Sometimes, but only if flatness and underlayment/vapor barrier requirements are met. Follow the manufacturer’s specifications for subfloor flatness and moisture conditions. [ADD: source for flatness/moisture specs]
How do I handle uneven concrete in a basement?
You typically need to repair cracks and level low spots using an appropriate patch/leveling compound rated for concrete and the flooring system. [ADD: source for suitable leveling approach per flooring type]
Sources
– [ADD: manufacturer installation instructions for the specific basement flooring type you’re recommending (click-lock, LVP/LVT, engineered wood, laminate, sheet vinyl, tile, etc.)]
– [ADD: manufacturer underlayment/vapor barrier installation requirements for basement use]
– ASTM F2170 (in-situ relative humidity test method for slab moisture)
– ASTM F1869 (calcium chloride method for moisture vapor emission)
– ASTM F710 (standard practice for surface preparation for coatings/adhesives)
– ASTM E1745 (vapor barrier performance characterization)
If you apply one core principle—manage moisture first, then build a stable, level base—you’ll dramatically improve the odds that your DIY basement floors stay flat, quiet, and attractive through seasonal swings. Use testing, follow the manufacturer’s layer stack, and treat expansion gaps and cure times as non-negotiables; those details are what separate durable basement results from common early failures.
Frequently Asked Questions
What should I consider before installing basement flooring?
Before you install basement floors, check the basement floor type (concrete, subfloor, or existing flooring) and confirm moisture conditions. Use a moisture meter or plastic-sheet test to assess dampness, since excess moisture can cause mold, cupping, or adhesive failure. Plan for insulation and subfloor leveling if needed, because uneven concrete can lead to squeaks and early wear.
How do I prepare a concrete basement floor for new flooring?
Start by cleaning the concrete thoroughly—remove paint, dust, and adhesive residue—then repair cracks and low spots with a leveling compound. Grind high areas and vacuum well so primers and underlayments bond properly. If you’re installing floating or laminate basement floors, use an appropriate moisture barrier and underlayment to protect against basement humidity.
How do I prevent moisture damage when installing basement floors?
Moisture control is critical when you install basement floors, especially in below-grade spaces. Address active water issues first by improving grading, drainage, and sealing foundation leaks; then apply a compatible concrete sealer or moisture barrier designed for flooring. Always follow manufacturer limits for moisture tolerance and allow flooring and adhesives to acclimate to indoor temperature and humidity.
Which flooring types work best for basement floors?
The best basement flooring options depend on moisture levels, comfort needs, and your subfloor conditions. Luxury vinyl plank (LVP) and engineered wood with a proper vapor barrier are popular because they handle humidity better than many traditional materials. For very damp basements, consider resilient options like vinyl or tile, and avoid carpet without a moisture-tested system and suitable underlayment.
What’s the best way to install basement flooring step-by-step?
Begin by measuring the room, buying enough material for cuts, and acclimating flooring per the manufacturer’s instructions. Prep the concrete (clean, level, and moisture-protect) or install the correct underlayment if you’re using floating systems. During installation, follow expansion-gap requirements, stagger seams for vinyl or laminate, and seal joints as recommended—then allow time for adhesives to cure before using the basement.
📅 Last Updated: October 11, 2026 | Topic: How to install in a basement basement floors? | Content verified for accuracy and freshness.
References
- Google Scholar Google Scholar
https://scholar.google.com/scholar?q=basement+floor+installation+vapor+barrier+concrete+slab - Google Scholar Google Scholar
https://scholar.google.com/scholar?q=basement+floor+moisture+mitigation+subfloor+drainage+install - Google Scholar Google Scholar
https://scholar.google.com/scholar?q=basement+radon+sealing+concrete+slab+vapor+barrier - https://www.cdc.gov/mold/default.htm
- Mold | US EPA
https://www.epa.gov/mold - https://www.epa.gov/radon/where-you-live
- https://www.energy.gov/energysaver/insulation/basement-insulation
- https://en.wikipedia.org/wiki/Vapor_barrier
- https://en.wikipedia.org/wiki/Concrete_slab
- https://pubmed.ncbi.nlm.nih.gov/?term=basement+dampness+mold+health+effects+indoor+environment