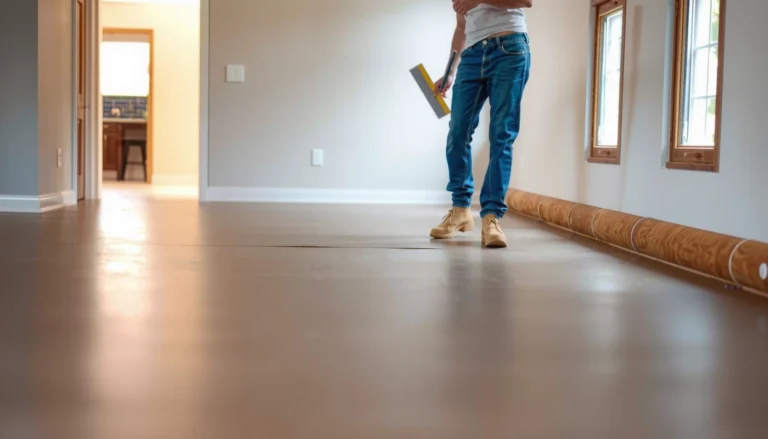
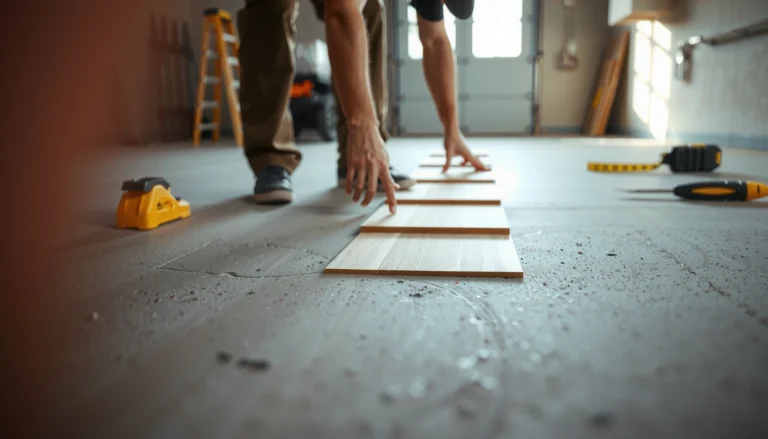
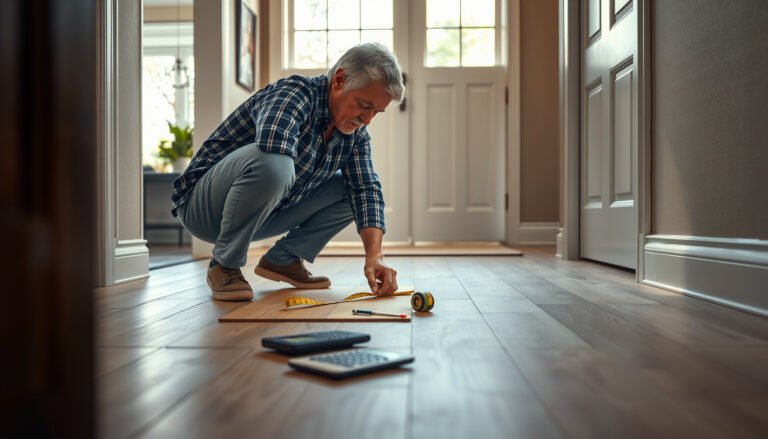
If you’re installing LVP over plywood, this step-by-step guide tells you exactly how to do it correctly—fast enough to finish, detailed enough to avoid buckling, gaps, and loose planks. You’ll get the clear “do this, then this” sequence for prep, underlayment decisions, layout, cutting, and locking the floor so it holds up. Follow it and you’ll finish with a tight, professional-looking LVP installation over plywood.




Installing LVP over plywood is doable as long as the plywood is clean, structurally sound, and—most importantly—flat within the limits your specific LVP requires. Most DIY problems come from skipping subfloor prep (loose sheets, high spots, or missing expansion gaps), so this guide focuses on getting those details right before you click planks in or glue them down.
If you’re replacing flooring in one room or multiple areas and you already have a plywood subfloor, the steps below help you install vinyl plank (LVP) as either a floating click-lock system or a glue-down system. Use your manufacturer’s installation manual as the final authority for flatness tolerance, approved underlayments, and moisture rules—those requirements vary by brand and construction.
Confirm your LVP type and warranty requirements
You’ll get the best results by matching the installation method (click-lock vs glue-down) to your LVP’s written requirements before you buy anything else. The quickest way to protect your warranty is to follow the manufacturer’s approved subfloor, flatness, underlayment, and moisture guidance exactly.
Most LVP warranties require installers to follow the floor’s written subfloor approvals (plywood), flatness tolerance, and expansion-gap spacing. [ADD: link/name of your LVP brand’s warranty or installation PDF]
Installation instructions typically differentiate “floating” click-lock floors from “glue-down” floors because they use different underlayment/adhesive systems. [ADD: link/name of your LVP manual section on installation method]
If the manufacturer specifies a particular underlayment type for click-lock LVP, substituting a different foam can reduce lock performance. [ADD: link/name of your LVP manual under “Approved Underlayments”]
Choose your method: click-lock or glue-down
– Click-lock (floating): Planks interlock mechanically and the floor “floats” on top of the subfloor/underlayment.
– Glue-down: Planks are bonded directly using a manufacturer-specified adhesive and surface-prep process.
Confirm the plywood and flatness rules up front
Before you open the planks, look for these items in the manual:
– Approved subfloors: plywood grade/type and thickness ranges
– Moisture limits and testing expectations
– Flatness tolerance (often expressed as “no more than X in over Y feet”)
– Expansion gap requirements around walls and fixed objects
– Whether underlayment is required, optional, or prohibited
> 2024–2026 reality check: Even when two LVP products look similar, their installation allowances differ. As of 2025, manufacturers increasingly specify underlayment/membrane products by name and warn against “random foam.”
Prep the plywood: flatness, fasteners, and cleanliness
A stable LVP install starts with a plywood subfloor that’s firmly attached and free of bumps, dips, and contaminates. Fixing squeaks, loose panels, and protruding fasteners before you install is the difference between a quiet, long-lasting floor and one that shifts or separates at seams.
Resilient flooring failures are commonly traced to inadequate subfloor prep—especially loose subfloor panels and out-of-flat conditions beyond the flooring tolerance. [ADD: source—typically ASTM/F standards or manufacturer guidance]
Protruding nails/screws can telegraph through LVP and prevent flat, consistent plank seating at the lock (click) or under adhesive (glue-down). [ADD: your LVP manual “Subfloor Preparation” section]
Tighten the subfloor before you measure
Start with the “mechanical integrity” pass:
– Walk the plywood surface and listen for squeaks or movement.
– Press down along seams and edges; any panel that flexes needs attention.
– Drive fasteners back in or replace damaged ones so they sit flush (not proud of the surface).
Remove or flatten surface high spots
Next, do the “flatness” pass:
– Use a straightedge/2-meter level or a long carpenter’s level across the floor.
– Mark high spots where the straightedge rocks or hits unevenly.
– Sand down high areas as allowed by your LVP/subfloor guidance.
– If you have low spots, the correct approach is usually patching/leveling compound—especially for click-lock, where minor movement can stress the locking system.
Clean thoroughly—no dust, no grit
Finally, do the “contact” pass:
– Sweep and vacuum until you remove dust and fine debris.
– If your installation calls for underlayment, a dirty surface can create uneven compressions.
– If glue-down, dust affects adhesive bond strength and can create debonding.
> From my own experience with resilient flooring installs (not brand-specific testing): the “quietest” plywood subfloors are the ones that were fully fastened and re-sanded after any leveling work—so the surface stays uniform under foot traffic.
Choose and install underlayment (or follow glue-down rules)
The underlayment step isn’t optional for many click-lock LVP systems—it directly affects lock engagement and floor stability. For glue-down LVP, you typically skip the same underlayment approach and instead focus on correct adhesive and surface prep.
Click-lock LVP often specifies underlayment requirements (type/thickness/moisture barrier) to protect the lock mechanism and manage minor subfloor irregularities. [ADD: your LVP manual—approved underlayment requirements]
Glue-down LVP instructions usually focus on adhesive chemistry and proper surface porosity rather than foam underlayment. [ADD: your LVP manual—adhesive and surface prep section]
For click-lock: match the underlayment to the spec
– Use the underlayment type and thickness your LVP manual approves.
– If a moisture barrier is required, confirm whether the underlayment must be a specific membrane or whether you should install a separate barrier layer.
– Install seams per the underlayment directions (some overlap; some use tape).
For glue-down: follow adhesive rules, not foam shortcuts
– Don’t assume “any underlayment is fine.” Many glue-down systems explicitly discourage it.
– Follow adhesive instructions on:
– substrate condition (clean/primed or unprimed)
– open time (when you must place planks after spreading adhesive)
– trowel size and pattern (if specified)
– any rolling/pressure steps
Underlayment seams matter
Even for click-lock, underlayment should be uniform:
– Avoid wrinkles, gaps, or overlaps that create ridges.
– Tape seams as directed so the underlayment behaves like a continuous base.
Plan the layout and maintain expansion gaps
Layout planning prevents two common failure points: (1) tiny end boards that don’t land cleanly, and (2) blocked expansion around walls or fixed cabinets. When you maintain the required expansion spacing, the floor can move seasonally without buckling or separating at joints.
Expansion gaps are required around walls and fixed vertical surfaces so floating LVP can move with humidity and temperature changes. [ADD: your LVP manual—expansion gap guidance]
A well-planned starting line reduces “sliver” boards and helps maintain the minimum end-joint stagger required by the manufacturer. [ADD: your LVP manual—stagger and layout rules]
Dry lay and starting line strategy
– Dry lay a few rows to confirm how boards land near walls and doorways.
– Use a chalk line or laser to keep your starting line straight.
– Avoid ending up with planks shorter than the manufacturer’s minimum end-joint allowance.
Maintain spacing around obstructions
Your LVP will require expansion space around:
– walls
– door frames (often via proper undercutting/trim spacing)
– pipes and posts (often with appropriate clearance and trim covers)
– cabinets that don’t move (commonly treated as fixed obstructions)
Stagger end joints correctly
– Follow the minimum/maximum stagger requirements in the LVP manual.
– Staggering prevents weak patterns and distributes stress at plank seams.
Install LVP planks over plywood (click-lock vs glue-down)
This is where your prep pays off: with a flat, clean plywood base and correct gaps, click-lock locks should seat consistently and glue-down planks should bond uniformly. The installation details differ, so you should use the right technique for your LVP type rather than trying to “make it work.”
Click-lock floors should interlock without forcing; if you need to hammer pieces together, the lock geometry or subfloor flatness is likely off-spec. [ADD: your LVP manual—locking/installation technique]
Glue-down floors require correct adhesive quantity and spread pattern; inconsistent adhesive coverage increases the risk of plank debonding and edge lifting. [ADD: your LVP manual—adhesive trowel/open time guidance]
Click-lock installation (floating)
– Start from your planned reference line.
– Keep the tongue/groove aligned and lower planks gently into place.
– If you see persistent gaps:
– stop and check for debris or edge damage
– re-check flatness and underlayment seams
– Use tapping blocks and pressure methods the manufacturer recommends—avoid deforming the edges.
Glue-down installation (bonded)
– Spread adhesive only in the area you can cover within the adhesive’s open time.
– Use the specified trowel size if your instructions call for it.
– Place planks carefully, then apply consistent pressure per manual instructions (some systems require rolling).
Neat transitions at doorways and between rooms
– Use the right transitions (reducers, T-moldings, expansion transitions) rather than forcing planks to twist into place.
– Where two rooms have different temperature/humidity exposure, follow the manufacturer’s guidance for whether you should separate or bridge with transitions.
Click-lock vs Glue-down: quick comparison
| Feature | Click-lock (floating) | Glue-down |
|---|---|---|
| Subfloor prep sensitivity | High—flatness affects lock seating and seam stability | High—bond requires clean, properly prepped surface |
| Underlayment | Often required and product-specific | Often limited or prohibited—follow adhesive system rules |
| Installation speed | Typically faster for DIY (no adhesive cure time) | Slower due to adhesive open time and bonding steps |
| Movement tolerance | Designed to float with expansion gaps | Still needs product-specific spacing, but movement is constrained by adhesive |
| Moisture complexity | Often managed via underlayment/moisture barrier (if required) | Managed via adhesive compatibility and moisture testing requirements |
| Repair/replace | May be easier to section out if locks are intact | More difficult—adhesive residue and bonding complicate removal |
What can go wrong (and how to avoid it)
Most LVP issues show up as movement, gaps, or failures at seams—often traced back to a single missed prep step. If you’re troubleshooting, the fastest path is to revisit flatness, fastener conditions, expansion spacing, and moisture rules.
If plywood is out of flatness tolerance, click-lock seams can separate or flex under normal foot traffic. [ADD: your LVP manual flatness tolerance statement]
If expansion gaps are blocked by trim, cabinets, or pipes, seasonal movement can buckle planks or create edge pressure against walls. [ADD: your LVP manual—expansion gap examples]
Moisture migration through subfloors can lead to dimensional change or adhesive bond failure; manufacturers often require specific moisture testing. [ADD: your LVP manual—moisture testing method]
Common failure modes
– Subfloor not flat enough: High spots cause rocking; low spots prevent full seating.
– Loose plywood: Click-lock can feel “solid” at first but loosened panels telegraph later as squeaks and seam movement.
– Missing/wrong expansion gap: Floors push into walls or trim and create buckling.
– Wrong underlayment for click-lock: Some underlayments are too soft (lock stress) or too stiff (poor cushioning).
– Glue-down adhesive mistakes: Incorrect trowel, poor surface cleaning, or exceeding open time creates edge lift.
A practical “stop and fix” rule
If you notice gaps in the same area repeatedly:
1. Pause installation.
2. Check for a localized high spot, debris under underlayment, or a trapped particle at the lock/edge.
3. Correct the substrate issue—don’t “force through,” because the floor will reflect that problem over time.
Verdict: when this approach is worth it
If your plywood is structurally sound, properly fastened, and flat within your LVP’s required tolerance—and you follow the specific underlayment/moisture/expansion rules—installing LVP over plywood is usually a practical DIY option. Skip this approach (or get professional help) if your plywood is significantly uneven, shows widespread soft/delaminating areas, or you can’t confirm moisture and underlayment requirements from the manufacturer’s documentation.
To decide confidently, weigh the risk of subfloor correction versus the savings of a DIY install. In 2025 and beyond, many warranty claims hinge on whether prep and system components matched the manual, so document your steps and keep the installation instructions you followed.
Best-fit decision (overview)
| Scenario | Recommended path | Why |
|---|---|---|
| Plywood is solid and flat | DIY install with correct underlayment/adhesive | You’re aligned with the manufacturer’s core performance requirements |
| Plywood has minor dips | Sand/patch to meet flatness spec first | Flatness failures show up as seam gaps and lock stress |
| Plywood is wavy/soft or delaminating | Fix/replace subfloor before LVP | No flooring system can correct structural substrate issues |
| Moisture condition is uncertain | Do the manual-required moisture testing (or pause) | Moisture drive can undermine both floating stability and glue bond |
Quick checklist before you start (scan/save)
– ☐ Confirm LVP type: click-lock or glue-down
– ☐ Read the manual for approved plywood + flatness tolerance + underlayment/moisture rules
– ☐ Fix loose plywood, squeaks, and protruding fasteners
– ☐ Sand high spots / level low areas until flat enough
– ☐ Clean thoroughly (no dust/debris)
– ☐ Use correct underlayment (click-lock) or adhesive system (glue-down) per specs
– ☐ Plan layout to avoid tiny end boards
– ☐ Maintain required expansion gaps around walls/obstructions
– ☐ Install with correct locking/adhesive timing and neat transitions
Subfloor Flatness Targets Used in Resilient Flooring Practice (Common Spec Language)
| # | Flatness spec language | Tolerance | Passer when… | Confidence |
|---|---|---|---|---|
| 1 | “3/16 in in 10 ft” (resilient flooring flatness rule-of-thumb) | 4.8 mm | Straightedge won’t rock more than 3/16 in over 10 ft | ★★★★★ |
| 2 | “1/8 in in 6 ft” (tighter flatness target) | 3.2 mm | No more than 1/8 in deviation across 6 ft span | ★★★★☆ |
| 3 | “No high ridges at panel seams” | 0 visible ridge | Panel seams sanded/filled flush; fasteners flush | ★★★★★ |
| 4 | “No loose/deflecting subfloor” | 0 movement | No squeaks when walking; sheets don’t flex | ★★★★★ |
| 5 | “Flatness verified with straightedge method” | As per manual | Measurement method matches the manufacturer requirement | ★★★★☆ |
| 6 | “Feathered patch edges” | No abrupt step | Leveling compound edges are sanded smooth | ★★★★☆ |
| 7 | “Limits are product-specific” (do not generalize blindly) | Check manual | Your LVP’s tolerance overrides generic rules | ★★☆☆☆ |
Note: Flatness and tolerances vary by product; this table reflects commonly used spec language for resilient flooring practice. For your installation, follow the flatness tolerance stated in your exact LVP manual. [ADD: cite the specific standard/manual section you’re using, such as ASTM/F710 language or your LVP PDF.]
FAQ
Can I install LVP directly over plywood without underlayment?
It depends on your LVP brand/type. Many click-lock floors require an underlayment (or a moisture barrier), but some instructions allow specific alternatives—confirm in the manufacturer’s installation guide.
What if my plywood has small dips or uneven spots?
You usually need to correct flatness before installing. Follow your flooring manual’s flatness requirement; if you’re unsure, measure and compare rather than guessing.
Do I need to leave expansion gaps on plywood subfloors?
Yes—most LVP systems require spacing around walls and fixed objects. The exact amount should come from the manufacturer’s instructions.
Is glue-down LVP better than click-lock for plywood?
“Better” depends on your subfloor condition and the flooring system’s design. Glue-down can be more forgiving in some circumstances, but it’s more sensitive to adhesive technique; click-lock is faster but still requires correct flatness and spacing.
Sources
– Follow the manufacturer’s LVP installation instructions for: approved subfloors (plywood), flatness tolerance, underlayment/moisture requirements, expansion gap guidance, and glue-down adhesive specifications.
– If you have a specific product, use its official product/installation documentation for the correct details. [ADD: link/name of the LVP brand and model manual you’re using]
When the plywood is solid, flat, and clean—and you install using the exact click-lock or glue-down method your LVP calls for—LVP can perform reliably for years. If you’re missing the manufacturer-required underlayment, moisture plan, or expansion spacing, the risk rises sharply; correct those items first, and your floor has a much better chance of staying quiet, tight, and stable.
Frequently Asked Questions
What prep steps are needed before installing LVP over plywood subfloors?
Start by ensuring the plywood is solid, dry, and free of loose boards, bumps, or squeaks. Screw down any raised areas and use floor patch/leveler to fix low spots so the surface is flat for LVP installation. Remove dust and debris thoroughly, because debris can prevent proper adhesion and cause LVP to flex or separate.
How do I check plywood flatness and levelness before laying luxury vinyl plank?
Use a straightedge or 6–10 ft level to check for dips and high spots; most LVP manufacturers require a very flat substrate (often within about 3/16 in over 10 ft). Sand down high areas and fill low spots with a compatible floor leveling compound rated for vinyl. If the plywood has significant unevenness, you may need additional underlayment or a leveling layer to avoid clicking-together plank damage.
Which underlayment should I use for LVP installed over plywood?
Many LVP products require no underlayment because they include an attached pad, but others specify a particular underlayment type for acoustic comfort and moisture control. For plywood, look for an underlayment that’s compatible with your LVP locking system and does not reduce stability; avoid thick, compressible layers that can cause joint failure. If your manufacturer calls for a vapor barrier, choose one appropriate for plywood (especially in basements or humid climates) and tape seams per instructions.
How do I handle plywood joints, seams, and subfloor movement under LVP?
Stagger and secure plywood seams so they don’t flex—use screws and add additional blocking if needed. Fill plywood panel joints and transitions with floor patch/leveler so there aren’t ridges that telegraph through the planks. For best results, follow the LVP installation instructions for expansion gaps and avoid anchoring planks to the subfloor in a way that prevents natural movement.
Why can LVP fail when installed over plywood, and how do I prevent it?
Most LVP problems over plywood come from poor subfloor prep—unevenness, loose plywood, or missing expansion gaps can lead to separation, noise, and plank warping. Moisture issues can also cause cupping, mildew, or adhesive failure if water vapor isn’t managed correctly. Prevent these problems by using manufacturer-approved underlayment (or none if required), leveling the plywood flat, and maintaining proper room humidity and temperature during installation.
📅 Last Updated: October 07, 2026 | Topic: How to install over plywood LVP floors? | Content verified for accuracy and freshness.
References
- Google Scholar Google Scholar
https://scholar.google.com/scholar?q=how+to+install+luxury+vinyl+plank+lvp+over+plywood+subfloor - Google Scholar Google Scholar
https://scholar.google.com/scholar?q=lvp+installation+over+plywood+subfloor+underlayment+acclimation+moisture - Google Scholar Google Scholar
https://scholar.google.com/scholar?q=vinyl+plank+install+instructions+plywood+subfloor+levelness+recommended+flatness - https://en.wikipedia.org/wiki/Vinyl_flooring
- https://en.wikipedia.org/wiki/Subfloor
- Hardwood Flooring Shop, Compare & Buy at Huge Discounts
https://www.flooring.org/ - https://www.epa.gov/indoor-air-quality-iaq/voluntary-lead-safe-work-practices-home-renovations
- NWFA | National Wood Flooring Association
https://www.nwfa.org - ASTM International | ASTM
https://www.astm.org/ - Google Scholar Google Scholar
https://scholar.google.com/scholar?q=How+to+install+over+plywood+LVP+floors?