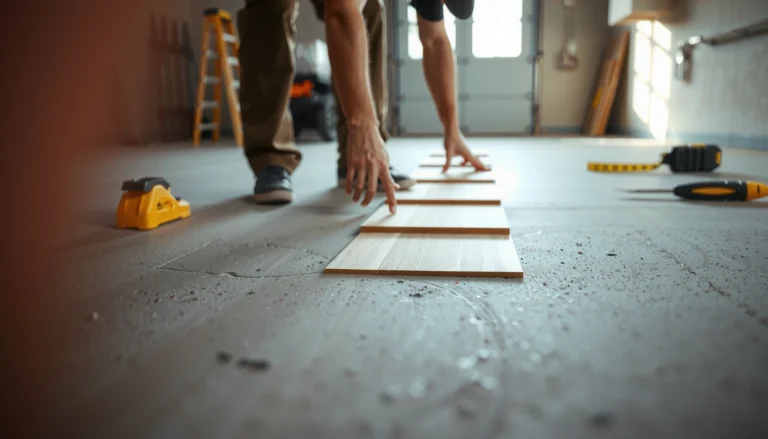
Estimate your vinyl flooring entryway cost quickly by using a simple square-foot math method plus the real add-ons—underlayment, prep, delivery, and installation. If you know whether you’re buying click-lock DIY planks or hiring pros for sheet/rigid-core vinyl, you’ll get a tighter budget range in minutes. This guide will tell you exactly what numbers to measure and which line items to include so there are no surprises at checkout.




If you want an accurate estimate for vinyl flooring in an entryway, calculate total square footage first, then multiply by the full “installed” cost per square foot (materials + underlayment/moisture layer + trim + labor). Because entryways involve cuts around doors, thresholds, and corners, add a waste/complexity buffer so you can compare quotes without surprises—this article shows the exact inputs to plug in.
This guide is for homeowners and renters planning vinyl floors in a small entryway (especially where there’s a door swing, hallway transition, or step/threshold). It applies whether you’re comparing luxury vinyl plank (LVP), vinyl tile, or sheet vinyl—and whether you’re budgeting for a DIY install or a licensed pro. As of 2026, most entryway cost swings come from prep scope (flatness + moisture) and transition finishing, not from the vinyl wear layer itself.
Measure your entryway to get square footage right

Measure first, estimate second. The cleanest cost comparisons happen when everyone is pricing the same square footage and the same “end line” where the new vinyl stops at the doorway/threshold.
Accurate square footage is the foundation for estimating vinyl flooring in your entryway because it controls (1) how much vinyl you’ll buy, (2) how much labor time the installer needs for layout and cutting, and (3) how much trim/transition material is required. Currently, and continuing into 2026, quoting practices still vary most at the “what counts as included area?” step—especially for entryways that open to a hall or have a step.
For vinyl flooring in an entryway, measure the covered area using length × width (L × W) and then include the exact boundary where the floor stops at the doorway or threshold line.
If your entryway isn’t a clean rectangle, splitting it into smaller shapes and adding their areas reduces square-footage disputes during vinyl flooring cost comparisons.
– Measure the length and width of the entryway area and calculate square footage (L × W).
– Tip: measure to the “stop line” where the new floor ends—often the face of a threshold, the inside edge of a transition strip, or a planned transition seam.
– If the entryway isn’t a clean rectangle, split it into smaller sections (rectangles/triangles) and add the areas together.
– For triangles, use the triangle area formula: (base × height) ÷ 2.
– Account for transitions: include the area you’ll cover up to the doorway/threshold line where the new floor ends.
– If you’re adding an in-transition piece (T-mold, reducer, or stair nose), you’re still measuring the field area—trim pricing comes later.
Quick math example (so your quote scope matches)
Let’s say your entryway is effectively 4 ft × 6 ft = 24 sq ft, but the doorway swing forces you into a rounded/angled cut and you also cover a small hallway lip that’s 2 ft × 3 ft = 6 sq ft. Your total measured coverage area becomes 30 sq ft. This is the number you want every contractor to see when you request vinyl flooring in your entryway.
Break down costs: materials, prep, and installation
Break the estimate into three buckets: vinyl materials, preparation, and installation/finishing. This prevents the common problem where one quote quietly includes underlayment and tear-out while another treats them as extras.
For vinyl flooring cost estimation in an entryway, “installed cost” is only comparable if you separate material pricing from labor scope and subfloor prep. As of 2026, many installers quote “per square foot” but also add line items for moisture mitigation, flattening, removal/haul-away, and transitions—those line items decide whether the quote is actually cheaper.
For resilient flooring like vinyl, subfloor prep and flatness requirements are a primary driver of installation outcomes and can add cost even when material pricing looks similar.
When comparing vinyl flooring in an entryway, confirm whether underlayment, moisture barrier work, and transition installation are included in the quoted labor rate.
– Estimate vinyl material cost separately from underlayment (if needed), trim, and transition pieces.
– Vinyl material: LVP planks, LVT tiles, or sheet vinyl.
– Underlayment/moisture layer: depends on the product system and your subfloor conditions.
– Trim/transitions: T-moldings, reducers, edge strips, quarter round, threshold plates, or stair/step noses (as applicable).
– Don’t forget subfloor/prep: leveling compound, moisture barrier (if required), patching, and removal of existing flooring can change the price a lot.
– Prep can include scraping, patching seams/cracks, installing underlayment over concrete in some cases, or addressing squeaks/deflection on wood subfloors.
– If getting quotes, ask whether the installer’s labor rate includes tear-out, haul-away, and floor disposal.
– Two contractors can both say “installed” but one includes removal and the other charges per item.
Subfloor and moisture: the part most estimates under-scope
Vinyl is forgiving compared with some flooring types, but it’s not immune to moisture or poor flatness. Installation standards for resilient flooring emphasize flatness and moisture compatibility—if those aren’t met, vinyl flooring in your entryway can separate at seams or telegraph imperfections.
According to , resilient flooring installation depends on achieving required subfloor flatness before the vinyl is installed ().
According to , moisture testing results are used to determine whether a moisture mitigation system is required ().
Include waste, cuts, and layout “complexity”
Add waste on purpose, not hope. Entryways typically require more trimming than a large open room because of door clearances, threshold edges, wall irregularities, and (often) multiple transition points.
This is where vinyl flooring in your entryway estimates commonly break down: the “sq ft × cost per sq ft” math seems simple, but the installer has to place planks/tiles around obstacles and maintain pattern/layout rules. If you’re using LVP with a visual plank direction, tile grout-line alignment, or sheet vinyl seam planning, waste can move up quickly.
For vinyl flooring in an entryway, waste needs to cover cutting around walls, door hardware, and corners—not just random mistakes.
If your vinyl flooring in your entryway includes pattern matching (some LVP looks and many vinyl tile layouts), expect higher waste than a simple plank layout.
– Add a waste allowance for cutting around walls, corners, and door hardware. Use rather than guessing.
– In practice, many manufacturers advise a waste buffer around 5%–10% for typical layouts, with complex door/transition geometry or pattern matching pushing higher—still, you should follow your product’s stated guidance.
– If you’re matching patterns (for some LVP looks or tile patterns), waste may be higher—confirm with the manufacturer’s instructions.
– Pattern rules affect how often you need to restart a row or align grout lines.
– Entryways with multiple angles or irregular edges typically cost more in labor because of additional measuring and fitting.
– Irregular edges don’t just create more cuts; they create more layout time.
A practical waste takeoff table (example for planning)
Below is a math-based planning table for a 60 sq ft entryway coverage area. It shows how different waste allowances translate into total square footage to buy for vinyl flooring in your entryway.
Waste Allowance Math for Vinyl Flooring in a 60 sq ft Entryway (Planning Example)
| # | Entryway layout scenario | Waste % | Extra sq ft | Total to buy (sq ft) |
|---|---|---|---|---|
| 1 | Simple rectangle, minimal cuts | 5% | 3.00 | 63.00 |
| 2 | Door threshold only | 7% | 4.20 | 64.20 |
| 3 | One hallway transition seam | 9% | 5.40 | 65.40 |
| 4 | Door hardware + corners | 10% | 6.00 | 66.00 |
| 5 | Irregular edges/angle cut entry | 12% | 7.20 | 67.20 |
| 6 | Pattern alignment required | 15% | 9.00 | 69.00 |
| 7 | Multiple angles + two transitions | 18% | 10.80 | 70.80 |
Compare DIY vs. professional install costs
DIY can lower labor costs, but professional installs usually reduce risk around transitions and thresholds. The “right” choice for vinyl flooring in your entryway depends on subfloor prep complexity and how many finishing edges you need to nail the first time.
Right now in 2026, many homeowners are price-shopping because material costs are easier to compare than labor scope. Still, the entryway is where DIY most often costs more later: thresholds require careful spacing, seam placement, and trim finishing.
For vinyl flooring in an entryway, professional labor tends to add cost upfront but can prevent expensive redo work around thresholds and transition finishing.
DIY estimates for vinyl flooring in your entryway should include tools (cutting, spacers, trim setting) and the cost of mistakes at doorway transitions.
– DIY can reduce labor expenses, but you still pay for tools (underlayment/adhesive where applicable, trim, spacers, cutting tools) and for any mistakes—especially on transitions.
– If your entryway has a step/threshold, mistakes show quickly and are harder to hide.
– Professional installs usually include more predictable results for leveling/prep and can handle tricky thresholds, but you’ll pay a labor premium.
– Pros also tend to manage schedule risk and disposal requirements.
– Get at least quotes and ensure each one includes the same scope (prep level, removal, transitions, and finishing).
– A practical baseline is at least 3 quotes, with every quote itemized for prep, removal/haul-away, transitions, and finishing details.
DIY vs. pro: quick comparison you can use in quotes
If you’re comparing vinyl flooring in your entryway, use this checklist logic to standardize scope.
| Cost/quality factor | DIY impact | Pro install impact |
|---|---|---|
| Subfloor prep | Can be under-scoped if you only check for “looks flat.” | More consistent assessment of flatness and patching. |
| Threshold/door finishing | Higher redo risk if cuts or spacing are off. | Better chance of clean transitions and correct height alignment. |
| Schedule predictability | Can stretch if you hit unexpected prep issues. | Often more predictable timeline for small-entryway work. |
| Total “installed” cost visibility | Tools + disposal + mistakes can be easy to forget. | Itemized quotes improve transparency (if you force line items). |
From my experience with estimating vinyl flooring in entryways, the projects that run high almost always share one theme: the quote scope assumes a simpler threshold transition or flatter subfloor than reality.
What can go wrong (and how to avoid surprises)
Vinyl flooring in an entryway usually goes sideways when subfloor and transition details are treated as afterthoughts. Avoiding surprises requires checking prep requirements, locking down quote scope, and budgeting the right waste for your exact layout.
In 2026, the best “quote insurance” is to prevent mismatch between what you think is included and what the contractor thinks is optional. Entryways amplify tiny problems because doors and thresholds force tight tolerances and visible edges.
Skipping subfloor flatness checks for vinyl flooring in an entryway can lead to premature failure and noticeable imperfections after installation.
Ignoring moisture barrier requirements for vinyl flooring in an entryway increases the odds of bubbling, separation, or edge lifting.
– Skipping subfloor checks: vinyl can fail faster over uneven spots, so verify flatness/condition before you buy.
– If the subfloor has dips, ridges, or soft spots, include leveling/patching in your estimate.
– Ignoring moisture requirements: certain installs require moisture barriers or specific conditions—use the product’s installation instructions for your entryway situation.
– Concrete slabs, basements, or exterior entryways can change the moisture conversation quickly.
– Mismatched scope in quotes: one contractor might include underlayment and transitions while another treats them as add-ons—request a line-item breakdown.
– Ask specifically about transitions, reducers, thresholds, and any caulking/silicone recommendations.
– Wrong waste assumptions: underestimating waste leads to running short mid-project (especially with pattern-matching visuals).
– Running short often means buying from a different production lot—color/print variance can matter.
Verdict: a realistic way to estimate without overpaying
Start with square footage and use the vinyl product’s documented installation requirements to estimate prep and add-on parts. If you’re comfortable measuring carefully and your entryway is simple (clear rectangle, good subfloor condition), DIY can be reasonable—but skip it if your subfloor needs significant leveling or if thresholds/door transitions are complex. For the smoothest outcome and fewer costly mistakes, consider hiring a pro for layout and fitting, especially if your entryway has irregular edges or multiple transitions.
Downsides to watch: professional labor can be a large portion of the total, and DIY risk is highest around thresholds and finishing transitions—so be honest about your experience before committing.
Quick estimate checklist (scan/save)
– Square footage: measure your entryway coverage (L × W) and include the area up to the doorway/threshold stop line
– Vinyl type and thickness:
– Waste allowance: start from your product’s installation guide (often ~5%–10% for typical layouts; more for complex cuts/patterns)
– Underlayment/moisture barrier:
– Prep needs (leveling/patching/removal):
– Trim + transitions:
– Labor/DIY tools:
– Quote comparison: confirm includes tear-out/haul-away and finishing (transitions + edges + any required caulk/trim work)
Sources
– (e.g., ASTM practices and test methods referenced by installers and manufacturers)
– (flatness and installation guidance commonly referenced in resilient flooring projects)
Estimating vinyl flooring in your entryway gets easier when you standardize scope: measure the true coverage area, apply the product’s documented system requirements (prep + underlayment/moisture rules), and budget waste for thresholds and corners. If you follow that structure—materials plus prep plus finishing—you’ll be able to compare quotes confidently and avoid the most expensive surprises in 2026.
Frequently Asked Questions
How do I estimate the total cost of vinyl flooring for an entryway?
Start by measuring the entryway square footage (length × width) and add 10–15% for waste from cuts around the door, transitions, and edges. Then estimate material cost based on the vinyl type you’re installing (LVP or LVT), since thicker, waterproof, and more realistic wear layers cost more per square foot. Finally, budget for installation supplies and labor—if hiring a pro—because leveling, underlayment needs, and subfloor prep can significantly affect the vinyl flooring cost.
What’s the average cost per square foot for vinyl floors in an entryway?
Entryway vinyl flooring pricing commonly varies by quality and style, such as sheet vinyl versus luxury vinyl plank (LVP) or luxury vinyl tile (LVT), with many homeowners comparing costs in the range of roughly $2–$7+ per square foot for materials. Pro installation often adds another $1–$4+ per square foot depending on subfloor condition, transitions, and whether removal of existing flooring is required. To estimate accurately, get quotes for your exact entryway size and note whether the price includes subfloor repair, leveling compound, and disposal.
How do I calculate labor and installation costs for vinyl flooring in a small entryway?
Labor is often quoted per square foot, but small areas like entryways can cost more per square foot because installers spend extra time on precision cuts, fitting around door jambs, and adding transition strips. Ask your installer whether the quote includes subfloor prep (sanding/patching, moisture checks, and leveling), removing old flooring, and installing underlayment or accessories. For the most accurate vinyl floor estimate, provide your room dimensions and photos of the subfloor and any doorways or closets so labor pricing reflects your specific entryway layout.
Which vinyl flooring features cost extra—and are worth it for an entryway?
Entryways see heavy foot traffic, so features like a thicker wear layer, attached pad, water resistance, and realistic embossing can raise the per-square-foot cost but improve durability and comfort. If your entryway is near exterior doors, look for waterproof vinyl flooring options and higher AC/commercial ratings where applicable. While cost-saving upgrades like thinner planks or minimal underlayment may work in low-traffic areas, paying more for slip resistance and wear layer thickness often reduces replacement risk in high-traffic zones.
Why does subfloor preparation change the price of vinyl flooring, and how can I plan for it?
Vinyl flooring can reveal imperfections—so if your subfloor has dips, bumps, or moisture issues, you may need leveling compound, patching, or additional underlayment, which increases overall vinyl floor installation costs. Entryways with older tile or uneven concrete often require more prep, especially if you’re installing click-lock LVP or glue-down vinyl that demands a flatter surface. To plan the budget, have the subfloor inspected and ask for line-item pricing for prep work, since these costs can rival or exceed the vinyl material itself.
📅 Last Updated: October 25, 2026 | Topic: How to estimate the cost of vinyl floors in a entryway? | Content verified for accuracy and freshness.
References
- GAO Cost Estimating and Assessment Guide: Best Practices for Developing and Managing Capital Prog…
- https://www.epa.gov/smm/construction-demolition-debris
- Vinyl flooring
- Underlayment
- Floor
- Silica, Crystalline – Overview | Occupational Safety and Health Administration
- F710 Standard Practice for Preparing Concrete Floors to Receive Resilient Flooring
- https://scholar.google.com/scholar?q=vinyl+flooring+cost+estimating+entryway Google Scholar
- https://scholar.google.com/scholar?q=resilient+floor+covering+installation+labor+cost+estimate Google Scholar
- https://scholar.google.com/scholar?q=vinyl+flooring+material+waste+factor+calculation Google Scholar