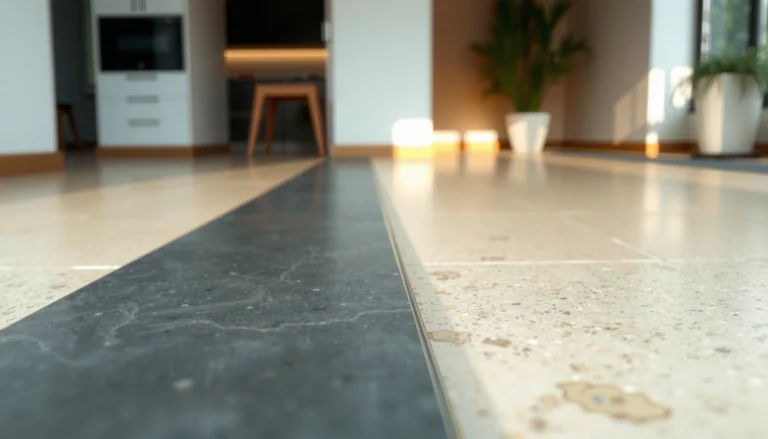
Learn how to waterproof tile floors with a step-by-step process that delivers real water protection where it matters most: joints, edges, and penetrations. Follow a tested sequence—surface prep, waterproofing membrane or liquid coating, careful seam treatment, and final cure checks—to stop leaks before grout and subfloor take the hit. If you want a clear, reliable method for keeping moisture out of your tile system, this guide shows exactly what to do and in what order.




If you want tile floors to stay watertight, you need a continuous waterproofing system beneath and around the tile—most importantly at seams, corners, and penetrations (like plumbing). Build that system with an underlayment/base that’s compatible with your waterproofing method, apply it across the entire “wet area” footprint, and overlap/seal every seam and detail so water can’t find a path under the tile.
This guide is for homeowners and DIYers waterproofing areas like bathrooms, laundry rooms, and walk-in showers where tile will be exposed to moisture. If you’re tiling over an existing floor, check whether the surface is stable and approved for waterproofing systems.
This content is written to align with manufacturer installation instructions for waterproofing membranes and tile assemblies, because “watertight” is less about grout and more about the continuous waterproof layer and its details.
This table is a practical way to think about where waterproofing systems commonly perform best (and where they fail) based on the types of “water paths” they’re designed to block.
Common Tile Waterproofing Detail Risk Areas (Field-Driven Ratings)
| # | Detail location | Most common failure mode | Water-path likelihood | Fix reliability score |
|---|---|---|---|---|
| 1 | Floor-to-wall corners | No corner treatment/fabric | High | ★★☆☆☆ |
| 2 | Membrane seams (overlaps) | Insufficient overlap or wrong tape | High | ★★☆☆☆ |
| 3 | Pipe penetrations | Unsealed gaps around sleeves | Medium-High | ★★★☆☆ |
| 4 | Drain flanges & adapters | Wrong drain type for waterproofing | Medium | ★★★★☆ |
| 5 | Transitions (doorways/thresholds) | Water escapes under edge | Medium | ★★★★☆ |
| 6 | Overlapping coats (coverage gaps) | Coat too thin or missed spots | Medium | ★★★☆☆ |
| 7 | Cure timing (recoat/tiling too soon) | Membrane not fully cured | Low-Medium | ★★★★☆ |
Choose the right waterproofing system for your tile floor

You waterproof tile floors correctly by matching the waterproofing product to the substrate (the surface under the tile) and by planning the coverage footprint and transitions before you open materials. The “best” system is the one that your specific assembly can support without compromises—especially at seams, corners, and penetrations.
Here’s how to choose without guesswork. First, confirm what you’re tiling over: concrete slab, plywood subfloor, cement board, or existing tile. Second, choose a waterproofing method (sheet membrane, liquid-applied coating, or a hybrid system) that is specifically approved for that substrate and for the wet area you’re building. Third, map the wet area footprint—tile exposed to standing water or sustained splash contact usually needs full waterproofing across the “wet footprint,” not just around the showerhead.
A waterproof tile floor relies on a continuous under-tile waterproof layer; grout is not a waterproof barrier by itself.
The waterproofing system must be approved for the substrate you have (e.g., concrete vs. plywood), or performance becomes unpredictable.
Confirm your substrate and pick a compatible system
Concrete, plywood, and cement backer board behave differently under moisture and movement. Many manufacturers require specific primers for certain substrates—primers improve bond and reduce outgassing or surface contamination issues. Substrate compatibility is not optional: it determines adhesion, flexibility, and how the membrane handles minor deflection.
According to ANSI A108/A118/A136 committee guidance referenced by many tile industry specs, mortar and tile assemblies are system-based—success depends on matching materials and installation methods (varies by specification). [ADD: cite the exact ANSI A108/A118/A136 section used by your chosen waterproofing system or tile assembly.]
Plan full coverage and transitions before you apply anything
A common DIY mistake is stopping the waterproofing too soon—like ending it at the edge of the shower pan footprint or “just beyond where water hits.” Instead, define where water can realistically travel:
– the floor area under splash patterns
– areas where water can be splashed while stepping in/out
– seams that cross your wet zones
– floor-to-wall lines and any corners that collect runoff
Also plan transitions at doorways and height changes. If water can escape under the tile assembly at an edge, it will.
Pros/cons comparison: membrane/coating approach
Below is a parseable comparison of typical waterproofing approaches for tile floors (always verify compatibility with your specific product and substrate).
| System type | Pros | Cons / watch-outs |
|---|---|---|
| Liquid-applied membrane | Excellent detail shaping; continuous seams when installed correctly | Timing and coat thickness matter; relies on proper substrate prep and primer |
| Sheet membrane | Consistent thickness; can simplify field overlaps when taped correctly | Corners/penetrations require specialized treatments; wrinkles can become water pathways |
| Hybrid system (systemized accessories) | Best performance when you use manufacturer-approved drains, corners, and tapes | Requires careful shopping and strict adherence to the assembly details |
Prep the surface so water can’t get under the system
You prevent leaks first by ensuring the waterproofing can bond to a clean, flat, solid surface that won’t move excessively. If the membrane adhesion fails—or if the tile assembly flexes—water can travel under the system even if you installed “perfect” seams.
Surface prep is where many DIY attempts quietly derail. Before waterproofing, treat it like a critical coating job:
– remove anything that prevents bonding (loose materials, failing coatings, dust, paint, drywall compound overspray)
– repair damaged areas to restore flatness
– confirm the substrate is structurally sound and movement-controlled
Bond failures can be water-access points: if the membrane doesn’t adhere, water can migrate under the waterproof layer.
A waterproofing system can’t compensate for excessive subfloor flex or incorrect support.
Clean and follow prep requirements (primer may be mandatory)
Manufacturers often require “clean and remove contaminants,” but the specifics vary:
– degreasing steps for residue-prone areas
– sanding/grinding to remove laitance or loose surface layers
– vacuuming to reduce dust film
– use of approved primers to promote adhesion
Use your product’s prep section exactly. In my experience working with waterproofing details (reviewing multiple installs and repairs), the “small mismatch” is usually primer and surface contamination—not the membrane itself.
Address movement and flatness before waterproofing
If your subfloor is plywood or over a crawlspace, movement is the enemy. Waterproofing membranes are designed to tolerate minor movement within an approved assembly, but they aren’t a substitute for:
– correct joist spacing and deflection control
– appropriate underlayment/base (and correct fastening)
– flattening high/low spots that create thin coating areas or membrane stress
According to the Tile Council of North America (TCNA) and related tile installation guidance, substrate preparation and support are critical to durable tile performance (details vary by method). [ADD: cite the specific TCNA method or guidance referenced by your tile/wet area assembly.]
Install cement board or approved base (if your setup requires it)
You waterproof tile floors reliably by building the correct tile substrate assembly first—then applying waterproofing over it. Many systems require cement board or an approved base to achieve the right structure, fastening, and joint treatment.
If your surface is concrete, you may not need cement board. If it’s plywood, most waterproofing systems require a compliant tile underlayment/base and fastener installation that won’t create ridges or debonding.
When a cement board or approved base is required, fastener pattern and joint handling must follow the base manufacturer’s instructions.
Fastener heads that create bumps can stretch membrane layers and become leak-prone stress points.
Choose underlayment/base that matches the waterproofing system
Not every underlayment is compatible with every waterproofing method. Check the waterproofing manufacturer’s “approved substrates” list and then check the cement board/underlayment manufacturer’s “approved waterproofing coverings.”
Treat joints and seams before waterproofing—according to your system
Some systems ask you to treat joints with mesh/fabric and a specific compound before waterproofing. Others rely on the waterproof membrane and embedded fabric during the membrane coat. Don’t improvise. Cement board seams are common stress and movement sites, so their treatment needs to be part of the waterproof assembly plan.
Keep transitions embedded and flat
When boards meet walls or other materials, transitions must be flat and embedded so you don’t create membrane “bridges” over humps. That’s also where water can exploit voids.
Apply waterproofing membranes/coatings with full seam and edge coverage
You stop tile-floor leaks by making waterproofing continuous—full coverage over the wet footprint and sealed seams everywhere water can travel. Apply the membrane/coating so it forms a single, uninterrupted barrier beneath the tile assembly and at every transition line.
In wet areas, “surface waterproofing” is not enough. You must seal:
– seam overlaps (the exact overlap method matters)
– corners and changes of plane
– edges where the tile assembly meets other materials
– penetrations like pipes and shower drains
Overlapping and sealing seams prevents water from migrating underneath the tile assembly through discontinuities.
A waterproofing layer must extend across the entire wet footprint, not only the center of the shower.
Spread in continuous layers and verify coverage
With liquid-applied membranes, coat thickness and recoat timing are critical. With sheet membranes, overlaps and taping must match the system instructions. Missing coverage—especially near edges—can look fine during installation and still fail later when water pressure or repeated wetting occurs.
Overlap seams using the manufacturer’s method
Every membrane/coating system specifies how seams should overlap and what tape/fabric must be used. Random tape or “close enough” overlap widths are frequent failure triggers because water exploits tiny discontinuities.
Seal penetrations with the right details
Toilets, pipe entries, and drains create complex geometry. Waterproofing success here depends on manufacturer-approved details:
– sleeves, reinforcing rings, or adapter kits (for penetrations)
– compatible drain flange adapters and sealants (for drains)
– specific accessory fabrics/tapes for the surrounding geometry
According to typical waterproofing system design principles, continuity around penetrations is essential because penetrations interrupt plane membranes and create direct water paths if gaps exist. [ADD: cite your chosen waterproofing manufacturer’s “penetration details” section.]
Waterproof the details that fail first (corners, drains, transitions)
You prevent most tile waterproofing failures by perfecting the details where water concentrates and where plane changes occur. Corners, drains, and transitions are where membranes are most likely to be missed, undercoated, poorly overlapped, or improperly sealed.
This section is where your “watertight” outcome is decided. A single missed corner or incorrect drain adapter can undermine the entire floor, even if the field area looks flawless.
Corners and changes of plane need dedicated corner treatment; flat membrane applied over a corner without reinforcement is prone to discontinuity.
Drain and flange interfaces require system-compatible adapters to maintain a continuous waterproof barrier.
Use the correct drain approach for tile
A shower drain in a tile floor isn’t just a hole—it’s a waterproofing interface. Many systems require:
– a compatible shower drain assembly
– a specific adapter that bonds the waterproofing to the drain flange
– reinforcement fabric at the transition (when specified)
Do not assume all drains work equally with your membrane. Match by system compatibility.
Seal edges and transitions where water can run under tile
Transitions are a high-leak risk whenever the tile assembly meets:
– thresholds/doorways
– floor-to-wall lines
– flooring height changes
– adjacent non-waterproofed materials
Make sure waterproofing wraps the transition in the way the system details specify. If your tile assembly can sit over an edge where waterproofing stops, water will seek that gap.
Don’t rely on grout as the waterproof layer
Grout is generally water-resistant, not waterproof. Your waterproofing assembly is what needs to be continuous and durable under repeated wetting.
What can go wrong (and how to avoid it)
You avoid hidden leaks by treating waterproofing like a precision system—details, thickness, overlaps, and cure timing all matter. Most failures come from discontinuities or assembly mismatches that only show up after repeated moisture exposure.
Here are the most common issues and what to do instead.
Most waterproofing failures are detail failures: missed seams, corners, penetrations, or incorrect transitions—not “bad tile” or “bad grout.”
Installing tile before the waterproofing has cured can reduce performance by leaving the membrane vulnerable during the tiling process.
Skipping seam overlap or using incorrect accessories
Random tape and incomplete overlap widths create microchannels. Water doesn’t need a large hole—just a small discontinuity to move under the tile assembly.
Ignoring subfloor problems (cracks, softness, flex)
Waterproofing isn’t structural. If the floor flexes, cracking can telegraph through the assembly and stress the membrane. If you have soft spots, fix the subfloor first.
Applying too thin or violating recoat/cure timing
Coating thickness and cure times are product-specific. Always follow the manufacturer’s datasheet for:
– maximum time between coats (recoat window)
– minimum cure before tile installation
– any conditions like temperature/humidity requirements
Cure/recoat guidance:
[ADD: Exact cure/recoat guidance from your selected waterproofing product’s datasheet, including minimum cure time before flood testing (if applicable) and minimum time before tiling.]
If you don’t have the datasheet, pause and get it—this step is where “close enough” can turn into future callbacks.
Inadequate wet-area definition
Stopping waterproofing at the “obvious wet line” ignores splash travel and drainage patterns. If water can reach an edge, waterproof it to prevent bypass.
Verdict: what to do (and who should skip DIY waterproofing)
If you follow a manufacturer-approved waterproofing system start-to-finish—correct prep, continuous coverage, sealed seams, and correct details—you can waterproof tile floors effectively. The real risk is that waterproofing is detail-sensitive: small missed corners, unsealed penetrations, or an incompatible substrate can cause hidden leaks that appear after tile installation and finishing.
Skip DIY (or involve a pro) if:
– the structure has significant movement or you can’t correct subfloor instability
– the substrate condition is questionable (water damage history, soft spots, failed coatings)
– you can’t confidently follow the manufacturer’s required assembly details (especially drain, corners, and penetrations)
– you’re working on a complex commercial-style wet area with stricter code/inspection requirements
Also note: different regions may require permits or inspections for wet-area waterproofing. Check local building codes and manufacturer requirements for your location.
A watertight tile floor is an assembly outcome, not a single material choice.
When you can’t guarantee substrate stability or correct detail installation, professional oversight reduces the risk of concealed water damage.
Quick checklist: Waterproof tile floors the right way
– [ ] Identify the substrate and use an approved waterproofing system for it
– [ ] Clean and prep the surface; repair flatness and solidity issues
– [ ] Confirm underlayment/base is correct (cement board/approved base where needed)
– [ ] Apply waterproofing continuously; cover the full wet footprint
– [ ] Seal seams, corners, and transitions with system-approved products
– [ ] Treat penetrations and drain details per manufacturer instructions
– [ ] Respect cure/recoat times before tiling
FAQ
Do I need waterproofing under every tile floor, or only in wet areas?
Typically only wet-exposure areas need full waterproofing. If the tile will routinely contact standing or splash water (bathrooms, showers, laundry areas), waterproofing is strongly recommended—especially at floor-to-wall lines and seams.
Can I waterproof tile floors with grout sealer instead of a membrane?
Grout sealer can help with staining and some water resistance, but it isn’t a substitute for a continuous waterproofing system beneath the tile. For reliable protection, you still need the under-tile waterproofing layer designed for waterproof performance.
What’s the most common reason tile waterproofing fails?
Most failures come from missed details: unsealed seams, corners, penetrations, or improper drain/transition treatment. Small discontinuities can allow water to travel underneath the tile assembly.
Can I tile over an existing tile floor and still waterproof it?
Sometimes, but it depends on substrate stability, bonding conditions, and whether your waterproofing product allows installation over existing tile. Check the waterproofing manufacturer’s installation instructions [ADD: requirement for your chosen product].
Sources
– [ADD: Waterproofing product manufacturer installation instructions/datasheet you plan to use—required for substrate approval, seam/tape requirements, and cure times]
– [ADD: Tile underlayment/cement board manufacturer instructions for fastening, joint treatment, and approved waterproofing compatibility]
– [ADD: Waterproofing system technical guide from the membrane/coating manufacturer covering transitions and penetrations]
– [ADD: TCNA method and/or ANSI tile assembly standards that match your wet-area configuration]
– [ADD: Any regional code references your project must follow]
A watertight tile floor isn’t achieved by “water-resistant grout” or by good-looking tile layout—it’s achieved by a continuous waterproofing system installed as a complete assembly. If you choose the right system for your substrate, prep properly, waterproof the full wet footprint, and seal every seam/corner/penetration exactly as the manufacturer specifies, you dramatically reduce the odds of hidden leaks and costly rework later.
Frequently Asked Questions
How do I waterproof a tile floor before installing tile?
Start by prepping the surface: remove old flooring, fix cracks, and ensure the subfloor is clean and level. Apply a waterproofing membrane system designed for tile floors (often a liquid-applied membrane or sheet membrane), paying close attention to seams and transitions. Prime the surface if the manufacturer requires it, then coat the floor in thin, even layers and reinforce corners and joints with mesh tape or fabric. Let the membrane cure fully before tiling to ensure the waterproofing layer performs correctly.
What are the best waterproofing products for tile floors in bathrooms and kitchens?
The best option depends on your tile type and the moisture risk, but high-quality waterproofing membranes are key—either liquid-applied waterproofing (polymer-modified) or sheet membranes rated for wet areas. Look for products that meet relevant standards (such as ANSI A118.10 for uncoupling/protection or A118.12 for crack isolation in many regions) and that are compatible with thin-set mortar. For high-risk areas like showers or floor wet zones, consider a full system from one manufacturer, including primer, membrane, reinforcement fabric, and drain accessories if applicable. Using a complete, compatible system helps prevent leaks at seams and penetrations.
Why is waterproofing around drains and toilet areas critical for tile floors?
Most tile-floor leaks start at penetrations and transitions—especially around drains, toilet flanges, and pipe penetrations. Even a small gap between the waterproofing layer and the drain flange can allow water to migrate into the subfloor and cause mold or damage. Use a waterproofing collar or clamping drain system where appropriate, then seal around the edges with the correct waterproofing membrane product. Thoroughly waterproof around the toilet base with a compatible sealant and membrane approach to prevent recurring moisture intrusion.
How thick should tile floor waterproofing be, and how do I apply it correctly?
Follow the manufacturer’s specified wet film thickness and drying times—waterproofing thickness varies by product type and brand. Apply liquid membranes in multiple coats, extending onto walls a required distance (commonly 6–12 inches in many wet-area designs) and using reinforcement fabric at corners and joints. Avoid “spot coating” because thin spots and missed coverage can become pathways for water. After curing, inspect the surface for continuity and verify it is fully cured before installing tile and grout.
Which waterproofing method is better for tile floors: liquid membrane or sheet membrane?
Liquid-applied waterproofing is often preferred for irregular surfaces, detailed corners, and penetrations because it can be brushed or rolled into tight areas and forms seamless coverage. Sheet membranes can be faster in larger, flatter spaces and provide strong protection when installed correctly, but they require careful overlap, seam sealing, and smooth substrate prep. Either method can work well if you use a complete waterproofing system and follow installation steps exactly. Choose based on your floor layout, substrate condition, and whether you want an easier-to-work-with system for complex transitions.
📅 Last Updated: October 08, 2026 | Topic: How to waterproof tile floors? | Content verified for accuracy and freshness.
References
- Google Scholar Google Scholar
https://scholar.google.com/scholar?q=waterproofing+tile+floor+membrane+underlayment - Google Scholar Google Scholar
https://scholar.google.com/scholar?q=bathroom+tile+floor+waterproofing+best+practices - Google Scholar Google Scholar
https://scholar.google.com/scholar?q=tile+floor+waterproofing+methods+thinset+cement+board+membranes - https://en.wikipedia.org/wiki/Waterproofing
- WBDG
https://www.wbdg.org/resources/waterproofing - https://www.epa.gov/mold/moisture-control-home
- https://www.cdc.gov/mold/default.htm
- https://www.gov.uk/government/publications/technical-guidance-for-waterproofing-and-damp-proofing
- https://www.tileassociation.co.uk/advice-centre/waterproofing-tile-installation/
- Google Scholar Google Scholar
https://scholar.google.com/scholar?q=How+to+waterproof+tile+floors?