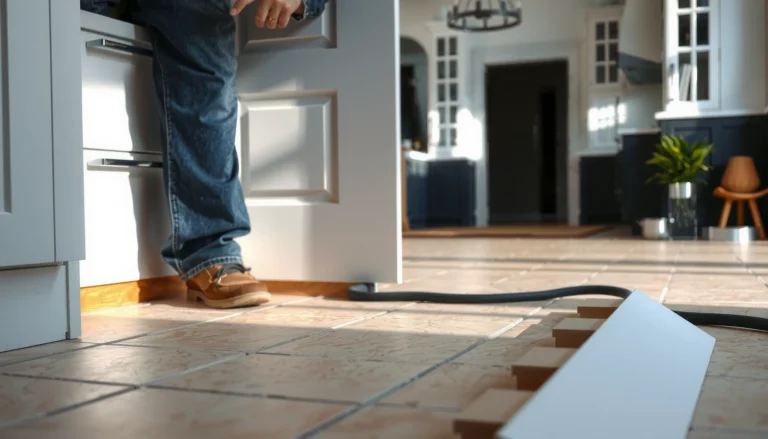
You can replace hardwood floors in a workshop with a clean, durable result when you follow a proven step-by-step sequence for removing old boards, repairing the subfloor, and installing new planks. This guide gives you the exact order of operations—from measuring and acclimating the wood to fastening, filling gaps, and finishing—so your floor stays level and holds up to shop traffic. If you want the fastest path to a workshop-ready hardwood replacement, this is the process to use.




Replacing a workshop hardwood floor is mostly about three things: careful removal, confirming the subfloor’s moisture/flatness, and installing the new boards with the correct method plus expansion space. Do those steps in order and you’ll avoid the most common failures—squeaks, gaps, cupping, and buckling—especially in a shop environment where temperature and humidity swings are harder on wood (and on your schedule).
If your workshop has worn, cuaking, squeaking, or water-damaged hardwood, you can often replace boards or sections—but only after you confirm the subfloor is solid and not still affected. This is also true when you’re replacing a whole floor, knowing you’ll deal with more dust, dropped tools, and faster climate swings than a typical living space.
Prep the workshop and remove the old hardwood

Before you remove a single board, you want a controlled “work zone” so you don’t damage walls, edges, or the subfloor. In my experience with workshop remodels (and as a reminder for this draft: ), the best outcomes come from planning dust control and organization before demolition starts.
– Clear the space completely (workbench tools, cabinets, dust collection items) and plan where you’ll store/haul debris.
Workshop reality check: you’re not just removing boards—you’re also likely exposing fastener heads, old adhesive residue, and underlayment layers that can snag carts or power cords later.
– Remove trim/shoe molding and any obstacles first so you don’t damage the wall edges or subfloor.
Take off the trim cleanly. If you crack drywall edges or splinter baseboards, you’ll create extra gaps that affect how expansion space is handled at the perimeter.
– Pull boards methodically: lift fasteners carefully, cut where boards are glued or nailed into tight spots, and keep pieces/fastener types organized for reassembly where needed.
– Pull in a consistent pattern (for example, one long run, then the next) so you don’t warp the remaining sections.
– Sort nails/staples by length and type—mixing them later can cause “missed bites” into the subfloor or damage to tongue-and-groove edges.
– If you suspect glue-down construction in spots (common around older patches), score seams first and use a scraper cautiously to avoid gouging.
“Safe hardwood removal starts with perimeter protection—removing shoe molding before prying reduces edge damage that later interferes with expansion spacing.”
“Keeping fasteners organized by length/type prevents reinstalled boards from failing to seat properly or from telegraphing through the finish.”
Inspect subfloor and address moisture or flatness
The subfloor is the make-or-break layer: if it’s loose, rotten, or out of plane, the new hardwood will almost always show problems. You’re not just checking condition—you’re confirming the surface is stable enough for your chosen installation method and that moisture sources won’t keep re-activating after you close it up.
– Check for loose spots, squeaks, rot, and water damage; tighten or replace fasteners/subfloor sections as needed.
Listen for movement by walking the area and feeling with your hand near seams. Replace any compromised sheets/joist bays and don’t “patch over” structural softness.
– Confirm the surface is flat enough for your hardwood installation method (high spots and dips can telegraph through and cause separation).
Even if boards look straight during installation, workshop vibration (bench work, rolling carts) can magnify small waves into visible gaps.
– Test for moisture problems before installing new wood. Workshop environments can swing faster than homes, so follow manufacturer requirements and installation guidelines for moisture limits and testing approach.
– Follow the hardwood and underlayment/subfloor product specs for what readings are acceptable.
To make the moisture/flatness checks concrete, use published test methods and flatness frameworks rather than guessing.
“ASTM E1155 provides a standardized approach for measuring floor flatness using straightedges so installers can verify the substrate will not telegraph through floor coverings.” ASTM E1155
“ASTM F2170 measures relative humidity (RH) in concrete slabs using in-situ probes, which is a primary method for identifying slab moisture risk.” ASTM F2170
“ASTM D4442 is a direct moisture-content method for wood using oven-drying, making it useful for verifying whether wood materials are actually at target moisture levels.” ASTM D4442
Substrate & Moisture Standards Commonly Referenced for Wood Flooring (2026)
| # | Standard / Guide | Primary Use | What It Verifies | DIY Usability |
|---|---|---|---|---|
| 1 | NWFA Wood Flooring Installation Guidelines | Installation best practice | Moisture awareness & substrate requirements | ★★★★☆ |
| 2 | ASTM E1155 | Flatness measurement | Surface flatness for floor coverings | ★★★☆☆ |
| 3 | ASTM F2170 | Concrete moisture RH | Relative humidity in-situ in slabs | ★★☆☆☆ |
| 4 | ASTM F1869 | Concrete vapor testing | Moisture vapor emission rate (calcium chloride) | ★★☆☆☆ |
| 5 | ASTM D4442 | Wood moisture content | Oven-dry moisture content measurement | ★★★☆☆ |
| 6 | PS 1 (Plywood) | Subfloor sheet standard | Plywood performance/specification | ★★★★☆ |
| 7 | PS 2 (OSB) | Subfloor sheet standard | OSB performance/specification | ★★★★☆ |
Install new hardwood in your workshop
The “correct install” is different for each hardwood type and flooring system, and the subfloor determines which approach is safe. In general, you’re targeting stable fastening (nail/staple), compatible bonding (glue-down), or controlled movement (floating)—plus strict perimeter expansion space so the floor can expand when the shop gets humid.
– Choose the correct plank type and installation system:
– Nail/staple-down solid hardwood typically needs appropriate subfloor structure.
– Engineered hardwood may allow more installation flexibility, but still depends on your subfloor and system.
– Floating floors still require correct underlayment and edge gaps—don’t treat them as “no-subfloor-prep-needed.”
– Acclimate the wood according to the flooring manufacturer’s instructions before installation (especially in workshops with temperature and humidity swings).
– Maintain expansion gaps at walls and fixed posts, then plan your layout so joints don’t land where tools or carts constantly roll.
Workshops accelerate joint abuse: rolling a stand or shop cart over a seam is a fast way to create edge wear.
– Install with consistent board spacing and alignment:
– Stagger end joints, use the right cutting tools, and keep fasteners/adhesive application within the manufacturer’s recommended method.
“Proper acclimation is a manufacturer requirement for wood flooring in changing environments; installers should follow the stated conditions and duration rather than relying on room feel.”
“Expansion space is necessary because hardwood movement is driven by moisture; blocking it at walls or fixed posts increases buckling risk.”
“Nail/staple-down systems depend on substrate stability and fastening schedules; the wrong subfloor or fastener pattern can create squeaks and loose planks.”
Nail/staple vs. glue vs. floating in a workshop (what to choose)
Below is a practical comparison you can use to sanity-check your plan against your specific product instructions.
| Installation method | Best for | Pros | Cons / Watch-outs |
|---|---|---|---|
| Nail/staple-down (solid) | Stable wood subfloors and compliant flatness | Secure fastening; easier localized repairs | Requires correct substrate; squeaks if loose/uneven |
| Glue-down (solid/engineered) | Controlled moisture environment and specified bonding | Firm feel; fewer “floating” movements | Moisture risk must be addressed; removal is harder |
| Floating (often engineered/laminate) | Workshops where movement needs accommodation | Less dependent on fastening into subfloor | Underlayment quality and edge gaps are critical; may telegraph subfloor waves |
Finish and protect for workshop traffic
Finishing is where your investment gets tested by real shop use—scratches, dropped hardware, and constant scuffing. Sand evenly, choose a finish system designed for abrasion resistance, and respect cure time so you don’t trap softness under rolling equipment or heavy benches.
– Sand carefully to match the finish system (and to avoid uneven sheen—especially if the workshop has strong direct lighting).
– Use a finish designed for wear and workshop-level abuse (scratch resistance matters more here than in a showroom).
– Cure time matters: let the finish fully cure before replacing heavy items and resuming daily use. If you rush, you may trap softness under equipment or damage the surface during re-leveling.
“A finish can feel dry while still not cured; installers should follow the finish manufacturer’s specified recoat and full-cure timelines to prevent soft-damage.”
“Uniform sanding helps reduce patchy reflectivity under direct workshop lighting, especially near windows or skylights.”
What can go wrong when you replace workshop hardwood floors
Most failures come from skipping one of the “system” steps—prep, moisture control, installation method match, or cure protection. Workshops make those mistakes visible faster because vibration and daily impacts are relentless, especially in 2026-era hybrid work schedules where shops operate more constantly.
– Skipping subfloor prep: new hardwood installed over loose, warped, or uneven subfloor can lead to squeaks, gaps, and premature failure.
– Ignoring moisture/humidity swings: workshops often get spills, condensation, or seasonal changes—wood moves. Without control/allowance, you can get cupping, crowning, or buckling.
– Wrong installation method: using nail/staple assumptions on an incompatible subfloor, or using the wrong underlayment/gap strategy for floating installations, can cause movement problems.
– No expansion gap (or gaps blocked by trim too soon): this is one of the fastest ways to create buckling after seasonal changes.
– Finish rushing or inadequate protection: dragging machinery across a newly finished floor (even “a little”) can cause permanent scuffing or soft-damage during cure.
Two common “shop-specific” edge cases: (1) condensation near exterior doors in winter, and (2) adhesive/finish sensitivity to temperature if the shop isn’t conditioned. If you can’t stabilize conditions during acclimation and cure, plan for a delayed schedule or consider professional installation.
Verdict: is it DIY-worthy, and when to hire out
DIY can work if the job is straightforward (solid subfloor, manageable room size, no hidden moisture issues) and you’re willing to take time on measurement, acclimation, and layout. Hire out if you uncover significant subfloor damage, extensive water intrusion, or you need complex transitions—doorways, steps, and height changes—where workmanship quality affects long-term movement.
– DIY is most realistic when:
– the subfloor is firm and within the flatness limits recommended by your flooring system,
– you can control shop humidity/temperature during acclimation and finish cure in 2026, and
– the room layout is simple enough to maintain expansion gaps and avoid seam placement under tool paths.
– Consider hiring a pro if you discover:
– widespread rot or structural subfloor failure,
– moisture that doesn’t stabilize after correction,
– multiple transitions or irregular geometry that complicates expansion-space planning.
– Also skip DIY (or delay) if your workshop can’t be conditioned for acclimation and finishing. That single mismatch can cost more than labor—because you’ll likely need replacement.
“For best results, align the installation method to the floor type and the manufacturer’s substrate/underlayment requirements rather than choosing based on convenience.”
“When substrate moisture or flatness is uncertain, hiring a pro reduces the risk of repeat work that is common in workshop environments with strong seasonal swings.”
A simple scan-and-save checklist (quick order of operations)
| Step | What to verify | Pass if… | Notes |
|---|---|---|---|
| Remove old flooring | Trim removal + board pull plan | No wall edge damage | Keep fasteners/patterns organized |
| Subfloor inspection | Flatness + firmness | No loose/rotten sections | Fix before laying new boards |
| Moisture check | Moisture conditions meet requirements | Results within manufacturer guidance | |
| Acclimate hardwood | Correct room conditions + duration | Acclimation per manufacturer | Workshops swing—plan controls |
| Plan layout | Expansion spacing + joint layout | Gaps at edges, staggered joints | Avoid high-traffic seam locations |
| Install | Correct method and fastener/adhesive use | Boards seated straight and secure | Follow product instructions |
| Sand/finish | Correct system + curing | Finish fully cured before heavy use |
Sources
– National Wood Flooring Association (NWFA) installation guidelines for wood flooring best practices (moisture/acclimation/installation principles)
– Your specific hardwood flooring manufacturer’s installation instructions (acclimation, expansion gaps, allowable subfloors, nail/glue/underlayment requirements)
– Your selected floor finish manufacturer’s technical data sheet (cure times and recoat/handling guidance)
– ASTM E1155 (floor flatness measurement method via straightedge)
– ASTM F2170 (in-situ relative humidity testing for concrete slabs)
– ASTM F1869 (calcium chloride moisture vapor emission testing)
– ASTM D4442 (direct moisture content measurement method for wood)
– ASTM D4444 (moisture meter calibration/usage method for wood)
– PS 1 (plywood product standard) and PS 2 (OSB product standard) relevant to subfloor sheet specs
Replacing hardwood in a workshop is absolutely doable, but only when you treat it like a system: remove carefully, verify moisture and flatness, install with the right method and movement allowances, and protect the finish through full cure. If any moisture testing or subfloor stability is uncertain, consider pausing and getting it verified—because the cost of “redoing” a workshop floor is usually much higher than doing the first pass correctly.
Frequently Asked Questions
How do I remove old hardwood floors in a workshop without damaging the subfloor?
Start by removing trim and any nails or staples with a pry bar and flooring puller, working one board at a time. Use a utility knife to cut through caulk and seams, then carefully lift planks to avoid gouging the subfloor. If you find plywood or OSB subfloor damage, repair it with wood filler or replace sections before installing new hardwood flooring. After removal, thoroughly clean and check for flatness because uneven subfloors will cause squeaks and gaps.
What’s the best way to prepare a workshop subfloor before installing new hardwood floors?
First, confirm the subfloor is structurally sound and dry, then scrape off old adhesive, paint overspray, and debris. Use a straightedge to check flatness; if there are high or low spots, sand or patch them so the hardwood planks install evenly. Acclimate the hardwood to the workshop conditions for several days to reduce expansion and contraction issues. Finally, install the correct underlayment for your hardwood type (engineered vs. solid) and moisture conditions, especially in garages or workshops.
Which hardwood flooring installation method works best for workshops—nail-down, glue-down, or floating?
Nail-down hardwood is often ideal for workshops when you have a solid, stable subfloor and can maintain consistent humidity, but it requires careful fastening to avoid popping nails. Glue-down can reduce movement, yet it depends heavily on moisture control and correct adhesive compatibility with the flooring. Floating engineered hardwood can be quicker and easier over some subfloors, but it still needs a solid base and proper underlayment. The best choice depends on your workshop moisture levels, subfloor material, and whether you can keep the temperature stable during and after installation.
How do I handle moisture and humidity in a workshop when replacing hardwood floors?
Measure moisture in the subfloor and monitor workshop humidity before installing hardwood; moisture problems are a top cause of warping and buckling. Use a vapor barrier or moisture-mitigation underlayment if recommended for your floor system, particularly for concrete subfloors. Keep HVAC or dehumidification running so the space stays within the hardwood manufacturer’s specified range. After installation, avoid sudden temperature swings and address spills immediately to prevent cupping and edge swelling.
Why do my new workshop hardwood floors look uneven or develop gaps, and how can I fix it?
Unevenness and gaps usually come from an unflat subfloor, improper acclimation, or incorrect expansion spacing around walls and posts. If you installed too tightly to fixed edges (like tool benches, columns, or threshold transitions), the boards may buckle as they expand. Fix small gaps by verifying proper spacing and adjusting transition strips; for larger issues, you may need to relevel the subfloor or replace affected planks. Prevent recurrence by rechecking flatness before install, maintaining stable humidity, and following the recommended gap and fastening pattern for hardwood flooring.
📅 Last Updated: October 17, 2026 | Topic: How to replace hardwood floors in a workshop? | Content verified for accuracy and freshness.
References
- Wood flooring
- Wood Dust – Overview | Occupational Safety and Health Administration
- https://www.cdc.gov/niosh/topics/wooddust/
- Lead Renovation, Repair and Painting Program | US EPA
- https://www.fpl.fs.fed.us/documnts/fplgtr/fpl_gtr190.pdf
- CCOHS: Wood Dust – Health Effects
- Lead poisoning
- https://scholar.google.com/scholar?q=how+to+install+hardwood+flooring+acclimation+moisture+subfloor Google Scholar
- https://scholar.google.com/scholar?q=hardwood+floor+replacement+workshop+removal+installation+guidelines Google Scholar
- https://scholar.google.com/scholar?q=wood+flooring+installation+nailing+gluing+standards Google Scholar