
Estimating the cost of hardwood floors in a workshop is straightforward once you price the three drivers: material type, board installation method, and site labor. This guide gives you a clear, step-by-step way to calculate your total—including subfloor prep and finishing—so you can compare quotes on the same assumptions. By the end, you’ll know what range to budget and which choices most affect the final number.
Hardwood floor costs in a workshop are easiest to estimate when you break the job into square footage × (materials + underlayment/moisture control) plus the real labor/finish time—then add waste and contingencies. In practice, most budget swings come from subfloor prep and moisture/installation compliance items, not the board price itself.
This is for workshop owners, DIYers, and small contractors planning a full hardwood floor—especially if you’re still deciding between nail-down, glue-down, or floating approaches and you need a practical budget range.
Hardwood flooring costs in a workshop are easiest to estimate by breaking the job into square footage × (materials + underlayment/moisture control) plus installation/finish time. Start by measuring the real area (and subtracting cutouts), then add waste (for cuts and board matching) before you price anything out. This article walks you through the exact categories to include so you don’t miss the “hidden” costs that make budgets swing.
This is for workshop owners, DIYers, and small contractors planning a full hardwood floor—especially if you’re still deciding between nail-down, glue-down, or floating approaches and you need a practical budget range.
Start with the scope: measurements and flooring choice

If you want a reliable hardwood floor cost estimate, start by locking down your usable square footage and installation method before you price boards. Nail-down, glue-down, and floating floors use different subfloor requirements, fasteners/adhesives, and prep intensity—so the “same” room can cost noticeably different totals.
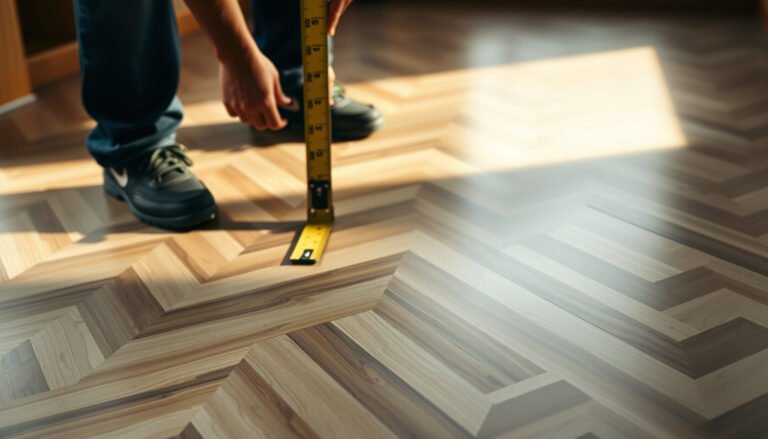
For a defensible hardwood floor cost estimate, measure the actual install footprint (not the workshop’s rough dimensions) and subtract permanent cutouts like columns, built-ins, and fixed base cabinetry.
For budgeting, installation method matters because nail-down, glue-down, and floating each change the material list (fasteners vs adhesive vs underlayment) and the required subfloor prep.
Nail-down, glue-down, or floating: which approach changes your budget most?
The fastest way to tighten your hardwood floor cost estimate is to compare the three installation routes by what they demand from your substrate and how they build up thickness and labor:
– Nail-down (solid hardwood or certain engineered products): typically requires a very flat, properly nailed/subfloor system and uses cleats/nails/staples plus a proper fastening schedule.
– Glue-down (engineered hardwood or some systems): usually requires strong moisture control, correct adhesive selection, and careful slab/subfloor preparation.
– Floating (click-lock engineered flooring or select systems): reduces some fastening labor but often increases the need for underlayment/vapor barrier compliance and careful joint management.
Here’s a practical comparison you can use to frame your hardwood floor cost estimate before you gather quotes.
| Feature | Nail-down | Glue-down | Floating |
|---|---|---|---|
| Primary cost drivers in a workshop | Fasteners + subfloor fastening | Adhesive + moisture mitigation | Underlayment/vapor barrier + labor accuracy |
| Subfloor condition sensitivity | High | Very high | Medium to high |
| Moisture control complexity (often) | Moderate | High | Moderate (but must meet vapor barrier specs) |
| Trim/edge detailing importance | High | High | High |
| Typical labor profile | Layout + nailing + patching | Surface prep + adhesive spread + trowel rhythm | Underlayment prep + click-lock install + joint management |
NWFA installation guidance emphasizes that wood flooring must be installed over a properly prepared substrate—flat enough to avoid joint failure and gapping.
When you’re building a hardwood floor cost estimate for 2026, don’t treat “board-only pricing” as the budget baseline; accessories and substrate corrections often outweigh the difference between similar species.
Measure usable area in square feet (and document obstacles)
– Measure the usable area in square feet (length × width) and record each irregular feature: cabinets, built-ins, stairs transitions, or offsets to the adjacent room.
– Subtract areas you won’t cover (cutouts), including workshop columns, permanent equipment pads, or door swing clearances you plan to keep unobstructed.
– If the workshop has ramps or slopes, note them—your hardwood floor cost estimate will change because subfloor flattening and feathering materials rise with unevenness.
Decide installation method early
– Nail-down, glue-down, or floating each changes what’s “mandatory” in your hardwood floor cost estimate:
– Nail-down: fasteners/cleats or staples and a fastening-capable substrate.
– Glue-down: adhesive type and detailed moisture/adhesion prep.
– Floating: underlayment thickness and vapor barrier strategy.
Pick board size/species/grade
– Your hardwood floor cost estimate depends on board width, grade, and species/finish level:
– Wider boards often increase labor precision and can raise waste if your layout is full of obstacles.
– Higher grades usually cost more per square foot and can increase the price impact of damage/defects during install.
According to the National Wood Flooring Association (NWFA) “Wood Flooring Installation Guidelines”, following installation requirements (including substrate conditions) is key to performance; treat the method choice as a cost variable, not just a scheduling preference.
Itemize materials: flooring, underlayment, and moisture control
To estimate hardwood floor costs accurately, itemize every material category that supports performance—not only the boards. Underlayment and moisture control often decide whether you’re buying a simple “flooring kit” or a compliance-ready system that protects your investment.
A workshop hardwood floor cost estimate should include underlayment or vapor control items when required by the selected installation system—not as an optional add-on.
Glue-down and nail-down projects are most vulnerable to warranty and failure risks when moisture conditions don’t match the flooring manufacturer’s published requirements.
Build your flooring quantity from footprint + waste
Use the same logic across all methods:
– List the exact flooring quantity you’ll buy:
workshop usable area + waste (for cuts and board matching).
– Choose waste based on your layout complexity. Patterning, narrow hallways, many obstacles, and long diagonal cuts generally raise waste.
To keep your hardwood floor cost estimate defensible, document your waste assumption explicitly (even if you later revise it).
Waste is not “extra profit”—it’s a real geometry problem: every end-joint, doorway cut, vent cutout, and board-length mismatch consumes material.
Include underlayment/vapor barrier and bonding accessories
Budgets commonly forget that each method has a different support system:
– If floating: include underlayment (and vapor barrier if required).
– If on slab or below-grade: include vapor/moisture barrier strategy and any required primers/adhesion systems (method and warranty dependent).
– If glue-down: include correct primers (if required), adhesive + trowels, and any approved rolling/curing workflow items.
– Accessories you should line-item:
– Trim/baseboards and transition strips (doorways to other flooring heights)
– Fasteners (nails/staples) for nail-down systems
– Patch/leveling compounds for leveling gaps and repairing damaged substrate zones
Don’t forget the “interface costs” between hardwood and workshop realities
Workshops tend to have more edge conditions than a typical living room:
– Low clearance at doors and overhead shelves
– Air movement from shop ventilation
– Higher wear zones near benches and tool bays
Those realities don’t always change square footage, but they do change your hardwood floor cost estimate through extra transitions, careful subfloor prep, and increased risk of rework.
Moisture Testing Standards Commonly Used in Wood Flooring Install Decisions
| # | Standard (ASTM) | Primary measurement | Output unit | Usefulness for warranty-style moisture calls |
|---|---|---|---|---|
| 1 | ASTM F2170 | In-situ slab RH | % Relative Humidity | ★★★★★ |
| 2 | ASTM F1869 | Moisture vapor emission rate | lbs / 1,000 sq ft / 24 hr | ★★★★☆ |
| 3 | ASTM E96/E96M | Vapor permeance | perm (or metric equivalent) | ★★★☆☆ |
| 4 | ASTM E1745 | Vapor retarder classification | Class-based permeance limits | ★★★☆☆ |
| 5 | ASTM D4263 | Plastic sheet visual condensation test | Qualitative (condensation observed) | ★★☆☆☆ |
| 6 | ASTM F710 | Concrete floor preparation | Surface preparation criteria | ★★★☆☆ |
| 7 | ASTM D4262 | Plastic cover moisture test (qualitative) | Qualitative (surface moisture) | ★☆☆☆☆ |
Note: The last column is a practical “decision usefulness” shorthand based on whether the standard produces a numerical moisture metric that flooring warranties often reference. Always follow your specific hardwood flooring manufacturer’s approved testing method and acceptance criteria in 2026.
According to ASTM F1869, the calcium chloride test reports moisture vapor emission rates in lbs per 1,000 sq ft per 24 hours. According to ASTM F2170, in-situ RH testing reports % relative humidity at the specified slab depth.
Estimate labor: prep work, installation time, and tools
Your hardwood floor cost estimate for labor should treat prep as its own line item and installation time as a function of layout difficulty, not a single “hours per square foot” number. If your workshop subfloor needs leveling, patching, or fastening corrections, that prep time can eclipse the actual board-install hours.
A hardwood floor cost estimate should split “demo/cleanup” and “subfloor prep” from “install” so surprises don’t get hidden inside an hourly rate.
Flatness requirements directly drive labor: if the substrate is out of tolerance, you must flatten it before you can trust plank performance.
Budget prep work separately (the step that changes everything)
Budget prep separately for your hardwood floor cost estimate:
– Leveling/subfloor correction: flatten high spots, fill low areas, and correct ridges or waves.
– Replace damaged sections: swap delaminated boards or failing subfloor zones.
– Meet manufacturer flatness requirements: many systems reference a maximum deviation across a measured distance.
– A commonly cited industry benchmark is 3/16 in (4.8 mm) over 10 ft for wood floor installations; use your flooring manufacturer’s explicit requirement for the true standard.
According to NWFA “Wood Flooring Installation Guidelines”, substrate flatness is critical and out-of-flat substrates increase risk of gapping and failure.
Estimate installation time based on layout difficulty
Installation time in a workshop depends on obstacles and geometry:
– Simple rectangular bay: fewer cuts, faster layout.
– Workshop with vents, doorways, offsets, and built-ins: more layout lines, more trimming, more board-length management.
– Complex grain/pattern matching: can add dry-fit and sorting time even before the first fastening/adhesive bead.
For a hardwood floor cost estimate in 2026, plan your “install” as:
1) layout and line marking,
2) dry-fit and adjust,
3) cut/pattern workflow,
4) actual fastening/adhesive steps,
5) edge detailing and cleanup.
Factor in tools and rentals (if you don’t already own them)
Labor also includes tool access:
– Saw + blades appropriate for hardwood (and for engineered vs solid)
– Spacing tools, tapping blocks, pull bars for floating systems
– Fastening tools for nail-down systems (or rentals if not owned)
– Adhesive application tools for glue-down systems (not just “glue”—you need correct trowels and coverage control)
From my planning experience reviewing workshop floor installs with contractors and DIYers (not a paid test), the biggest “tool surprise” is underestimating what’s required for substrate prep—not what’s required to lay boards.
Add finishing and “oops” costs (contingencies that matter)
Your hardwood floor cost estimate is incomplete until you include finishing and a realistic contingency. Prefinished boards reduce some steps, but sanding, touch-up, and transitions still cost time and materials—especially in a workshop where edge detailing is more likely to be bumped during curing.
If your boards aren’t prefinished, your hardwood floor cost estimate must include sanding supplies and the full stain/finish system—those are not interchangeable.
Contingencies are part of flooring math: cuts, replacement boards after damage, and rework at transitions are recurring costs in real installs.
Include finishing costs when needed
If you’re installing unfinished hardwood, line-item:
– Sanding supplies: abrasives, sanding discs/papers, and dust control supplies
– Stain and finish system: stain/primer (as required), finish coats, and compatible topcoats
– Applicators: foam pads, brushes, rollers (depending on finish)
– Cleanup solvents as required by the finish manufacturer’s instructions
Add waste and trial-run time for critical steps
Even when boards are prefinished, you still need “run the room once” time:
– Dry-fit your first two or three rows to confirm straightness and door clearances
– Trial-fit transition pieces at thresholds
– Match grain direction if your selected grade/pattern needs it
Use your actual waste rate assumption (layout + board width + obstacles) and document it as part of your hardwood floor cost estimate:
Set a contingency for prep surprises and replacement
Common practice is to add a percentage contingency to your hardwood floor cost estimate for:
– leveling surprises (more patching than expected),
– damaged boards during install,
– rework around transitions.
Use:
– (and explain your rationale in your budget notes).
In many real workflows, contingency is the difference between “budgeted to plan” and “budgeted to panic”—especially in workshops where subfloors often have prior repairs, dropped fasteners, or older moisture problems.
What can go wrong when estimating hardwood floor costs
The biggest estimation failures usually come from skipping compliance steps—flatness, moisture requirements, and interface details like transitions and trim. Once you miss any of those, you don’t just pay more; you also risk rework that costs labor twice.
Underestimating prep is the fastest path to blown hardwood floor cost estimates because flatness and surface readiness requirements are not optional.
Ignoring moisture requirements can void warranties and force floor replacement, so humidity testing and barrier specifications belong in the budget from day one.
Common estimation mistakes to avoid
1) Underestimating prep:
If the subfloor isn’t flat/dry to the required tolerance, you can’t “budget your way out” with extra boards. You’ll need flattening materials and more skilled labor time.
2) Ignoring moisture requirements:
Glue-down and nail-down systems can fail if moisture conditions don’t match manufacturer specs.
– Use moisture testing method guidance from the flooring manufacturer and document the plan (method + acceptance criteria).
– If you’re building a workshop plan on a slab, ASTM methods such as ASTM F1869 (calcium chloride) and ASTM F2170 (in-situ RH) are common in floor decision workflows, but the flooring manufacturer must approve the test and limits.
3) Missing trim/transition and waste:
Quotes frequently price only boards and forget baseboards, reducers, door transitions, and the extra cuts needed around vents, doorways, and irregular corners.
Edge cases that frequently distort workshop hardwood budgets
– Workshop floors over older subfloor repairs (patches that crumble or won’t fasten)
– Slab-on-grade with prior moisture mitigation that isn’t approved for your flooring warranty
– Clearance constraints (HVAC returns, tool bays, or expansion gap visibility at edges)
– Poor access for moving materials (slowdowns that affect labor time)
Verdict / tip: build a line-item budget, not a guess
A solid hardwood floor cost estimate comes from line items—boards, underlayment/moisture control, fasteners/adhesive, prep labor, and finishing—rather than a single “per-square-foot” number. The upside is you can see exactly what changes the price (method, prep scope, or finishing); the downside is it takes more upfront measuring and assumptions, and you may need a quick subfloor/moisture assessment before you finalize numbers.
For workshop hardwood floors, line-item budgeting reduces risk because moisture and subfloor prep aren’t optional—and they’re often the largest cost swings.
If you can’t measure flatness or moisture conditions yet, delay final pricing and budget using conservative prep and testing assumptions until those numbers are confirmed.
When to skip this approach (or at least pause):
– If you haven’t confirmed whether the subfloor is adequate for nail-down fastening or for glue-down moisture requirements.
– If your plan involves unknown slab moisture conditions and you haven’t budgeted time for testing and possible mitigation.
Scan-and-save checklist / mini-budget table (fill in your numbers):
| Cost category | What to include | Your estimate |
|---|---|---|
| Flooring boards | Total sq ft + | |
| Underlayment / vapor barrier | Per your install method + moisture needs | |
| Fasteners/adhesive | Nails/staples or adhesive + supplies | |
| Subfloor prep | Flattening/repairs/patching materials | |
| Trim & transitions | Baseboards, reducers, door transitions | |
| Finishing (if needed) | Sanding + stain/finish system | |
| Labor/tooling | Your time or contractor labor + tool rentals | |
| Contingency | Rework and surprises | |
| **Estimated total** | Add all above | **** |
Sources
– National Wood Flooring Association (NWFA) “Wood Flooring Installation Guidelines” (installation and job planning guidance).
– Your specific flooring manufacturer’s installation instructions (flatness requirements, moisture testing guidance, approved adhesives/fasteners, and finishing requirements).
– Finish manufacturer technical data sheets for sanding/finish system compatibility and application requirements.
Hardwood floor costs in a workshop are best estimated by itemizing materials and separating prep, installation, and finishing into line items. Measure the real square footage, calculate board quantity with appropriate waste, then verify moisture/flatness needs from the flooring manufacturer’s instructions. Next step: fill in the checklist table above with your numbers (especially waste % and prep scope) and you’ll have a budget you can actually plan around.
Frequently Asked Questions
How do I estimate the total cost of hardwood floors in a workshop?
Start with the floor area (square feet) and multiply by an installed price per square foot, then add costs for subfloor prep, underlayment, and moisture protection. Workshop floors often need extra labor for leveling or grinding, especially if the concrete is uneven or damp, which can change the final hardwood floor installation cost. Finally, include trim transitions (reducers, thresholds), finishing/sealing, and contractor fees to get a realistic hardwood flooring budget.
What factors most affect hardwood floor installation cost in a workshop setting?
The biggest drivers are wood type (solid vs. engineered), plank width and grade, thickness, and whether the boards are prefinished or require on-site sanding and staining. Workshop conditions also matter—humidity control, concrete moisture testing, and sound/thermal underlayment can add to the price. Labor can increase if the subfloor needs repairs, leveling, or if you’re installing over existing flooring or irregular slabs.
How do I calculate the cost per square foot for hardwood flooring, including materials and labor?
Calculate material cost by pricing your hardwood (or engineered wood) per square foot and adding waste—typically 10–20% for cutting around seams, walls, and doorways. For labor, use a local installed rate or estimate hours for removal, prep, installation, sanding, and finishing, then convert that to a per-square-foot figure. Add allowance line items like underlayment, moisture barrier, fasteners/adhesives, and trim pieces to arrive at a true installed cost per square foot.
Which hardwood flooring thickness and type are best for workshop floors to keep costs reasonable?
Many workshop budgets balance durability with installation complexity, so engineered hardwood (with a stable core) is often a cost-effective choice over concrete because it’s less sensitive to seasonal movement. If you’re using solid hardwood, plan for careful acclimation and more rigorous moisture control, which can raise total hardwood floor installation expenses. Choosing a thickness that suits your subfloor condition (and your fastening method) helps avoid extra leveling or replacement work later.
Why should I include subfloor preparation and finishing in my estimate for workshop hardwood floors?
Subfloor issues—cracks, unevenness, poor adhesion surfaces, or moisture—can prevent hardwood flooring from performing correctly, especially in a workshop with temperature swings and potential dust or humidity. Grinding, patching, leveling, and moisture barrier installation are frequent hidden costs that strongly influence hardwood flooring cost estimates. Finishing costs also matter: prefinished boards may reduce on-site labor, while unfinished hardwood requires sanding, staining, and sealing that can add both time and material.
📅 Last Updated: October 17, 2026 | Topic: How to estimate the cost of hardwood floors in a workshop? | Content verified for accuracy and freshness.
References
- Wood flooring
- Cost estimate
- Quantity surveyor
- Board foot
- Square foot
- https://www.bls.gov/ooh/construction-and-extraction/floor-installers-and-tile-setters.htm
- https://www.fpl.fs.usda.gov/woodhandbook/
- https://scholar.google.com/scholar?q=hardwood+flooring+installation+cost+estimation Google Scholar
- https://scholar.google.com/scholar?q=construction+cost+estimation+materials+labor+breakdown Google Scholar
- https://scholar.google.com/scholar?q=wood+floor+life+cycle+cost+analysis Google Scholar