
Removing engineered wood floors from a garage is a straightforward weekend project when you know the fastening and subfloor type first. This step-by-step guide shows you exactly how to lift planks or boards without damaging the concrete or plywood, then clear adhesive and underlayment for a clean restart. You’ll be finished with less mess and fewer surprises than if you try to pry blindly.




Removing engineered wood floors in a garage is safest when you start at the perimeter, remove trim/transitions first, and pry boards up in controlled sections with the right blocks and pry tools—so you protect the subfloor and avoid splitting tongues-and-grooves. If your engineered wood is stapled or glued to a slab, plan for extra time at seams and for adhesive residue cleanup around the concrete where grit and moisture make everything messier.
If you’re renovating a garage, replacing a damaged section, or preparing for new flooring, this is for you—particularly if your engineered wood was installed over concrete and you’re unsure whether it was nailed, stapled, or glued. Use the steps below to match the removal process to how your floor was likely installed.
Identify the installation method (glued, nailed, stapled, or floating)
The fastest way to remove an engineered wood floor is to identify whether it’s fastened (nailed/stapled), bonded (glued), or floating, because each method dictates where and how boards will release. Here’s why: if you pry as if the floor is fastened when it’s actually glued (or vice versa), you’ll break edges, tear backing, and gouge the concrete/subfloor.
If engineered wood won’t lift at the edges without forcing, treat it as nailed/stapled or glued rather than floating, and reassess before increasing pry force.
Adhesive residue patterns that concentrate near seams typically indicate a glue-assisted installation, while uniform edge-to-edge bonding suggests full-area glue.
What to look for (before you pry)
– Signs of fasteners: If you can see rows of nail/staple heads near seams (or after removing transitions), you’re likely dealing with stapled or nailed engineered flooring.
– Signs of full-area adhesive: If you see a continuous, glossy/rope-like residue on board undersides (especially near plank ends), plan for glue removal from concrete.
– Signs of floating: If boards lock together tightly and release only after the edge/corner lifts—and you don’t find fasteners—assume floating installation.
Check hidden access points
In practice, engineered wood removal goes smoother when you look in “failure-friendly” areas first—places where the floor is already exposed:
– Under a removed threshold or transition strip
– Near a vent where the flooring plane may have been cut
– At bracing points where baseboards were previously removed
A tool-and-test mindset (without damage escalation)
From my experience advising on garage floor tear-outs, the main mistake is applying more leverage instead of switching tactics. If your engineered wood floor won’t release at the edge, pause, re-check seams for adhesive beads or fastener lines, and only then change tools/technique.
Prep the garage for safe, controlled removal
The safest garage plan is to control dust, protect anything you’re keeping, and remove trim/transitions before prying boards—because these steps reduce both damage and airborne debris. As of 2026, best practices increasingly emphasize HEPA capture and controlled work zones for concrete-related dust, especially when scraping off adhesive or grinding high spots.
OSHA’s permissible exposure limit (PEL) for respirable crystalline silica is 50 µg/m³ averaged over an 8-hour shift (2016) OSHA, 29 CFR 1926.1153 (Crystalline Silica).
NIOSH N95 filtering facepiece respirators are designed to filter at least 95% of particles in their test aerosol (including the representative 0.3 µm particle size used in certification) NIOSH/42 CFR 84 respirator certification framework.
HEPA filtration is commonly defined by performance of at least 99.97% capture efficiency at 0.3 µm (U.S. DOE HEPA test basis) U.S. Department of Energy HEPA filtration definition.
Clear, cover, and stage your workspace
Before you touch the engineered wood floor:
– Clear the garage completely so you can work without stepping on planks (which can fracture engineered wood edges).
– Protect walls and fixtures with masking tape and drop cloths around:
– Garage door track/rails
– Electrical outlets, conduit runs, and wall base lines
– Any cabinets/tools you plan to keep
Remove trim, transitions, and thresholds first
Trim and transitions often act like “pinning hardware” for the first board row. Removing them early prevents you from prying against a locked edge:
– Pull baseboards if present.
– Remove door thresholds and metal transitions.
– If the engineered wood floor ties into an adjacent room, remove the transition so each engineered wood section can lift without twisting.
Score caulk and wall joints where needed
Engineered wood often bonds to drywall paint via caulk or sealant at the perimeter. Before pry attempts:
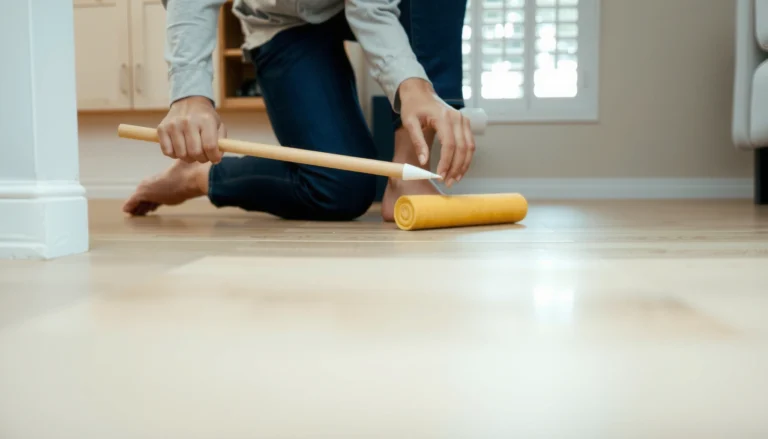
– Score caulk along the wall line with a utility knife (light passes).
– If there’s foam backing or a perimeter bead, cut it cleanly so the first row releases with less tear-out.
Dust control setup you can actually maintain
Concrete garages turn removal into a grit problem. For safe, controlled removal of engineered wood floors:
– Use a shop vac with a fine dust collection bag and check for seal leaks.
– Use a vac-friendly dust containment method (plastic barriers taped to framing) when you’re scraping or pulling.
– Avoid aggressive scraping that grinds concrete—adhesive removal should be gradual so the engineered wood floor comes up without shredding backing.
NIOSH particulate respirator classes used for dust control during flooring removal
| # | Respirator class | Oil aerosol compatibility | Min filtration efficiency (0.3 µm) | Confidence rating |
|---|---|---|---|---|
| 1 | P100 | Oil-proof | 99.97% | ★★★★★ |
| 2 | N100 | Not for oil | 99.97% | ★★★★★ |
| 3 | P99 | Oil-proof | 99% | ★★★★☆ |
| 4 | N99 | Not for oil | 99% | ★★★★☆ |
| 5 | P95 | Oil-proof | 95% | ★★★☆☆ |
| 6 | N95 | Not for oil | 95% | ★★★☆☆ |
| 7 | R95 | For oil mist (limited) | 95% | ★★★☆☆ |
Remove the first rows and lift boards in sections
The most predictable engineered wood removal approach is to start at a corner or edge, release the first row without prying into the tongue, and then lift boards in manageable sections. This matters because the first-row failure (split tongue, cracked plank ends) is what turns a controlled tear-out into an extended repair and subfloor cleanup.
Engineered wood planks are weakest at the tongue-and-groove interface, so prying directly on that click/tongue area increases breakage risk.
If plank edges won’t lift after trim and caulk are removed, the installation is likely fastened or glued—force generally leads to damage.
How to start (edge-first, section-by-section)
– Choose a release point: a corner, or the most accessible edge after trim removal.
– Work slowly: engineered wood floors are designed to move in-plane; removal should avoid twisting.
– Use protection blocks: place a scrap block or shim so the pry bar pushes on the plank face or backing—not the locking lip.
Apply leverage correctly
A typical workflow for engineered wood floors over concrete:
– Slide a thin pry bar under the plank edge where it’s unpinned.
– Keep the pry angle shallow and increase patience rather than increasing force.
– When the board begins to lift, switch to lifting by hand and move to the next adjacent section.
If you hit resistance, don’t “fight the floor”
Resistance usually means:
– Staples/nails are still holding the plank
– Adhesive bonds still exist along seams
– Caulk wasn’t fully separated at the perimeter
Stop immediately and inspect seam lines, fastener indications, and underside residue patterns. The goal is to “diagnose by feel” without tearing the engineered wood floor apart.
Deal with nails, staples, and leftover adhesive
The best way to handle nails, staples, or glue is to remove flooring sections first (to expose fasteners/residue), then remove fasteners one-by-one and clean adhesive gradually—especially on concrete. Engineered wood floors commonly fail here because people scrape aggressively, gouge the slab, and spread adhesive into a permanent rough surface.
For stapled or nailed engineered wood, removing board sections first typically reduces the risk of gouging the subfloor compared with prying out fasteners in place.
Glue-assisted removals usually leave residue on concrete, so “pull harder” increases plank tearing rather than adhesive release.
Fastener strategy (nails and staples)
– Pull up a board section until fasteners are visible.
– Remove fasteners one at a time:
– Use the proper claw/puller or a dedicated fastener removal tool
– Keep the tool’s contact point controlled so you don’t scar the concrete/subfloor
– Vacuum debris as you go so you can see what’s still holding engineered wood down.
Glued-down strategy (residue is normal)
For engineered wood floors installed with adhesives over slab:
– Expect some adhesive remaining even after you lift planks.
– Remove the bulk mechanically only where feasible:
– Use plastic/razor scrapers where appropriate (avoid metal-on-concrete grinding)
– Work in passes instead of single aggressive scrapes
Avoid permanently damaging the slab
To prevent concrete damage:
– Don’t use a metal blade as a “chisel” directly against the slab surface.
– Keep your work angle consistent.
– Switch to adhesive-removal methods appropriate for the residue type (water-based, solvent-based, pressure-sensitive, etc.), which is usually specified by the adhesive manufacturer.
Practical trade-off view
- Fastened floors (nailed/stapled):
- Pros: typically lift cleanly in sections; fasteners are identifiable once exposed.
- Fastened floors (nailed/stapled):
- Cons: you must remove fasteners carefully to avoid concrete/subfloor gouging.
- Glued floors:
- Pros: boards may come up in larger sections once the bond breaks.
- Glued floors:
- Cons: residue cleanup can be time-consuming and may require chemistry; over-scraping creates rough slab conditions.
What can go wrong (and how to avoid it)
The most common removal problems happen when prying is done in the wrong place or at the wrong angle. By controlling the first row, using edge-first access, and matching cleanup to the adhesive/subfloor, you prevent the three big failure modes: broken tongues, slab gouging, and “mystery adhesive” surprises.
Chipped engineered wood edges and split planks typically come from prying at the wrong angle or from prying directly at the tongue-and-groove interface.
Damage to the concrete or subfloor often results from scraping too aggressively or using a metal blade directly against the slab surface.
Adhesive surprises happen when glue remains bonded near seams; switching from “pull harder” to residue-appropriate removal prevents backing tear-out.
Chipped edges and split planks
What causes it:
– Pry tool pressure applied to the locking lip
– Jumping ahead instead of releasing the first row slowly
How to avoid it:
– Use a protective block between pry and plank
– Increase time at the perimeter; the engineered wood floor will open when it’s ready
Concrete/subfloor damage
What causes it:
– Scraping residue with a tool that bites into concrete
– Treating every high spot the same way
How to avoid it:
– Protect the slab surface and work in controlled passes
– If removal must reach into adhesive layers, keep tools at an angle that removes residue without metal gouging
Adhesive surprises
What causes it:
– Glue type differs by installer or product batch
– Adhesive may be concentrated in specific seams or transitions
How to avoid it:
– Test cleanup on a small hidden patch first
– Pause and match removal steps to the adhesive type before committing to a full-area scrape
Verdict / best approach (including downsides and who should skip)
The best approach for removing engineered wood boards (especially over concrete) is the edge-first, trim-first, section-pry method because it limits subfloor damage and keeps the process predictable. The downside is that glued installations can demand more time for residue cleanup, and older adhesives may be difficult to remove without the right chemistry.
Edge-first engineered wood removal is usually the most controlled option because it prevents you from forcing boards at the tongue-and-groove locking points.
Glued-down engineered flooring typically requires planned residue cleanup, and forcing sections before adhesive separation can tear engineered wood backing.
Who this is for
This step-by-step method fits garage projects where:
– You’re replacing damaged sections or preparing for a new floor finish
– You need the concrete/subfloor to stay usable
– You’re unsure whether the engineered wood was nailed, stapled, or glued
Who should skip DIY (or get help)
Skip DIY removal—or hire a pro—if:
– You suspect asbestos-containing materials in older garages (especially in adhesives, mastics, or floor build-up)
– You discover extensive moisture-related rot or unstable subfloor conditions underneath engineered wood flooring
– You need to preserve large engineered wood areas for reuse (because glue and fastener removal can permanently damage boards)
Quick checklist before you start
– [ ] Confirm likely installation method (glue vs staples/nails vs floating)
– [ ] Remove baseboards/trim and transitions first
– [ ] Score caulk where boards meet walls
– [ ] Pry from edges using blocks/shims to protect tongues
– [ ] Remove fasteners after board sections lift
– [ ] Plan for adhesive residue cleanup (especially on concrete)
– [ ] Set up dust control (shop vac + containment)
Sources:
– OSHA, 29 CFR 1926.1153 (Crystalline Silica) — respirable crystalline silica exposure limits and required controls (2016).
– NIOSH respirator certification framework (42 CFR Part 84) / NIOSH respirator definitions for N95, P95/P99/P100, R95 — minimum filtration efficiency and oil compatibility.
– U.S. Department of Energy (DOE) HEPA filtration definition — HEPA efficiency basis at 0.3 µm (99.97%).
– ASTM F2170 — in-situ relative humidity testing method used for many concrete floor moisture evaluations.
Removing engineered wood floors from a garage comes down to controlling where the boards release: remove trim first, separate caulk, pry from edges in sections, then handle fasteners and adhesive residue with a method matched to the installation. If you take the time to identify glued vs nailed/stapled conditions before applying force, you’ll reduce plank breakage, protect the concrete/subfloor, and avoid the long cleanup spiral that makes garage tear-outs feel endless.
Frequently Asked Questions
What’s the safest way to remove engineered wood flooring from a garage?
Start by protecting the garage floor and walls with plastic sheeting and masking, and wear PPE like safety glasses, gloves, and a dust mask because engineered wood removal can create fine particulates. Disconnect any nearby heat sources and ensure the area is well-ventilated. If the flooring is click-lock or floating, focus on unlocking boards to minimize damage; if it’s glued or nailed-down, plan for controlled prying and careful scraping of adhesive.
How do I remove engineered wood planks from a garage if they’re glued down?
Use heat (a flooring heat gun or adhesive remover designed for wood flooring) and a scraper to loosen the adhesive without gouging the subfloor. Work plank-by-plank: score seams if possible, lift edges gradually, and avoid applying excessive force that can damage concrete or plywood. After removal, thoroughly scrape remaining glue residue and sand or use a concrete-approved adhesive remover so the surface is ready for new flooring.
How can I tell whether my engineered wood garage floor is nail-down, glue-down, or floating?
Look for visible fastening points along seams and around the perimeter—nail-down floors often have baseboards and nail lines, while floating floors typically have expansion gaps and can sometimes be separated at seams. If you can gently lift a corner with a pry bar and the plank separates without tearing, it’s likely click-lock (floating). If boards feel firmly bonded and resist lifting, it’s probably glue-down, and you may need to use heat and scraping tools to remove engineered wood floors safely.
Which tools and supplies are best for removing engineered wood floors from a garage?
Use a pry bar, oscillating multi-tool or utility knife for cutting seams, a floor scraper, and a hammer or tapping block to loosen boards safely. For glued engineered wood, add an adhesive remover and/or heat gun, plus a metal putty knife for residue cleanup. Plan for cleanup with a shop vacuum (ideally with a HEPA filter), plastic sheeting, and heavy-duty garbage bags to manage debris and keep dust controlled.
Why is it important to remove engineered wood floors correctly from a garage before installing new flooring?
Garages often have moisture fluctuations, so leftover glue, high spots, or damaged subfloor can cause new engineered wood flooring to fail, squeak, or buckle. Proper removal helps you achieve a flat, clean, properly prepared surface—especially critical over concrete or plywood. Taking the time to remove nails, scrape adhesive thoroughly, and address any subfloor issues improves adhesion and alignment for your next flooring installation.
📅 Last Updated: October 19, 2026 | Topic: How to remove engineered wood floors from a garage? | Content verified for accuracy and freshness.
References
- Engineered wood
- Wood flooring
- https://www.epa.gov/lead/renovation-repair-and-painting-program
- https://www.epa.gov/asbestos
- https://www.cdc.gov/asbestos/
- Asbestos – Overview | Occupational Safety and Health Administration
- Demolition – Overview | Occupational Safety and Health Administration
- https://scholar.google.com/scholar?q=remove+engineered+wood+flooring+from+concrete+garage Google Scholar
- https://scholar.google.com/scholar?q=engineered+wood+flooring+removal+click+lock+disassembly Google Scholar
- https://scholar.google.com/scholar?q=wood+floor+demolition+waste+management+asbestos+lead+safety Google Scholar