
Getting adhesive off WPC floors doesn’t require guesswork—you can remove it cleanly without damaging the surface when you follow the right step-by-step method. This guide shows the fastest, safest approach to lift common glue residues, then finish the area so your WPC looks like new. If you’re dealing with stubborn adhesive, you’ll learn exactly what to use, in what order, and when to stop.




If you need to remove adhesive from WPC floors, soften the glue residue first (without soaking the planks), then lift loosened residue gently with a plastic scraper. Use a remover explicitly safe for WPC/LVP-style surfaces first, and only escalate to stronger chemistry if a careful test patch still leaves residue behind.
This guide is for homeowners and installers dealing with leftover glue from sheet vinyl–style/WPC installations—common culprits include trowel-applied adhesive, double-sided tape, or transition and edge glue smears. If your WPC floor has been sealed, waxed, or uses an embossed/printed top layer, you’ll want to follow the “test first” steps closely because many WPC finishes can haze or dull if exposed to the wrong solvent.
Identify the adhesive type (so you don’t damage the WPC)
The fastest way to avoid damaging a WPC floor is to identify whether the residue is “tape-like” or a harder cured adhesive film before you apply any chemistry. Once you know which category you’re dealing with, you can choose the least aggressive removal method that still works.
“WPC” is a vinyl click/loose-lay category where the wear layer and printed décor layer can be affected by strong solvents and over-wetting; spot-testing is essential before using any chemical remover.
Trowel-applied adhesives often cure into a tougher film than transfer-tape residues, so mechanical scraping alone may not fully remove cured adhesive.
Transition glue smears are typically localized, which makes repeated short-cycle treatment safer than flooding the area.
If adhesive is fully cured and well-bonded, many “general” vinyl removers may only partially soften it, requiring the exact remover recommended by adhesive or flooring documentation.
Here’s how to classify the residue in practical terms:
Tape-like residue vs. cured glue film
– Tape-like residue usually feels rubbery, tacky, or stringy and may roll or smear when pressed with light force.
– Cured glue film is typically harder, more glassy/rubbery in a cured way, and resists smearing; it often flakes or forms a thin film that doesn’t “pull” like tape.
Look at the placement pattern
– Full-area trowel adhesive (broad patches): expects uniform curing and may require more sustained softening.
– Thin edge/spot smears: usually responds well to targeted application on a cloth or cotton pad rather than puddling chemicals.
– Transition glue near doorways/stair noses: often has mixed material contact (subfloor + transition metal/wood), so you may need extra care around thresholds and fasteners.
Identify the original installation system (if possible)
If you have access to the installer’s materials list, even a partial record helps. Adhesive removers are not universal: the “best” chemistry depends on the adhesive family (pressure-sensitive, acrylic latex, rubber-based, etc.) and sometimes the specific brand.
[ADD: source for adhesive compatibility guidance, if you know the brand/model]
If you don’t know the adhesive, your safest route is still the same: test in an inconspicuous area and step up only if residue remains.
Prepare safely and protect the floor finish
The safest removal process begins before the first chemical touches the floor: protect surfaces, ventilate, and do a hidden test patch. For WPC/LVP, your goal is to remove residue without clouding the wear layer or driving solvent into seams.
Proper ventilation is necessary because many adhesive removers and solvents release strong fumes, and odor control matters for both safety and indoor air quality.
A hidden test patch helps confirm the WPC wear layer won’t become dull, hazy, or swollen before you treat a larger area.
Minimizing puddling reduces the chance of chemical migration into seams and under edges.
Use a plastic scraper first because WPC wear layers can be scratched or de-layered by metal blades.
What to do before you start
1. Clear the area so you’re not constantly knocking furniture or tracked dust back onto the adhesive.
2. Ventilate—open windows and use fans if available.
3. Protect nearby trim/walls with painter’s tape or plastic sheeting, especially if your remover is strong enough to mark paint or caulk.
4. Use clean cloths and a controlled applicator: microfibers or lint-free cloths prevent grit from acting like an abrasive.
Gather the right tools and materials
You’ll typically need:
– Plastic scraper (gentle edge, not a razor blade)
– Lint-free cloths (white if possible, so you can see transfer)
– Clean water and/or a manufacturer-approved WPC cleaner for final wipe-down
– Adhesive remover compatible with WPC/LVP-style surfaces (per the compatibility guidance you can reference)
[ADD: list exact products only if you have a known “approved” remover from the manufacturer]
If you can’t confirm an “approved” remover, follow the compatibility guidance you find in your flooring or adhesive documentation and proceed with small test sections.
Test patch steps (non-negotiable for finished WPC)
– Choose a discreet area (a closet line, under a removable appliance edge, or behind a vent cover).
– Apply the remover exactly as instructed (timing matters).
– After wiping, observe the surface in normal lighting:
– Clouding/haze
– Dulling or change in sheen
– Edge lifting or swelling near seams (especially if residue ran under borders)
Soften and lift: the safest removal order for WPC
The most reliable approach for WPC adhesive residue is a removal order that starts mechanical and uses chemistry only to soften what the scraper can’t lift. That sequence reduces the time the floor finish is exposed to solvents.
Starting with gentle mechanical removal reduces the chemical load needed to clean residue from WPC wear layers.
Targeted application—applying remover to a cloth or directly on residue—helps prevent puddling that can seep into seams.
Short cycles (“apply, wait per label, wipe, re-scrape”) are safer than soaking because extended dwell time increases haze or swelling risk.
After softening, wiping and re-scraping typically outperform scraping alone when adhesive is partially cured.
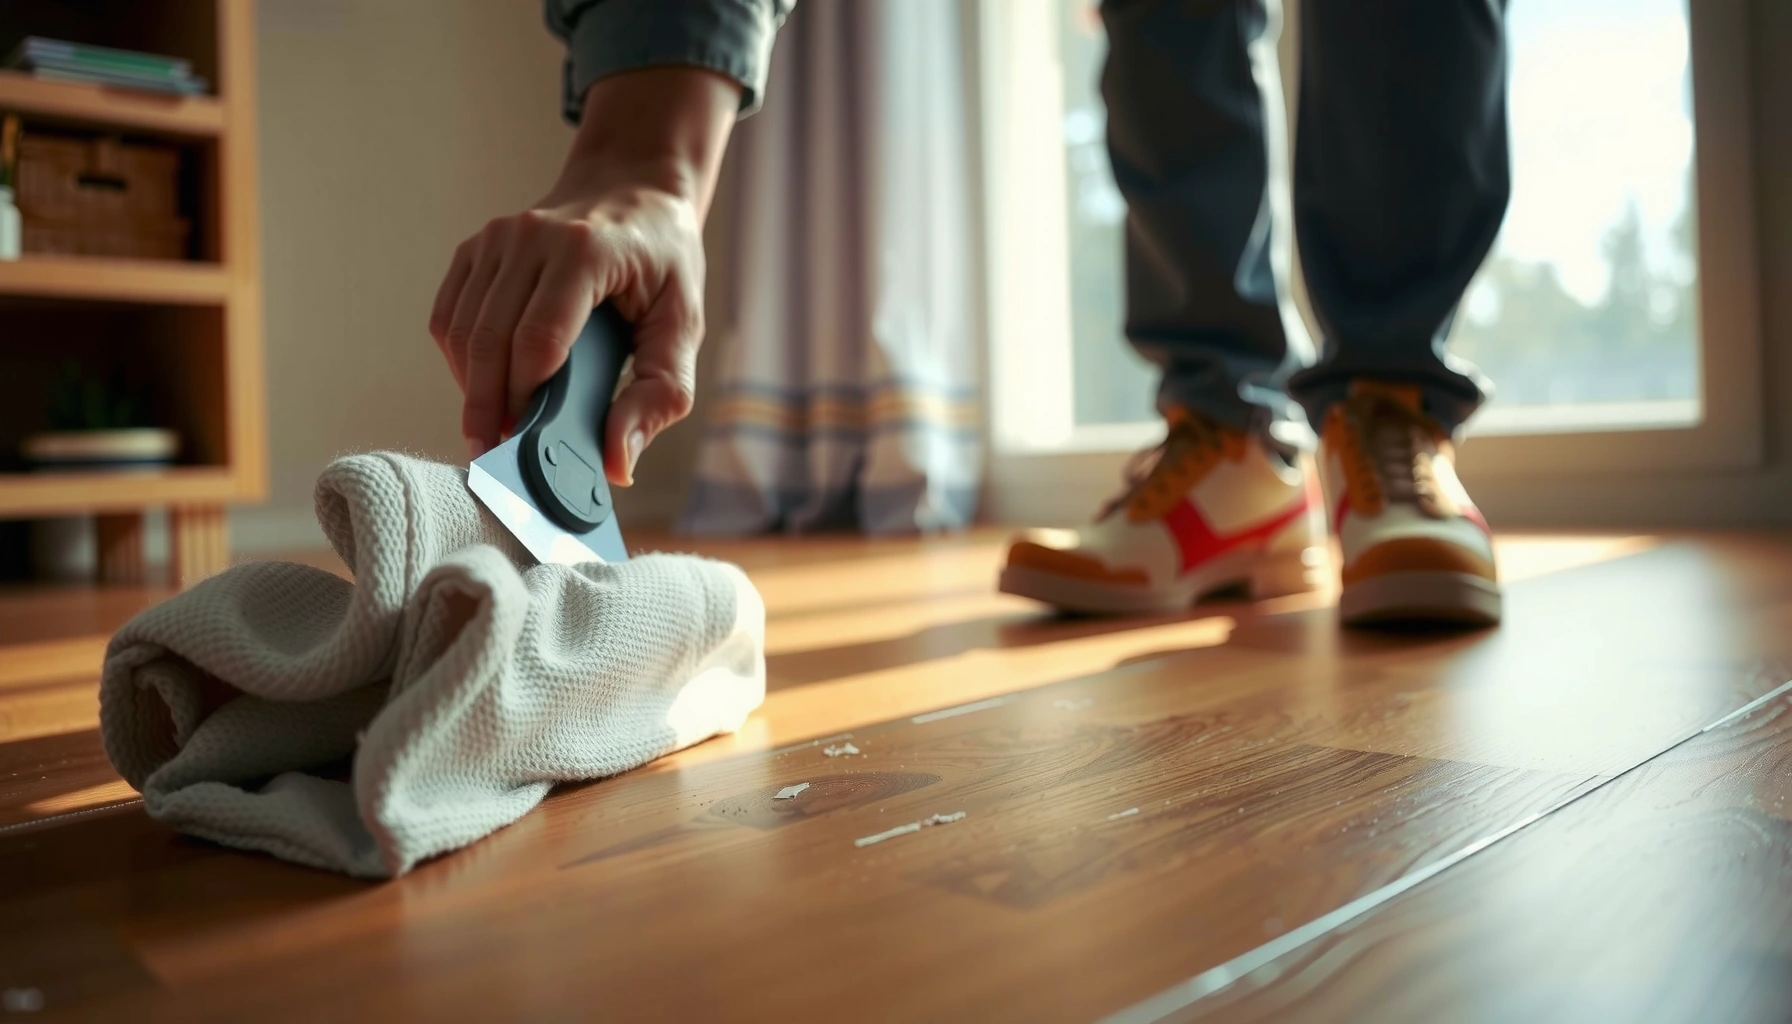
Step 1: Scrape gently to remove loose residue
– Use the plastic scraper at a low angle.
– Don’t press hard; you’re trying to lift uncured or brittle residue first.
– Vacuum or sweep up loosened bits to keep them from turning into smears.
Step 2: Apply remover in small sections (controlled dwell time)
– Apply the remover to a cloth first (preferred) and then dab onto residue, or apply directly on residue without puddling.
– Wait only as long as the remover label directs.
– Wipe thoroughly, then re-scrape.
This matters because WPC surfaces can show solvent-related haze when chemicals stay in contact too long or spread wider than intended.
Step 3: Repeat in short cycles
If residue remains:
– Re-apply remover for another short cycle.
– Avoid the temptation to “let it sit” longer than directed—extended dwell time is one of the most common paths to a hazy finish.
Step 4: Work from smallest to largest areas
Treat a manageable patch size (for example, a doorway transition zone) before moving across the room. This reduces uneven finish exposure and helps you track what’s working.
Clean residue and prevent streaking or haze
After adhesive is removed, thorough wipe-down and finish-safe cleaning prevents streaks, residue film, and lingering solvent effects. Your goal is a neutral-feeling, uniform surface that doesn’t grab at dust.
Many removers leave a chemical film; wiping with a WPC-safe cleaner recommended for the remover system helps restore surface uniformity.
If the floor looks hazy after adhesive removal, avoid abrasive pads and harsh solvents until you’ve confirmed the correct cleanup method.
Final drying is important because trapped moisture at seams can encourage edge lifting or swelling.
A clean water wipe—only if permitted by the remover’s instructions—can help clear residual chemistry before drying.
Cleanup method (best-practice sequence)
1. Wipe with the WPC-recommended cleaner (or the remover’s specified cleanup method).
2. Re-wipe with clean cloths until transfer stops.
3. If the instructions allow it, do a final clean water wipe to remove any remaining cleaner chemistry.
4. Dry fully before normal foot traffic.
Prevent streaking
– Use several clean cloths rather than one worn piece that spreads dissolved adhesive.
– Don’t “buff” with dry dust—dust can act like fine abrasive.
[ADD: exact final-clean method only if your WPC manufacturer specifies one]
Inserted data table: what removal method typically fits which residue (scan-friendly)
WPC Adhesive Residue Removal Matchups (Typical Outcomes)
| # | Residue category | Start method | Best first chemical family | Expected cycle count* | Confidence |
|---|---|---|---|---|---|
| 1 | Pressure-sensitive tape transfer | Plastic scrape + wipe | Vinyl-safe citrus/ester (test) | 1–3 cycles | ★★★★☆ |
| 2 | Trowel-applied adhesive (partially cured) | Scrape → targeted softening | Manufacturer-approved vinyl/LVP remover | 2–5 cycles | ★★★☆☆ |
| 3 | Cured adhesive film (hard, non-tacky) | Scrape + multiple short dwells | Stronger adhesive-specific remover (only after test) | 4–8 cycles | ★★☆☆☆ |
| 4 | Thin glue smear near transitions | Dab remover on residue | Vinyl-safe remover (low spread) | 1–4 cycles | ★★★☆☆ |
| 5 | Remnant residue after partial peel | Scrape then wipe solvent-softened bits | Citrus/ester vinyl-safe (test) | 2–4 cycles | ★★★★☆ |
| 6 | Multiple layers of dried adhesive | Scrape in layers + repeated softening | Adhesive-specific remover (test escalating) | 5–10 cycles | ★★☆☆☆ |
| 7 | Glossy haze from over-solvent exposure | Re-clean with WPC-safe cleaner | WPC cleaner only (no new solvents) | 1–3 cleanings | ★☆☆☆☆ |
Cycle count depends on cure time, adhesive thickness, temperature, and whether the remover is truly compatible with the WPC wear layer.
What can go wrong (and how to avoid it)
If you remove adhesive incorrectly, WPC damage typically shows up as haze, dullness, or edge lifting—not immediate catastrophic failure. Avoid aggressive chemistry, excessive dwell time, and over-wetting seams, and you significantly reduce the risk of permanent surface changes.
Acetone and aggressive paint strippers can permanently dull or cloud vinyl wear layers, especially when contact time is longer than a brief test patch.
Over-wetting can allow liquids to migrate into seams, increasing the risk of swelling or edge lift in WPC installations.
Heavy scraping with the wrong tool can gouge the wear layer, leaving permanent texture changes.
If residue is fully cured and bonded, chemistry selection matters—using an incompatible remover can waste time without truly softening the adhesive.
Common mistakes that cause real problems
– Using acetone or harsh strippers: These can dissolve or deform finish chemistry and leave an uneven sheen.
– Abrasive pads: They may remove residue, but they also micro-scratch the wear layer and can amplify haze.
– Leaving remover longer than the label: Extended dwell time raises the chance of clouding.
– Soaking seams/edges: If adhesive reached under planks or into seam areas, water/solvent migration increases the likelihood of lifting.
– Scraping too aggressively: Even with plastic, too much force can create a “scuffed” look that’s hard to conceal.
If adhesive is deeply cured and bonded
Some adhesives require an adhesive-specific remover (or they won’t soften properly). If residue doesn’t respond to a WPC-compatible remover after multiple short cycles, don’t “guess harder chemistry” without compatibility guidance.
[ADD: source for “cured adhesive removal” guidance from adhesive/installer documentation]
Verdict: best-practice approach (and when to stop)
For most WPC glue residue, the safest and most predictable method is: test in a hidden area → scrape lightly → soften with a WPC-compatible adhesive remover → wipe and repeat in small sections. This typically balances removal power with finish protection, but it can take time—especially with fully cured trowel adhesives.
Skip DIY and call a pro if adhesive is under lifted planks, your installation has a warranty that restricts chemical use, or your test patch shows surface damage (crazing, peeling, or edge swelling) after treatment. If you can’t confirm what adhesive was used, it’s safer to pause and seek guidance from the floor/adhesive manufacturer than to escalate to stronger solvents blindly.
Best practice for WPC adhesive removal prioritizes compatibility and controlled exposure: test patch, plastic scraping, WPC-safe remover, and short-cycle dwell time.
When residue is under planks or trapped in seams, professionals can reduce the risk of sub-surface migration and finish haze.
Pros/cons comparison (quick decision support)
| Approach | Pros | Cons / Risks |
|---|---|---|
| DIY with WPC-compatible remover + short cycles | Lower risk of finish damage when tested; targeted to small areas | Time-consuming; cured adhesive may require stronger, adhesive-specific chemistry |
| Pro removal (especially for under-plank residue) | Better chance of removing residue without finish haze; manages seam/subfloor risk | Costs more; still requires compatibility to protect warranty and wear layer |
Quick checklist (save this)
– [ ] Identify residue type (tape-like vs cured glue film)
– [ ] Ventilate + protect walls/trim
– [ ] Test adhesive remover on a hidden spot
– [ ] Plastic scraper first (gentle, low force)
– [ ] Apply remover in small sections (no puddling)
– [ ] Wait only per label directions
– [ ] Wipe clean and repeat if needed
– [ ] Use WPC-safe cleaner per manufacturer guidance
– [ ] Dry completely before normal foot traffic
FAQ
Can I use a metal scraper on WPC floors?
It’s risky. Metal blades can gouge the wear layer or pull up edges—use a plastic scraper to reduce damage.
What’s the safest first chemical to try?
Start with a remover that’s explicitly stated as compatible with WPC/LVP/vinyl surfaces and follow the label timing. If you don’t have compatibility info, [ADD: name of your WPC manufacturer/spec] should be your reference.
Will heat help remove adhesive from WPC?
Gentle heat may soften some adhesives, but it also increases the risk of surface haze or damage. If you try it, do it only on a tested spot and avoid overheating—**[ADD: source for heat limits, if your floor manufacturer provides them]**.How do I remove sticky residue after the main adhesive is gone?
Re-wipe with the recommended cleaner for your WPC/remover system, then repeat wiping with clean cloths until the surface feels neutral (no chemical film or grab).
Sources
– [ADD: WPC flooring manufacturer installation/care guide—adhesive/remover compatibility and “do/don’t” cleaning instructions]
– [ADD: Adhesive manufacturer technical data sheet (TDS) or removal instructions for cured adhesive/tape residue]
– [ADD: Adhesive remover product label/instructions for safe substrates and required clean-up method]
Removing adhesive from WPC floors is straightforward when you treat it like a controlled finishing process: classify the residue, protect the surface, start with plastic scraping, and use WPC-compatible remover in short, repeatable cycles. If your test patch shows haze or any edge issues, stop early—switch to manufacturer guidance or professional removal to protect the wear layer and your warranty.
Frequently Asked Questions
How can I remove adhesive residue from WPC floor tiles without damaging the surface?
Start by scraping off as much leftover glue as possible using a plastic scraper or a putty knife to avoid scratching the WPC (wood-plastic composite) top layer. Then soften the residue with gentle heat (a hair dryer or heat gun on low, held at a distance) and wipe with a microfiber cloth. For remaining tackiness, use a manufacturer-approved adhesive remover or a mild solvent suitable for vinyl/WPC flooring, testing in a hidden area first. Finish by cleaning with warm water and a pH-neutral cleaner, then dry thoroughly.
What is the safest method to remove carpet glue or double-sided tape adhesive from WPC flooring?
For tape adhesive, begin with warm air to loosen the bond, then peel slowly and remove residue with a soft cloth. If residue remains, apply a small amount of a tape adhesive remover that’s safe for resilient flooring (avoid harsh chemicals), and let it dwell briefly before wiping. Do not soak the floor—WPC can tolerate cleaning chemicals better than many wood floors, but excess liquid can seep into seams or edges. After removal, wash with a pH-neutral cleaner to remove any chemical film.
Which cleaning products should I avoid when removing glue from WPC floors?
Avoid acetone, strong paint strippers, and aggressive solvents that can cloud, discolor, or weaken the WPC protective wear layer. Also steer clear of abrasive pads, steel wool, or scraping blades that can gouge the surface and expose the core. If you’re using adhesive removers, choose products explicitly labeled safe for vinyl/resilient flooring and always do a patch test first. When in doubt, begin with the mildest method (heat + gentle cleaner) and increase only if needed.
Why does adhesive removal get harder on WPC floors over time, and how should I respond?
As adhesives cure, they bond more tightly and become more resistant to wiping, meaning older residues often feel harder and stickier. The best approach is to soften the adhesive first with controlled heat, then remove with gentle mechanical scraping. Afterward, use a safe adhesive remover in small amounts and allow proper contact time rather than scrubbing aggressively. Finish with a pH-neutral wash to ensure the WPC floor is clean and slip-safe.
Best way to remove contact cement or construction adhesive from WPC plank floors?
For contact cement or construction adhesive, use gradual heat to soften the bond, then remove the bulk with a plastic scraper. Apply a flooring-safe adhesive remover to the remaining spot, let it sit according to the label, and wipe away residue with a microfiber cloth. Repeat as needed instead of using heavy dwell times that could affect the WPC surface finish. Once the adhesive is gone, clean thoroughly with a pH-neutral cleaner and dry to restore the floor’s appearance and traction.
📅 Last Updated: October 08, 2026 | Topic: How to remove adhesive from WPC floors? | Content verified for accuracy and freshness.
References
- Google Scholar Google Scholar
https://scholar.google.com/scholar?q=adhesive+residue+removal+from+vinyl+floor - Google Scholar Google Scholar
https://scholar.google.com/scholar?q=pressure-sensitive+adhesive+removal+mechanism+surface+cleaning - Google Scholar Google Scholar
https://scholar.google.com/scholar?q=wood+plastic+composite+wpc+floor+adhesive+removal - https://pubmed.ncbi.nlm.nih.gov/?term=adhesive+residue+removal
- https://www.sciencedirect.com/search?qs=adhesive%20residue%20removal%20from%20surfaces
- Pressure-sensitive adhesive
https://en.wikipedia.org/wiki/Pressure-sensitive_adhesive - White spirit
https://en.wikipedia.org/wiki/Mineral_spirits - Solvent
https://en.wikipedia.org/wiki/Solvent - https://en.wikipedia.org/wiki/Vinyl_flooring
- https://www.britannica.com/technology/adhesive