


You can repair vinyl floors in a staircase cleanly and reliably by following a tight, step-by-step process for fixing lifts, bubbles, and worn edges. This guide tells you exactly what to inspect first, which vinyl patching approach to use, and how to match seams and transitions so the repair holds under foot traffic. If you want the fastest path to a stair that looks good again—and stays that way—start here.




Yes—you can repair vinyl floors on a staircase, but the right fix depends on whether the damage is a lifted seam, a gouge/scratch, or a loose/rotting substrate. In this guide, you’ll learn how to identify the damage, prep the step safely, and patch or re-secure the vinyl without making the repair more noticeable.
This is for homeowners dealing with scuffed stair treads, peeling edges, or small damaged sections in LVP/LVT (glue-down or click-lock) on stairs. If your staircase has major subfloor damage, repeated lifting, or water problems, you’ll also see when it’s smarter to stop and call a flooring pro.
Identify the damage (and your vinyl type)
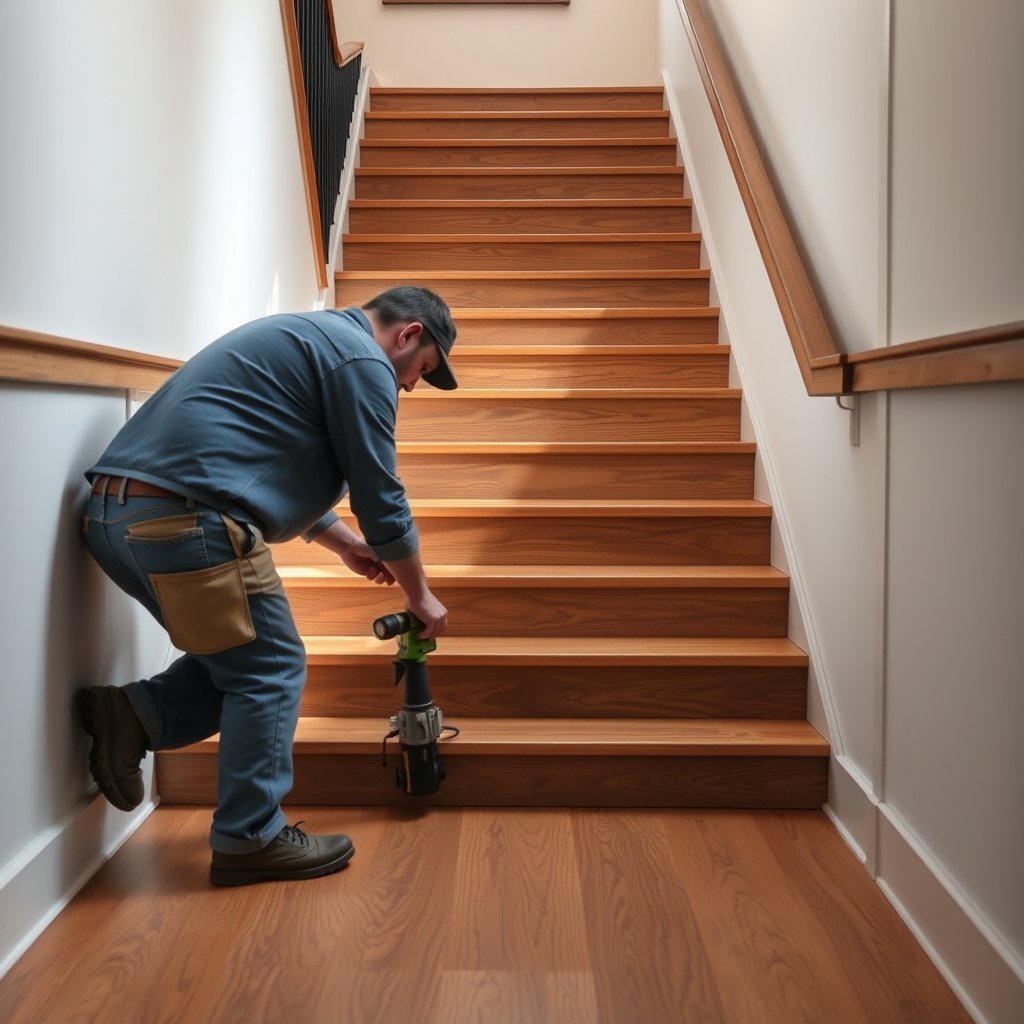
The fastest way to repair a vinyl staircase is to identify what failed first: the seam/edge, the surface (scratch/gouge), or the layer underneath. Once you know whether you have glue-down or click-lock (loose-lay) LVP/LVT, you can choose the correct adhesive or replacement method and avoid re-lifting the same spot.
Start with what’s most visible on the step: lifted seams along the tread edge, wear at the nose (the front lip people kick when carrying items), and impact dents from dropped tools or bags. Then confirm the vinyl type, because glue-down and click-lock behave differently on stair treads.
Click-lock/loose-lay LVP/LVT uses mechanical locking, so “gluing it back” is usually not the correct primary repair—replacement is often more reliable.
Many resilient flooring failures on stairs begin at high-stress edges (the tread nose) where repeated flex and foot impact concentrate force.
Step 1: Determine your vinyl installation method
Inspect a damaged area (or a corner with a clear view) to decide which system you have:
– Glue-down vinyl (glue-down LVP/LVT): adhesive is under the planks/tiles. Typically, when an edge lifts, you may see thin adhesive residue or a lack of movement in the rest of the plank.
– Click-lock/loose-lay vinyl (floating): planks snap together mechanically. If one section lifts, you may notice movement at the seam lines rather than adhesive separation.
If you’re unsure, check your original install paperwork or the product model number on leftover boxes—vinyl staircase repairs go much faster when you confirm the system before cutting.
Step 2: Identify the failure pattern
Decide what you’re dealing with:
– Loose/lifted edges or seams (usually adhesion failure, loose substrate, or flexing)
– Scratches/dents/gouges (usually surface damage; sometimes the top wear layer is breached)
– A section that’s separating or turning brittle (often deeper moisture/substrate issues, or repeated impact)
Step 3: Know what “success” looks like
On a vinyl staircase, the repair should do three things:
1. Sit flat (no raised lip at the tread nose)
2. Resist re-lifting under foot traffic
3. Blend visually as much as possible (especially with pattern alignment on LVP/LVT)
From what I see most often in real homes, the biggest repair “fail” isn’t bad workmanship—it’s fixing the symptom (a lifted corner) while the underlying cause (movement, moisture, or an unstable substrate) continues.
Gather the right tools and materials
The right tools prevent two common problems in vinyl staircase repairs: uneven cuts and weak bonding. Before you start cutting or applying adhesive, gather supplies that match your vinyl type (glue-down vs click-lock) and the repair style (re-seal vs replace).
For glue-down and click-lock LVP/LVT on stairs, you typically need a controlled cutting setup, cleaning/degreasing supplies, and either compatible patch material or replacement planks. Because stairs get constant traffic, plan the repair so you can keep people off the area while the adhesive cures or the patch beds in.
For resilient flooring patches, clean preparation is critical: bonding fails most often when residue, dust, or cleaning-film is left on the vinyl surface.
A sharp utility knife blade and a rigid straightedge reduce “micro-gaps” at the patch seam, which is a common visibility and wear trigger on stair noses.
Tools/materials to have on hand (based on your vinyl type)
– Basics (use for both types):
– Utility knife with fresh blades
– Straightedge (metal preferred)
– Tape measure
– Pencil/marker suitable for light tracing
– Clean microfiber cloths
– Ventilation (fans/open window) and good lighting
– Painter’s tape to protect adjacent steps and contain adhesive
– If your LVP/LVT is glue-down:
– Manufacturer-approved vinyl flooring adhesive or repair adhesive (match product and system)
– Optional: roller or weighted pressure tool (if your adhesive instructions allow it)
– Replacement scrap vinyl/planks/tiles if you’re patching
– If your LVP/LVT is click-lock/loose-lay:
– Replacement planks (the most reliable fix for many stair-tread failures)
– Manufacturer guidance tools (some systems use specific under-tuck/removal steps)
– Removal tools (as recommended by the floor manufacturer) so you can lift without tearing surrounding boards
– For safety and cleanliness:
– Gloves and eye protection (especially if you’re cutting out damaged sections)
– Shop vacuum for dust control during trimming
Subfloor Specs That Matter Most for LVP/LVT Repairs on Stair Treads
| # | Condition to Check | Target Value | Test Method | Repair Impact |
|---|---|---|---|---|
| 1 | Flatness (high/low spots) | ≤ 3/16 in over 10 ft (≈ 5 mm over 3 m) | Straightedge/level checks (ASTM F710) | ★★★☆☆ |
| 2 | Moisture (MVER) | ≤ 3 lb/1000 sq ft/24 hr (commonly specified for resilient floors) | ASTM F1869 (calcium chloride) | ★★★★★ |
| 3 | Moisture (RH) | ≤ 75% RH (commonly specified for resilient floors) | ASTM F2170 (in-situ probe) | ★★★★★ |
| 4 | Surface cleaning (bonding surface) | No dust, wax, or residue film before adhesive/patch | Visual + wipe-down check (RFCI work practices) | ★★★★☆ |
| 5 | Adhesion readiness (existing loose edges) | Remove all loose vinyl before re-adhering | Mechanical prep (manufacturer guidance) | ★★★★☆ |
| 6 | Temperature stability during repair | Maintain typical installation comfort range (≈ 65–85°F / 18–29°C) | Follow flooring adhesive/installation spec | ★★★☆☆ |
| 7 | Stair edge wear risk | Prioritize flush seams at tread nose (no raised lips) | Straightedge/hand-feel check | ★★★★☆ |
Prep the staircase so the repair actually sticks
The best adhesive job in the world still fails if the surface is contaminated or the substrate is unstable. On a vinyl staircase, prep means deep cleaning, removing loose material, and ensuring the patched/lifted area can sit flat under foot traffic.
Vinyl repairs fail most often because dust, oil, and residue block bonding. Stair noses get extra grime from shoes, so you need a cleaning routine that actually removes film—not just surface wipe marks. Also, plan where your seams will land: on stairs, a seam at the exact outer edge is much more visible and much more likely to get chipped.
Surface residue (dust, wax, and cleaning-film) is a primary cause of resilient flooring repair failure because adhesives can’t wet and bond to contaminated surfaces.
Flatness matters on stair treads: even small high spots can create a raised patch edge that wears through the top layer first.
Clean thoroughly (and verify it’s clean)
– Remove dirt and grit with a vacuum and microfiber wipe.
– Use a cleaner approved for resilient flooring and the adhesive you’ll use (many adhesives require a specific prep approach).
– After cleaning, wipe again with a fresh microfiber towel to confirm no residue remains.
Reality check: If your staircase has been cleaned with oil-based products, you’ll often see shiny residue. That film can prevent bonding even when the vinyl “looks clean.”
Stabilize the area before you cut or glue
– If a seam is lifting, gently loosen just enough vinyl to access the edge/underlayer.
– Let the vinyl lie flat and settle for a few minutes before you proceed, especially if it was curled up due to daily traffic and heat.
Mark before you cut (so seams hide where they should)
– Trace the damaged area lightly.
– Plan your cuts so the patch seam lands where it’s least visible—often toward the tread’s interior rather than the very edge.
On stairs, “least visible” is also “least stressed.” A seam at the tread nose sees more impact and more toe drag, so you want that seam as far in as your layout allows.
Fix loose seams and lifted vinyl on stair treads
Loose seams are usually fixable—if you re-adhere correctly and address why the seam lifted in the first place. The direct path is to lift minimally, apply the correct adhesive method for your vinyl type, and press/weight it until the bond sets.
Vinyl stair edges are under constant stress: your body weight loads the tread, your shoes add friction and scuffs, and the stair structure can flex slightly. That’s why a “quick glue-and-press” can work once, yet fail again if the substrate moves or moisture is present.
For lifted seams, minimal lifting reduces damage to surrounding planks and preserves the locking/fit needed for a flatter stair tread finish.
If the substrate is unstable or wet, re-securing vinyl seams won’t hold long-term—adhesion can’t compensate for movement.
Fix route depends on glue-down vs click-lock
– For lifted edges/seams on glue-down: lift minimally, apply manufacturer-approved adhesive, then press firmly back into place.
– For click-lock: many systems are designed to remain locked, so repeated lifting may require plank replacement rather than adhesive patching.
Here’s a quick comparison you can use while deciding your repair approach:
| Repair Approach | Best For | Key Risk |
|---|---|---|
| Re-adhere a lifted seam (glue-down) | Localized edge lifting where the rest of the plank is solid | Wrong adhesive or contaminated surface causing re-lift |
| Replace affected planks (click-lock) | Recurring lifting, cracked/brittle sections, or seam failure across multiple steps | Tearing surrounding pieces during removal if you cut too aggressively |
Reinforce the seam so it cures flat
– Use firm hand pressure and, if your adhesive instructions allow it, a roller or weighted pressure.
– Use the manufacturer’s recommended cure time: .
If you’re repairing in 2026: plan for a realistic “no traffic” window. Stairs are hard to isolate, so do the work when you can control movement for the cure period.
If lifting keeps coming back, troubleshoot the real cause
For recurring lifting, check:
– Substrate movement or uneven support
– Moisture intrusion (even small leaks behind a wall can drive the problem)
– Insufficient adhesion during installation
– Expansion/temperature conditions that stress the vinyl staircase installation
Adhesive alone won’t fix a stair that flexes enough to re-break the bond.
Patch scratches, dents, and gouges (replace the damaged piece)
Scratches and gouges are usually best repaired by replacing the damaged section rather than “filling and hoping.” The most reliable method is to cut out only the compromised area, install a matching replacement piece, and keep the seam flush on the stair nose.
Vinyl staircase surface damage often looks cosmetic—until the top wear layer breaks and the edges start catching shoe soles. On LVP/LVT, a worn spot can also become a dirt trap, which makes the next repair harder.
On vinyl stair treads, patch seams must be flush at the nose; even a small raised edge will wear faster and become more visible.
Deep gouges usually compromise more than the print layer, so partial “spot fixes” often fail unless you replace the damaged plank or tile section.
Remove only what you must (clean, squared cut)
– Cut out the damaged section in a clean shape (commonly a rectangle), staying square to the plank/tile layout.
– Avoid cutting through additional layers or disturbing underlayment beyond what your flooring system allows.
Fit the patch before setting
– Dry-fit the replacement piece so it sits flush with the surrounding vinyl, especially near the stair nose.
– Make micro-adjustments with trimming rather than forcing the patch into a gap.
Set the patch with the right system
– For glue-down vinyl: use adhesive specified for your product and apply it per instructions.
– For click-lock systems: replacements may require a specific approach—sometimes the most reliable route is replacing the affected plank(s) rather than “gluing in” a patch.
Because stair treads see repeated load, using the system the manufacturer designed (mechanical lock vs adhesive bond) matters more than on flat floors.
What can go wrong (common mistakes and edge cases)
Most vinyl staircase repair issues come from mismatching the fix to the failure cause. If the seam lifts again, or the patch ends up raised, it’s usually due to adhesive incompatibility, poor prep, or substrate problems you didn’t address during installation.
Here are the biggest failure modes to watch for—these are the problems I see most often when homeowners report “it worked for a week” and then the vinyl starts peeling again.
Using adhesive that’s not compatible with your vinyl type can create permanent raised seams because the bond weakens or fails to wet the surface properly.
If you cut too far and disturb underlayment support, the patch won’t sit flat—stairs then amplify the gap into visible wear and edge lift.
Common mistakes
– Wrong adhesive for your vinyl type: glue-down vs click-lock repairs can behave very differently, and the wrong adhesive can cause further lifting or a permanent raised seam.
– Cutting the wrong layer: if you cut through too much (or damage underlayment), the patch won’t sit flat, and the tread edge will keep wearing.
– Poor surface prep: dust, oils, and old residue prevent bonding—especially on stair edges where cleaning products may leave film.
– Stair flex and traffic: stairs experience constant movement; even a correct patch can fail if the substrate is unstable.
– Color/pattern mismatch: if you can’t match the exact pattern (and you don’t have extra flooring), the repair will be visible even if it’s installed correctly.
Edge cases where you should pause
– Water intrusion, musty smells, or soft spots
– Multiple steps lifting in a line (often substrate or moisture)
– Planks that are already brittle or cracking at seams
In 2026, more vinyl products are sold with strong visuals, but the “real” weak points on staircases still tend to be moisture control and flatness.
Verdict / tip: when DIY repair is worth it (and when to skip)
DIY is usually a good move for small lifted edges, minor gouges, or a limited patchable area—especially if you have matching leftover vinyl. If you’re missing matching pieces or you suspect substrate/moisture issues, the cost of repeated attempts can quickly exceed a professional inspection.
Skip DIY (or pause and troubleshoot first) if you see subfloor soft spots, water intrusion, widespread lifting across multiple steps, or repeated separation after “fixing” it once.
DIY seam re-adhesion works best when the substrate is stable and clean; if the stair structure flexes or moisture is present, the bond is likely to fail again.
When matching replacement planks are unavailable, visual mismatch can make a technically-correct patch look unacceptable, especially on stair noses.
If you’re unsure whether your stairs are glue-down or click-lock, or you can’t source matching replacement pieces, it’s often more cost-effective to get a flooring pro to confirm the repair method.
Quick checklist (scan/save)
| Problem you see | Best first move | What to watch for |
|---|---|---|
| Lifting edge/seam | Clean → minimal lift → correct adhesive → press/weight | Wrong adhesive type; seam stays raised |
| Scratch/scuff | Clean → use manufacturer-approved repair method (if applicable) | Deep gouges usually need replacement |
| Dent/gouge | Cut out damaged section → install matching patch | Patch not flush; visible seam at stair nose |
| Multiple steps lifting | Stop and inspect substrate/moisture/movement | Adhesion won’t fix an unstable/overmoisture substrate |
– [ ] Confirm glue-down vs click-lock
– [ ] Clean thoroughly (no residue)
– [ ] Plan cuts so seams are less visible
– [ ] Use only manufacturer-compatible adhesive/repair method
– [ ] Press/weight until the recommended cure time (from documentation)
– [ ] Re-check after 24–72 hours for any edge lifting (timeline depends on your adhesive)
Frequently Asked Questions
How can I repair a lifted or peeling vinyl floor on a staircase?
Lifted or peeling vinyl on stairs is usually caused by moisture, poor adhesion, or subfloor movement. Clean the area thoroughly, remove any loose vinyl, and dry the subfloor completely. Spread a vinyl-specific flooring adhesive or double-sided tape rated for LVP/LVT, press the vinyl firmly, and weigh it down while it cures to prevent re-lifting.
What’s the best way to fix a cracked vinyl stair tread?
For small cracks, you can often stabilize the damage by cleaning the crack, then filling it with a vinyl crack repair compound or color-matched vinyl filler. For deeper splits, you may need to replace the damaged vinyl stair tread section, especially if the crack affects traction or flex. After repair, sand lightly if needed and seal/finish with a compatible product so the surface stays durable and slip-resistant.
How do I repair gaps or lifting seams in vinyl flooring on stairs?
Gaps at seams commonly come from temperature swings, improper installation, or movement on the stair nosing. If you’re working with sheet vinyl, re-glue the seam using a seam sealer or vinyl adhesive, then press and clamp until the bond sets. For plank or tile vinyl, you may need to remove the affected pieces and reinstall them with proper underlayment and expansion gaps, using the manufacturer’s recommended transitions for stairs.
Why does vinyl stair flooring separate or buckle, and how do I prevent it after repairs?
Buckling and separation usually happen when moisture is trapped, the subfloor is uneven, or the vinyl wasn’t installed with proper acclimation and stair-ready flatness. Before repairing, check for moisture issues, fill low spots, and ensure the subfloor is smooth and dry. To prevent repeat problems, acclimate the flooring, use the correct adhesive for stairs, and consider adding stair tread grip for added stability and safety.
Which tools and materials do I need to repair vinyl floors on a staircase?
You’ll typically need a utility knife, flooring scraper, seam roller (or a heavy roller), and a clean microfiber cloth for prep. For adhesive repairs, use a vinyl-specific flooring adhesive/seam sealer, and for damage filling use a vinyl repair filler or crack filler matched to your finish. If you’re replacing sections, have a measuring tape, straightedge, replacement planks/tiles or tread pieces, and optional grip strips to restore durability and traction.
📅 Last Updated: October 26, 2026 | Topic: How to repair vinyl floors in a staircase? | Content verified for accuracy and freshness.
References
- Vinyl flooring
- Flooring
- Floor
- Underlayment
- Staircase
- Stair tread
- Caulk
- https://scholar.google.com/scholar?q=vinyl+flooring+repair+sheet+vinyl+patching Google Scholar
- https://scholar.google.com/scholar?q=repair+vinyl+floor+plank+lifting+seams Google Scholar
- https://scholar.google.com/scholar?q=vinyl+stair+tread+resilient+flooring+repair Google Scholar

[…] the tread nose where impact […]