


Fixing buckling in polyaspartic floors is usually straightforward if you identify the root cause—moisture trapped in the slab, incorrect surface prep, or material/application errors. This guide walks you through the fastest practical steps to stop further buckling, assess whether the area can be repaired or must be replaced, and get a flat, durable finish. By the end, you’ll know exactly what to check first and what to do next to restore performance.


Buckling in polyaspartic floors is usually caused by an adhesion failure or an ongoing moisture/pressure issue under the coating. The practical fix is to identify which condition is driving the lifting, mechanically remove only the failed coating down to solid substrate, and reapply the system over a properly cured, dry, and correctly profiled concrete surface.
If you’re managing a warehouse, garage, commercial corridor, or industrial slab that shows raised waves, ridges, or tenting in a polyaspartic coating—especially after curing, heavy traffic, or slab moisture changes—this guide walks you through the same root-cause-to-recoat workflow we recommend for localized or repeat failures.
Step 1: Confirm what “buckling” looks like (and where it starts)
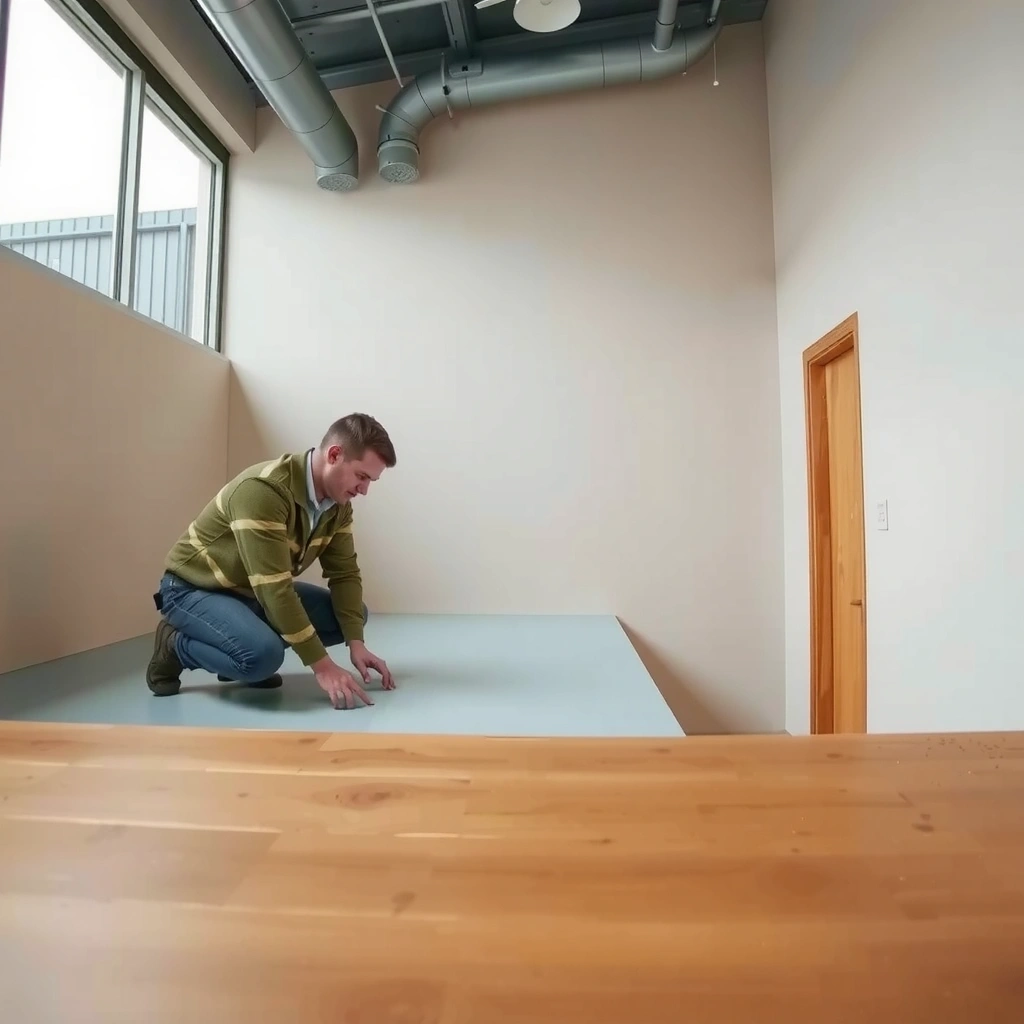
You can’t fix buckling effectively without first confirming the failure mode and mapping where the coating is detaching. Tenting, edge-lifting, and wave formation often point to different underlying causes (adhesion loss versus moisture-driven pressure versus installation/curing window problems).
Tenting typically presents as sheet-like lifting with broad movement of the coating, which often indicates a loss of bond across a larger zone rather than a single point impact.
Localized edge lifting—where a crack forms and then the coating peels from the crack edges—commonly aligns with adhesion failure and stress concentrating at the defect.
Buckling that repeatedly shows near drains, perimeters, or joint lines often suggests a moisture-path, pressure variation, or movement constraint in those regions.
To confirm the “shape” of the buckling in the field, do the following:
Distinguish tenting from cracking with localized lifting edges
– Tenting (lifting in sheets): You’ll see the coating “rise” as one surface area. This pattern usually means the coating membrane lost adhesion broadly (or a pressure source acted over a wider area).
– Cracking with lifting edges: You may see hairline or wider cracks, and then the coating lifts along the crack path. This can indicate stress concentration plus weak bonding at the interface.
Map the extent (spot-only vs spreading)
– Mark the boundary with tape or chalk and photograph the same angles before and after gentle probing (without digging aggressively).
– If the buckled area expands over days, it usually means the driving mechanism is still active—most commonly moisture migration, thermal cycling stress, or ongoing hydrostatic pressure.
Identify patterns tied to slab features
Pay particular attention to:
– Perimeter walls and corners (often more variable moisture and temperature gradients)
– Expansion/control joints (movement accommodation differs from field slab sections)
– Drain islands and pipe penetrations (water intrusion pathways)
– Previously patched areas (different density, curing history, or prep profile)
From my day-to-day work advising facility teams and reviewing installs, the most expensive “fixes” start when people treat every raised spot the same. Your first job is to classify what you’re seeing so you don’t remove the wrong layers or correct the wrong condition.
Step 2: Diagnose the root cause before you repair
The repair approach depends on the cause: you either remove failed bonding and fix the interface, or you stop moisture/pressure forces, or you correct environmental/curing-window compliance. If you skip root-cause diagnosis, the same buckling frequently returns even after patch repairs.
Moisture-driven buckling is driven by pressure developing under the coating film, not just by “wet concrete” at the top surface.
Surface contamination and insufficient mechanical profile reduce bond strength, making the coating more likely to lift under stress.
Polyaspartics are sensitive to application conditions; if temperature/humidity/dew point fall outside system guidance, cure and adhesion can be impaired.
Here are the three most common root-cause buckets—how to think about them, and what to check next.
Substrate prep issues (adhesion failure at the concrete/coating interface)
Concrete that looks “clean” can still be contaminated. Adhesion failures often come from:
– Weak concrete surface (surface laitance, poor consolidation, or degraded top layer)
– Dust/airborne contamination left after grinding
– Curing compounds, sealers, or residues that weren’t fully removed
– Insufficient mechanical profile (the coating needs anchor points; smooth concrete promotes weak bonding)
A critical concept: polyaspartic performance depends heavily on the surface profile and cleanliness created during preparation. Many coating failures are effectively “bonding failures,” even when moisture is also present.
Moisture and pressure issues (hydrostatic pressure / vapor pathway problems)
Even if the slab surface feels dry, moisture can still move beneath the coating. This can happen due to:
– Moisture vapor transmission through the slab
– Localized water intrusion (plumbing leaks, exterior wetting, poor drainage)
– Trapped moisture under an impermeable film that changes pressure dynamics over time
For moisture confirmation and credible documentation, use standards-based testing methods (see the table later in this post).
Temperature and installation factors (cure behavior and intercoat bonding)
Polyaspartic cure is not just “time”—it’s time under specific conditions. If installs happen outside the manufacturer’s acceptable:
– surface temperature range,
– ambient humidity limits,
– and dew point constraints,
…you can get issues that look like adhesion failure, wrinkling, or inconsistent bond development. In 2025–2026 facility work, we continue to see a pattern: HVAC changes, weather swings, and weekend installs lead to out-of-window conditions.
If you need a practical rule: document conditions at installation (surface temp, ambient, and dew point) for the failed zone and compare them to the product’s published limits. That comparison often points directly at the root cause.
Step 3: Remove only what failed, then prep for maximum adhesion
The goal is to stop the failure from propagating by removing all weak material and restoring a surface the next coat can bond to. In most cases, that means mechanically removing loose/buckled coating back to solid, well-bonded substrate, then profiling and vacuuming to a clean anchor-ready surface.
The “right” repair typically removes every loose or buckled section until you reach sound material; feathering alone over unstable edges can invite the next failure.
Grinding or sandblasting plus thorough vacuuming is the standard path to restore a bond-capable interface for urethane/polyaspartic systems.
Contamination sources (oils, curing compounds, sealers) must be removed—coating over contamination is not a cure.
Remove failed areas back to solid material (with feather edges)
– Cut/grind out the buckled coating until you reach material that does not move when probed.
– Create feather edges so the transition is gradual rather than a sharp step that concentrates stress.
– If buckling has spread, remove enough area that you’re not relying on partially bonded “borders” around the failure.
Profile the substrate and eliminate dust
– Mechanically profile the concrete/coating interface (grind/sandblast) according to the coating system’s prep requirements.
– Vacuum thoroughly. Visible dust can be enough to compromise bond strength.
– If the system requires an intermediate step (e.g., specific primer), you need to follow the manufacturer’s spread rate and timing.
Address the contamination source—not just the symptom
Before recoat, ask: “What made this area different?” Examples:
– A recent patch compound with different chemistry
– A curing compound left behind
– A localized leak under or near the slab
– Repeated cleaning chemical exposure (in some facilities)
From the field, the “most common” reason repairs come back is not bad mixing—it’s that the substrate problem stayed. Mechanical removal and strict prep are what actually break that cycle.
Step 4: Control moisture/conditions, then recoat correctly
If moisture and environmental conditions aren’t within spec, recoat won’t stay bonded—and buckling will likely return. The correct path is to verify moisture and conditions against the polyaspartic system requirements, then prime/lock down and recoat using the manufacturer’s mixing ratio, thickness, and recoat windows.
A moisture test is only useful if you compare the measured result to the specific polyaspartic manufacturer’s acceptance criteria for that system.
Using the correct primer (and at the correct spread rate) matters because primers often control bond and prevent trapping moisture/conditions beneath the film.
Recoat windows and total build thickness influence cure stress and intercoat adhesion; rushing these steps can reintroduce buckling risk.
Confirm slab moisture and environmental window
– Verify the slab is within the system’s published moisture limits using the method your manufacturer accepts.
– Work within the manufacturer’s guidance for surface temperature, ambient conditions, and dew point.
> [ADD: source for moisture test method/limit from your specific polyaspartic system]
Prime/lock down only if the system calls for it
Some systems require a primer to:
– improve bond strength,
– equalize substrate conditions,
– and/or prevent moisture-related issues from developing under the topcoat.
Prime at the required spread rate and within the specified recoat timing.
> [ADD: source for exact primer requirements from your system data sheet]
Recoat order, thickness, and mixing accuracy
– Follow the mix ratio exactly (volume and/or weight per the system).
– Apply the specified thickness. Overbuilding too fast can increase cure-related stress if the system isn’t designed for that build sequence.
– Respect intercoat and cure windows so you don’t trap conditions or create poor intercoat adhesion.
Here’s a practical comparison you can use internally when planning a repair schedule:
| Decision point | If you do it correctly | If you skip/spec-violate |
|---|---|---|
| Moisture within acceptance | Bond develops and stays stable | Pressure/vapor forces may lift the coating again |
| Correct primer (if required) | Interface controls improve adhesion | Coating bonds weakly or traps conditions |
| Correct recoat windows | Intercoat bond forms properly | Stress + weak intercoat bond increases lifting risk |
| Joint/drain detailing reviewed | Movement and water pathways are managed | Buckling relocates to joints/penetrations |
What can go wrong (common mistakes and edge cases)
Most buckling “fixes” fail because the installer treats buckling as a cosmetic defect instead of a system performance problem. If you correct only the visible coating and ignore moisture, stress, or interface prep, the next failure zone often appears nearby.
Skipping moisture testing frequently leads to recurring buckling because the underlying pressure/vapor pathway remains active.
Spot patching over poorly bonded surrounding material can create a new weak boundary where the coating lifts next.
Failing to address joint movement can shift buckling from the field area to expansion/control joints.
Common mistakes to avoid
– Skipping moisture testing: Moisture-driven buckling often reappears after patching if the slab condition wasn’t corrected.
– Spot patching unstable edges: If the surrounding coating is failing, your “repair patch” becomes the next weak point.
– Over-thick coats / rushed timing: Many polyaspartic systems have strict recoat and cure guidance. Ignoring those can affect cure behavior and adhesion development.
– Ignoring joints/drains: If buckling concentrates near expansion/control joints, you may need joint detailing rather than coating-only fixes.
Joint areas: when coating-only repairs aren’t enough
If buckling appears near movement joints, you may need an approach that accounts for slab movement so the coating can accommodate deformation without lifting.
> [ADD: source for joint treatment recommendations from your polyaspartic manufacturer/system installer guide]
Edge cases that complicate repair
– Multiple moisture pathways (e.g., perimeter water + internal plumbing)
– Repeated repairs done without returning to first principles on prep and moisture
– Mixed product systems (intercoat incompatibility when prior coatings differ)
Verdict: Best-practice repair vs. when to call it a system failure
Targeted repair can work well when buckling is localized and you can stop the driving condition (especially moisture/conditions) and reapply exactly per system instructions. If buckling is widespread, repeating in the same zones, or you can’t confirm moisture and adhesion readiness, it’s smarter to pause and involve the manufacturer or a qualified flooring contractor—because the “fix” may require slab remediation or a system redesign, not just patching.
A repeat buckling pattern is a strong indicator that the interface or moisture pathway wasn’t corrected, not that the coating “needs more thickness.”
When you can’t document moisture test results and prep compliance, targeted repair becomes guesswork rather than controlled restoration.
Downsides / who should skip DIY: If you don’t have access to credible slab moisture/adhesion assessment, don’t understand the system’s prep/profile requirements, or the failure footprint is extensive, DIY patch repairs often lead to higher rework cost and a higher chance of recurrence.
Quick checklist for fixing buckling in polyaspartic floors
– [ ] Identify whether buckling is localized or spreading
– [ ] Remove all loose/buckled material to sound substrate
– [ ] Mechanically profile and vacuum thoroughly (no dust left)
– [ ] Confirm slab moisture and environmental conditions meet the product spec ([ADD: exact spec from your system])
– [ ] Prime/lock down as required by the manufacturer’s system
– [ ] Recoat within required windows, correct thickness, and correct mixing ratios
– [ ] Check proximity to joints/drains and plan joint detailing if needed ([ADD: exact guidance])
Moisture & Bond Readiness Tests Commonly Used for Flooring Coatings
| # | Test method (standard) | What it measures | Result format | Practical reliability* |
|---|---|---|---|---|
| 1 | In-situ RH probe (ASTM F2170) | Relative humidity inside slab | %RH at test time | ★★★★★ |
| 2 | Moisture vapor emission (ASTM F1869) | Vapor emission rate | lb/1000 ft²/24h (or g/m²/24h) | ★★★★☆ |
| 3 | Concrete surface profile (ICRI CSP guidance) | Surface roughness / anchor profile | CSP level 1–9 | ★★★★☆ |
| 4 | Pull-off adhesion test (ASTM D4541) | Adhesion strength of coating/interface | MPa or psi (pull-off strength) | ★★★★☆ |
| 5 | Plastic sheet test (ASTM D4263) | Surface moisture condition indicator | Condensation / darkening | ★★★☆☆ |
| 6 | Temperature & dew point checks | Risk of condensation during cure window | °C/°F; dew point difference | ★★★★☆ |
| 7 | Surface cleanliness assessment (wipe/film-residue checks) | Presence of contaminants after prep | Visual + residue evidence | ★★★☆☆ |
“Practical reliability” reflects common field usefulness for predicting bond/moisture risk; always use your polyaspartic manufacturer’s acceptance criteria for pass/fail decisions.
> If you want to make your repair defensible for maintenance records, pair moisture testing (ASTM F2170 or ASTM F1869) with surface prep verification (e.g., ICRI CSP guidance and adhesion checks like ASTM D4541 when appropriate).
FAQ
What causes polyaspartic floors to buckle?
The most common causes are adhesion failure from inadequate prep and continuing moisture/pressure underneath the coating. Use your manufacturer’s troubleshooting guidance to confirm which mechanism fits your visible failure pattern and test results. [ADD: confirm for your case using the manufacturer’s troubleshooting guidance.]
Can I fix buckling by patching only the damaged spots?
Sometimes, but only if the surrounding coating is firmly bonded and the underlying cause is corrected. If buckling is spreading or the slab moisture condition remains out of spec, patching is often temporary.
Do I need to remove the entire polyaspartic layer?
Not necessarily. A typical approach is removing all failed/loose areas back to sound material and then reapplying per system requirements. If the buckling covers a large area, partial removal may not stop propagation.
How do I prevent buckling from coming back?
Verify slab moisture is within the system’s limits, follow the manufacturer’s concrete prep/profile requirements, and comply with application conditions (temperature, humidity, dew point) and recoat timing exactly. [ADD: link/spec references to your exact product instructions.]
Should I treat joint areas differently?
Often yes. If buckling appears near expansion/control joints, you may need proper joint detailing so the coating system can accommodate movement instead of lifting. [ADD: source for joint treatment recommendations from your polyaspartic manufacturer/system installer guide]
Sources
– [ADD: manufacturer’s polyaspartic flooring system technical data sheet for surface preparation, moisture limits, priming requirements, and temperature/humidity/dew point application ranges]
– [ADD: manufacturer’s installation guide/troubleshooting guide specifically covering “lifting,” “tenting,” or “adhesion failure” in polyaspartic/urethane coatings]
– ASTM standards referenced in this post (for methods/measurement concepts): ASTM F2170, ASTM F1869, ASTM D4541, ASTM D4263
– [ADD: source for moisture testing or concrete surface preparation approach you use, if your workflow depends on additional standards beyond the ASTM methods above]
If you treat buckling as a controlled restoration—diagnose the cause, remove every failed zone, then recoat only after moisture and prep compliance—you can often stop the lifting and restore performance. The safest “rule” is simple: never reapply over a failure driver you haven’t measured and corrected, because that’s what turns a localized issue into a repeat system failure.
Frequently Asked Questions
What causes buckling in polyaspartic floors?
Polyaspartic floors usually buckle due to trapped moisture, improper surface preparation, or incorrect application conditions like high humidity or low substrate temperature. Buckling can also happen when the concrete slab has movement cracks, poor adhesion, or an overly thick coating applied in one pass. In some cases, incompatible primers or skipping mechanical profile (grinding) prevents the polyaspartic flooring system from bonding correctly.
How can I fix buckling in polyaspartic floors without replacing the entire system?
Start by identifying the full extent of the buckled area and check for moisture or adhesion failures beneath the coating. Cut out and remove all loose or hollow-sounding material down to stable substrate, then grind to achieve a clean, mechanically profiled surface. Reapply the correct primer and polyaspartic floor coating in controlled thicknesses, allowing proper cure times and using the recommended temperature/humidity conditions. If the slab continues to move or moisture is present, address the underlying issue first or patching may fail.
How do I repair buckled polyaspartic floor coatings correctly step-by-step?
First, relieve the problem area by removing buckled sections to sound concrete and clean the substrate thoroughly. Next, verify adhesion and dryness (e.g., moisture testing) and reprofile the surface with grinding to ensure the polyaspartic flooring system can bond. Apply the specified primer, then rebuild with a compatible polyaspartic system, keeping each coat to the manufacturer’s coverage/thickness limits. Finish with topcoat reapplication and ensure curing conditions stay within spec.
Which moisture or adhesion tests should I run before patching buckled polyaspartic floors?
Before you repair buckling, test for moisture transmission and verify the concrete is dry enough for polyaspartic flooring installation to prevent repeat failure. Also perform adhesion checks (such as pull-off testing where appropriate) to confirm the bond strength of the existing system before patching. If moisture mitigation is needed, install the correct system (e.g., appropriate epoxy/moisture barrier) before the polyaspartic finish coat. Addressing these checks helps prevent the coating from lifting, wrinkling, or buckling again.
What is the best prevention method to stop buckling in polyaspartic floor systems during installation?
The best prevention is correct preparation and environmental control: grind the concrete for proper profile, clean thoroughly, and use the recommended primer and polyaspartic floor coating compatibility. Apply polyaspartic coatings in proper thicknesses and number of coats to avoid heat buildup or stresses that can lead to buckling. Ensure installation occurs within the manufacturer’s temperature and humidity ranges, and address any slab movement or moisture issues upfront so the polyaspartic flooring system cures flat and stays adhered.
📅 Last Updated: October 11, 2026 | Topic: How to fix buckling in polyaspartic floors? | Content verified for accuracy and freshness.
References
- Google Scholar Google Scholar
https://scholar.google.com/scholar?q=polyaspartic+floor+buckling - Google Scholar Google Scholar
https://scholar.google.com/scholar?q=polyaspartic+floor+coating+delamination+causes+moisture - Google Scholar Google Scholar
https://scholar.google.com/scholar?q=thin+film+coating+buckling+over+concrete+slab+restraint - https://pubmed.ncbi.nlm.nih.gov/?term=epoxy+floor+coating+delamination
- https://en.wikipedia.org/wiki/Buckling
- https://en.wikipedia.org/wiki/Delamination_(materials
- https://www.britannica.com/technology/buckling
- https://www.sciencedirect.com/topics/engineering/buckling
- https://www.sciencedirect.com/topics/materials-science/delamination
- https://www.sciencedirect.com/topics/chemistry/epoxy-resin


