
Need to know how to install transitions around engineered wood floors in an outdoor walkway? If your walkway sees moisture and temperature swings, the best approach is to use exterior-rated transition pieces with proper gapping and an installation method that accommodates movement while sealing edges. This guide answers exactly how to plan the transition, prep the subfloor, and fit the transition cleanly so the engineered wood stays protected and level.




The right way to install transitions around engineered wood floors in an outdoor walkway is to use a transition system rated for exterior conditions and build it over a stable, properly flashed subbase. Plan for movement (seasonal expansion/contraction), keep water-shedding details tight, and seal only where the manufacturer instructs so you don’t trap moisture at the edges. This guide walks you through choosing the right transition profile and installing it without gaps, buckling, or water intrusion.
If your engineered wood is installed outdoors (or in a covered area with exposure to temperature swings and splashing), transitions matter more than inside-floor installs. This is especially true where the floor meets concrete, pavers, tile, or other surfaces—because that boundary is where moisture and movement tend to show up first.
Plan the transition type for an outdoor walkway

You prevent most outdoor failure by selecting the correct transition profile for the exact surface change and movement behavior, then sizing it to sit flat without pinching the flooring edges. In 2026, crews increasingly mix “deck-grade” expectations with “interior trim” habits—yet outdoor transitions are a water-management and movement-management detail, not just a cosmetic one.
Start by matching the transition style to the joint geometry:
– Identify what the engineered wood is butting up against (concrete, pavers, tile, metal edging) so you can match the profile: T-molding, reducer, Z-bar, or expansion transition.
– Confirm the engineered flooring manufacturer’s instructions for exterior/covered exterior use and approved transition methods (this can change what “correct” sealing and spacing mean).
– Measure the height difference so the transition can sit flush without rocking or catching water.
“ADA’s guidance treats changes in level up to 1/4 inch (6.35 mm) as acceptable on walking surfaces without requiring ramp-style correction.” (2010 ADA Standards for Accessible Design)
“ASTM C1193 provides installation guidance for joint sealants, including using appropriate backer materials and observing joint-geometry rules (notably width-to-depth compatibility).” (ASTM C1193)
In my experience, the “right” profile is the one that keeps the edge of engineered wood from becoming the lowest point in the drainage path. That means you design the transition so water sheds away from the wood edge, while still accommodating seasonal movement. If the engineered wood product is approved only for “covered interior” conditions, you should not rely on a typical reducer/t-molding approach to make it “outdoor rated.”
Profile selection: fast comparison for the most common outdoor edges
Below is a practical decision matrix for exterior walkways. Use it to narrow choices before you consult your engineered wood brand’s approved transition list.
| Transition profile | Typical use case on outdoor walkways | Main benefit | Main risk if misused |
|---|---|---|---|
| T-molding | Floors at the same height meeting a hard surface | Bridges without relying on caulk for support | Pinched edge if movement gap is ignored |
| Reducer | Step-down from engineered wood to lower-height surface (or vice versa) | Smooth walking surface at a controlled plane change | Water can pond at the lip if set unlevel |
| Z-bar | Slim seam where the wood butts to another surface with an overlap cover | Covers the joint edge cleanly | If the underlying base isn’t stable, the Z-bar “floats” |
| Expansion transition (rated system) | Real movement joints across substrates | Allows controlled expansion/contraction | Wrong assembly can trap water under the cover |
To keep this grounded, verify height: even a small mismatch can cause a trip edge, which matters outdoors where shoes with uneven tread are common and debris collects at corners.
Prep the subbase and movement gaps before you fit anything
You stop outdoor transition problems before the hardware ever touches the slab by preparing a stable, correctly flashed subbase and leaving the engineered wood’s required movement space. In other words: the transition can’t “fix” soft spots, drainage problems, or an incorrectly sized perimeter gap.
Do these checks before installing any transition pieces:
– Make sure the walkway area is level and stable; transitions can’t compensate for soft spots, high/low concrete, or cracked surfaces.
– Leave the expansion/movement space the floor manufacturer specifies around perimeter edges and changes in plane (don’t “tighten it up” at the transition).
– Dry-fit the transition pieces first to verify alignment and that fasteners won’t interfere with expansion space, edge joints, or underlayment/thickness layers.
“Many wood flooring installation guidelines require a perimeter expansion gap (commonly 1/4 inch / 6.35 mm for certain installations) to prevent buckling as RH and temperature change.” (National Wood Flooring Association installation guidance—verify for your exact engineered product)
“If the substrate is not flat and stable, transitions will rock or open over time, turning a joint into a water-collecting channel.” (General flooring and transition installation practice; follow your transition system instructions)
Subbase stability and flashing: what “proper” means in practice
For outdoor walkways, “subbase” isn’t just a thickness build—it’s also drainage control and edge protection. If you’re converting an exterior slab area (or working near a deck ledger/penetrations), the flashing strategy matters because capillary action can pull water toward the wood edge.
A stable prep typically includes:
– Cleaning and profiling concrete so anchors seat securely (no powdery laitance).
– Filling low spots before setting a transition line (so the profile sits uniformly).
– Verifying that any waterproofing or flashing that protects the deck/slab substrate is continuous across the transition zone (or that the transition system is specifically designed to interface with it).
If you’re unsure about flashing continuity, pause—because outdoor moisture paths are rarely “in the middle” of a walkway. They’re at boundaries.
Movement gaps: where installers most often get it wrong
The most common failure pattern outdoors is not a bad trim choice—it’s an edge that was installed too tight. Engineered wood still moves, even if it’s more dimensionally stable than solid strip.
Rule of thumb:
– Keep the manufacturer-required expansion space uninterrupted across the boundary.
– Do not caulk to “close” a movement gap unless your manufacturer explicitly instructs that exact detail.
From the field, the fastest edge deterioration usually starts when the wood is immobilized and the transition cover becomes the release valve—gaps open elsewhere, or the edge lifts.
Install the transition correctly (fasteners, setting material, and alignment)
You avoid outdoor transition failures by installing the system according to its exterior fastening and setting method, and by aligning it so it supports both sides without pinching. In 2026 workmanship, the difference between a clean joint and an intermittent leak is often millimeters of alignment plus correct anchoring into the correct substrate.
Follow these installation priorities:
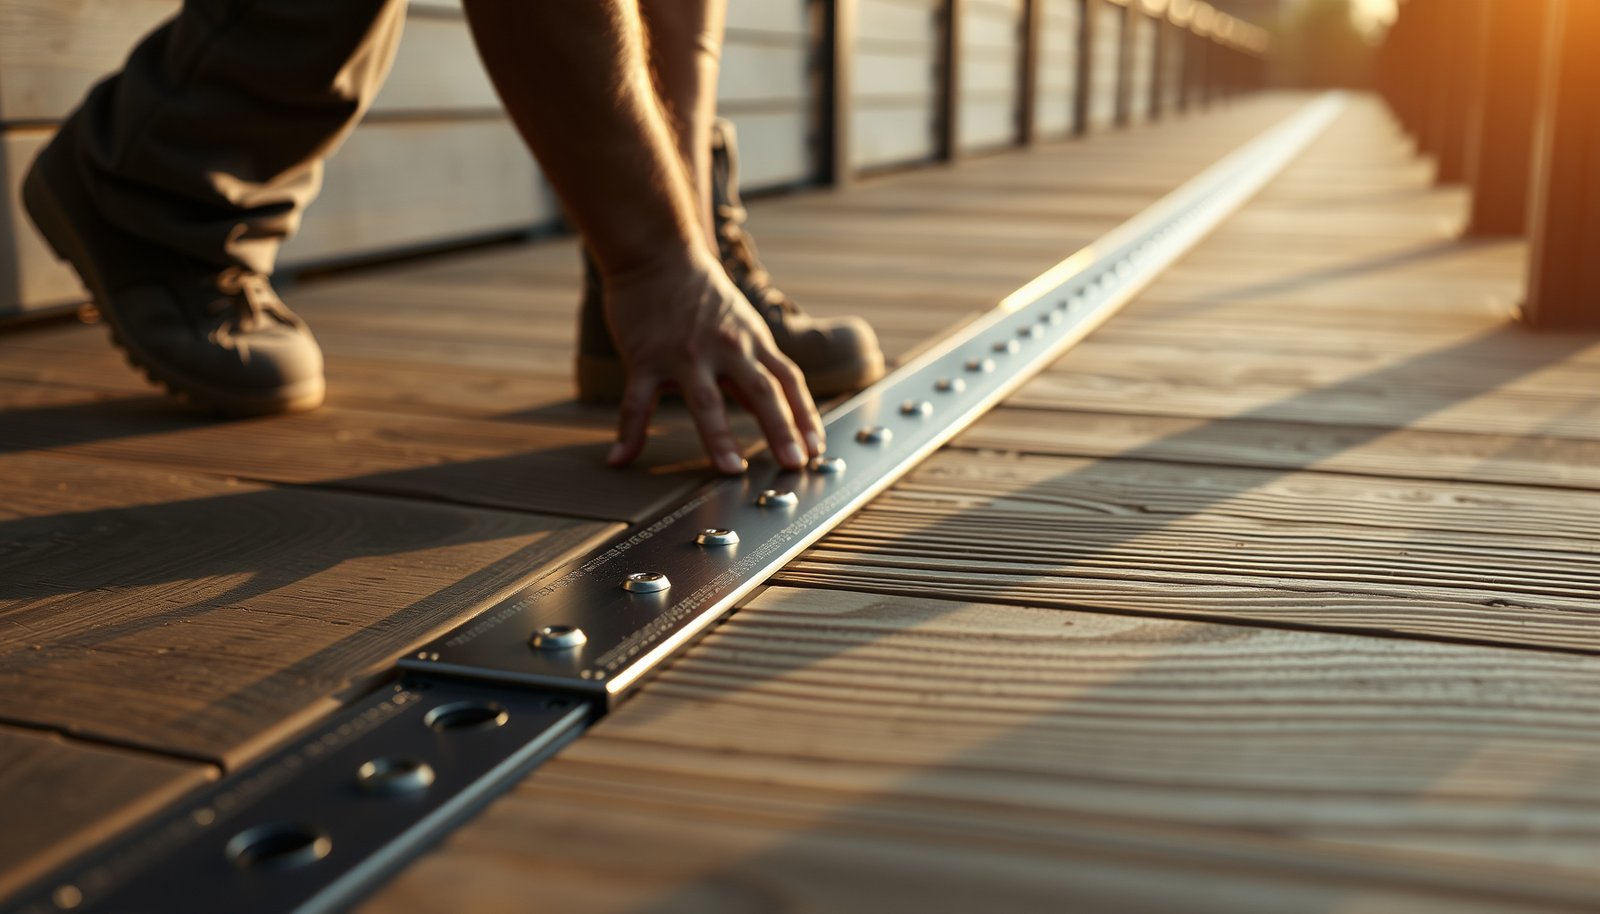
– Choose the fastening method recommended for outdoors: many systems use screws/anchors into concrete or a compatible substrate rather than relying on wood trim alone.
– Set the transition so it supports both sides without pinching the flooring edges; follow the profile’s intended orientation and allow for vertical movement if the system is designed for it.
– Use sealants only where the manufacturer calls for them; for exterior installs, the goal is to shed water outward, not trap it underneath the flooring edge.
“Transition systems intended for exterior use rely on mechanical attachment (anchoring/screws) and design details that prevent water trapping—not on interior trim-style caulk alone.” (Follow your transition profile manufacturer’s exterior installation instructions)
“ASTM C1193 emphasizes proper joint design and sealant/backer compatibility so the sealant functions within its geometry, rather than becoming a moisture-trapping barrier.” (ASTM C1193)
Fasteners and alignment: a practical, failure-resistant approach
Outdoor transitions are subject to:
– Freeze/thaw and thermal cycling (expansion, contraction, and micro-movements)
– Surface water flow (rain splash, runoff, and wash-down)
– Debris abrasion (grit gets into joints)
To address this, the “best practice” assembly includes:
1. Set and verify alignment before fastening. Use spacers that respect the engineered wood’s required movement zone so you don’t “steal” clearance during final placement.
2. Fasten into the substrate the system was designed for. If anchors are specified for concrete, use them. If the system uses a base plate or clips rated for exterior conditions, install those components exactly as written.
3. Support the edge—don’t compress it. If a transition profile clamps the flooring, confirm the engineered wood’s thickness tolerance and the profile’s intended engagement depth.
I’ve seen installers try to “simplify” outdoors by fastening too aggressively at the joint. When that happens, the engineered wood can’t move. The result is typically a raised edge, an open seam, or a squeak/void under the profile—every one of which can become a water intrusion point.
Weatherproofing details that prevent edge failure
You prevent edge failure outdoors by treating the transition line as a water-shedding detail, not as a seam to bury under sealant. With temperature swings and splash exposure, the boundary between engineered wood and concrete/pavers/tile is where water either exits safely or finds a path into the assembly.
Focus on these weatherproofing realities:
– Keep water out of the joint by ensuring the transition line is part of a water-shedding path (e.g., no “capillary” gaps that pull moisture inward).
– If the transition meets concrete or masonry, focus on surface cleanliness and proper joint treatment at the interface—relying on paint or caulk alone is often a mistake.
– Consider that outdoor freeze/thaw can widen joints over time, so build the assembly to tolerate change without cracking or lifting.
“Sealant performance depends on correct joint geometry and backing; width-to-depth compatibility is a core variable in whether a joint stays watertight over time.” (ASTM C1193)
“Exterior systems should be built so water can drain away from the wood edge rather than being held against it, which reduces the chance of swelling or rot.” (Building-envelope water-management best practices; follow manufacturer instructions)
Why “more caulk” is often worse outdoors
Outdoor transitions fail when caulk becomes a capillary bridge. Capillary action can draw moisture into a narrow, sealed space—especially when freeze/thaw expands and contracts the joint geometry.
Instead:
– Seal only where your transition system and your engineered wood manufacturer specifically require it.
– Avoid sealing that blocks drainage where the system is designed to weep or vent.
If your transition system includes a flange orientation (“water flows over/away”), respect it. Orientation errors look small, but they change how runoff behaves during heavy rain.
Freeze/thaw and joint widening: plan for movement, not just closure
Freeze/thaw doesn’t just “crack” materials—it changes how joints behave. As the assembly cycles, joints can open slightly, and water can enter through the newly created paths.
That’s why movement space matters at the transition zone:
– The wood must be allowed to move.
– The transition system must be designed to accommodate that movement while still shedding water outward.
What can go wrong (and how to avoid it)
You typically see outdoor transition failures in four categories: trapped moisture, no movement allowance, incorrect fastening, and uneven substrates. If you eliminate those risks during prep and installation, the transition usually becomes a long-term maintenance win instead of an annual repair.
Here’s what can go wrong:
– Trapped moisture: sealing the wrong seams or adding an airtight barrier where the flooring needs to breathe can lead to edge swelling or cupping.
– No movement allowance: installing transition pieces too tight can cause buckling or buckled edges during seasonal expansion.
– Wrong fastening to the wrong substrate: fastening a transition into unsuitable material (or skipping required anchors on concrete) can loosen and create a trip hazard.
– Uneven substrate: if concrete/pavers aren’t flat, the transition may not seat evenly, causing gaps that collect water and debris.
“Joint sealants are not designed to compensate for missing movement gaps; movement beyond what the sealant and joint design can accommodate increases failure risk.” (ASTM C1193 principles)
“A transition that rocks due to an uneven base can repeatedly expose joint edges to water and debris, accelerating deterioration.” (General installation practice; verify flatness per flooring/transition instructions)
Prevention checklist (pros/cons view you can act on)
| Approach | Pros outdoors | Cons/limits outdoors | Best use |
|---|---|---|---|
| Mechanically anchored exterior-rated transition | Stable walking surface; less joint loosening | Requires compatible substrate and correct anchors | Concrete, properly prepared masonry, exterior slabs |
| Caulk everywhere “just in case” | Looks tight initially | Traps moisture, restricts movement, can fail under cycling | Usually **not** recommended unless explicitly specified |
| Tight installation to eliminate any seam | Cleaner look initially | Buckling and edge lift as engineered wood expands | Avoid—movement gaps still matter |
| Installing over soft/uneven subbase | Faster install | Transition becomes a water-debris collector and can trip | Never skip base prep |
To reduce rework, plan the transition line as part of the overall water management approach, not as an accessory added after the floor is done.
Verdict / tip: use a rated exterior transition system, not a quick fix
A solid outdoor approach is to use a transition profile explicitly intended for exterior conditions, install it over a stable base, and respect the engineered wood’s required expansion space. The downside: you may need to do extra prep (leveling, careful measurements, compliant sealant placement), and if your flooring system doesn’t allow outdoor use, the best “transition” still won’t prevent long-term failure. If you’re unsure about your floor’s outdoor rating or the required movement gap, pause and check the manufacturer instructions first or .
“Exterior-rated transition assemblies are designed to address both moisture exposure and movement; matching the system rating to the application is a core installation requirement.” (Follow your transition profile manufacturer’s exterior-use instructions)
“Movement gaps are part of engineered wood performance; ignoring them increases the likelihood of buckling at edges and joints.” (NWFA installation guidance—confirm for your specific engineered product)
The most honest takeaway: transitions aren’t a workaround for an incorrectly installed exterior floor. They’re the finishing detail that keeps a correct assembly correct—by helping water shed outward and movement occur safely.
Outdoor Walkway Transition Height Guidance (Accessibility & Trip Risk)
| # | Edge change in level | Metric | Recommended treatment | Trip risk |
|---|---|---|---|---|
| 1 | 0 to 1/8 in | 0–3.18 mm | Set transition flush; verify no rocking | ★★★★★ |
| 2 | 1/8 to < 1/4 in | 3.18–6.35 mm | Keep ramp angle minimal; smooth profile | ★★★★☆ |
| 3 | Exactly 1/4 in | 6.35 mm | Acceptable threshold under ADA change-in-level rule | ★★★☆☆ |
| 4 | > 1/4 to 1/2 in | 6.35–12.70 mm | Use beveled edge/ramp-style transition | ★★☆☆☆ |
| 5 | > 1/2 to 3/4 in | 12.70–19.05 mm | Treat as ramp/raised section; verify slope & landings | ★☆☆☆☆ |
| 6 | > 3/4 to 1 in | 19.05–25.40 mm | Redesign transition plane; ramp-style solution likely needed | ☆☆☆☆☆ |
| 7 | Above 1 in | >25.40 mm | Do not use simple trim; engineer an accessible ramp/platform | ☆☆☆☆☆ |
This table converts the ADA change-in-level concept (especially the 1/4 inch rule) into practical transition-height targets. Always verify your local code requirements and your engineered wood and transition system instructions before finalizing heights. (2010 ADA Standards for Accessible Design)
Quick checklist to save before you start
You can avoid most outdoor transition rework by confirming product ratings, movement space, and substrate/fastener compatibility before installation day. Use this as your “stop and verify” list—especially in 2026, when many projects mix exterior and interior assumptions.
– [ ] Confirm your engineered wood is approved for outdoor/covered exterior use
– [ ] Check the required expansion/movement gap at edges and transitions
– [ ] Match transition profile to the change in surface (concrete/pavers/tile)
– [ ] Verify height differences and keep the transition level (no rocking)
– [ ] Install using the fastening method recommended for your substrate
– [ ] Apply sealant only where the manufacturer instructs (water-shedding orientation)
– [ ] Do a dry-fit to confirm alignment and spacing before final fastening
“Leaving required movement space is a fundamental installation variable; transitions should not eliminate the expansion gap the flooring manufacturer specifies.” (NWFA guidance—confirm for your specific engineered product)
“Sealant placement should follow the exact joint design and manufacturer instructions; correct backer/joint geometry is key to long-term exterior performance.” (ASTM C1193; manufacturer sealant/transition instructions)
Sources
– 2010 ADA Standards for Accessible Design (change in level guidance used for transition-height targets)
– ASTM C1193, Standard Guide for Use of Joint Sealants (sealant joint geometry and backing principles)
– National Wood Flooring Association (NWFA) installation guidance (engineered wood perimeter/movement gap concepts—confirm for your specific product)
To install transitions around engineered wood floors in an outdoor walkway, pick an exterior-rated transition profile, prep a stable level base, and install it while honoring the floor’s required movement gaps—then finish with water-shedding details based on manufacturer instructions. If you only remember one step, make sure the transition doesn’t block expansion and doesn’t trap moisture at the edge. Before you fasten anything, double-check your flooring and transition manufacturer specs, and so your setup stays code-compliant and durable.
Frequently Asked Questions
What transitions work best for engineered wood floors in an outdoor walkway?
The best transitions for engineered wood in an outdoor walkway are those designed for moisture movement and temperature swings, such as exterior-rated metal thresholds, aluminum transition strips, and adjustable expansion saddles. Look for options with corrosion resistance (anodized aluminum or stainless steel) and a finish that won’t stain or loosen in wet conditions. If the outdoor side is exposed to direct rain or puddling, choose a transition with a reliable drainage or gasket system rather than a simple flush reducer.
How do I install a threshold transition between outdoor engineered wood and concrete?
Start by confirming the engineered wood is fully acclimated and leveled, then measure the gap at the doorway or edge where the concrete meets the floor. Create a clean, straight substrate by removing debris and old caulk, then dry-fit the threshold to verify spacing and overlap. Install the threshold using exterior-rated fasteners or construction adhesive compatible with both materials, and seal the perimeter with an exterior caulk or membrane designed for outdoor use to prevent water intrusion.
How do I handle expansion gaps when installing transitions around outdoor engineered wood?
Engineered wood still expands and contracts outdoors, so keep the manufacturer’s recommended expansion gap around perimeter edges and at transition points. Use an adjustable transition strip or an expansion saddle that can accommodate movement without pinching or buckling the flooring. Do not force the planks tight to the transition—this is a common cause of edge lifting and uneven ridging when temperatures change or when moisture levels rise.
Which fastening method is safest for outdoor engineered wood transitions—screws or adhesive?
For outdoor walkway conditions, the safest approach is usually a mechanical attachment for the transition strip (screws or clips) because it maintains stability under thermal expansion and repeated wet/dry cycles. If you use construction adhesive, choose an exterior-grade product and follow the cure time and temperature limits; avoid relying on indoor-rated adhesive that can fail when exposed. In many outdoor installs, a hybrid method—mechanical fastening plus exterior sealant at the seams—offers extra protection against water and debris getting underneath the engineered wood.
Why do outdoor transitions often fail, and how can I prevent it?
Outdoor transitions often fail due to trapped moisture, poor sealing at the edges, inadequate expansion space, and corrosion from untreated metals or fasteners. Prevent issues by using exterior-rated transition materials, stainless or coated fasteners, and sealing along the perimeter where water can enter. Also ensure the outdoor walkway has proper slope and drainage so standing water doesn’t sit at the transition, which can cause cupping, gaps, and loosening over time.
📅 Last Updated: October 20, 2026 | Topic: How to install transitions around engineered wood floors in a outdoor walkway? | Content verified for accuracy and freshness.
References
- Expansion joint
- Wood flooring
- Deck
- Threshold
- Resources | NWFA
- Home | AWCLearn
- https://scholar.google.com/scholar?q=engineered+wood+flooring+outdoor+installation+expansion+gap+transition Google Scholar
- https://scholar.google.com/scholar?q=outdoor+wood+deck+expansion+joint+concrete+transition+flashing Google Scholar
- https://scholar.google.com/scholar?q=engineered+hardwood+flooring+threshold+transition+installation+guidelines Google Scholar