


Cleaning engineered wood floors in an outdoor walkway is all about controlling moisture and grit—do it wrong and they can warp or dull fast. This guide shows the fastest, safest routine for removing dirt, handling wet spots, and protecting the finish without damaging the engineered core. You’ll learn exactly what to use, what to avoid, and how often to clean so your walkway stays looking sharp.


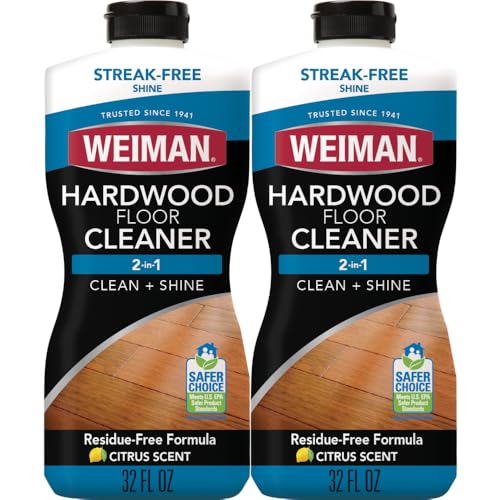

Cleaning engineered wood floors on an outdoor walkway comes down to one rule: remove grit fast, then clean with a barely-damp mop/cloth—no soaking. Use a cleaner that matches your floor’s manufacturer guidance (often a pH-neutral option), rinse if the label requires it, and dry thoroughly to prevent swelling or dulling.
If your engineered wood is not rated for exterior/continuous moisture, the safest “cleaning” is careful sweeping and quick spot cleaning only. This advice is for walkways that see rain/snow tracking in, but where the boards are still installed and maintained as directed by the product manufacturer.
Get the basics right before you clean

Before you apply any cleaner, you protect the surface from abrasion—then you control moisture. The outdoors adds sand, grit, and micro-debris, and those are what most often scratch the finish even when you use the “right” product.
– Check the flooring’s installation/maintenance instructions to confirm it’s approved for outdoor conditions (or at least for exposure similar to your walkway).
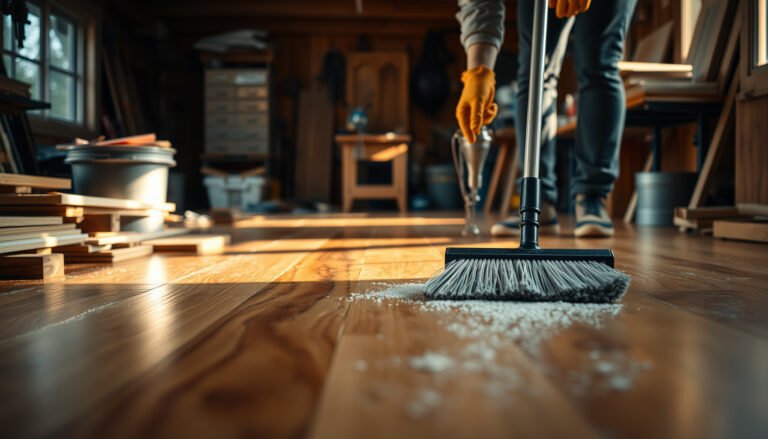
– Remove loose dirt and grit first (dry sweep or vacuum with a floor-friendly head) because sand is what most often scratches the surface.
– Clear nearby debris and leaves so they don’t sit wet on the boards between cleanings.
Why “grit removal first” matters
When particles are dry, they’re less likely to become embedded in the finish. If you start with moisture, sand behaves like sandpaper and can grind through the top wear layer. In my view, this is the single highest-impact step for keeping an engineered wood outdoor walkway looking consistent year-round.
ASTM guidance on moisture testing for wood commonly uses oven-drying to characterize moisture content—this underscores why excess water is treated as a material risk, not a “temporary” surface condition.
Outdoor sand and grit are abrasive by nature; cleaning protocols for wood floors universally start with removing loose debris before any damp wipe, to prevent scratching of the finish.
Moisture control starts with understanding the material
Engineered wood floors are still wood-based. That means swelling risk isn’t theoretical; it’s tied to how much moisture the wood and underlayers absorb during cleaning and afterward (especially near joints and edges).
According to ASTM D4442-16, oven-drying for wood moisture testing is performed at 103 ± 2°C (2016), illustrating how “true dry” conditions are measured—your goal during cleaning is the opposite of sustained wetting.
Standards that help prevent moisture-related failures under flooring (selected ASTM methods)
| # | ASTM standard | What it measures | Reported output | Relevance to outdoor moisture risk |
|---|---|---|---|---|
| 1 | ASTM D4442-16 | Wood moisture content via oven-dry | % moisture (dry-basis) | ★★★★★ |
| 2 | ASTM F1869-16 | Concrete moisture vapor emission rate | lb/1000 ft²/24 hr | ★★★★☆ |
| 3 | ASTM F2170-16 | In-situ relative humidity in concrete slabs | %RH (at depth) | ★★★★★ |
| 4 | ASTM F710-21 | Surface preparation for resilient floor coverings | Methods (grind/shot blast) + cleanliness criteria | ★★★☆☆ |
| 5 | ASTM F3191-18 | Site conditions affecting moisture-related flooring performance | Qualitative/quantitative site condition checks | ★★★☆☆ |
| 6 | ASTM D6009-17 | Moisture content relationships for wood | Measurement approaches for EMC/MC | ★★★★☆ |
| 7 | ASTM E1745-06 | Thermal and moisture protective assemblies (general) | Material performance classifications | ★★☆☆☆ |
Daily and weekly cleaning (what to do most often)
For outdoor walkways, routine maintenance is about limiting abrasion and preventing water from lingering. The best “daily” method is dry removal of grit—followed only by the lightest possible damp wipe if your floor’s care guide allows it.
– Sweep or vacuum regularly, especially after storms or windy days, to keep abrasive particles off the finish.
– For routine cleaning, use a microfiber mop or cloth that’s only lightly damp—wring it until it doesn’t drip.
– If you use water at all, stick to quick passes and avoid leaving puddles near joints or edges.
What “barely-damp” means in practice
Barely-damp means the mop head feels damp to the touch, but no liquid transfers when you lift it. If your cloth drips, it’s too wet; that extra water is what can creep into seams and underlayment over repeated cleanings.
If you’re cleaning wood-based flooring, the safest approach is typically “remove first, damp-clean second,” because moisture exposure is directly tied to wood moisture content and dimensional change.
According to ASTM D4442-16, wood moisture testing relies on oven-drying to a stable mass, which reflects why preventing prolonged moisture exposure is a core moisture-control strategy.
Weekly rhythm: how to keep it consistent
A practical weekly cycle for an outdoor walkway is: sweep after the weekend rain cycle, wipe only the areas that show residue, and finish by drying any damp edges with a dry microfiber. This reduces both visible dulling and hidden seam-wetting.
If you want a faster system, use two microfibers: one lightly damp for cleaning, one dry for immediate follow-up drying. That’s not a “chemical trick”—it’s moisture management.
Spot cleaning stains and wet spots
For stains and wet spots, the answer is simple: blot first, then use only the cleaner your manufacturer approves. Scrubbing while the finish is wet turns surface residue into a grind, and outdoor spills often include salt, oils, or organic grime.
– Blot spills immediately with a dry towel; don’t scrub hard while the finish is still wet.
– Use a manufacturer-approved wood floor cleaner on tougher spots (follow the label for dilution and contact time).
– If mildew/organic staining is possible from persistent moisture, avoid harsh chemicals unless your floor instructions explicitly permit them—use the cleaner your manufacturer recommends for that issue.
Handling salt, muddy tracking, and organic stains
Outdoor tracking often contains road salts and soil particulates. Salt can be abrasive when it dries, and oils/soils can leave a dark film that attracts more grit.
According to ASTM F1869-16, moisture-related testing for concrete flooring is measured as moisture vapor emission (reported as lb/1000 ft²/24 hr) (2016). While your walkway is outdoors, the principle is the same: controlling moisture transfer is central to flooring performance.
For spot cleaning, manufacturers generally expect you to blot and damp-wipe rather than soak, because excess surface moisture can migrate into seams even when the rest of the floor looks “dry.”
Outdoor wet spots are more likely to cause long-term discoloration when moisture persists at edges and joints, so immediate blotting and drying reduces both staining and finish haze risk.
A manufacturer-approved approach beats “stronger is better”
The temptation with tough stains is to increase chemical strength. Don’t. If the care guide forbids certain pH ranges, solvents, waxes, or abrasives, those restrictions exist because finishes and adhesives can degrade—or because residues can build up and dull the surface.
If you’re unsure what your floor allows, use the brand’s recommended cleaner list and follow dilution exactly.
Deep cleaning for outdoor grime (without soaking)
Deep cleaning works when it’s staged: controlled damp cleaning in small sections, followed by immediate drying. If you try to deep-clean the whole walkway at once, you risk keeping joints and edges wet longer than the manufacturer intends.
– Pre-clean with a dry sweep, then do a controlled damp clean (small sections at a time) so the boards don’t stay wet.
– If the cleaner label says to rinse, use minimal water and wipe/rinse in one step—then dry right away with a clean, dry microfiber.
– Let the walkway fully dry before walking on it or placing rugs/mats back down.
A section-by-section method that protects seams
Work from one end to the other in narrow sections (for example, one “board width” at a time, or one area you can dry immediately). Use one lightly damp microfiber for cleaning, then a second dry microfiber to pull moisture from the seam lines and edges.
When a cleaner’s label specifies rinsing, the safest technique for wood-based flooring is minimal water application and immediate drying to prevent moisture dwell near seams.
If you clean in sections, you reduce the time water remains in contact with edges—this directly addresses the common outdoor failure mode of moisture trapping along joints.
Rinse requirements and pH-neutral cleaners
Many engineered wood care guides recommend a pH-neutral cleaner because extreme pH can stress finishes. If your label says “rinse required,” follow it; if it says “no rinse,” avoid adding extra rinse water that can seep into seams.
From an analytical standpoint, pH-neutral doesn’t mean “water-free,” it means “chemically gentle.” Your moisture limit is still about technique: wring dry, clean quickly, dry immediately.
What can go wrong (and how to avoid it)
Outdoor engineered wood maintenance fails for predictable reasons: over-wetting, wrong chemicals, incomplete drying, or aggressive scrubbing. Avoiding these four issues will reduce swelling risk, finish dulling, and stubborn streaks.
– Over-wetting: engineered wood can swell or the finish can haze when moisture sits in seams—avoid mopping “until it looks clean.”
– Wrong products: acidic/alkaline cleaners, waxes, or steam can damage finishes or leave streaking (follow your specific product’s allowed list).
– Skipping drying: after rain or cleaning, moisture can linger around edges; dry promptly and check high-risk areas near thresholds and joints.
– Too much scrubbing: abrasive pads and stiff brushes can scratch the top layer and make outdoor cleaning harder over time.
Damp vs steam: the risk profile is different
If your outdoor walkway sees frequent wetting, steam can deliver heat and moisture far deeper and longer than a quick damp wipe. Unless the manufacturer explicitly approves steam cleaning for your specific model and finish, treat steam as “not permitted.”
Moisture-control standards for wood-related flooring performance emphasize preventing sustained moisture exposure, which supports avoiding steam when the manufacturer hasn’t authorized it.
Aggressive scrubbing can damage top wear layers; once micro-scratches form, outdoor grit creates a feedback loop of faster dulling and deeper staining.
Quick comparison: safe damp cleaning vs risky moisture methods
| Method | Pros | Cons |
|---|---|---|
| Barely-damp microfiber wipe (manufacturer-approved cleaner) | Removes residue without soaking; fastest path to drying | Only works if your cleaner and floor rating allow damp mopping |
| Full wet mopping / leaving puddles | May look “clean” temporarily | Raises swelling and finish haze risk along seams |
| Steam cleaning (not explicitly approved) | Can dissolve some grime on hard surfaces | Often too much moisture/heat for engineered wood finishes |
Verdict: the safest approach for most outdoor walkways
For most outdoor walkways, the safest method is “dry first, then minimal-moisture damp cleaning, then immediate drying.” This approach aligns with how engineered wood performs when moisture is controlled and abrasive grit is removed.
– If your floor is confirmed suitable for outdoor exposure and your manufacturer allows damp mopping, use gentle, minimal-moisture cleaning plus quick drying.
– If your product is not rated for outdoor/continuous moisture, consider limiting cleaning to dry sweeping and carefully controlled spot cleaning only—otherwise you may shorten the floor’s lifespan.
– after you confirm what your manufacturer permits.
Who should skip damp cleaning (and stick to dry care)
If your engineered wood care instructions explicitly prohibit mopping, or if your walkway is regularly exposed to standing water (pooling after rain, poor drainage, or frequent snow melt), you should avoid damp-cleaning altogether. In that scenario, the “cleaning” strategy becomes: sweep promptly, remove spots immediately, and manage drainage so the boards aren’t staying wet.
Quick checklist (scan/save)
– [ ] Dry sweep/vacuum first (remove grit)
– [ ] Microfiber cloth/mop barely damp (no drips)
– [ ] Use only manufacturer-approved cleaner (often pH-neutral)
– [ ] Clean small sections; don’t let water pool
– [ ] Rinse only if the cleaner label requires it
– [ ] Dry thoroughly right after cleaning
| Situation | Best move | Avoid |
|---|---|---|
| After rain/tracking dirt | Quick dry sweep + damp wipe if needed | Wet mopping or soaking |
| Sticky spot | Manufacturer-approved spot cleaner + blotting | Abrasive pads/harsh chemicals |
| Hazy finish | Gentle cleaner per instructions + dry promptly | Waxing or steam unless approved |
Sources
– ASTM D4442-16 — Standard Test Methods for Direct Moisture Content Measurement of Wood and Wood-Based Materials (oven-dry method parameters, 2016)
– ASTM F1869-16 — Standard Test Method for Measuring Moisture Vapor Emission Rate of Concrete Subfloor Using Anhydrous Calcium Chloride (2016)
– ASTM F2170-16 — Standard Practice for Determining Relative Humidity in Concrete Floors Using in situ Probes (2016)
When you clean engineered wood outdoors, treat moisture like a limited resource: remove grit quickly, use only the manufacturer-approved cleaner, keep the microfiber barely damp, and dry immediately. That disciplined routine protects the finish, reduces swelling risk at seams, and keeps your walkway looking consistent through rainy and snowy seasons—without “deep cleaning” it into damage.
Frequently Asked Questions
What’s the best way to clean engineered wood floors on an outdoor walkway?
Start by sweeping or using a microfiber dust mop to remove sand, grit, and leaves, since debris can scratch the surface. Then use a cleaner specifically labeled safe for engineered wood (and follow the manufacturer’s dilution and dwell time if applicable). Wring your mop well so the water stays minimal, and dry the area promptly to prevent moisture from seeping at seams or edges.
How do I remove dirt, mud, or sand from engineered wood outdoor walkways without damaging the finish?
Rinse off loose mud with a gentle stream of water or a damp cloth, then wipe away grit immediately—don’t let it dry and grind into the finish. For sand and grit stuck in texture, use a soft-bristle brush or a vacuum with a floor-brush attachment. Finish by cleaning with a wood-safe, pH-neutral cleaner and drying thoroughly to protect the engineered wood plies and top layer.
How can I handle standing water or spills when cleaning engineered wood outside?
Blot spills right away with a clean microfiber towel, and avoid letting liquid pool on the outdoor walkway. After blotting, lightly clean the area with a damp microfiber mop using a small amount of manufacturer-approved cleaner. Dry completely, especially around seams, transitions, and board edges, since moisture is the biggest risk for engineered wood flooring outdoors.
Why is it important to avoid harsh cleaners and excessive water on engineered wood floors outdoors?
Engineered wood still contains wood layers that can be affected by prolonged moisture exposure, which may cause swelling, edge lift, or cupping. Strong chemicals, bleach, or abrasive scrubbers can strip protective finishes and increase surface wear, making dirt stickier and more damaging over time. Using a pH-neutral, engineered-wood-safe cleaner and minimal water helps preserve the finish and supports long-term durability.
Which cleaning tools and methods are safest for outdoor engineered wood walkway floors?
Use microfiber mops, microfiber towels, and soft-bristle brushes to minimize scratching, and avoid steel wool or abrasive pads. Choose a vacuum with a soft brush attachment for regular debris removal, and always wring mops until they are barely damp. For periodic deep cleaning, follow the flooring manufacturer’s guidance and keep the process light—clean in sections, use the recommended cleaner sparingly, and dry immediately.
📅 Last Updated: October 20, 2026 | Topic: How to clean engineered wood floors in a outdoor walkway? | Content verified for accuracy and freshness.
References
- Engineered wood
- Wood flooring
- https://www.cdc.gov/coronavirus/2019-ncov/community/disinfecting-building-facility.html
- https://www.epa.gov/coronavirus/cleaning-and-disinfecting-your-facility
- https://www.armstrongflooring.com/support/care-and-cleaning/hardwood.html
- https://scholar.google.com/scholar?q=how+to+clean+engineered+wood+floors+maintenance Google Scholar
- https://scholar.google.com/scholar?q=engineered+wood+floor+outdoor+use+moisture Google Scholar
- https://scholar.google.com/scholar?q=how+to+clean+wood+floors+avoid+standing+water+steam+mop+damage Google Scholar

[…] to know how to install transitions around engineered wood floors in an outdoor walkway? If your walkway sees moisture and temperature swings, the best approach is to use exterior-rated […]