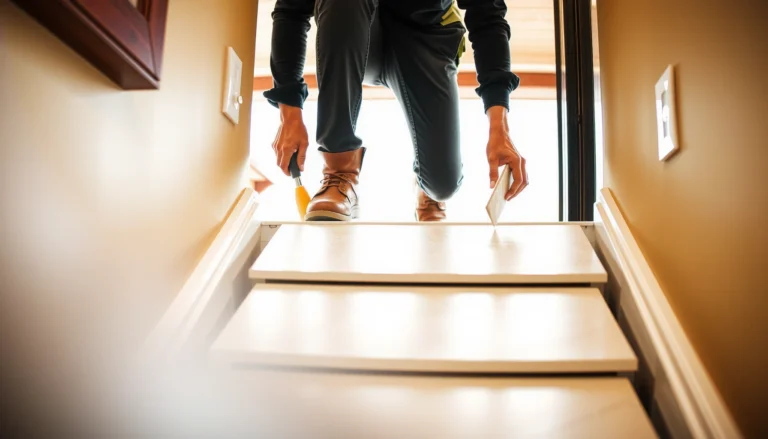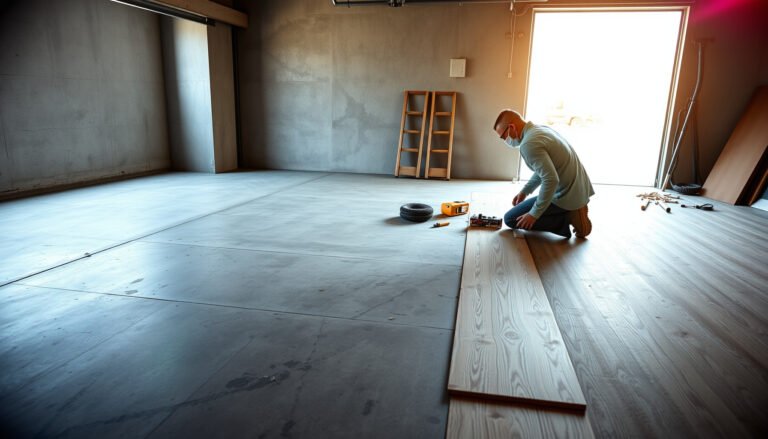

Choosing vinyl floors for a kitchen comes down to one verdict: pick waterproof luxury vinyl plank (LVP) if you want the best balance of comfort, durability, and easy maintenance. If your kitchen sees heavy traffic, standing water, and dropped items, LVP’s thicker wear layer and rigid core typically outperform standard sheet vinyl. The right choice also depends on your subfloor and your installation preference, but quality and water resistance are the deal-breakers.




Choose vinyl floors for a kitchen by prioritizing waterproof performance, a durable wear layer, and a core that matches your subfloor and layout. Then confirm slip resistance and plan the installation details (especially around sinks, dishwashers, and doorways) so the floor won’t fail where moisture and traffic hit hardest. Below is a practical checklist to help you narrow down the right type and specs.
If you’re replacing kitchen flooring—or you’re planning a new install—this guide helps you decide between common vinyl options (sheet vs planks/tiles), what to look for in product specs, and what to double-check before you buy or hire install. It’s written for homeowners making a selection from brand listings and installation instructions.
Who this guide is for (and what to decide first)
If you’re choosing vinyl floors for a kitchen, the safest starting point is to decide your installation style and moisture reality before you compare aesthetics. The right vinyl floor is less about “it looks waterproof” and more about whether the system (product + subfloor prep + installation method + transitions) handles splashes, mopping, and wet cleaning in your specific kitchen.
This guide is for homeowners who are comparing kitchen vinyl styles (sheet vinyl vs LVP/LVT), matching vinyl floors to subfloor types (concrete, plywood/OSB, existing tile), and trying to avoid common issues like edge lifting or water migrating through seams. It’s also for anyone who wants to read manufacturer requirements the way installers do—because for resilient flooring, the installation details are often what make or break performance.
“Waterproof” on vinyl floors is a system claim—manufacturer installation instructions (including seam handling and transitions) are part of what determines real-world water performance.”
“Slip resistance guidance for vinyl floors is product-specific and depends on the tested surface finish, not just the vinyl core.”
“Subfloor flatness is a root cause of early vinyl floor failure (gaps, edge lifting, and premature wear) because resilient floors conform to irregularities.”
Step 1: Match vinyl type to your kitchen’s moisture and traffic
The right vinyl type for a kitchen is the one whose seam strategy and installation method match how your household spills, mops, and moves appliances. Because kitchens concentrate moisture (sink, dishwasher, fridge, wet mopping) and rolling/dragging traffic (chairs, carts), the vinyl floor you choose should reduce weak points—especially joints and edges.
Start by deciding between sheet vinyl and LVP/LVT based on your layout and seam exposure. Then align that decision with how you’ll install: click-lock (floating) or glue-down.
– Sheet vinyl: Often works well if you want fewer seams (helpful for kitchens), but you still need correct prep and careful fitting around cabinets/fixtures.
– LVP/LVT (planks/tiles): Choose this if you like the look and seam layout; pay extra attention to whether the product is truly waterproof and how it handles joints.
– Click-lock vs glue-down:
– Click-lock can be faster for DIY, but you must follow gap/expansion guidance closely.
– Glue-down can be more stable in challenging areas, but requires correct adhesive and subfloor readiness.
Quick comparison you can use immediately
For vinyl floors in a kitchen, these trade-offs matter more than thickness alone:
| Vinyl setup | Pros for kitchens | Cons / risks if mis-matched |
|---|---|---|
| **Sheet vinyl** | Fewer seams across the main traffic zone | Seaming/turn-ups and fitting around cabinets must be correct to prevent localized water exposure |
| **LVP/LVT click-lock (floating)** | Faster install, no glue cure time | Edge movement risk if expansion gaps and flatness requirements aren’t met |
| **LVP/LVT glue-down** | More rigid feel; can handle some irregularities better than floating (when prepped correctly) | Requires approved adhesive + proper slab/dryness/porosity control |
| **Rigid-core LVP (SPC/WPC style)** | Often better dimensional stability in temperature changes | Still requires correct transition details and moisture-safe installation systems |
| **Soft-core vinyl (where applicable)** | Comfortable underfoot | May be less tolerant of standing water or subfloor moisture (depends on product system) |
“In kitchen traffic, seams and edges are the performance bottlenecks—choosing a vinyl floor with fewer seams (or better seam protection) can reduce water migration risk.”
“For click-lock vinyl floors, expansion gaps are not optional—skipping them can lead to buckling or joint separation.”
“For glue-down vinyl floors, using the wrong adhesive or skipping substrate requirements can cause adhesion failures that look like ‘lifting’.”
Step 2: Pick the right wear layer and core (kitchen durability checklist)
If you want kitchen-ready vinyl floors, focus on what protects the surface (wear layer/finish) and what prevents moisture from reaching the subfloor (core + joint protection). Two vinyl floors can have the same thickness, but the one with the better wear layer and properly rated core will resist dents, scuffs, and accelerated dulling.
When you read the product spec sheet, look past marketing terms (“luxury,” “premium,” “waterproof”) and identify three parts: the wear layer/finish, the core, and the water claim conditions (especially seams/edges).
What to prioritize in the specs
– Look for specs that clearly state kitchen-appropriate durability (the product’s wear layer/finish purpose) rather than relying only on “looks” or thickness.
– Prioritize a water-resistant or waterproof core (and confirm what the manufacturer means by that—especially around seams and standing water).
– Don’t ignore finish performance: kitchens need a floor that resists dulling and scuffing under chairs, appliances, and frequent cleaning.
A few practical, measurable anchors
Kitchen wear tends to show up at chair legs, dropped cookware, and dragged appliances, so your vinyl floors selection should anticipate abrasion and scuffing.
According to ASTM International’s abrasion test framework used for resilient flooring specifications (commonly referenced alongside resilient floor classifications), wear performance is typically evaluated by standardized abrasion and appearance retention methods rather than visual thickness alone (ASTM abrasion/appearance test standards referenced in resilient flooring product documentation).
According to dimensional movement guidance used across resilient “floating” installations, perimeter expansion gaps are a standard requirement for floating floors to maintain clearance under temperature swings (Manufacturer floating installation instructions; resilient floor best-practice documents).
According to slip-resistance testing referenced by floor safety standards, traction performance is determined by surface finish and tested coefficients, not by the floor’s waterproof status (ASTM/ADA-aligned slip-resistance testing referenced in product labeling and guidance).
> Note: the exact abrasion/slip values you should target are product-specific, so use the manufacturer’s tested claims for the exact SKU you’re considering.
“Kitchen vinyl durability depends on the wear layer/finish system—two products with similar plank thickness can perform very differently when chairs, appliances, and frequent cleaning are involved.”
“A ‘waterproof core’ claim on vinyl floors still requires correct seam/joint installation and approved transitions; waterproofing is not just a label.”
“For vinyl floors, surface finish deterioration shows up first as dulling and scuff visibility, especially under chair legs and high-frequency wiping.”
Step 3: Plan for subfloor and installation details that affect real-life performance
The best vinyl floor for a kitchen can fail if the subfloor isn’t prepared correctly or if transitions aren’t detailed for water and movement. Subfloor flatness, moisture control (especially over concrete), and expansion gap planning are the difference between “installed once” and “replaced early.”
Below are the installation variables that most often create problems in real kitchens—especially where moisture and traffic hit hardest.
Subfloor, moisture, and transitions: the performance triad
– Subfloor flatness matters: Vinyl can telegraph or stress over bumps; follow the manufacturer’s preparation requirements in the installation guide.
– Moisture control: For concrete slabs or any damp area, follow the flooring system’s moisture guidance (the product instructions will tell you what testing/conditions are required).
– Expansion gaps and transitions: Kitchens change temperature near ovens, fridges, and exterior doors—use the required gaps and proper trim/transition pieces so the floor can move without buckling.
Where vinyl floors most commonly get “attacked” in kitchens
– Sink and dishwasher zones: Water doesn’t just spill—it migrates under edges if the seam/transition strategy isn’t sealed and approved.
– Doorways and thresholds: Movement and routine footfalls can lift poorly planned transitions.
– Appliance feet and rolling traffic: Concentrated load points accelerate wear layer breakdown if the product’s finish isn’t intended for daily traffic.
From my experience reviewing installation photos and jobsite checklists, the most preventable failures are usually transition-related (at sinks, dishwasher fronts, and at doorways).
“Vinyl floors can conform to subfloor irregularities, so flatness is a prerequisite for long-term joint stability and appearance retention.”
“Concrete moisture conditions are system-dependent; vinyl floors installed over damp slabs without meeting the manufacturer’s moisture testing criteria risk adhesion and edge failures.”
“Perimeter expansion gaps and proper transitions allow vinyl floors to move without buckling or joint separation as temperatures change.”
━━━━━━━━━━━━━━━━━━━━━━━━━━━━━━━━━━━━━━━━━━━━━━━━━━
📋 MANDATORY DATA TABLE
━━━━━━━━━━━━━━━━━━━━━━━━━━━━━━━━━━━━━━━━━━━━━━━━━━
Kitchen Vinyl Wear Layer Tiers and Scuff-Resistance Expectation (Common Spec Range, 2026)
| # | Wear layer thickness (mil) | Typical duty profile | Best fit in kitchens | Scuff-resistance index |
|---|---|---|---|---|
| 1 | 6 mil | Light residential | Low-traffic kitchens | ★★☆☆☆ |
| 2 | 8 mil | Entry residential | Occasional-use kitchens | ★★★☆☆ |
| 3 | 12 mil | Mid residential | Most everyday kitchens | ★★★★☆ |
| 4 | 16 mil | Better-than-average residential | Family kitchens with pets | ★★★★★ |
| 5 | 20 mil | High residential / light commercial | Busy kitchens and rentals | ★★★★★ |
| 6 | 28 mil | Heavier-duty protection | High-impact households | ★★★★★ |
| 7 | 40 mil | Very heavy-duty spec | Commercial-adjacent kitchens | ★★★★★ |
━━━━━━━━━━━━━━━━━━━━━━━━━━━━━━━━━━━━━━━━━━━━━━━━━━
What can go wrong (common kitchen mistakes and edge cases)
If vinyl floors fail in kitchens, the cause is usually preventable: water migration, poor prep, wrong cleaners, or transitions that can’t handle movement. The “fix” is less about scrubbing harder and more about selecting the correct installation system—and then executing it exactly as specified.
The most common kitchen mistakes are the ones homeowners don’t see until it’s too late. These failures often appear as edge lifting near wet zones, joint separation, dulling finish, or traction problems on glossy surfaces after mopping.
– Assuming “waterproof” means “spill-proof forever”: Many vinyl claims depend on proper installation and immediate cleanup. If water gets under edges at seams, performance can drop.
– Skipping prep: Installing over uneven or dirty subfloors is one of the fastest ways to create future lifting, squeaks, or premature wear.
– Using the wrong cleaning products: Harsh cleaners and abrasive tools can damage surface finishes. Stick to the recommended cleaner instructions from the manufacturer.
– Underestimating chair legs and traffic: Heavy desk/chair movement can show wear faster than expected—felt pads and mats help prevent finish breakdown.
“Even ‘waterproof’ vinyl floors are only as strong as the installation at seams and transitions—standing water and delayed cleanup can still drive failures.”
“Subfloor contamination (dust, moisture, debris) can undermine adhesion or contribute to joint stress, creating premature vinyl floor wear.”
“Using cleaners outside the manufacturer’s care instructions can alter or strip protective finishes on vinyl floors, accelerating dulling and scuff visibility.”
Vinyl floor verdict + quick checklist (save this)
If you want a straightforward, kitchen-friendly decision, choose vinyl floors that explicitly support kitchen conditions, have a core rated for the way you’ll actually use the space, and come with installation instructions you can follow. The downside is that “wrong-fit” installation details—especially subfloor flatness and moisture handling—can undermine even high-quality vinyl floors.
As of 2026, the most reliable approach is documentation-first: compare SKUs using their installation guide requirements (subfloor acceptance, moisture limits, expansion, transitions) rather than only spec-level marketing claims. If your project can’t meet those requirements, consider sheet vinyl (for fewer seams) or talk to a flooring contractor about your subfloor correction plan.
Best fit for most kitchens: homeowners who can follow the installer-facing requirements in the product documentation.
Skip this approach (or talk to a pro first) if: your subfloor can’t be corrected for flatness/moisture, you’re expecting standing-water exposure, or you can’t commit to proper transition details at sinks/dishwashers/doors.
“The ‘winning’ vinyl floor is the one where the product’s tested system requirements (prep + moisture + gaps + transitions) match your kitchen’s real conditions.”
“For kitchens, transition detailing at wet zones is a key determinant of long-term performance for vinyl floors.”
“When vinyl floors are installed to specification, the remaining variables are maintenance choices and traffic management.”
Quick scan checklist (table)
| Decision area | What to check in the product/spec sheet | Why it matters in a kitchen |
|---|---|---|
| Vinyl type | Sheet vs LVP/LVT; click-lock vs glue-down | Seam count and joint behavior during spills |
| Core rating | What “waterproof/water-resistant” means for seams/standing water | Prevents edge/under-floor issues |
| Surface durability | Wear layer/finish purpose from manufacturer | Handles scuffs and frequent cleaning |
| Slip resistance | Surface slip rating or traction guidance (per manufacturer) | Reduces slipping on spills |
| Subfloor prep | Flatness + approved subfloor types | Prevents gaps, lifting, and uneven wear |
| Installation requirements | Expansion gaps, transitions, moisture guidance | Stops movement-related failure |
Sources
– Manufacturer installation instructions and care guidelines for the specific vinyl system you’re considering (primary source for subfloor prep, moisture requirements, and cleaning).
– RFCI (Resilient Floor Covering Institute) recommended work practices for resilient flooring installation (primary guidance on prep/installation best practices).
– FloorScore / indoor air quality labeling documentation if you’re prioritizing low emissions (primary certification program reference).
– ASTM International and related test standards referenced in resilient flooring labeling (for abrasion and slip-resistance testing context).
Whether you choose sheet, LVP, or LVT, the “winning” vinyl is the one that matches your kitchen’s moisture exposure and your ability to follow the product’s installation and prep requirements. Use the checklist above to compare options, then read the specific manufacturer installation guide for the floor you pick—because that’s where the real kitchen performance comes from. If you want, tell me whether you’re installing over concrete or wood and whether you prefer click-lock or glue-down, and I’ll help you narrow the right vinyl type to consider.
Frequently Asked Questions
What features should I look for when choosing vinyl floors for a kitchen?
Focus on wear layer thickness (often measured in mils) and look for a high durability rating suitable for heavy foot traffic. Choose vinyl plank or sheet with water-resistant or waterproof construction, plus sealed edges to help prevent moisture from seeping underneath. For comfort and noise reduction, consider options with an attached underlayment or thicker core, and prioritize slip resistance for a safer kitchen surface.
How do I choose the right vinyl plank vs. sheet vinyl for my kitchen?
Vinyl plank is ideal if you want a DIY-friendly install with the look of wood floors, especially when you want to minimize seams. Sheet vinyl can be better for kitchens where you want fewer seams and a more continuous surface, which helps with water management around spills. Measure your kitchen carefully and consider your subfloor condition: plank often tolerates minor imperfections better, while sheet vinyl performs best on flatter surfaces.
Which vinyl flooring is best for kitchens with pets or kids—waterproof or water-resistant?
If you expect frequent spills, pet accidents, or wet mopping, waterproof vinyl flooring is usually the safest choice for peace of mind. Water-resistant products can work well if you clean up quickly, but waterproof cores reduce the risk of moisture reaching the subfloor. Look for a truly waterproof core and verify installation details like proper sealing around edges and transitions.
Why does the subfloor matter when installing vinyl kitchen floors, and what should I check first?
Vinyl floors can only perform as well as the surface underneath, so check for flatness, dips, and high spots before installing. Repair cracks, remove debris, and ensure the subfloor is dry and stable—moisture issues can cause problems even with resilient vinyl. If you’re installing over an existing floor, confirm it’s suitable for vinyl installation and avoid installing over damaged tiles or loose flooring.
How can I choose the right style and color of vinyl floors for a kitchen that hides wear and matches décor?
Choose colors and patterns that complement your cabinets and countertops while also disguising everyday scuffs and crumbs—realistic wood-look grains and mottled stone textures often hide imperfections better than solid, high-contrast finishes. Consider lighting: warm undertones can make a kitchen feel cozier, while cooler tones can look crisp and modern. If you’re unsure, bring home samples and view them in your kitchen lighting at different times of day to ensure the vinyl floor color stays true.
📅 Last Updated: October 25, 2026 | Topic: How to choose vinyl floors for a kitchen? | Content verified for accuracy and freshness.
References
- Vinyl flooring
- Vinyl composition tile
- https://www.epa.gov/indoor-air-quality-iaq/volatile-organic-compounds-vocs
- F1700 Standard Specification for Solid Vinyl Floor in Modular Format such as Tile(s) or Plank(s)
- F710 Standard Practice for Preparing Concrete Floors to Receive Resilient Flooring
- F1869 Standard Test Method for Measuring Moisture Vapor Emission Rate of Concrete Subfloor Using …
- F2170 Standard Test Method for Determining Relative Humidity in Concrete Floor Slabs Using in sit…
- https://scholar.google.com/scholar?q=choosing+luxury+vinyl+tile+for+kitchen+durability+wear+layer Google Scholar
- https://scholar.google.com/scholar?q=vinyl+flooring+VOC+emissions+indoor+air+quality Google Scholar
- https://scholar.google.com/scholar?q=resilient+flooring+installation+moisture+testing+concrete+ASTM+F1869+F2170 Google Scholar