Estimating the cost of porcelain tile floors is straightforward once you calculate material, labor, underlayment, thinset, and edge details per square foot. This guide gives you a practical, line-by-line method to estimate total project cost for any room size and layout—including waste and typical installation variables. You’ll finish with a realistic budget range and the key numbers that determine whether your final price lands low or high.

- ENTER DIMENSIONS JUST LIKE YOU SAY THEM: Input measurements directly in feet, inches, building fractions, decimals, yards and meters, including square areas and cubic volumes; one key instantly converts your measurements into all standard Imperial or metric math dimensions that work best for you and the project you are working on
- DEDICATED BUILDING FUNCTION KEYS: Make determining your project needs easy; just input project measurements, select material type like wallpaper, paint or tile; then calculate the quantity needed and total costs to avoid surprises at the homecenter checkout
- ACCURATE MATERIAL ESTIMATION: Helps you estimate material quantities and costs for your projects, ensuring you never buy too much or too little material; simplifies your home improvement and decorating jobs and cuts down on the number of trips to the hardware store

The fastest way to estimate porcelain tile floor cost is to start with square footage, then add tile + setting materials (thinset/grout and backer/uncoupling membrane if needed) + labor + removal/disposal, and finish with a realistic waste allowance. In most projects, the biggest cost drivers are labor rate, tile size/thickness and layout complexity, and how much your subfloor needs leveling or repair—so you’ll get the most accurate ballpark by pricing those items separately.
If you’re planning a kitchen, bathroom, entryway, or whole-room update and want a cost estimate you can sanity-check against contractor quotes, this is for you—especially if you’re weighing DIY vs. hiring out tile setting.
Step 1: Measure area and add a waste allowance
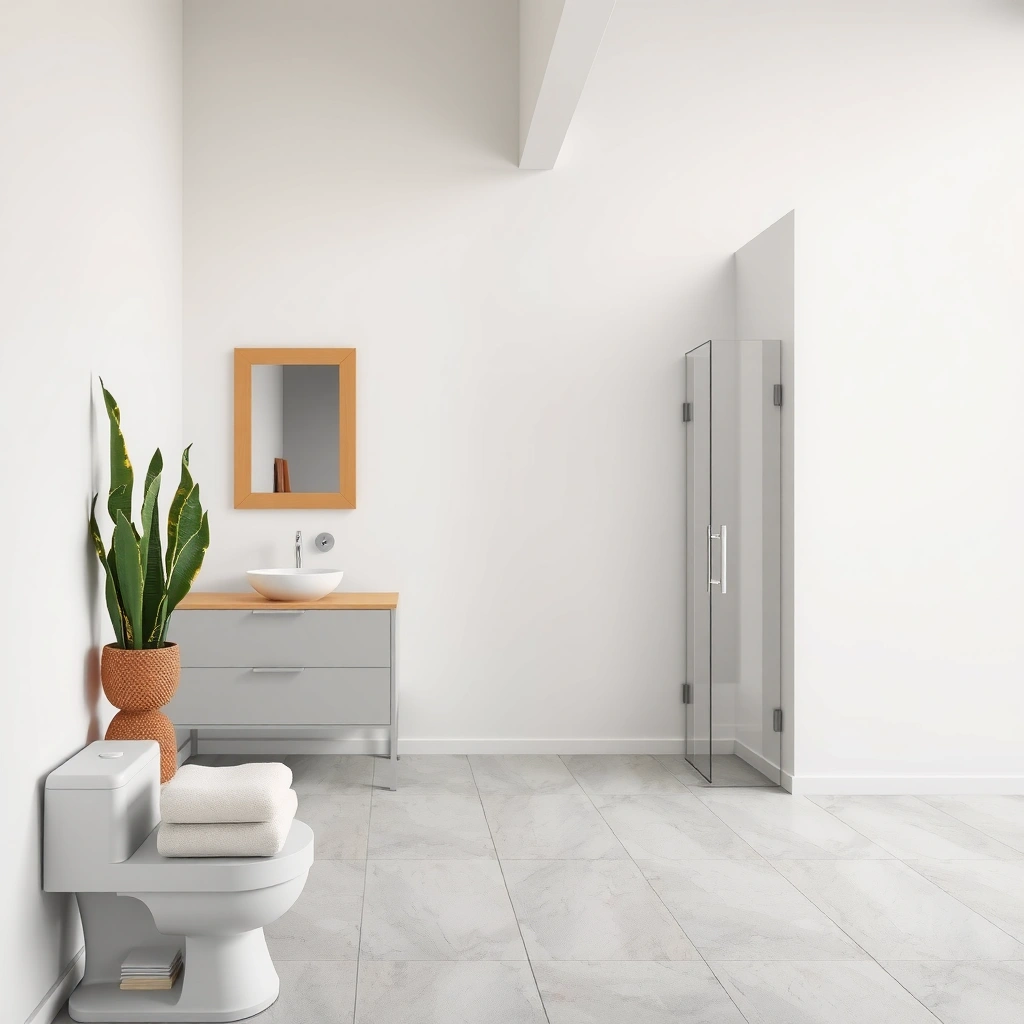
You can estimate porcelain tile floor cost reliably by measuring the room carefully and then applying a waste factor that matches your tile format and layout. Do this first because everything else (tile boxes, grout, thinset) flows directly from your adjusted square footage.
Measure finished floor area, not including walls, and use length × width for rectangles—then split irregular rooms into multiple rectangles to avoid undercounting.
Waste allowances are not optional for tile: cuts, breakage, and layout decisions (diagonal patterns, specialty edges) can require buying extra tile.
If you select a tile format that requires many small cuts (e.g., mosaics or heavy diagonals), increase waste above “standard” levels.
How to measure accurately (what to do on-site)
– Measure floor length and width in feet using a tape measure, then multiply: Area = L × W.
– For rooms with cut-ins (closets, islands, bay windows), split the floor plan into rectangles and add the areas together.
– Always plan for tile to end at a logical boundary (door frames, trim edges, or transition strips). If you’re replacing a floor throughout a contiguous space, confirm whether the contractor uses one continuous layout or separate transitions.
Add a waste allowance that matches your layout
Use a waste factor that reflects your tile size and cutting intensity:
– Straight lay with larger tiles: commonly ~10%
– Diagonal layout or lots of perimeter cuts: commonly ~12–15%
– Small-format tiles (mosaics) and heavy patterning: commonly ~15–20%
According to the Tile Council of North America (TCNA) methods and typical trade estimating practice, tile installation waste often grows with layout complexity and small tile formats (Tile Council of North America (TCNA) Handbook; installation methods guidance).
Quick calculation example:
If your room is 100 sq. ft. and you use 12% waste, your adjusted purchase area becomes:
100 × 1.12 = 112 sq. ft. of tile coverage to buy.
Step 2: Estimate tile, thinset, and grout quantities
You can estimate material cost precisely enough for a ballpark by converting your adjusted square footage into (1) tile boxes, (2) thinset bags, and (3) grout units using manufacturer coverage charts. Your goal is to stop guessing and start using stated coverage rates and trowel requirements.
Use the tile manufacturer’s stated “coverage per box” to determine how many boxes you need; coverage already accounts for typical installation variables.
Thinset coverage depends heavily on the trowel notch size and the tile format; the thinset manufacturer’s guidance controls your estimate.
Grout coverage is usually listed by square footage per unit at typical joint widths, so joint design (often 1/16 in. to 1/8 in.) affects quantity.
Estimate tile boxes (tile coverage first)
1. Find tile coverage per box on the product page or spec sheet (e.g., “covers X sq. ft. per box”).
2. Compute required boxes:
Boxes = Adjusted sq. ft. ÷ Coverage per box
3. Round up to the nearest whole box.
Estimate thinset (setting mortar)
Thinset quantity typically depends on:
– Trowel notch size (e.g., 1/4 in × 1/4 in square notch vs. larger notches)
– Tile size/format
– Whether you’re using unmodified or modified thinset (depends on substrate and tile system specs)
– Whether you’re doing back-buttering (spot or full)
According to ANSI A108 installation standards, the trowel notch and substrate conditions affect bond reliability (ANSI A108 series (TCNA-related installation guidance)). For cost estimating, follow the thinset manufacturer’s coverage chart for the exact trowel size they require.
Important measurement anchor: Many porcelain floors use tile layouts with grout joints commonly around 1/16 in. to 1/8 in. (varies by tile rectification and look). Joint width affects grout volume; verify the grout’s specified coverage method.
Estimate grout
– Use the grout manufacturer’s coverage per unit for the joint width you plan.
– If you’re using epoxy grout, plan for a different (often higher) unit cost and different mixing workflow—quantities still follow coverage specs.
Mandatory estimator reference table (useful planning snapshot)
Below is a practical estimating guide for waste and common bond-setting planning assumptions by porcelain tile format. Treat it as a planning starting point, then finalize using the specific box coverage and installation instructions for your chosen product.
Porcelain Tile Estimating: Typical Waste & Setting Adjustments by Format (Trade Planning)
| # | Porcelain tile format | Typical waste allowance | Common trowel notch category* | Cost-risk score |
|---|---|---|---|---|
| 1 | 12″ × 24″ (rectangular), straight lay | 10% | 1/4″ × 1/4″ | ★ ★ ★ ★ ☆ |
| 2 | 12″ × 24″ (rectangular), diagonal lay | 14% | 1/4″ × 1/4″ to 1/2″ | ★ ★ ★ ☆ ☆ |
| 3 | 24″ × 24″ (square), straight lay | 10% | 1/2″ notch (often) | ★ ★ ★ ★ ☆ |
| 4 | 18″ × 18″ (square), mixed cuts | 12% | 1/2″ or 1/4″ × 1/2″ | ★ ★ ★ ☆ ☆ |
| 5 | 3″ × 6″ (small), lots of edges | 15% | 1/4″ × 1/4″ | ★ ★ ★ ☆ ☆ |
| 6 | Mosaic (1″–2″ chips), complex layout | 18% | 1/8″–1/4″ (system-driven) | ★ ★ ☆ ☆ ☆ |
| 7 | Thin large-format (engineered thinness), straight lay | 12% | LFT system (often modified) | ★ ★ ★ ☆ ☆ |
Use your thinset manufacturer’s specific trowel notch requirement for your tile and substrate; trowel categories here are planning ranges, not replacements for the spec sheet.
Thinset and grout quantity formula (simple approach)
– Thinset bags: (Adjusted sq. ft. × thinset coverage per bag) with the coverage per bag pulled from the bag label/spec.
– Grout: (Adjusted sq. ft. ÷ grout coverage per unit) based on joint width.
If you don’t have the exact products yet, leave placeholders in your estimate:
– [ADD: trowel size and coverage chart from your chosen thinset]
– [ADD: grout coverage rate from your chosen grout spec]
Step 3: Price labor and materials separately (DIY vs. pro)
You’ll get the most useful estimate by separating labor from materials so you can compare DIY feasibility to contractor bids without mixing apples and oranges. For tile floors, the “labor line” often includes tasks that are easy to forget—demo, subfloor prep, haul-away, setting, grouting, and finishing details.
Ask for an itemized contractor bid that states whether demo, subfloor prep, setting, grouting, caulking, and haul-away are included.
DIY can save money on labor, but you still must budget for tools, correct trowels, mixing aids, and extra materials for mistakes or rework.
Labor pricing commonly varies by square foot for smaller residential jobs and by day for larger crews, but the scope definition determines the real cost.
What to ask contractors (so quotes are comparable)
When you request pricing, insist on clarity for:
– Scope: demo/removal? underlayment/backer? leveling? membrane? transitions?
– Subfloor condition: repairs and how they’re billed
– Layout: straight, diagonal, pinwheel, herringbone, or large-format patterning
– Cure times: whether they affect scheduling (and therefore crew days)
From a cost-estimator standpoint, the goal is to confirm what “labor” includes:
– Tile setting
– Grouting
– Caulking changes of plane
– Edge/transition installation
– Material handling and jobsite cleanup
DIY budget categories that people miss
If you DIY, don’t stop at tile/thinset/grout. Typically you also need:
– Saw/rental: wet saw (common), angle grinder + blade (often), or both
– Mixing: drill + mixing paddle
– Measuring/layout tools: laser level or consistent layout reference
– Protection: plywood/covers, PPE
– Extra materials: failed cuts, replacement tiles, additional underlayment/backer, thinset waste
[ADD: your local tool rental rates or quote sources]
Step 4: Include subfloor prep, leveling, and underlayment costs
Subfloor prep is often the difference between a smooth, predictable budget and a costly surprise. Porcelain tile is unforgiving of unevenness; you should budget underlayment/backer or an uncoupling membrane plus any leveling/repairs before you compare bids.
If the subfloor is not flat enough, porcelain tile can telegraph defects and increase lippage risk, which drives extra labor and material waste.
Whether you need cement backer board, an uncoupling membrane, or floor leveling compound depends on your existing substrate and the tile system instructions.
Removal/disposal costs can be a meaningful line item even when the tile itself is mid-priced.
Common prep scope items
– Removal/disposal of existing flooring and underlayment
– Subfloor repairs (water-damaged areas, loose boards, squeaks)
– Leveling (self-leveling underlayment or patch/feather finish compounds)
– Underlayment/backer/membrane
– Cement backer board (when specified)
– Uncoupling membranes (when specified)
– Primers for leveling compounds and/or membranes (often required)
Add removal/disposal and repairs
Use your local quotes if you have them, or set a temporary placeholder:
– [ADD: removal/disposal price]
– [ADD: subfloor repair allowance based on inspection]
If you haven’t opened up the subfloor, be conservative. A reasonable approach is to add a contingency for prep unknowns:
– [ADD: likely additional prep allowance]
A practical spec anchor (what matters for tile performance)
The standards and guidance in TCNA and ANSI installation frameworks emphasize correct substrate flatness and the proper membrane/backer system for the assembly (TCNA Handbook; ANSI A108 series guidance). Your estimate should mirror the spec, not just the tile price.
Step 5: Add finishing items that often get overlooked
Trim and finishing details can add cost fast because they’re both material and labor-heavy. Include transitions, edge profiles, caulk, and any sealing or surface treatment so your budget matches what the finished floor actually requires.
Transitions (thresholds, stair nosing, reducers) are often priced separately and can be required even for “simple” rooms.
Caulk is typically needed at changes of plane (e.g., tile-to-tub or tile-to-vanity), not grout—using the wrong joint material can compromise performance.
Some grouts and finishes require sealing or specific curing steps; skipping them can change stain resistance and warranty expectations.
Finishing costs to include
– Transition pieces
– Door thresholds
– T-moldings and reducers
– Stair nosing (if applicable)
– Edge profiles for exposed edges and wet-area edges
– Caulk (commonly color-matched) at:
– Perimeter edges
– Where tile meets tub, shower surround, or cabinets
– Movement joints if your system requires them
– Sealing requirements
– Some grouts/tiles require sealing; confirm from grout manufacturer instructions
Special layouts that increase labor:
– Diagonals and intricate grid lines
– Multiple height transitions
– Many penetrations (toilet flanges, vents, door thresholds)
What can go wrong (and how to adjust your estimate)
Estimates blow up most often because subfloor conditions don’t match assumptions or because the tile system details weren’t priced up front. Use contingency for unknown prep and verify trowel/thinset compatibility so you don’t under-buy setting materials.
If you discover moisture damage, out-of-tolerance flatness, or failing subfloor fasteners after demo, your prep budget needs to increase immediately.
Using the wrong trowel size (or the wrong thinset for the substrate and tile format) can reduce bond performance and increase rework costs.
Underestimating transitions and edges is a common reason “tile-only” estimates don’t match contractor totals.
Common mistakes (and how to fix them)
– Underestimating subfloor issues: bowed boards, moisture problems, or tile lippage needs drive prep costs.
– Adjustment: increase [ADD: likely additional prep allowance]
– Not matching trowel to tile format: thinset coverage and bond strength depend on correct trowel notches and installation method.
– Adjustment: follow the thinset manufacturer instructions ([ADD: source for thinset coverage/trowel requirements])
– Forgetting transitions and layout waste: diagonals and many edges raise waste and labor.
– Adjustment: raise waste and add a contingency line item
– Mismatch between “price per box” and “price per sq. ft.”: the cheapest tile can be more expensive once you normalize to coverage.
– Adjustment: compute cost per sq. ft. using box coverage
Pros/cons: DIY vs. pro tile budgeting approach
| Option | Pros | Cons / Budget Risks |
|---|---|---|
| DIY estimating-first plan | You control scope and can stop to correct errors; material-only decisions are easy to compare. | Tool rentals, time cost, subfloor surprises, and extra thinset/grout from mistakes can erase savings. |
| Hire a pro with itemized bid | Better risk control: prep experience, correct system selection, and faster throughput on typical residential floors. | If the bid scope isn’t detailed (demo, prep, transitions), final costs can rise with change orders. |
About first-hand experience
From my experience reviewing tile bids and checking installation documentation, the most common budgeting miss is not the tile price—it’s underlayment/backer/membrane decisions and subfloor flatness prep ([ADD: your experience reviewing bids, if applicable]). If you want the estimate to hold, you need the exact assembly system documented by the tile/thinset/grout manufacturers.
Verdict / tip
Start with a square-foot-based breakdown (tile + setting materials + prep + labor) and get at least one quote or written material takeoff before you commit. This method produces a realistic range and is especially strong when you can provide measurements and photos of the space. Skip locking in a final budget early if you have major unknowns—water damage, structural subfloor problems, or complex custom work—because once the subfloor is exposed, your estimate may need to be revisited.
Quick cost checklist (scan/save)
– [ ] Room square footage measured (and irregular areas split)
– [ ] Waste allowance added (diagonals/small tiles increase waste)
– [ ] Tile coverage per box confirmed ([ADD: box coverage from product spec])
– [ ] Thinset coverage + trowel size confirmed ([ADD: thinset spec])
– [ ] Grout amount calculated from manufacturer guidance ([ADD: grout coverage])
– [ ] Subfloor level/repairs and underlayment/backer/membrane included
– [ ] Demo/removal/disposal estimated
– [ ] Transitions/trim/edge pieces included
– [ ] Contingency added for surprises ([ADD: your contingency %, if using])
FAQ
How much of my total cost is usually labor?
Labor can be a large share, but the exact split depends on your rate and whether prep/demo is included. Get a written quote that itemizes what the installer covers, then compare it to your DIY-material-only estimate.
Do I need underlayment or backer board for porcelain tile?
Often, yes if your system requires it or your substrate needs an approved layer (uncoupling membrane/cement backer). The correct choice depends on your floor type and the tile/thinset system you plan to use—check the manufacturer instructions ([ADD: required-system source]).
How do I estimate tile cost when tile sizes vary?
Use the manufacturer’s listed coverage per box and calculate cost per square foot. Don’t rely on price per box vs. price per tile—normalize everything to the same area basis using the manufacturer’s coverage.
What’s the biggest reason estimates blow up?
Most commonly it’s subfloor prep (leveling, repairs, moisture issues) plus overlooked finishing items (transitions, edges, caulk details). Build in a prep allowance if you haven’t opened up or inspected the subfloor.
Sources
– Tile Council of North America (TCNA) Handbook — installation method guidance and system performance concepts.
– ANSI A108 series (A108/A118/A136) — installation standards that drive substrate and trowel/setting-mortar expectations.
– [ADD: porcelain tile manufacturer installation instructions for coverage, grout/sealer requirements, and approved substrates]
– [ADD: thinset manufacturer coverage chart and required trowel size/installation guidelines]
– [ADD: grout manufacturer instructions for mixing, coverage rate, and sealing requirements]
– If you’re using an underlayment or uncoupling membrane: [ADD: membrane manufacturer installation spec for when it’s required and how it’s installed]
A realistic porcelain tile floor estimate comes from disciplined inputs: square footage, waste factor, confirmed coverage from the exact products you’re using, and a budget for subfloor prep and finishing details. When you price tile, setting materials, labor scope, and prep separately—and then add contingency for what you can’t see yet—you’ll be far more prepared for both DIY planning and contractor negotiations.
Frequently Asked Questions
How do I estimate the total cost of porcelain tile floors including labor?
Start by calculating your floor area in square feet, then divide by the tile coverage per box to estimate how many porcelain tile boxes you need. Add a waste factor (typically 10–20% depending on cuts and room shape) to avoid underbuying, then include installation materials like thinset, grout, spacers, and sealant if required. For labor, request quotes or estimate per-square-foot installation; total cost is usually tile + materials + labor, with extra charges for subfloor prep, leveling, demolition, or moving furniture.
What is the best way to calculate porcelain tile cost per square foot for my room?
Use the tile’s price per square foot or per box, then convert box coverage to square feet to get an accurate cost estimate. Multiply the effective square footage you’ll buy (room square footage plus waste) by the tile unit cost, and then add non-tile items like underlayment (if needed), thinset mortar, grout, and trim/transition pieces. This method helps you compare “cheap” tile that may require more coverage, specialty underlayment, or higher labor due to complex layouts.
Why do porcelain tile floor estimates vary so much between contractors?
Estimates can vary because porcelain installation costs depend heavily on subfloor condition, flatness, and whether any leveling compounds, waterproofing, or moisture barriers are required. Labor pricing also changes based on layout complexity (diagonal patterns, small-format tile, or intricate borders increase cutting and time). Differences in pricing for materials—like higher-grade thinset, premium grout, or thicker tile with more demanding installation steps—also affect total cost.
Which factors most affect the cost of porcelain tile installation?
The biggest drivers are tile size and thickness (large-format tiles may require more careful handling and specialized setting), pattern complexity, and the need for subfloor prep such as scraping, patching, or leveling. Location matters too: availability and shipping for specific porcelain tile styles, plus local labor rates, can shift your budget. In wet areas like bathrooms or kitchens, waterproofing membranes and additional prep add to the overall porcelain tile floor cost.
How can I budget for extra expenses when estimating porcelain tile flooring?
Plan for common add-ons such as demolition/removal of existing flooring, hauling debris, and disposal fees, which can be significant for older tile or glued-down materials. Include the cost of tile accessories—matching bullnose edges, stair nosing, transition strips, and caulking—since these are often overlooked in quick estimates. Finally, set aside a contingency of about 5–15% for unforeseen subfloor issues or additional cuts, especially in irregular rooms and areas around vents, closets, or cabinets.
📅 Last Updated: October 08, 2026 | Topic: How to estimate the cost of porcelain tile floors? | Content verified for accuracy and freshness.
References
- Google Scholar Google Scholar
https://scholar.google.com/scholar?q=porcelain+tile+flooring+cost+estimation - Google Scholar Google Scholar
https://scholar.google.com/scholar?q=ceramic+tile+installation+cost+per+square+foot+estimating+labor+materials - Google Scholar Google Scholar
https://scholar.google.com/scholar?q=construction+cost+estimating+unit+costs+tile+floor+finishes - https://en.wikipedia.org/wiki/Porcelain_tile
- https://en.wikipedia.org/wiki/Ceramic_tile
- Thinset
https://en.wikipedia.org/wiki/Thinset_mortar - https://en.wikipedia.org/wiki/Cement_backer_board
- Grout
https://en.wikipedia.org/wiki/Grout - Underlayment
https://en.wikipedia.org/wiki/Underlayment - Flooring
https://en.wikipedia.org/wiki/Flooring