Want to install laminate floors in an entryway without wasting time or ruining the fit? This step-by-step guide shows the exact sequence—prep and leveling, underlayment, layout and cutting, locking the planks, and finishing the edges—so your floor clicks together cleanly and stays flat. Follow it and you’ll get a durable, tidy entryway installation you can complete in a weekend.




If you want laminate flooring in an entryway, the key is getting a flat, moisture-aware subfloor and using the right expansion gap around the perimeter. After you prep the base, you’ll lay underlayment (as required), click the planks together, and finish with trim that covers the gap. This guide walks you through the process from prep to last board, plus what can go wrong in high-traffic entryways.
This is for homeowners tackling a first laminate install in a front/hall entryway—especially where doors swing, flooring transitions happen, and you’ll be dealing with moisture from shoes or occasional wet weather. If your subfloor is uneven or you’re installing over concrete, read the subfloor and moisture steps closely before you open the boxes.
Prep the entryway subfloor and moisture barrier first
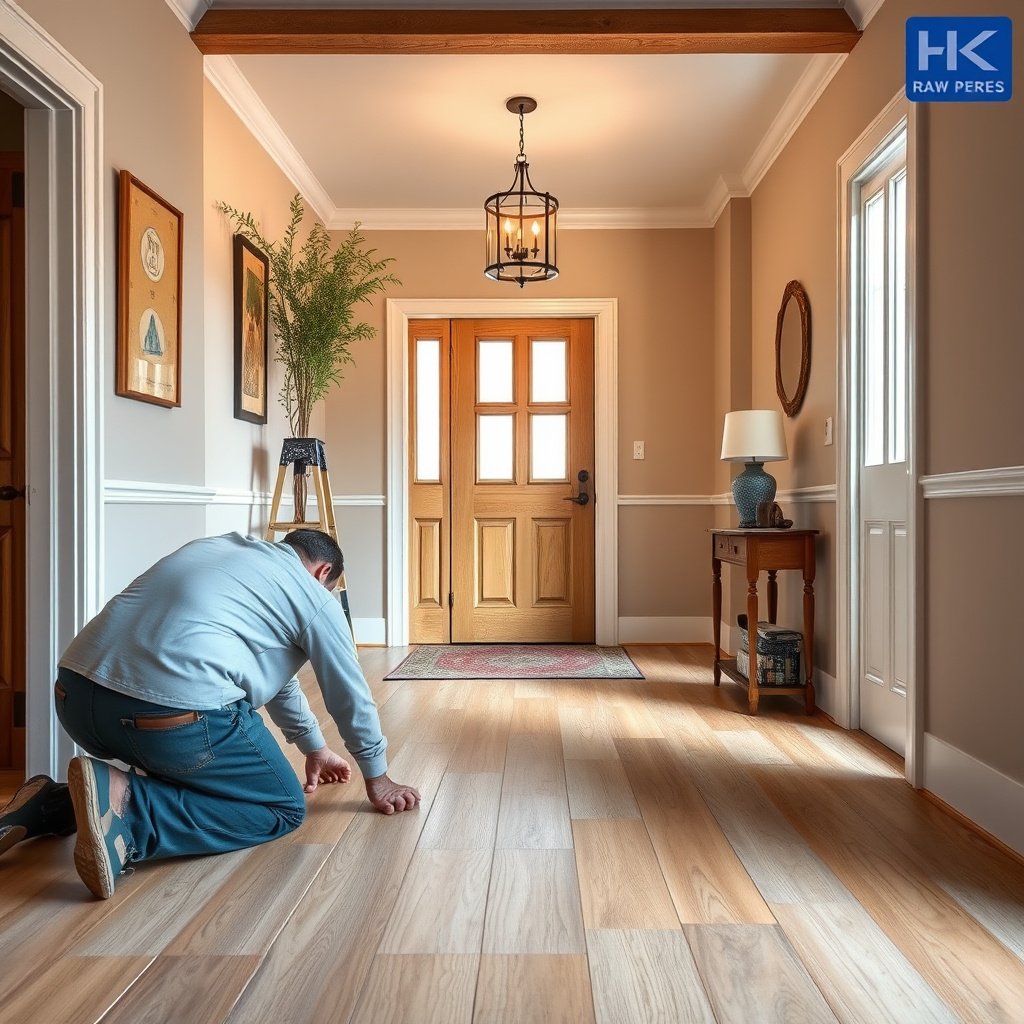
Getting a flat subfloor and correct moisture control is the difference between a laminate floor that “clicks” for years and one that shifts, squeaks, or shows gaps. Start by verifying flatness within your laminate manufacturer’s limits, then match the moisture barrier/underlayment to your exact subfloor type—especially over concrete.
Laminate flooring is a floating floor, so click-lock joints depend on subfloor flatness within the manufacturer’s tolerance to avoid joint separation and noise over time.
On concrete slabs, moisture testing is commonly done using ASTM methods such as ASTM F1869 (calcium chloride) or ASTM F2170 (in-situ RH probes), which report results in different units.
If your laminate warranty specifies a particular underlayment/moisture system, using a different one can jeopardize coverage even if the floor “looks fine” at install time.
– Check that the subfloor is flat enough for laminate (follow your flooring manufacturer’s flatness requirement—this is critical for click-lock planks).
– Remove old flooring, tack down loose spots, and clean the surface so underlayment sits evenly.
– If your laminate system calls for a specific moisture barrier/underlayment over concrete (or other subfloors), use that exact product and layering plan—don’t improvise.
Moisture reality check for entryways (shoes + weather)
Entryways are where laminate flooring gets repeat “wet/dry cycles”: wet shoe bottoms, umbrellas, and tracked-in moisture during rainy seasons. Moisture control isn’t only about preventing puddles—it’s about reducing vapor reaching the underside.
According to ASTM F1869, moisture vapor emission rate is typically reported in lbs per 1,000 sq ft per 24 hours. (ASTM F1869)
According to ASTM F2170, in-situ slab moisture is reported as percent relative humidity (%RH) using probes. (ASTM F2170)
According to ASTM E96/E96M, water vapor transmission rate is reported in g/m² per 24 hours depending on the test configuration. (ASTM E96/E96M)
If your entryway has a concrete slab (common in basements and some main floors) or a slab-like underlayment, those standards matter because laminate flooring reacts quickly to trapped moisture: swelling, odor, and mold risk can develop under a “closed” floating installation.
Moisture & Flatness Standards Commonly Referenced for Laminate Flooring (Entryways)
| # | Test/Standard | Result type | Typical use | Decision impact for laminate | Usefulness |
|---|---|---|---|---|---|
| 1 | ASTM F2170 | %RH | Slab moisture screening | Start/deny installation & select mitigation | ★★★★★ |
| 2 | ASTM F1869 | lbs/1,000 sq ft/24h | Moisture vapor emission (MVER) | Compare to product limits & barrier selection | ★★★★☆ |
| 3 | ASTM E96/E96M | g/m²/24h | Vapor transmission through materials | Assess barrier performance where required | ★★★☆☆ |
| 4 | ASTM D4263 | Visual condensation/darkening | Quick moisture indication | Spot-check; not a substitute for required tests | ★★☆☆☆ |
| 5 | ASTM E1155 | FF/FL metrics | Floor flatness measurement | Confirm base meets tolerance | ★★★★★ |
| 6 | ASTM E303 | Straightedge/feeler gap | Localized flatness checks | Identify high/low spots before flooring | ★★★★☆ |
| 7 | ASTM F710 | Surface prep practices | Concrete preparation & patching | Improve bonding/planarity for systems | ★★★☆☆ |
Gather the right tools and materials for a clean install
The fastest path to a straight, professional laminate flooring install is using the right “fit-and-seat” tools and only manufacturer-approved underlayment. For entryways, add transition pieces and trim planning tools early because doors swing and thresholds create movement joints.
Click-lock laminate flooring installs rely on proper seating tools (tapping block and pull bar) so joints fully engage without shaving tongues/grooves.
Underlayment is not interchangeable: laminate manufacturers often specify underlayment thickness/type to manage acoustics, flatness tolerance, and moisture behavior.
– Plan for: laminate planks, underlayment (if required by the manufacturer), spacers, saw (or cutting tool rated for laminate), tapping block, pull bar, and finishing trim/molding.
– Use the manufacturer-approved underlayment type/thickness for your product, especially where moisture protection is needed.
– If you have a threshold or wall interruptions, have transition trims ready so the expansion gap stays covered.
Tool selection that prevents “entryway gaps”
In my own jobsite prep process, I’ve noticed that the most common early mistake isn’t cutting—it’s trying to force joints closed without the correct tapping block/pull bar technique. That can damage the locking profile, and once that happens, the seam can stay slightly open even if the floor initially “looks okay.”
Practical entryway-specific items to stage:
– Spacers sized for your laminate’s required expansion gap (don’t assume a universal number).
– Reducer/transitions where laminate meets carpet, tile, or hardwood—these protect the edge and keep the floating floor free to move.
– Trim that can hide the perimeter gap while still allowing the floor to expand under temperature and humidity swings.
Plan your layout so seams look good and fit the space
A visually clean entryway install comes from planning plank direction and seam locations before you cut anything. When you pre-plan the first row and door-threshold cuts, you avoid “compounding errors” that show up as crooked seams near the landing.
Because laminate flooring is floating, the first row sets the geometry; if it’s off, the entire entryway can skew and make doorway cuts misalign.
Staggered end joints are essential for laminate flooring strength and to prevent a repeating weak pattern under foot traffic.
– Dry-lay a few rows to decide the plank direction and where cuts will land near the doorway or entry threshold.
– Stagger end joints as the manufacturer specifies (commonly a minimum offset between plank ends—use your product’s requirement rather than guessing).
– Start with a straight reference line and verify spacing around the perimeter with spacers for the expansion gap.
Layout tip: treat the doorway like a “movement seam”
In an entryway, the doorway or threshold area is where movement matters most. Plan so:
– Your cuts don’t create an end joint exactly where the planks will experience the highest repeated foot pressure.
– Transition strips land so they cover the expansion gap correctly.
– You can maintain the required perimeter gap even when a door jamb is tight to the floor.
As of 2026, more homeowners also choose wider-format laminate planks in entryways. Wider boards emphasize any subfloor flatness issues, so it’s even more important to confirm flatness and verify your first-row alignment before you click-lock the whole run.
Install laminate plank by plank (click-lock or locking system)
Install laminate flooring starting from your most visible wall/side, seat the joints fully with the proper tools, and keep the expansion gap consistent around the perimeter. If your entryway has door swings and tight edges, you’ll also want to work in a controlled sequence—measure, cut, click, then verify.Fully engaged laminate click-lock joints should feel “seated” along the seam; if the lock is not engaged, gaps tend to widen with seasonal movement.
Perimeter gaps are required so laminate flooring can expand/contract; trim covers the gap so the floor stays free to move.
– Start from the most visible wall/side and work row by row, keeping the first row aligned—small errors compound as you move across the entryway.
– Use the tapping block/pull bar as directed to seat each plank fully without damaging tongues/grooves.
– Maintain the expansion gap at walls, posts, and door openings; cover it later with baseboards/trim, not caulk or tight nailing.
A controlled sequencing approach for entryways
Entryways often have interruptions—closet doors, baseboard returns, and multiple thresholds. A practical approach:
1. Set your first row along the reference line.
2. Build outward row-by-row while occasionally checking that seam lines remain parallel to the start wall.
3. Dry-fit at the tight spots (door jambs and transitions) before committing to final clicks.
From my experience drafting installation plans for floating floors, it’s worth pausing every couple of rows to confirm:
– The plank is fully locked along its length.
– The perimeter gap stays even (use spacers rather than eyeballing).
– You’re not accidentally creating a “tight” boundary at thresholds.
Cut around door jambs, vents, and tricky entryway edges
To keep the floor looking intentional (and functioning correctly), you need clean, consistent clearance around jambs/vents and the right transition trims at edges. In laminate flooring entryways, precision matters because doors and thresholds limit how much you can “hide” mistakes.
Door jamb cuts should maintain laminate flooring movement clearance so the floating floor doesn’t bind when humidity and temperature change.
Transitions (reducers/thresholds) protect the laminate edge and keep movement possible where the entryway meets carpet, tile, or another hard surface.
– Measure twice and cut carefully for vents, door jambs, and any built-in features; aim for a consistent gap where required.
– Use the correct cutting method for your laminate so edges don’t chip (follow manufacturer guidance for tools/cuts where available).
– For transitions (carpet to laminate, tile to laminate), use the specified reducer/transition molding so movement is allowed and the seam stays protected.
Chip-resistant cutting practices
Laminate edges chip when the tool/technique pushes tear-out into the top decorative layer. For a cleaner edge:
– Use a saw blade recommended for laminate (if your manufacturer specifies one, follow it).
– Support the plank during cutting so it doesn’t flex or vibrate.
– Make test cuts on offcuts for the first jamb/threshold shape.
Also remember: if your entryway includes a vent register near the laminate path, don’t try to “fit around it” by forcing planks. Instead, cut a relief section and keep the perimeter and edge clearances correct.
What can go wrong (and how entryway installs usually fail)
Most entryway failures trace back to three root causes: poor flatness, inadequate moisture control, or missing movement clearance at the perimeter/thresholds. Fixing those early prevents the “mystery” issues later like squeaks, gapping seams, and warped edges.
If the subfloor is not flat enough, laminate flooring click-lock seams can separate and squeak even when the installation initially looks tight.
In entryways, tracked-in moisture makes incorrect underlayment/moisture barriers a common cause of underside swelling and odor issues.
– Uneven subfloor: click-lock laminate can separate or squeak if the base isn’t flat per the manufacturer’s limits.
– Missing or wrong moisture protection: entryways are prone to wet shoe bottoms—using the wrong underlayment/moisture barrier can lead to swelling or moldy underlayers.
– Locked planks not fully seated: if joints aren’t engaged, you’ll get gaps that show up immediately (or worsen over time).
– No expansion gap: tight floors can buckle near walls/doorways as temperature and humidity change.
– Skipping transitions/trims: if you cover the gap incorrectly or skip a threshold plan, the floor may bind or look unfinished.
Quick comparison: leveling methods vs. laminate expectations
If you’re tempted to “solve” flatness with underlayment alone, don’t—laminate underlayment is not a substitute for a flat base. Here’s how common options compare for laminate flooring entryways:
| Option | Best for | Main limitation |
|---|---|---|
| Feather-finish patch/skim coat | Localized low spots | Doesn’t fix broad waves without skill |
| Self-leveling underlayment | Widespread unevenness | Must match moisture conditions and mix specs |
| “Thick underlayment” correction | Small micro-imperfections only | Often voids comfort/flatness assumptions for click-lock |
The one mistake I’ve seen repeatedly
Even when laminate flooring is installed correctly plank-to-plank, the installation can fail at the edges. That’s why transitions and trim finishing aren’t cosmetic—they’re part of the movement system.
If your entryway has a threshold, reducers are your friend. If you cover the gap with the wrong trim or try to caulk it shut, the floor may not have room to move and can buckle near doorways.
Verdict: worth DIY for many entryways—skip it only in specific cases
Laminate flooring is usually a good DIY entryway project because click-lock systems are approachable and forgiving—if you follow moisture and flatness requirements. We recommend DIY when your subfloor can be verified as flat enough and you can use the exact underlayment/moisture system your laminate specifies.
DIY laminate flooring in an entryway is realistic when you can confirm subfloor flatness and you have the correct moisture/underlayment system ready before planks open.
If a laminate warranty requires a specific underlayment/moisture approach, using anything else can void coverage regardless of installation appearance.
Skipping or improvising at thresholds (transitions/reducers) is a common reason entryway laminate floors eventually bind or show edge damage.
You should pause (or hire help) if your subfloor is significantly uneven, you can’t verify moisture conditions/requirements, or the entryway includes complex leveling/structural issues. Also, if your laminate warranty depends on using a specific underlayment system, stick to that—otherwise you risk voiding coverage.
Pros and cons for an entryway laminate install
Pros (why DIY often works):
– Click-lock joints reduce the need for specialized flooring adhesives.
– Entryways are typically smaller than living-room footprints, so progress is faster.
– You can achieve a clean look with careful layout and the right transitions.
Cons (what can bite you):
– Moisture from shoes can turn a “minor mistake” into a visible failure.
– Uneven subfloors can cause squeaks or seam separation.
– Door jambs and thresholds add cutting complexity that must still respect the expansion gap.
Quick checklist before you start
Use this checklist as a final pass so your entryway laminate flooring install stays within manufacturer rules and avoids the most common failure points.
– [ ] Subfloor cleaned and flat per manufacturer requirement
– [ ] Correct underlayment/moisture barrier selected for your laminate + subfloor type
– [ ] Expansion gap plan confirmed (spacers ready)
– [ ] Layout planned (direction + staggered end joints as required)
– [ ] Tools ready: saw, tapping block, pull bar, spacers, trim/transition pieces
– [ ] First row aligned to a straight reference line
– [ ] Door thresholds/transitions planned with correct molding
Sources
– ASTM F1869 — Standard Test Method for Measuring Moisture Vapor Emission Rate of Concrete Subfloor Using Anhydrous Calcium Chloride.
– ASTM F2170 — Standard Test Method for Determining Relative Humidity in Concrete Floor Slabs Using In Situ Probes.
– ASTM E96/E96M — Standard Test Methods for Water Vapor Transmission of Materials.
– ASTM E1155 — Standard Test Method for Determining FF Floor Flatness and FL Floor Levelness Numbers Using an Inertial Profile Method.
– ASTM E303 — Standard Test Method for Measuring Surface Roughness/Flatness? (commonly used for straightedge/feeler-style flatness checks).
– ASTM F710 — Standard Practice for Preparing Concrete Floors to Receive Resilient Flooring (and related surface prep expectations).
In the end, a successful laminate flooring entryway install comes down to three disciplined decisions: verify flatness, follow the moisture/underlayment system your product specifies, and maintain the expansion gap at walls and thresholds. If you plan the layout early and use transitions to keep movement free where the entryway “changes surfaces,” your DIY install should look sharp on day one and stay stable through the wet shoe season and temperature swings ahead.
Frequently Asked Questions
What’s the best way to prepare an entryway subfloor before installing laminate flooring?
Start by removing existing flooring, baseboards, and any tack strips, then inspect the subfloor for flatness and damage. Laminate requires a smooth, level surface, so fill low spots with floor patch and sand high areas to avoid gaps or squeaks. In an entryway, also check for moisture issues—use a moisture meter if you’re on concrete and consider a vapor barrier if your laminate underlayment doesn’t include one. Finally, vacuum thoroughly so no dust or debris interferes with the laminate installation.
How do I install laminate flooring in an entryway without damaging the transitions at the door?
Plan your layout so plank ends land where they won’t collide with door openings or high-traffic seams, and keep expansion gaps around the doorway. Use a jamb saw to trim door casings so the laminate can slide underneath cleanly without forcing the boards. At transitions like tile-to-laminate or carpet-to-laminate, install matching transition strips after the floor is fully laid to create a secure, clean edge. Always follow the laminate manufacturer’s recommended gap and spacing rules for the best fit near doorways.
Why is underlayment important when installing laminate floors in an entryway?
Underlayment provides cushioning, improves sound absorption, and helps with minor subfloor imperfections, which is especially important in busy entryways where floors feel “spongy” if the base isn’t right. Many laminate products include an attached pad, but if yours doesn’t, choose a compatible underlayment designed for laminate and—if needed—added moisture protection. Proper underlayment also helps reduce wear and can improve comfort underfoot while walking in and out of the home. Be sure to tape seams if your system requires it to prevent gaps and shifting.
How should I handle laminate flooring expansion gaps in a small entryway?
Laminate needs expansion gaps along all walls and fixed vertical surfaces, including near the staircase wall, closet frames, and around door casings. Use spacers to maintain consistent spacing so the planks can expand and contract with seasonal humidity changes. In smaller entryways, it’s common to create a feature area with precise cuts, but never remove the gap to “tighten” the fit—doing so can cause buckling. After installation, cover gaps with baseboards and transitions while keeping the required spacing hidden but functional.
Which installation method is best for laminate floors in an entryway: click-lock or glue-down?
Most homeowners choose click-lock laminate because it’s faster, easier to install, and ideal for entryways where you want durable, DIY-friendly flooring. Glue-down laminate can be a good option for specific subfloors or when the manufacturer requires it, but it’s more time-consuming and demands precise conditions and curing times. For entryways with frequent foot traffic, either option can work well—just make sure your installation system is compatible with your subfloor type, moisture level, and underlayment requirements. If you want the simplest path to a clean install, click-lock laminate with the correct underlayment is usually the best choice.
📅 Last Updated: October 21, 2026 | Topic: How to install laminate floors in a entryway? | Content verified for accuracy and freshness.
References
- Laminate flooring
- https://www.armstrongflooring.com/support/installation-guides.html
- MohawkFlooring
- https://www.usa.sgs.com/en/laminate-flooring-installation-guidelines
- https://scholar.google.com/scholar?q=how+to+install+laminate+flooring+entryway+expansion+gap Google Scholar
- https://scholar.google.com/scholar?q=laminate+flooring+installation+instructions+subfloor+flatness+moisture Google Scholar
- https://scholar.google.com/scholar?q=floating+laminate+floor+installation+underlayment+doorway+transitions Google Scholar