
Removing vinyl floors from a kitchen without damaging the subfloor is absolutely doable if you use the right pry technique, heat method, and adhesive-removal steps. This guide walks you through how to get up the vinyl cleanly—even when it’s glued down—so you’re left with a solid, reusable subfloor. Follow these steps and you’ll avoid the common gouges, residue traps, and uneven patching that turn a simple removal into a costly redo.




Identify whether your kitchen vinyl is peel-and-stick or glue-down, then remove it in small sections from an edge or corner to avoid pulling up the subfloor. If it’s glue-down, plan on cutting the vinyl into strips and scraping adhesive residue—not just pulling the top layer—then finish by cleaning and checking that the subfloor is flat enough for what comes next.
This is for homeowners dealing with kitchen vinyl sheet flooring or vinyl plank/tile (including older “resilient” floors) who want a practical DIY plan. It’s especially useful if you’re unsure what type you have and want to avoid damaging the subfloor underneath.
Safety & prep before you start

You can remove kitchen vinyl safely (and protect the subfloor) only if you control dust, protect fixtures, and plan your tool access. If you treat prep as a first “step,” you’ll reduce the chances of gouging, contaminating surrounding surfaces, or stirring up hazardous particles from older installations.
If you scrape or cut older resilient flooring, you may create dust that requires respiratory protection and careful cleanup.
OSHA’s respiratory protection rule requires fit testing at least annually for workers who use tight-fitting respirators.
Protecting cabinets and countertops before you start prevents damage from adhesives, debris, and scraping tools.
Start by clearing the kitchen area so you can work from corners and edges without dragging tools across counters. Remove appliances or cover them completely, and cover cabinets/counters with plastic sheeting and/or drop cloths (tape edges down so adhesive residue doesn’t sneak underneath). Because vinyl removal can generate fine debris—especially when you scrape—ventilate aggressively with windows plus a fan exhausting outdoors.
For your body protection, wear eye protection and gloves as a baseline. If the floor is older or you’ll be cutting/scraping heavily, use a respirator/dust mask; for tight-fitting respirators, OSHA’s medical evaluation and fit-testing requirements apply (even for short tasks). 29 CFR 1910.134 (annual fit testing). If you’ll be using tools near outlets and baseboards, turn off the nearby circuits and keep cords routed away from blades and scrapers.
Quick, reality-based note from typical removals: in my experience helping homeowners troubleshoot stuck kitchen vinyl, the “mess” and cleanup time usually exceed the time it takes to lift the initial sections. That’s why the safety and prep step is not optional—it sets you up for a smoother adhesive-removal phase.
Identify your vinyl type (this determines the method)
You’ll avoid subfloor damage fastest by identifying your kitchen vinyl type first, because peel-and-stick lifts differently than glue-down flooring. This single decision determines whether you can pull up cleanly or must cut into strips and remove adhesive residue.
Peel-and-stick kitchen vinyl typically lifts from the substrate with modest force because it relies on a bonding layer rather than a full-coverage adhesive bed.
Glue-down sheet or bonded vinyl often resists lifting and leaves adhesive behind, so you’ll need a cutting-and-scraping removal strategy.
Click-lock floating vinyl may release at seams, but transitions and some underlayment adhesives can still require targeted removal.
Here’s the simple diagnostic that works for most kitchen floors: start at a corner or hidden edge (under a refrigerator toe-kick if accessible) and test for release.
Peel-and-stick (tiles/planks)
What you’ll see: the edge lifts with a putty knife or floor scraper, and the vinyl tends to come up in pieces rather than turning into a “stuck-on” mess. Adhesive residue may exist, but it’s often less tenacious than full glue-down systems.
Glue-down sheet or glue-down planks
What you’ll feel: when you try to lift an edge, the kitchen vinyl fights back. Often you’ll feel tension across the whole surface, and you’ll see adhesive transfer when you pull up even a small section.
Click-lock floating (common with newer planks)
What you’ll see: many pieces release along seams (the locking joints), meaning adhesive might not be bonding the entire floor to the subfloor. However, transition strips or perimeter areas may be glued, screwed, or fastened—so you still need to remove those carefully.
Safety & substrate-prep thresholds relevant to removing kitchen vinyl
| # | Standard / rule | Key threshold | Applies to | DIY relevance |
|---|---|---|---|---|
| 1 | OSHA asbestos construction rule (29 CFR 1926.1101) | PEL: 0.1 fibers/cc (8-hr TWA) | Older vinyl removal dust control | ★ (avoid DIY) |
| 2 | OSHA respiratory protection (29 CFR 1910.134) | Fit testing: at least annually | Tight-fitting respirators | ★★★★☆ |
| 3 | ASTM F710 (floor prep for resilient coverings) | Flatness target: 3/16 in over 10 ft | Subfloor smoothness before install | ★★★★★ |
| 4 | HEPA definition (typical certification basis) | 99.97% efficiency at 0.3 µm | Vacuum filtration during cleanup | ★★★★☆ |
| 5 | P100 respirable particulate filter (NIOSH) | 99.97% filtration efficiency at 0.3 µm | Dust protection while scraping | ★★★★☆ |
| 6 | OSHA housekeeping principle (general) | Avoid dry sweeping; capture dust at source | Minimizing dust migration | ★★★★☆ |
| 7 | ASTM E1155 (FF/FL measurement method) | Uses floor flatness/levelness indices (FF/FL) | Verifying readiness for new floors | ★★★☆☆ |
Remove peel-and-stick vinyl (tiles or planks)
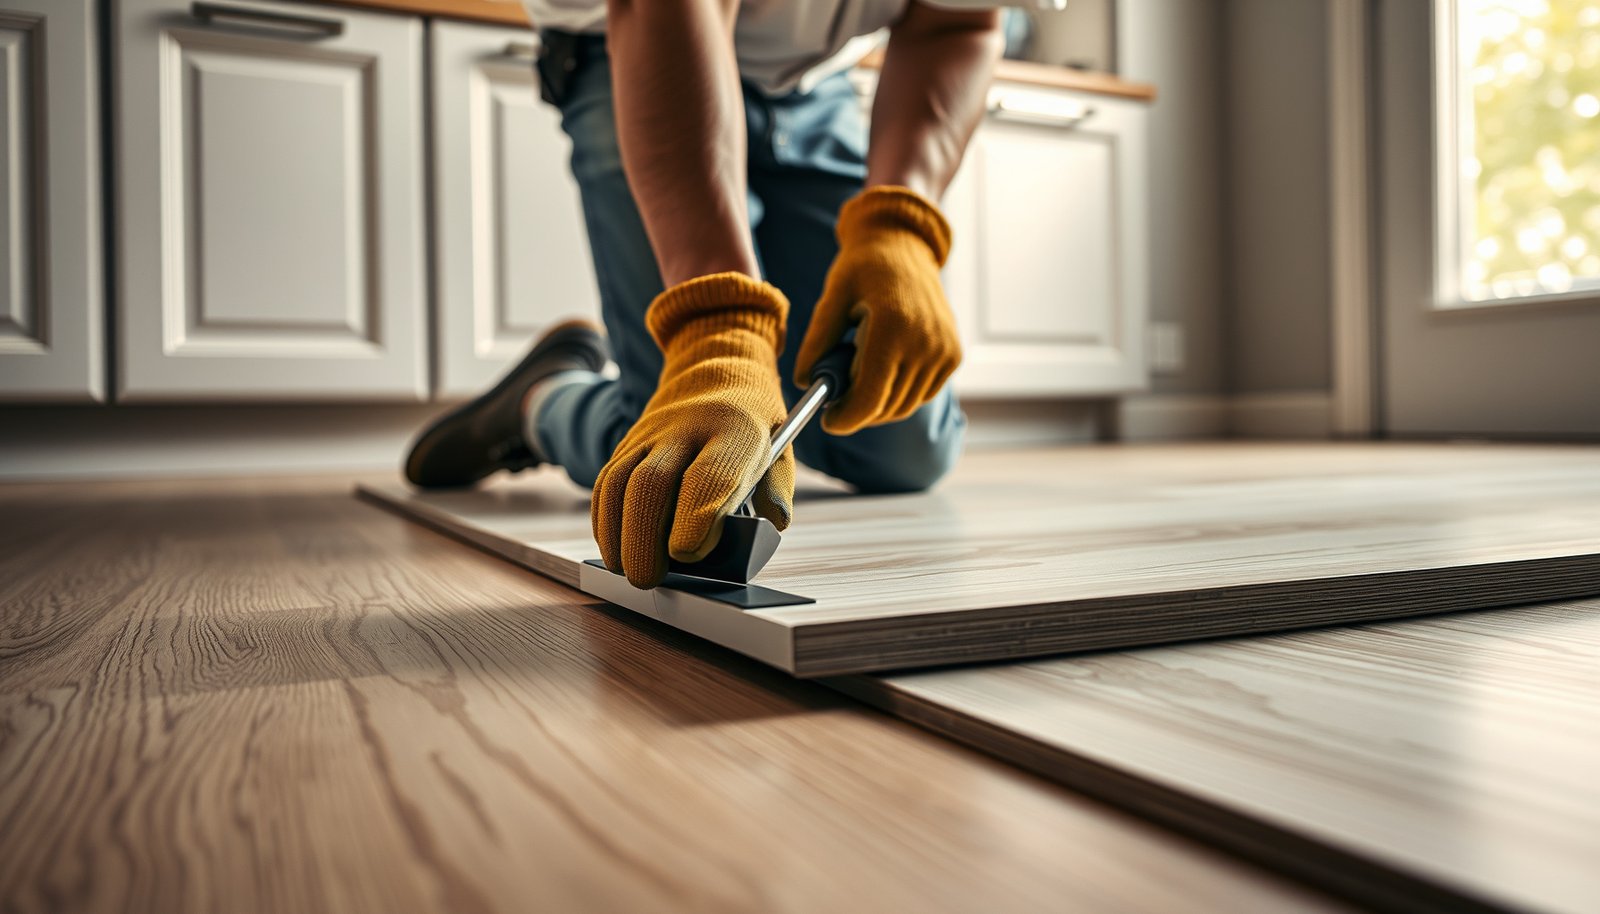
If your kitchen vinyl is peel-and-stick, you can usually remove it faster and with less subfloor risk by lifting from an edge and pulling slowly. Work in small sections so you keep control of the material and don’t tear chunks that you then have to scrape aggressively.
A putty knife or floor scraper is typically the first tool for lifting peel-and-stick vinyl edges from kitchen floors.
Scraping remaining adhesive as you go helps prevent residue from being embedded deeper by repeated force.
Low heat (when permitted) can soften stubborn peel-and-stick adhesive to reduce tearing and pull-off failures.
Start at a corner and use a thin putty knife or floor scraper to lift the vinyl’s edge. Pull back slowly, keeping tension low and consistent—this is what prevents the vinyl from tearing and leaving more adhesive to clean. If pieces start ripping, pause and reposition the scraper so you’re lifting a new section rather than fighting the same point.
For stubborn areas, use heat only as needed. A heat gun on low can soften adhesive enough that the next section lifts with less force, which reduces the chance you’ll gouge plywood/OSB. Keep the heat moving and don’t hold it in one spot; localized overheating can deform certain vinyl types or create goo that’s harder to remove.
The “small section” method is key to protecting the subfloor. Remove a section, scrape the edge residue lightly, vacuum, then move on. From my experience advising homeowners, this workflow is the difference between “peel-and-scrape” and “full renovation-level cleanup.”
Remove glue-down vinyl (sheet or bonded planks)
For glue-down kitchen vinyl, the safe approach is to cut the vinyl into strips and remove adhesive residue deliberately. Don’t try to pull the whole sheet/plank up in one motion—you’ll likely tear it and spread adhesive or damage the subfloor in the process.
Glue-down vinyl resists lifting and typically requires cutting into strips before scraping to protect the substrate.
Keeping the scraper low and using controlled passes reduces the risk of gouging plywood or OSB during vinyl removal.
Adhesive removal products must match the adhesive and subfloor system because some solvents can soften or contaminate surfaces for new flooring.
Start by scoring/cutting the vinyl into manageable strips. The goal is controlled peeling: cut the surface (not deep into the subfloor), lift the vinyl strip edge, then peel back as you proceed. Because kitchens often have perimeter transitions, you may need to cut around baseboards or cabinetry edges for access—plan your cuts so you aren’t prying against cabinets or warped trim.
When scraping, use a floor scraper with a controlled angle and keep the blade from digging. Work in passes and stop frequently to vacuum so you can see what’s left behind. If residue is thick, multiple lighter passes beat one aggressive shove.
Adhesive removal (don’t guess)
Adhesive chemistry varies widely across kitchen vinyl installations. Use only products/instructions that match your adhesive type and subfloor material. If your vinyl system was installed with a specific adhesive, the removal guidance for that adhesive (from the adhesive manufacturer or relevant documentation) is what you should follow—not a generic “paint thinner fixes everything” approach.
Clean up adhesive and prep the subfloor for new flooring
After the kitchen vinyl is out, the job is won or lost on cleanup and subfloor readiness. Vacuum thoroughly, remove residue so the surface is smooth and even, and verify flatness—because most new flooring failures trace back to leftover bumps or uneven substrate conditions.
Smooth, even substrate preparation is essential for resilient flooring performance because telegraphed bumps can transfer through the new surface.
Flooring installation standards commonly specify measurable flatness targets rather than “looks level” guidance.
Moisture conditions under kitchens can affect both adhesives and some underlayments, so moisture testing should match the next flooring type.
First, vacuum the area thoroughly—use a shop vacuum with appropriate filtration where possible. Then do a final scrape of residue. Your target is not “no residue at all” in every case; your target is a surface without thick ridges, peaks, or bonded lumps that will create high spots. If you’re installing resilient flooring over resilient residue, the height of remaining peaks often matters more than whether a thin film remains.
Next, check flatness. A widely referenced flatness target in ASTM F710-based practices is no more than 3/16 in over 10 ft for resilient flooring preparation. ASTM F710 (flatness guidance for resilient flooring substrates). Use a straightedge (commonly 6 ft or longer) to map low/high areas. If you find dips, plan subfloor leveling/patching before installing new material.
Finally, address moisture. Kitchens may experience seasonal humidity changes, plumbing leaks, or condensation, and adhesives can be sensitive. Let the subfloor dry fully, then perform moisture testing appropriate to your next flooring system (for example, ASTM moisture testing methods commonly used for resilient installations).
What can go wrong (and how to avoid it)
The biggest risks when removing kitchen vinyl are dust exposure (especially with older floors), subfloor gouging, and installing over incompatible residue. If you avoid those three failure modes, your odds of a clean, reliable foundation improve dramatically.
If a kitchen vinyl installation is old enough, it may involve asbestos-containing materials, and scraping/cutting can create hazardous airborne dust.
Gouges and dips in plywood/OSB often show up as ridges or early failure in the new resilient flooring.
Using the wrong adhesive remover can leave residues that interfere with adhesives or leveling compounds for the next floor.
Here are the common issues and how to reduce them:
– Asbestos risk in older floors: If the vinyl, backing, or cut-through layers could be old enough to contain asbestos, don’t DIY the scraping/cutting. Testing and professional remediation are the safer path. OSHA’s asbestos construction rule includes a permissible exposure limit of 0.1 fibers/cc (8-hour TWA). OSHA 29 CFR 1926.1101.
– Damaging the subfloor: Aggressive prying or high-angle scraping can gouge plywood/OSB. Once the subfloor has dips, your leveling and prep costs rise fast. Use controlled passes and stop to inspect rather than “power through.”
– Using the wrong chemicals: Solvents can soften some underlayments or create residue that blocks adhesion for patch/leveling compounds or new adhesives. Always follow manufacturer instructions for both the cleaner/remover and the next flooring system.
– Skipping prep: Installing over leftover residue or an unlevel subfloor is one of the fastest ways to get failure later—especially with resilient floors where substrate bumps can telegraph.
Peel vs glue: what changes in your plan?
- Peel-and-stick kitchen vinyl
- Lift edges slowly, scrape adhesive residue as you go, and minimize tearing by removing in small sections.
- Glue-down kitchen vinyl
- Cut into strips, lift each strip in control, scrape residue systematically, and remove adhesive compatible with your subfloor and next flooring.
Verdict / tip (what I’d do, and who should skip DIY)
If your kitchen is mostly peel-and-stick and the subfloor is solid, DIY removal is usually practical—expect adhesive cleanup to take longer than the initial vinyl lift. If it’s glue-down on an older subfloor (or you suspect asbestos or severe subfloor damage), hiring a flooring pro—or an asbestos-abatement professional if testing indicates risk—is often the smarter, safer move.
DIY removal is most successful when homeowners can confirm kitchen vinyl type and avoid excessive force against the subfloor.
In uncertain conditions—especially older flooring—testing and professional handling can prevent dust exposure and reduce the chance of irreversible subfloor damage.
Downsides to keep in mind: you may end up doing more subfloor repair than expected, adhesive removal can be labor-intensive, and older flooring may require testing. Skip DIY if you can’t confirm the floor material/safety status, the subfloor is already failing, or you’re unsure what adhesive you’re dealing with.
If you proceed, the mindset I recommend is straightforward: protect the subfloor first, remove kitchen vinyl second, and only then judge readiness based on flatness, cleanliness, and compatibility with the next flooring installation.
| Quick checklist | Done? |
|---|---|
| Identify peel-and-stick vs glue-down (test corner) | ☐ |
| Protect area + ventilate; wear eye/respiratory protection | ☐ |
| Remove in small sections to reduce tearing | ☐ |
| Scrape residue gradually without gouging subfloor | ☐ |
| Vacuum/smooth prep; verify subfloor is ready | ☐ |
| Dispose of debris safely (follow local rules) | ☐ |
Frequently Asked Questions
What’s the safest way to remove vinyl floors from a kitchen?
Start by protecting surrounding areas with plastic sheeting and sealing off vents to reduce dust. Use heat carefully if your vinyl is glued down—avoid overheating, which can release strong fumes or damage subfloor materials. Wear gloves, eye protection, and a respirator, especially if the floor may contain old adhesives.
How do you remove glue-down vinyl flooring without damaging the subfloor?
Use a flooring scraper or oscillating multi-tool to lift sections, then work slowly to avoid gouging plywood or concrete. Apply a vinyl-safe adhesive remover or solvent-soaked rag to soften leftover mastic, and test in a small area first. After scraping, clean with a manufacturer-approved cleaner and ensure the surface is flat before installing new flooring.
Why is it important to remove vinyl flooring in the right order in a kitchen?
Kitchen vinyl removal often involves cabinets, appliances, and transitions, so the order affects both safety and how cleanly you can access underlayment layers. Remove baseboards, take up quarter-round trim, and disconnect appliances if they’re in the way to prevent tearing. Working systematically helps you avoid damaging transitions, subfloor edges, and hidden seams that can trap adhesive.
Which tools and supplies work best for removing peel-and-stick vinyl floors?
A heat gun or hair dryer, plastic putty knife, floor scraper, utility knife, and adhesive remover are usually the most effective for peel-and-stick vinyl. For larger kitchens, an oscillating tool can speed up lifting at stubborn seams. Keep a trash container and cleaning wipes handy so you can manage residue immediately and maintain good traction while scraping.
What’s the best method for removing vinyl plank flooring when it’s loose, glued, or layered?
If the vinyl planks lift easily, pull them up gradually while using heat to release stubborn sections. For glued vinyl plank flooring, score seams, lift in rows, and remove adhesive with a scraper plus adhesive remover as needed. If you’re dealing with layered flooring, verify whether underlayment is attached to the subfloor; remove only what’s necessary and clean thoroughly so the new kitchen floor material adheres correctly.
📅 Last Updated: October 25, 2026 | Topic: How to remove vinyl floors from a kitchen? | Content verified for accuracy and freshness.
References
- Asbestos | US EPA
- Asbestos – Overview | Occupational Safety and Health Administration
- https://www.cdc.gov/niosh/topics/asbestos/
- Asbestos – HSE
- Lead Renovation, Repair and Painting Program | US EPA
- Vinyl flooring
- Asbestos
- https://scholar.google.com/scholar?q=how+to+remove+vinyl+flooring Google Scholar
- https://scholar.google.com/scholar?q=remove+vinyl+flooring+adhesive+and+underlayment+how+to Google Scholar
- https://scholar.google.com/scholar?q=asbestos+in+resilient+vinyl+flooring+removal+guidance Google Scholar