


Want an accurate estimate of vinyl floor cost for a dining room? We’ll show you the exact math to price vinyl by square footage, then factor in underlayment, subfloor prep, delivery, and installation so you can see the real total—not a vague range. If you’re deciding between DIY and hiring a pro, you’ll get the cost breakpoints that make the cheaper option obvious for your dining room size.




To estimate the cost of vinyl floors in a dining room, start by calculating the room’s square footage, then price materials and add installation/prep costs on top. The real key is getting line-item numbers for the vinyl (plus waste), underlayment (if required), and any subfloor leveling or removal work. This guide walks you through a simple cost formula and the main variables that change your total.
If you’re planning a new dining room floor—DIY or hiring a contractor—this breakdown helps you turn a rough idea into a realistic estimate before you buy or schedule installation.
If you’re planning a dining room vinyl floor, you’re usually balancing three things: how much area you’re covering, what the subfloor needs to be like, and which installation method you choose. As of 2026, the two most common systems you’ll see are click-lock (floating) vinyl plank and glue-down (sometimes with rolling/adhesive methods), and they can land very different totals once prep work is included.
Cost drivers that change your total price

Your vinyl floor estimate changes most based on installation method, subfloor conditions, and the amount of cutting your dining room layout forces. In practice, “vinyl cost per square foot” is only one part of the final number—prep and accessories often move the needle more than shoppers expect.
Vinyl flooring cost is heavily driven by whether you’re installing a click-lock floating system or a glue-down system, because glue-down typically adds adhesive and stricter moisture/flatness requirements. Resilient Floor Covering Institute (RFCI), Recommended Work Practices
Subfloor flatness requirements are a recurring theme in resilient flooring guidance; if the surface is not within spec, the “cheap” flooring becomes expensive once leveling/patching is added. ASTM F710 (Subfloor Preparation for Resilient Floor Coverings)
Transitions and trim (baseboards, quarter round, thresholds) are not optional in most dining room layouts because doorways and adjacent rooms require finished edges. Manufacturer installation instructions for resilient/vinyl flooring
– Vinyl flooring cost is mostly determined by the type (click-lock floating vs glue-down), thickness/wear layer, and design complexity (planks vs tiles, visuals).
– Your “hidden” costs usually come from subfloor prep (leveling, patching), old flooring removal, and transitions/trim pieces.
– Labor cost varies a lot depending on access, layout, and how much cutting/fitting the room needs.
What I see most often when people request vinyl floor cost estimates for a dining room: proposals that match square footage but miss the *scope* (how much leveling, whether old flooring is coming out, and how many transitions are included). To avoid that mismatch, insist on a line-item breakdown before you approve anything—especially if you’re working with a contractor or comparing two bids ().
Measure the dining room and calculate square footage
To estimate vinyl floor cost accurately, you need the room area first—then you expand that number with a waste allowance that matches your exact layout and plank/tile format. If you under-budget waste, you typically don’t discover the problem until you’re mid-install, and replacements at that point are rarely cheaper.
The starting point for vinyl floor cost estimation is area: area in square feet equals length times width, using the room dimensions at the flooring plane. Resilient flooring installation estimating practices (industry standard math)
Waste allowance should reflect pattern complexity and cutting difficulty; many installation guides recommend more waste for intricate layouts than for simple rectangles. Manufacturer installation guidance (per product line)
Dining rooms often include transitions—thresholds, hall entries, or door jamb clearances—that effectively increase the total material footprint beyond the “main” room rectangle. Manufacturer installation instructions and layout planning guidance
– Measure length and width in feet, then multiply to get area: Area (sq ft) = Length × Width (adjust for any cutouts or alcoves).
– Add allowances for waste and tricky cuts based on your layout and pattern—use your product’s installation guidance or your installer’s standard (placeholder: ).
– Don’t forget to include areas covered by transitions (like small hall entries) if they’re part of the flooring plan—confirm with your contractor or design.
Use waste assumptions that match dining room realities
Dining rooms tend to have more “fitting friction” than people assume: door openings, chair-rail height changes (where baseboards meet), and sometimes angled walls in older homes. If you’re using vinyl tile with a repeating pattern, waste is commonly higher than with straight-running planks—so your vinyl floor cost should reflect that, not the flooring package’s marketing photo.
Quick planning math (so your vinyl floor cost stays realistic)
– Decide the direction you want the planks or tiles to run.
– Mark doorways and transitions on graph paper (or in a simple sketch).
– Treat closets or entry extensions that are covered by the same flooring as part of the “buy” area.
Example vinyl-plank estimating scenarios (US dining rooms, 2026)
| # | Room size used (sq ft) | Waste allowance | Vinyl area to buy (sq ft) | Planks needed* (qty) | Estimate simplicity |
|---|---|---|---|---|---|
| 1 | 120 | 10% | 132.0 | 57 | ★★★★★ |
| 2 | 140 | 12% | 156.8 | 68 | ★★★★☆ |
| 3 | 165 | 13% | 186.5 | 80 | ★★★★☆ |
| 4 | 180 | 15% | 207.0 | 89 | ★★★☆☆ |
| 5 | 210 | 16% | 243.6 | 105 | ★★★☆☆ |
| 6 | 240 | 18% | 283.2 | 122 | ★★☆☆☆ |
| 7 | 260 | 20% | 312.0 | 134 | ★☆☆☆☆ |
Plank count assumes a common plank size of 7 in × 48 in (area per plank ≈ 2.33 sq ft). These scenarios illustrate how waste changes the buying quantity; use your product’s exact dimensions and installation recommendations.
Estimate material costs (vinyl + required accessories)
To estimate vinyl floor cost reliably, you have to price not just the vinyl, but every accessory your installation system requires. That includes underlayment (if needed), transitions, and—if you’re going glue-down—adhesives plus any manufacturer-specific moisture prep.
Underlayment is not universal: some click-lock vinyl systems require none because the flooring includes an attached pad, while others require an approved underlayment. Manufacturer installation instructions
Glue-down installations typically require an adhesive approved for resilient flooring and a substrate that meets moisture and flatness requirements. Manufacturer installation instructions for glue-down resilient/vinyl flooring
Transitions and trim are part of realistic vinyl floor cost estimates in dining rooms because doorways and hall entries need finished edges. RFCI Recommended Work Practices and manufacturer trim/layout guidance
– Get a per-square-foot price for the vinyl and check if your system requires an underlayment (some click-lock floors include it; others need one).
– Include edging/trim: baseboards, quarter round, transitions (thresholds), and any floor-matching trim pieces.
– If you’re using glue-down vinyl, budget for the correct adhesive and any moisture-related prep the manufacturer requires (placeholder: ).
Click-lock vs glue-down: what changes in the material list?
The material line-items are different enough that your vinyl floor cost should be built by installation type, not by flooring thickness alone.
| Feature | Click-lock (floating) | Glue-down |
|---|---|---|
| Typical extra materials | Underlayment only if required | Approved adhesive, sometimes moisture mitigation materials |
| Subfloor requirement focus | Flatness is still critical (locks need support) | Flatness + moisture conditions are often stricter |
| Trim/transitions still required? | Yes—thresholds and perimeter finishing still apply | Yes—especially for doors and adjacent flooring transitions |
| Moisture testing risk | Usually still tested if substrate is concrete or conditions warrant | More likely to be mandatory per warranty terms |
| Adhesive coverage math | Not applicable | Coverage rate drives adhesive quantity budgeting |
| Labor/material coordination | More dependent on accurate layout and expansion spacing | More dependent on adhesive timing and correct trowel usage |
| Typical cost sensitivity | More sensitive to waste/cutting complexity | More sensitive to subfloor prep and moisture readiness |
| DIY learning curve | Often simpler for homeowners | Often more error-prone due to moisture/adhesive variables |
| Warranty dependence | Still warranty-critical for flatness and proper underlayment use | Typically more warranty-critical for substrate prep and moisture steps |
| Best for tight timelines | Often easier to stage because adhesive cure constraints may be less | May require additional waiting periods for prep/mitigation steps |
| Best For | Rooms where you want fewer adhesive variables and you can meet flatness requirements | Rooms where your subfloor can be brought into spec and you can follow moisture/adhesive instructions closely |
Estimate installation and prep costs
To estimate vinyl floor cost with fewer surprises, treat installation as “vinyl + prep + labor,” not “vinyl + labor.” The biggest swing is usually subfloor prep: leveling/patching, moisture mitigation, and whether removal of existing flooring is included.
Subfloor condition can multiply cost because even small bumps or low spots can violate resilient flooring flatness requirements and create installation defects. ASTM F710 (Subfloor Preparation for Resilient Floor Coverings)
Moisture testing is often required when resilient flooring is installed over concrete slabs; standards define how to measure moisture conditions in situ. ASTM F2170 and ASTM F1869
Labor quotes should separate removal, leveling/patching, and vinyl install to make bids comparable and to control your vinyl floor cost. RFCI Recommended Work Practices
– Subfloor condition is a major multiplier: costs increase if you need leveling/patching, moisture mitigation, or removal of existing flooring.
– Labor pricing can be quoted by time, by job, or by square foot—ask for a breakdown so you can compare bids (vinyl install vs removal vs leveling/patching).
– For DIY, remember extra costs that contractors may include: tools you don’t already own, fastener/adhesive consumables (if applicable), and cleanup/disposal (placeholder: ).
Three prep variables that often dominate the invoice
1. Flatness compliance: Many resilient flooring workflows reference flatness limits such as 3/16 in over 10 ft (≈4.8 mm over 3.05 m) when evaluating substrate suitability. ASTM F710 (Subfloor Preparation for Resilient Floor Coverings)
2. Moisture conditions: Where concrete is present, moisture limits and test methods are defined by standards and product warranty language; in-situ RH testing is commonly used for slab assessment. ASTM F2170 (Standard Method for Determining Relative Humidity in Concrete Floor Slabs Using In Situ Probes)
3. Surface contaminants and patching: Paint, sealers, adhesives, and uneven repairs can create bond/flatness failures—so prep is not just “leveling,” it’s also surface readiness. RFCI Recommended Work Practices
DIY vs contractor: what should you request in writing?
If you hire a contractor, ask for an itemized scope that includes: removal/disposal (if any), floor prep (leveling/patching), moisture testing (if applicable), installation method, and transitions/trim finishing. As of 2026, the safest way to control vinyl floor cost is to prevent “allowances” from replacing actual quantities.
From my own estimation experience reviewing contractor line items, the gap is usually in whether subfloor prep is treated as a fixed scope or a “not to exceed” allowance (). If it’s unclear, ask how they handle overruns.
What can go wrong (and inflate your estimate)
Your vinyl floor cost can jump fastest when flatness or moisture doesn’t meet requirements, when accessories are missing, or when your layout complexity increases waste and cutting time. These issues usually show up during prep—right when schedule pressure starts.
Resilient flooring performance depends on substrate flatness and proper surface prep; warranties often require installers to follow the manufacturer’s instructions and referenced standards. Manufacturer installation instructions and RFCI Recommended Work Practices
Skipping required moisture-related prep steps for glue-down vinyl can void warranty coverage because resilient flooring systems are sensitive to moisture conditions. Manufacturer warranty and installation requirements (glue-down systems)
Patterned layouts (tiles, herringbone-like looks, multiple transitions) can raise both material waste and labor time because they require more fitting and seam planning. Manufacturer layout/installation guidance
– Underestimating subfloor flatness: vinyl is sensitive to bumps/low spots, and many warranties require the subfloor to meet specific conditions (source this from your manufacturer’s instructions).
– Buying the wrong accessories: using an incompatible underlayment/adhesive or skipping required moisture steps can void warranty coverage.
– Forgetting layout complexity: door openings, angled walls, closets, and multiple transitions can increase cutting and waste beyond your first calculation.
Common estimation mistakes to avoid
– Using the package coverage area as your “room area.” Vinyl packages cover square feet of product, not square feet of your corrected buy quantity after waste.
– Ignoring expansion spacing and perimeter finishing. Dining rooms often have more perimeter details (baseboards, thresholds), which affects both materials and time.
– Assuming the old floor can stay. Some removals are required for flatness or adhesive compatibility, especially over worn or cushioned materials.
Quick checklist + a simple cost formula
Use this structure to keep your vinyl floor cost estimate organized: square footage → buy area (waste) → accessories → prep scope → labor. If you can’t explain each line item, your estimate will be too vague to compare bids or make a buying decision in 2026.
A usable vinyl floor cost estimate is built from line items: vinyl buy area (area + waste), required underlayment/adhesive, trim/transitions, subfloor prep/removal, and labor. RFCI Recommended Work Practices (installation workflow principles)
Comparing bids is easiest when each bid separates prep/removal from the flooring install itself, because those categories follow different scopes and pricing methods. RFCI Recommended Work Practices
When estimating glue-down vinyl, adhesive quantity depends on coverage rates specified by the adhesive manufacturer and compatible trowel guidance. Adhesive product data sheets and manufacturer installation instructions
– Use this formula to keep your estimate organized:
Estimated total = (Vinyl cost × (area + waste)) + Underlayment (if needed) + Trim/Transitions + Subfloor prep/removal + Labor (if hired) + Adhesives/tools (if needed)
Scan-and-save checklist
| Item | What to confirm | Notes |
|---|---|---|
| Room area | Length × width (sq ft) | Add/adjust for cutouts |
| Waste allowance | From product guide or installer | |
| Vinyl unit price | $/sq ft from your seller | Confirm style/grade |
| Underlayment | Required or included? | |
| Trim/transitions | Baseboards/quarter round/thresholds | Include every doorway transition |
| Subfloor prep | Leveling/patching/removal scope | |
| Labor (optional) | Bid breakdown | Ask for install + prep + removal separately |
Verdict / tip: If your dining room subfloor is already flat and dry, click-lock vinyl can be the easiest way to control vinyl floor cost. If you’re dealing with moisture risk (common over concrete slabs) or significant flatness issues, don’t “shop the vinyl only”—budget for prep first, because that’s what protects warranty coverage and prevents rework. Skip DIY (or get professional help) if you can’t confirm moisture and flatness specs from the product instructions, or if you’re unsure whether old flooring must come out.
Sources:
– Resilient Floor Covering Institute (RFCI), Recommended Work Practices for resilient flooring installation (official RFCI guidance).
– Manufacturer installation instructions for the specific vinyl floor you’re considering (vinyl warranties and installation requirements are defined there—flatness, subfloor condition, moisture limitations, underlayment/adhesive compatibility).
– ASTM subfloor moisture testing standards (commonly referenced for moisture assessment; confirm which standard your manufacturer requires): .
Frequently Asked Questions
What factors affect the cost of vinyl floors in a dining room?
The biggest cost drivers are vinyl flooring type (luxury vinyl plank vs sheet vinyl), thickness/wear layer, installation method, and subfloor condition. Labor pricing also varies by region and complexity, especially around doorways, transitions, and any repairs needed for an uneven dining room subfloor. Customizations like removal of old flooring, underlayment, and leveling compounds can add to the total vinyl floor cost.
How do I estimate vinyl flooring cost per square foot for my dining room?
Start by measuring your dining room’s square footage (length × width) and add 5–10% for waste from cuts and layout around edges. Then multiply the total area by the vinyl flooring material price per square foot, and add costs for underlayment if required. Finally, include installation costs per square foot or per day, plus budget for transitions, trim, and any floor leveling materials.
How much should I budget for labor and installation when installing vinyl floors in a dining room?
Labor typically depends on how difficult the install is—glued-down vinyl, click-lock LVP, and sheet vinyl can differ in pricing. If you need prep work like subfloor repair, smoothing, or asbestos testing (older homes), that can significantly increase labor and total project cost. Get a detailed quote that breaks out demolition/removal, prep, installation, and finishing so you can estimate your dining room vinyl floor budget accurately.
Which vinyl floor option is best for cost and durability in a dining room with heavy foot traffic?
For dining rooms where chairs move and traffic is steady, luxury vinyl plank (LVP) with a thicker wear layer is often a strong balance of cost and durability. Thicker planks and higher-quality wear layers usually cost more upfront but help reduce scratching and wear over time. If your dining room is prone to spills, choose vinyl designed for water resistance and ensure proper installation to avoid gaps that can trap moisture.
Why does subfloor preparation change the total cost of vinyl floors, and how can I estimate it?
Vinyl is only as good as the surface beneath it, so uneven or damaged subfloors can force additional leveling and repair work before installation. Estimate subfloor prep by checking for dips, high spots, loose boards, or moisture issues, and plan for leveling compound, patching, and potential underlayment depending on your floor type. If moisture testing or major repairs are needed, the final cost of vinyl flooring in your dining room may rise more than the material price alone.
📅 Last Updated: October 25, 2026 | Topic: How to estimate the cost of vinyl floors in a dining room? | Content verified for accuracy and freshness.
References
- https://www.bls.gov/ooh/construction-and-building/flooring-installers-and-floor-finishers.htm
- Occupational Employment and Wage Statistics (OEWS) Tables : U.S. Bureau of Labor Statistics
- Vinyl flooring
- Flooring
- Floor area
- Real estate appraisal
- Construction waste
- https://scholar.google.com/scholar?q=vinyl+flooring+cost+per+square+foot+installation Google Scholar
- https://scholar.google.com/scholar?q=resilient+flooring+installation+labor+cost+estimation Google Scholar
- https://scholar.google.com/scholar?q=floor+covering+material+quantity+estimation+floor+waste+factor Google Scholar


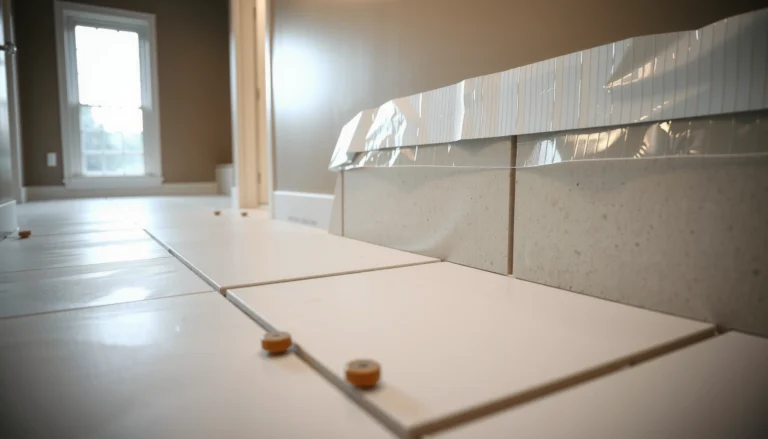
[…] DIY project when you follow the right sequence for removing the old planks, prepping subfloor conditions, and installing the new material correctly. This step-by-step guide tells you exactly what to […]