


Get the fastest way to remove stains from vinyl floors in a kitchen—so the spot disappears without dulling or damaging the finish. For most common spills, a simple cleaner plus the right scrubbing method beats harsher products by lifting residue instead of spreading it. Follow the steps below to identify the stain type and restore your floor the first time.


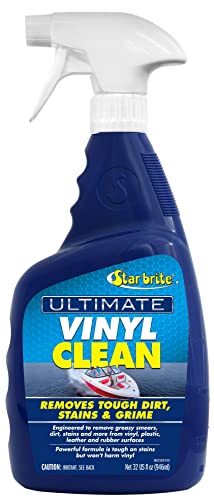

For most kitchen stains on vinyl floors, the fastest safe win is to blot first with a damp cloth, then clean with a pH-neutral dish soap solution and rinse with clean water. For tougher marks (like scuffs, grease smears, or shoe rubber), use a gentle targeted cleaner such as diluted rubbing alcohol on a cloth—never harsh abrasives. This guide shows what to try by stain type and what to avoid so you don’t damage the vinyl finish.
If your kitchen vinyl is looking stained from food spills, cooking grease, coffee/tea, or tracked-in marks, you’re in the right place. The steps below are designed for typical vinyl sheet or luxury vinyl plank/tile—always follow your floor’s care label if it’s different from general guidance.
If your kitchen vinyl is stained, the safest way to start is to identify whether residue sits on top or whether discoloration has soaked into the wear layer. Here’s how to protect the vinyl finish while you narrow down the right cleaning approach.
Identify the stain and protect the vinyl finish

If you want stains to lift without haze or dulling, you need to confirm whether the mark is surface residue and whether your wear layer can handle spot treatment. Here’s what to check before you apply any cleaner.
– Decide whether it’s surface residue (wipes up) or a deeper discoloration (may need repeat cleaning).
– Check whether your vinyl has an easy-clean/urethane “wear layer” (most do); avoid abrasives that can dull it.
– Always spot-test any cleaner in an inconspicuous area before treating the stain.
– Use good lighting and look at edges: surface residue often has a sharper “wipe line,” while true discoloration spreads gradually.
– Keep traffic patterns in mind: tracked-in soil near the entryway is often a combination stain (dirt + grease + pigment), which usually needs a two-step clean (soapy wipe + rinse) before spot treatment.
Vinyl flooring care guidance commonly emphasizes identifying surface residue vs. deeper discoloration because repeated gentle cleaning is safer than aggressive scrubbing.
Resilient vinyl floors typically have a protective wear layer, and abrasive cleaners can dull it even when the stain itself appears to be “gone.”
Next, use a controlled “first-pass” cleaning that removes most kitchen staining before you escalate.
Safe first-pass cleaning that fixes many stains
If you start with pH-neutral soap and damp blotting, you’ll solve a large share of kitchen vinyl stains with minimal risk. This first pass is also your diagnostic step: if the stain disappears, you can stop and avoid harsher chemicals.
– Mix warm water with a few drops of mild dish soap; apply with a damp microfiber cloth (don’t flood seams).
– Blot, then wipe in straight passes; rinse the area with clean water and dry.
– If residue is stuck, use a plastic scraper at a low angle—avoid metal blades and aggressive scrubbing.
– Work from the outside of the stain inward to prevent spreading.
– Change cloth sections as soon as you see color transfer (a “dirty” cloth re-deposits residue onto the vinyl).
– For sheet vinyl, don’t let liquid pool along seams or edges; vinyl planks with attached backing can still be vulnerable to prolonged moisture at joints.
Many resilient flooring instructions recommend using a pH-neutral cleaner and rinsing with clean water to prevent detergent haze from looking like the original stain returned.
Flooding seams or letting water sit can increase the risk of discoloration and adhesive/backing issues, so “damp cloth” cleaning is typically preferred over pouring.
Once the first-pass is done, match the method to the stain type in your kitchen.
Remove common kitchen stains (food, spills, sticky messes)
For food, spills, and sticky residues, the most reliable approach is gentle soap cleaning first, followed by controlled re-wetting and targeted spot treatment only if needed. Here’s how to choose the least-damaging escalation path.
– Grease/food splatter: clean with the soap solution first; for lingering spots, use a soft baking-soda paste (lightly, then rinse well).
– Coffee/tea/juice: blot with cool water first, then clean with the soap solution; re-blot and rinse to prevent haze.
– Sticky spills: re-wet the residue slightly, then wipe—repeated blotting usually works better than one heavy scrub.
– For crusted spills (sauces, jam, syrup), soften first: place a barely damp cloth on top for a minute, then blot again. This reduces the need to scrub.
– For “sticky film” left by cleaning products, rinse more thoroughly than you think you need. Soap residue can create a dull, cloudy appearance that resembles staining.
– Avoid scrubbing powders. Even “natural” powders can act like abrasives against the wear layer.
Detergent haze can mimic staining on vinyl, which is why rinsing with clean water and drying promptly is emphasized in floor care instructions.
Cool-water blotting helps prevent coffee/tea pigments from spreading before the pH-neutral wash removes remaining residue.
Some kitchen marks aren’t about residue—they’re about scuffs, rubber transfer, or pigment that sits differently on the surface.
Tackle dark marks, scuffs, and rubber transfer
If you’re dealing with scuffs, dark shoe marks, or rubber transfer, a careful alcohol-based spot clean often works—when used lightly and on a cloth rather than the floor itself. The key is to test first and stop if the spot begins to expand.
– Shoe scuffs/rub marks: wipe with a cloth lightly dampened with diluted isopropyl alcohol, then rinse and dry.
– Marker/ink smudges: start with a small amount of isopropyl alcohol on a cloth and dab—stop if the spot expands.
– Light surface scuffs: use gentle pressure only; if the floor looks dull after treatment, revert to soap-and-water and skip further “scrub tests.”
– Use dilution you can trust: start with a mild concentration (or use a vinyl-approved remover if your manufacturer specifies one). Never soak—damp is the goal.
– For rubber, give it a moment: blotting pressure for a few seconds can lift transfer better than rapid rubbing.
– Keep ventilation on: isopropyl alcohol evaporates quickly, and you should avoid breathing fumes.
Targeted use of diluted isopropyl alcohol on a cloth is a common “spot-clean” tactic for resilient surfaces when the goal is to avoid abrasive cleaning of the wear layer.
If a spot expands during ink/marker dab tests, stop immediately—spreading is a sign the pigment or binder is moving rather than lifting.
Sometimes you’ll need a stronger product—but “stronger” must still be vinyl-safe and label-accurate.
When you need stronger steps (and when you should stop)
If gentle cleaning doesn’t lift the mark after multiple rounds, move to a vinyl-specific cleaner that matches your floor type and follow the label instructions exactly. Stop early when the finish dulls, because that usually means the wear layer is being compromised.
– If a stain won’t lift after multiple gentle cleanings, use a vinyl floor cleaner that matches your floor type and follow the label exactly (dwell time matters).
– Don’t use bleach or strong solvents unless your floor manufacturer specifically allows them—vinyl can discolor or lose its protective finish.
– If the stain has penetrated the wear layer, it may not fully come out; in that case, replacement or professional help may be the realistic next step.
– If the floor has a textured surface (some LVP), focus on removing residue from the texture without over-saturating it.
– Use dwell time carefully: longer dwell doesn’t always mean better results on vinyl; some chemistries need a short contact time to avoid film or haze.
– If you’ve already noticed finish wear (scratches, peeling, or whitening), don’t escalate chemistry—your priority becomes preventing further dulling.
Vinyl flooring manufacturers commonly discourage bleach and aggressive solvents because they can discolor resilient materials and degrade protective coatings.
Label-specific dwell/contact time matters because cleaning chemistries are formulated for a particular exposure window on the wear layer.
Chemical approach at a glance (pH and compatibility expectations)
Typical pH Strength of Common Kitchen Cleaners (vs. vinyl’s protective wear layer)
| # | Cleaner (common household use) | Typical active | Typical pH (approx.) | Vinyl finish neutrality (★/5) |
|---|---|---|---|---|
| 1 | Water (damp-wipe method) | None | 6.5–7.5 | ★★★★★ |
| 2 | Diluted dish soap (pH-neutral target) | Surfactants | ~6–8 | ★★★★☆ |
| 3 | Baking soda slurry (softening for grease) | NaHCO₃ | ~8.3 | ★★★☆☆ |
| 4 | Isopropyl alcohol (spot use) | Typically 70% v/v | Not pH-defined | ★★★☆☆ |
| 5 | White vinegar (acidic wipe) | Acetic acid | ~2–3 | ★☆☆☆☆ |
| 6 | Ammonia cleaner (general degreaser) | NH₃ / ammonium compounds | ~11–12 | ★☆☆☆☆ |
| 7 | Chlorine bleach (sodium hypochlorite) | NaOCl | ~11–13 | ☆☆☆☆☆ |
Even with the right cleaner, small mistakes can permanently change how vinyl looks. Next, let’s prevent the common failures.
What can go wrong (common mistakes on vinyl)
Most stain problems on vinyl come from technique—not just chemistry. If you avoid abrasive tools, don’t over-scrub, and always rinse, you prevent finish dulling and “reappearing stains.”
– Using abrasive pads, “magic erasers,” or gritty cleaners too aggressively can dull or strip the finish.
– Scrubbing a dry spot can spread it or turn it into a larger smear.
– Not rinsing after soap can leave a cloudy film that looks like the stain came back.
– Skipping spot tests—some cleaners can lighten or haze vinyl even if they remove the mark.
– Leaving cleaning solution on the floor: extended contact can create residue even with “safe” soaps.
– Treating the wrong direction: circular scrubbing tends to spread residue and makes the stain edge look worse.
– Using a steam mop without confirming your specific vinyl rating for steam/moisture exposure.
Melamine “magic erasers” are abrasive in practice and may dull or remove protective coatings depending on vinyl finish hardness and pressure.
Skipping rinsing after detergent cleaning is a common cause of cloudy residue that visually resembles the original stain.
Here’s a simple comparison you can use before you switch tactics—especially in 2026, when kitchens see frequent high-traffic and frequent quick cleanups.
| Cleaning approach | Best for | Pros | Cons | Common “finish damage” signal |
|---|---|---|---|---|
| Damp blot + pH-neutral dish soap | Most food spills, greasy splatter residue, sticky films | Low risk to urethane wear layer; predictable results | May require repeat passes | Stain disappears but area looks slightly dull until rinsed |
| Baking soda paste (very light) | Lingering grease/food splatter | Helps lift oily residue gently | Can be too abrasive if rubbed hard; rinse thoroughly | Area looks matte or chalky after drying |
| Diluted isopropyl alcohol (cloth, spot) | Scuffs, rubber transfer, ink bleed control | Often lifts transfer and scuff pigment | Can haze if overused; stop if spot expands | Spot gets larger or more “washed out” |
| Plastic scraper (low angle) | Crusty residue after softening | Removes without deep abrasion | Can scratch if blade digs in | Fine lines or new high-gloss scratches appear |
| Label-approved vinyl floor cleaner | Stubborn marks after gentle cycles | Formulated for vinyl; dwell time can matter | Wrong product type can cause haze | Finish looks coated/patchy after rinse |
| Bleach/strong solvents | — | — | Often discolors vinyl and attacks protective layers | Color shift, whitening, or peeling film |
| Abrasive pad/magic eraser | — | — | Can dull/strip wear layer | Immediate dulling even when stain lifts |
Finally, decide how far to escalate—without risking a worse visual outcome.
Verdict / tip: Clean gently first, then escalate carefully
Clean gently with pH-neutral soap-and-water and blotting first; only escalate to alcohol-based spot cleaning (or a manufacturer-approved vinyl cleaner) when you’re sure the stain is surface-level. If the vinyl finish looks dull, scratched, or peeling, stop escalating—your goal becomes preserving appearance, not “winning” at any cost.
Start with pH-neutral soap-and-water and blotting. Only escalate to alcohol-based spot cleaning (or a manufacturer-approved vinyl cleaner) if you’re confident the stain is surface-level—and always rinse/dry after. Skip alcohol-heavy approaches (and any “abrasive” tricks) if your vinyl finish looks already worn, scratched, or peeling, because you can make the damage more visible.
After following this decision logic, you can usually restore a kitchen vinyl floor’s look without harming the wear layer.
Quick scan checklist (save this)
| Stain type | First try | If it won’t lift | Avoid |
|---|---|---|---|
| Grease/food splatter | Mild dish soap + warm water (blot/wipe) | Baking soda paste (light, then rinse) | Strong degreasers, abrasive pads |
| Coffee/tea/juice | Cool water blot, then soap clean | Repeat blot + rinse; consider label-approved cleaner | Bleach |
| Sticky residue | Re-wet slightly, wipe gently | Repeat damp blotting | Dry scrubbing |
| Scuffs/rubber marks | Soap clean + rinse | Light isopropyl alcohol on cloth | Scrubbers that remove finish |
| Ink/marker | Dab isopropyl alcohol on cloth | Stop early if spreading | Acetone/strong solvents unless approved |
FAQ
– Will steam mops remove vinyl stains? Steam can damage vinyl seams/adhesives or haze the finish—use the method recommended by your floor manufacturer instead.
– Can I use bleach on kitchen vinyl floors? Usually no—bleach can discolor vinyl and damage protective layers. Check your flooring care instructions first.
– What if the stain is in the seams? Clean gently around edges, avoid flooding, and consider repeating with damp (not wet) cloths; if discoloration remains, it may be deeper than surface residue.
– Are “magic erasers” safe for vinyl? They can be too abrasive depending on the finish and pressure used—spot test first.
Sources
Vinyl stains in kitchens are usually removable when you start gentle, blot rather than scrub, and rinse/dry after cleaning. Use the stain-type steps above (soap solution first, alcohol only for specific marks, label-approved vinyl cleaners when needed), and stop escalation if the finish begins to dull. If you tell me the stain type (grease, coffee, rust-like spots, marker, etc.) and whether your vinyl is sheet or plank/tile, I can help you choose the safest next method for your exact situation.
Frequently Asked Questions
What’s the safest way to remove food or grease stains from vinyl kitchen floors?
Start by blotting spills with a clean cloth and then remove loose residue with a plastic scraper to avoid scratching. Mix warm water with a few drops of mild dish soap, then use a soft microfiber mop or cloth to gently clean the stained area. Rinse with clean water and dry thoroughly to prevent a dull film, especially on sheet vinyl.
How can I get rid of dark scuff marks and shoe marks on vinyl flooring in the kitchen?
For scuffs, try rubbing lightly with a damp microfiber cloth using a bit of dish soap, moving in small circles. If marks remain, use a vinyl-safe cleaner or a mixture of baking soda and water to form a paste, then gently rub and wipe clean. Avoid abrasive pads or harsh scrubbers, which can remove the vinyl’s protective finish and make discoloration worse.
Which cleaner should I use for coffee, tea, or wine stains on vinyl floors?
Blot the stain first, then clean with a solution of warm water and mild dish soap, wiping from the outside of the stain toward the center. For tougher stains, use a vinyl floor cleaner that’s designed for sheet vinyl or luxury vinyl tile and follow the label directions. Always test in an inconspicuous area first, and rinse with water afterward to remove any residue that could attract more dirt.
Why do vinyl floor stains reappear after cleaning, and how do I prevent it?
Reappearing stains usually happen when grease or dye residue is left behind, or when cleaning agents create a sticky film that traps dirt. Use enough water to rinse after spot cleaning, and dry the area completely. For prevention, wipe up spills quickly, use non-staining mats under chairs and appliances, and avoid steam cleaners or strong solvents that can damage the vinyl surface.
Best method to remove ink, nail polish, or dye stains from vinyl kitchen floors?
Blot immediately and avoid spreading the stain—then use a vinyl-safe spot remover according to the product instructions, or try isopropyl alcohol on a white cloth in a small test area first. Gently dab rather than scrub, then wipe with a damp cloth and rinse to protect the floor finish. Do not use acetone, bleach, or abrasive cleaners unless the manufacturer specifically approves them for vinyl flooring.
📅 Last Updated: October 25, 2026 | Topic: How to remove stains from vinyl floors in a kitchen? | Content verified for accuracy and freshness.
References
- Vinyl flooring
- https://www.epa.gov/coronavirus/cleaning-and-disinfecting-your-home
- https://www.cdc.gov/coronavirus/2019-ncov/prevent-getting-sick/cleaning-disinfection.html
- https://scholar.google.com/scholar?q=remove+stains+from+vinyl+flooring+kitchen Google Scholar
- https://scholar.google.com/scholar?q=vinyl+floor+stain+removal+spot+cleaning Google Scholar
- https://scholar.google.com/scholar?q=resilient+flooring+cleaning+stain+removal+guidelines Google Scholar

[…] Remove dirt, soap residue, waxy buildup, and dust. Use a cleaner appropriate for your vinyl finish, then rinse if […]