
To remove scratches from your wood floor, start by evaluating the damage's severity. For minor scratches, a mixture of olive oil and vinegar can help conceal them, while a baking soda paste may fill in deeper marks. You can also use a wood crayon that matches your floor's finish to touch up scratches; just apply it carefully and wipe away excess. For more stubborn issues, consider a scratch repair kit, following the instructions closely. Don't forget to maintain your floors by using furniture pads and area rugs to prevent future scratches. There's plenty more you can explore to enhance your floors further.
Assessing the Damage
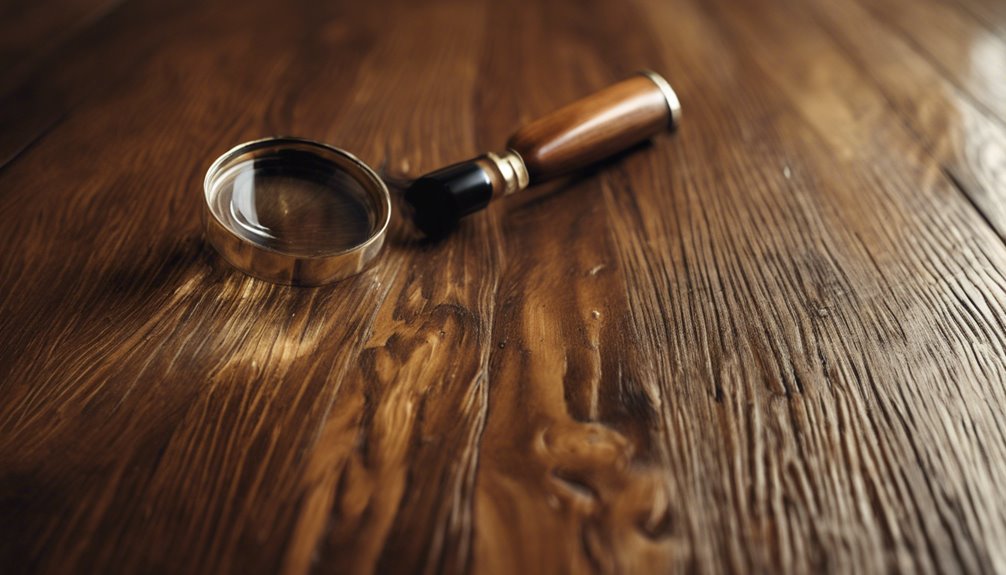
Before you tackle any scratches on your wood floor, it's important to assess the damage thoroughly. Start by identifying the severity of the scratches. Are they shallow surface marks or deep gouges? Shallow scratches may only require a quick fix, while deeper ones may need more extensive repairs. Next, evaluate the finish on your wood floor. Knowing whether it's oil-based, water-based, or a natural finish will guide you in selecting the appropriate repair method. Use a damp cloth to clean the area, allowing you to see the scratches clearly. This step guarantees you're fully aware of what you're dealing with, setting the stage for effective repair options. Proper assessment is vital for restoring your floor's beauty and longevity.
Common Household Remedies
You can effectively address minor scratches on your wood floor using common household remedies. Mixtures like olive oil, baking soda paste, and a vinegar and oil blend can help restore the wood's finish and conceal imperfections. Each method offers a simple solution that utilizes items you likely already have at home.
Olive Oil Mixture
One effective remedy for minimizing scratches on wood floors involves a simple olive oil mixture. This natural solution not only aids in wood maintenance but also enhances the floor's appearance. To create your olive oil mixture, follow these steps:
- Combine equal parts of olive oil and white vinegar in a bowl.
- Stir until well mixed, ensuring both ingredients are evenly blended.
- Apply a small amount to a soft cloth and gently rub it into the scratched area of the floor.
Allow the mixture to absorb for a few minutes before buffing with a clean cloth. This method can help reduce the visibility of scratches, providing your wood floors with a refreshed look while maintaining their integrity.
Baking Soda Paste
While the olive oil mixture offers a natural way to address minor scratches, another effective option is a baking soda paste. Mixing equal parts of baking soda and water creates a thick paste that can aid in scratch removal. Apply the paste directly to the scratch, gently rubbing it in with a soft cloth. Let it sit for a few minutes before wiping it away with a damp cloth. This method not only helps to fill in the scratch but also cleans the area.
| Benefits | Considerations |
|---|---|
| Easy to make | Requires gentle application |
| Non-toxic | May need multiple applications |
| Affordable | Works best on light scratches |
| Versatile | Test on inconspicuous area first |
Vinegar and Oil
A popular household remedy for removing scratches from wood floors involves a simple mixture of vinegar and oil. This combination takes advantage of vinegar benefits, such as its ability to dissolve dirt and grime, while oil properties help nourish and protect the wood.
Here's how to use this remedy effectively:
- Mix equal parts of vinegar and a suitable oil, like olive or coconut oil.
- Apply the mixture to a soft cloth and gently rub it onto the scratched area.
- Buff the surface with a clean cloth until the scratch blends in and the wood shines.
This method not only minimizes the appearance of scratches but also enhances the natural beauty of your wood floors, providing a quick and effective solution.
Using a Wood Crayon
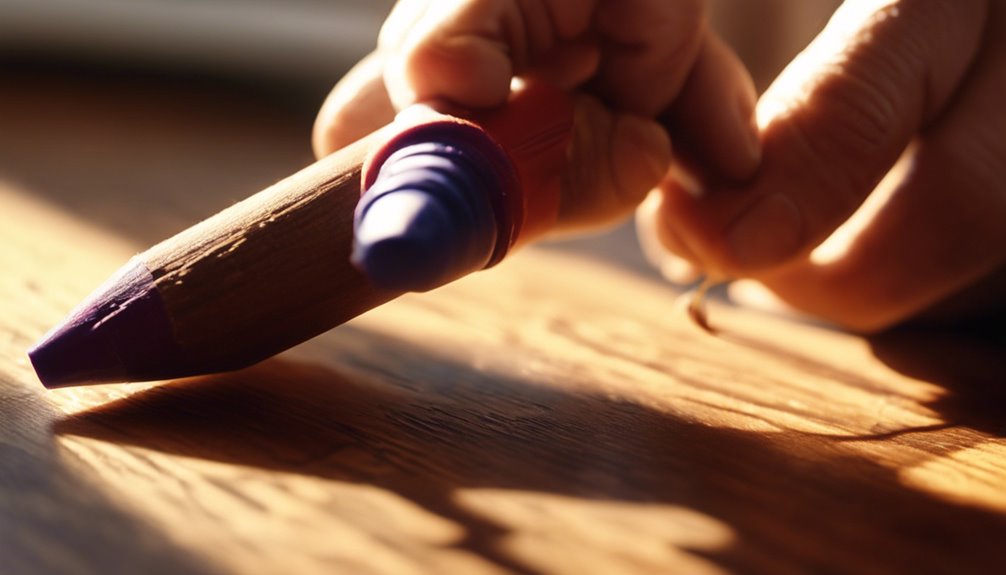
When using a wood crayon to repair scratches, it's essential to choose a color that closely matches your floor's finish. Proper application techniques can enhance the effectiveness of the crayon, ensuring a seamless blend with the surrounding wood. This method can provide a quick and visually appealing solution for minor imperfections.
Choosing the Right Color
Choosing the right color for your wood crayon is vital to effectively camouflage scratches on your wood floor. Proper color matching guarantees the repair blends seamlessly with your existing finish. Follow these steps for ideal stain selection:
- Identify Your Wood Type: Different woods have unique grain patterns and colors, so knowing yours is important.
- Test Multiple Shades: Apply small amounts of various crayon colors on inconspicuous areas to see which one closely matches your floor.
- Consider Lighting Conditions: Natural and artificial lighting can alter how colors appear, so check your chosen crayon under different lights to confirm consistency.
Application Techniques Explained
While it's essential to have the right color crayon, knowing how to apply it properly is equally important for effective scratch repair. Start by gathering your application tools: a clean cloth, the wood crayon, and a putty knife if needed. First, clean the scratched area to remove dust and debris. Then, gently rub the crayon over the scratch, filling it in completely. For deeper scratches, you might need to use the putty knife to smooth the crayon evenly with the wood grain. Once filled, wipe away any excess crayon with the cloth. Finally, let it set for a few minutes to guarantee proper adhesion. This method guarantees efficient scratch removal, restoring your wood floor's appearance seamlessly.
Applying a Scratch Repair Kit
Applying a scratch repair kit can effectively restore the beauty of your wood floor. To achieve the best results, follow the kit instructions closely. Here's a quick guide to help you through the process:
- Clean the area: Thoroughly clean the scratched surface with a wood-safe cleaner to remove dust and debris.
- Apply the repair solution: Using the provided applicator, carefully apply the scratch repair solution to the affected area, ensuring even coverage.
- Buff and blend: After the solution dries, gently buff the area with a soft cloth to blend it with the surrounding wood.
Refinishing the Affected Area
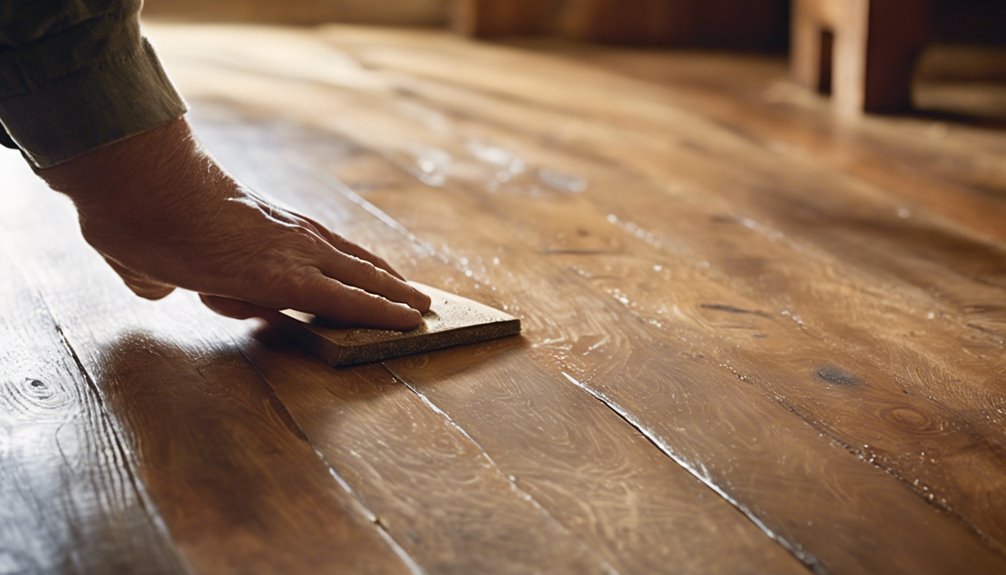
Refinishing the affected area is a crucial step in restoring your wood floor's appearance and protecting it from further damage. Start by using appropriate sanding techniques to smooth out the scratched surface. Choose a fine-grit sandpaper to avoid deep grooves, and sand in the direction of the wood grain. Once you've achieved a smooth finish, clean the area thoroughly to remove dust and debris. Next, select a stain that matches your existing floor color. Test the stain on a small, inconspicuous area first to verify it blends well. Apply the chosen stain evenly, followed by a protective finish to seal and safeguard the wood. This process not only revives your floor but also enhances its longevity.
Preventing Future Scratches
To prevent future scratches on your wood floor, implementing a few proactive measures can make a significant difference. By focusing on preventive measures, you can maintain the beauty and integrity of your flooring.
- Use Furniture Pads: Place pads under all furniture legs to avoid scratches when moving items.
- Incorporate Area Rugs: Strategically position area rugs in high-traffic zones to reduce direct contact with the floor.
- Practice Mindful Cleaning: Regular maintenance is essential; use soft mops and avoid abrasive materials that can cause damage.
Additionally, be mindful of shoe choices and encourage minimal foot traffic indoors. If you have pets, make sure their nails are trimmed to prevent scratches. Taking these steps will help keep your wood floors looking pristine.
Frequently Asked Questions
Can I Use Vinegar to Remove Scratches From Wood Floors?
You might wonder about vinegar's effectiveness in removing scratches from wood floors. While vinegar can help clean and restore shine, it's not ideal for deep scratches. Instead, consider using a specialized wood floor repair product. To prevent future scratches, applying a protective finish or using area rugs in high-traffic zones can be beneficial. Keeping your floors clean and well-maintained will also enhance their longevity and appearance, ensuring your space remains inviting.
Are There Professional Services for Scratch Removal?
Yes, there are professional services for scratch removal. If you're looking for a thorough solution, hiring experts can be beneficial. They use specialized techniques and tools to restore your wood floors effectively. These services often assess the damage and recommend the best approach, ensuring your floors look as good as new. Plus, you won't have to worry about potential DIY mishaps; their expertise guarantees a high-quality finish.
How Can I Tell if My Floor Needs Refinishing?
To determine if your floor needs refinishing, look for specific refinishing signs. If you notice deep scratches, dents, or a dull appearance, it's a strong indication that your floor's condition has deteriorated. Additionally, if the finish is wearing away or there's significant discoloration, it's time to contemplate refinishing. Regular inspection helps maintain your floor's aesthetic and longevity, ensuring you enjoy its beauty for years to come.
Will Sunlight Affect the Appearance of Repaired Scratches?
Yes, sunlight exposure can affect the appearance of repaired scratches on your wood floor. UV rays may cause the surrounding wood to fade over time, altering the color match between the repair and the original surface. As a result, scratch visibility can increase, making the repair more noticeable. To minimize this effect, consider using UV-protective window films or curtains, which can help maintain the uniformity of your floor's appearance despite sunlight exposure.
What Types of Wood Floors Are More Prone to Scratches?
When considering which wood floors are more prone to scratches, you'll find that softer hardwood types like pine and cherry tend to be more vulnerable than harder varieties like oak or hickory. Laminate floors, while generally more scratch-resistant, can still show wear over time, especially in high-traffic areas. Understanding these differences can help you choose the right flooring for your lifestyle, ensuring you maintain its appearance and longevity effortlessly.


