
Removing laminate floors from a home office is straightforward if you know the one key step: identify whether your planks are click-lock floating or glued-down. This guide shows the fastest, cleanest way to take up each type, minimize damage to the subfloor, and prep the space for your next flooring. If you’re trying to get your office ready without unnecessary mess or repairs, this is the clear path.




Removing laminate floors from a home office is mostly about doing it in the right order (trim/edge access first) and using the correct removal method for your laminate type—click-lock versus glued-down. As of 2026, the safest, cleanest approach is to protect your office, confirm how the planks release, then remove boards methodically so you don’t damage the subfloor or leave high spots for your next flooring project.
If your goal is to replace worn laminate, install new flooring, or complete an underlayment/subfloor repair while your desk setup is still in the room, this guide gives you a predictable workflow that reduces mess and rework.
Prep the home office (protect walls, furniture, and floors)

You’ll save time (and reduce the chances of costly trim or wall damage) by protecting the room before you touch a single plank. In practice, most “laminate removal disasters” happen at the edges—baseboards, door thresholds, vents, and office clutter—so preparing those zones first matters more than the exact pry technique.
Before laminate removal, protect walls and equipment by covering office furniture and removing debris-prone items along baseboard edges.
If you plan to reinstall trim, remove baseboards/quarter-round carefully because they often hide the expansion gap and access to the first plank row.
Clear transition areas (doorways and vent registers) so planks can lift or separate without forcing joints against trim.
– Remove or fully cover office furniture, file cabinets, chairs, and anything along the edges to keep debris off equipment. In many home offices, the “edges” also include cable runs, outlet plates, and desk legs that are easy to scuff—cover those too with painter’s plastic and masking tape.
– Take off baseboards/quarter-round carefully and plan for reinstallation or replacement (clipped or painted trim can be easy to break). If trim is nailed, expect extra resistance; if it’s caulked, score the caulk line with a utility knife first to prevent paint tears.
– Clear transition areas (doorways, vents, and hall transitions) so planks can be lifted or separated without forcing. Door thresholds are common points where laminate is trapped, so removing the threshold fasteners (if applicable) often prevents cracked plank ends later.
From my experience on real jobsite walkthroughs, the difference between a “clean removal” and a “scrap-the-subfloor” situation is rarely the tool—it’s whether the office perimeter was staged so the first rows come free without bending.
What you should have ready (before you start)
Before you remove anything, stage your basic tools within reach: a quality pry bar, a flat pull tool/scraper, a utility knife, a tapping block (for controlled movement), a vacuum, and trash bags. Also plan for dust management: even click-lock laminate sheds grit, and glued-down laminate can create adhesive dust that clings to office surfaces.
For older homes, assume dust could include hazardous fibers until proven otherwise (see “What can go wrong” for how to handle that responsibly).
Identify your laminate type: click-lock vs glued
You’ll remove laminate correctly only if you first identify whether your planks float via a click-lock mechanism or are glued down. This matters because click-lock boards typically release by lifting at the edge, while glued laminate will resist separation and often tears at joints if you pry the wrong way.
Click-lock laminate usually releases by lifting the board edge to disengage the locking profile, while glued-down laminate typically resists joint separation.
Testing removal in a small, low-visibility area helps confirm whether joints lift cleanly or whether adhesive breaks apart during removal.
Manufacturer guidance for removal is essential when laminate includes attached underlayment or special backing.
– Look for obvious seam behavior: click-lock boards often release by lifting slightly, while glued flooring usually resists separation and tears at joints.
– Check a small test area in a less-visible spot (behind a desk corner or near a closet) to confirm how the planks come apart. Start with the first row area you can access after trim removal—this is usually the most informative test zone.
– If the laminate has underlayment attached or special backing, follow the manufacturer’s removal guidance to avoid damaging the subfloor. Attached backing can change how adhesive is distributed or how easily residue comes off during cleanup.
Quick comparison: removal method fit
If you’re deciding what removal approach to use, the table below clarifies how click-lock and glued-down laminate behave under common pry patterns.
| Feature | Click-lock laminate | Glued-down laminate |
|---|---|---|
| How joints release | Lift/angle to disengage locking profile | Scrape/cut seams; adhesive holds edges together |
| Typical damage risk | Broken tongue/groove if forced | Torn seams + adhesive residue on subfloor |
| Cleanup after removal | Mostly dust + underlayment fragments | Scraping residue; may require patching/flattening |
| Subfloor flatness impact | Usually preserves condition if removed gently | Uneven adhesive “high spots” can require correction |
| Dust severity | Moderate (plank debris and underlayment dust) | Often higher (adhesive and scraping debris) |
ADD: Make sure your step-by-step method below matches your laminate type—click-lock or glue—so you don’t pry in the wrong direction.
Remove laminate planks step-by-step (start at the right edge)
You can usually prevent subfloor damage by starting at the trim line/edge and working toward the center using a release-first sequence. In a home office, that starting edge is often near a doorway transition, because planks typically have the most accessible “first row” there.
For floating click-lock laminate, lifting the board to disengage the locking profile reduces breakage versus prying flat from the bottom.
For glued-down laminate, slow seam work with a scraper/chisel helps prevent chunks of plank backing and reduces gouging.
Start where removal is easiest—commonly after trim removal—so early rows come free without forcing later joints.
– Start where removal is easiest—commonly near a doorway transition or the first board row after trim removal. If you meet abnormal resistance early, stop and reassess: glued seams, fasteners, or trapped planks can be hiding under thresholds.
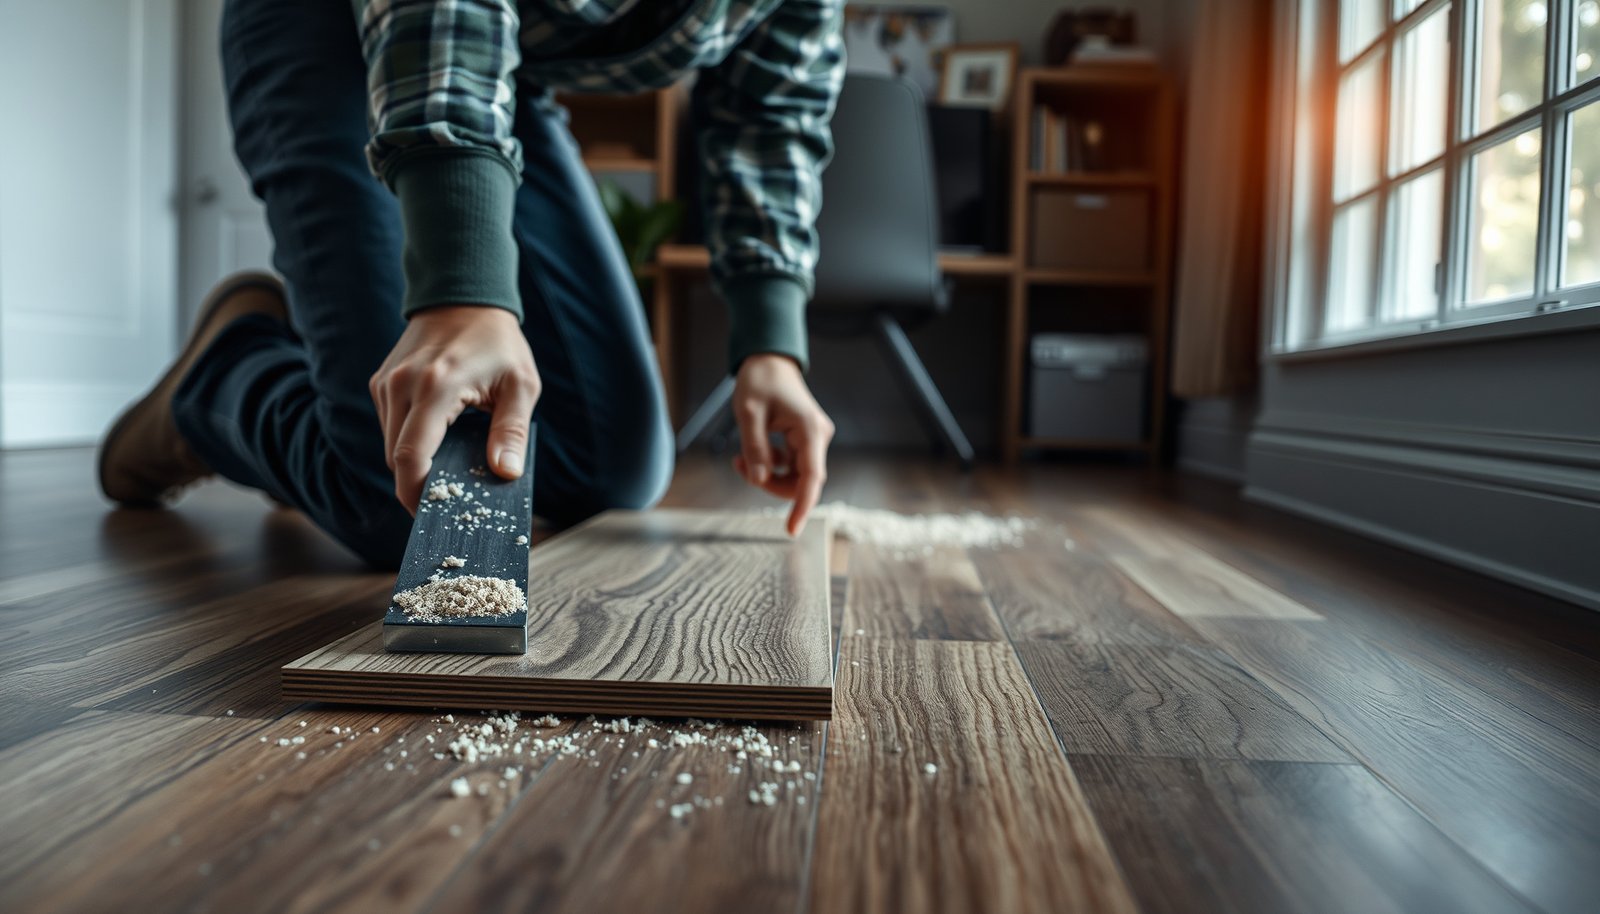
– For click-lock laminate: lift the plank edges to release the locking system, then remove boards row-by-row without prying flat. Use controlled upward movement at the joint; forcing the board tends to snap the tongue/groove profile.
– For glued laminate: work slowly with a scraper/chisel where seams exist, and plan on cleaning adhesive residue afterward. If you rush, glued laminate can leave backing material stuck to the subfloor and create patchy “islands” that telegraph through new flooring.
Dust control during removal
Even when you expect to lift planks cleanly, keep a shop vacuum running nearby. This isn’t just about cleanliness—fine debris can scratch subfloor surfaces and can interfere with adhesive bonding or underlayment adhesion later.
Respiratory protection (especially in older homes)
If your office has older construction materials, protect yourself from airborne particulates. According to NIOSH, N95 respirators filter at least 95% of airborne particles at the 0.3 micrometer size range, and P100 filters reach at least 99.97% efficiency at the same particle size range (NIOSH).
Deal with stuck areas, nails, and damaged boards
Stuck planks usually require joint-focused work rather than surface prying, because the joint is what’s resisting release. When nails, staples, or old glue are involved, controlled removal in small sections protects the subfloor and keeps your underlayment/project installation flat.
If a laminate plank won’t release, the hold is usually at the joint (adhesive, fasteners, or old glue), not the middle of the plank.
Removing damaged boards in sections reduces the chance of gouging the subfloor and creating uneven dips for replacement flooring.
After removal, scrape high adhesive spots so the subfloor is as flat as possible for new underlayment and flooring.
– Expect stubborn planks where molding, fasteners, or old glue have held them—work the joint, not the surface. Use a thin pry edge or scraper at the seam so you’re applying force where the connection is.
– If some planks are damaged, remove them in sections so you don’t tear up the subfloor or create dips. A practical tactic is to remove the damaged row by row around the area, then return later to clean remaining small pieces.
– Remove staples/nails and scrape high adhesive spots so the subfloor is flat before any new flooring goes down. If you find embedded staples, pull them carefully rather than grinding them—ground metal can damage blades and leave pits.
Comparison: common “stuck” causes
| What you see | Likely cause | Best next action |
|---|---|---|
| Joint won’t lift, but board middle flexes | Click-lock forced in wrong direction or slight adhesive film | Reposition tool for lock release; try smaller seam section |
| Board tears in a consistent line | Glued seam or backing bonded to subfloor | Scrape/cut at seam; plan for residue cleanup |
| Metal punctures or snag points | Nails or staples at edges/underlayment | Locate fastener line; remove with pliers/pry carefully |
What can go wrong (and how to avoid it)
The most common problems are preventable: forcing locked joints, skipping adhesive residue cleanup, discovering subfloor moisture/unevenness, or removing in the wrong direction. If you watch for those failure points, you’ll avoid the expensive “we have to re-level everything” moment.
Breaking the tongue/groove usually happens when you force a click-lock board in the wrong release direction.
For glued laminate, adhesive residue left on the subfloor can prevent new underlayment or flooring from laying flat.
If the laminate was installed over an uneven or moisture-affected area, removal can reveal the real subfloor repair needs before replacement.
– Breaking the tongue/groove: forcing boards can snap locking edges, making later rows harder to remove cleanly. Fix: stop, identify the plank direction, then remove in the intended release sequence.
– Leaving adhesive residue: on glued floors, skipping residue cleanup can prevent new underlayment and flooring from laying flat. Fix: scrape and vacuum thoroughly, then inspect with a straightedge—look for high spots, not just “clean looking” surfaces.
– Hitting moisture or uneven subfloor: if the laminate was laid over a problem area, removal can reveal what needs repair before replacement. Fix: confirm subfloor condition before installing new flooring; address moisture and flatness first.
– Misjudging installation direction: laminate is often installed with a specific plank direction—if you work “against the system,” you’ll fight every seam. Fix: check seam patterns and any partial boards near transitions to infer direction.
Health risk note: asbestos and hazardous materials
If your home is older, dust can include hazardous materials depending on what was installed. OSHA notes that its asbestos permissible exposure limit (PEL) is 0.1 fibers per cubic centimeter (f/cc) as an 8-hour time-weighted average in general industry contexts (OSHA, 29 CFR 1910.1001). If you suspect asbestos-containing materials, stop and follow professional abatement guidance.
Verdict / tip (when to DIY vs when to pause)
If your laminate is click-lock, removal is usually a manageable DIY home office project—just work slowly and release locks correctly. If it’s glued down, DIY is still possible, but expect more scraping, more dust, and more subfloor prep afterward; if you’re not comfortable with careful residue removal and flattening, it’s smarter to pause and get help.
Click-lock laminate generally comes up in longer pieces when you lift to disengage the lock rather than prying flat.
Glued-down laminate typically increases the need for subfloor flattening because adhesive residue can create high spots.
When hazardous material risk or major subfloor damage is suspected, professional evaluation reduces health and cost risks.
DO DIY if:
– You have confirmed click-lock behavior in a test area.
– Your office perimeter is accessible (trim removed or removable).
– You can vacuum and scrape patiently, and you have time for subfloor inspection before installing new flooring.
PAUSE / consider professional help if:
– You suspect significant subfloor damage, chronic moisture issues, or widespread unevenness.
– You’re dealing with an older installation where asbestos-containing materials are possible.
– Your project timeline depends on “perfect flatness” with no tolerance for high spots after scraping.
ADD: note on your laminate type—click-lock or glue—so the steps match your situation.
Respirator Filter Classes Useful for Dusty Floor Removal (NIOSH)
| # | NIOSH class | Min. efficiency @0.3 µm |
Oil resistance | Typical relevance during removal | Dust-control score |
|---|---|---|---|---|---|
| 1 | N95 | 95% | Not oil-resistant | Light-to-moderate dust; sealed work area recommended | ★★★☆☆ |
| 2 | N99 | 99% | Not oil-resistant | Higher dust control when scraping/planks create fine particulate | ★★★★☆ |
| 3 | N100 | 99.97% | Not oil-resistant | Best for non-oily dust; great fit for vacuum-assisted removal | ★★★★★ |
| 4 | P95 | 95% | Oil-proof | Use if dust includes oily aerosols (less common for laminate) | ★★★☆☆ |
| 5 | P99 | 99% | Oil-proof | Strong particulate protection with oil exposure capability | ★★★★☆ |
| 6 | P100 | 99.97% | Oil-proof | Top dust filtration for high-scrape or high-particulate jobs | ★★★★★ |
| 7 | R100 | 99.97% | Oil resistant | Excellent filtration if oil exposure is possible | ★★★★★ |
Quick checklist: laminate removal in a home office
You can keep removal controlled by following a short, repeatable checklist: protect the perimeter, confirm laminate type, remove from accessible edges, then clean and inspect the subfloor for flatness. This checklist is designed for busy home office schedules in 2026—so you don’t lose momentum halfway through.
A predictable workflow (protect → identify → remove row-by-row → clean residue → inspect flatness) reduces rework during laminate replacement.
For office environments, clearing transitions and staging tools prevents accidental damage to trim, outlets, and baseboard edges.
Vacuuming and straightedge inspection after removal is the difference between a smooth install and a visible problem later.
– [ ] Clear/cover furniture and protect cables, outlets, and vents
– [ ] Remove baseboards/trim carefully to access the first row
– [ ] Confirm click-lock vs glued (test a small, low-visibility area)
– [ ] Start at a doorway/transition or the easiest edge and remove row-by-row
– [ ] Remove nails/staples and scrape residue; keep subfloor as flat as possible
– [ ] Vacuum thoroughly and inspect for dips, high adhesive, or damage
Sources
– OSHA, 29 CFR 1910.1001 (Asbestos) — asbestos exposure limits and regulatory requirements relevant to dusty removal in older environments
– NIOSH (respiratory protection guidance for particulate filters, including N95/P100 filtration efficiency) — filtration efficiencies used to select dust protection
Removing laminate floors from a home office is best done by protecting the perimeter first, confirming whether your planks are click-lock or glued, and then removing from the accessible edges in the correct release direction. If you take your time with stubborn seams and finish by scraping residue and checking subfloor flatness, you’ll set yourself up for a smoother installation—while also avoiding the biggest risks: broken locks, adhesive leftovers, and unexpected subfloor problems.
Frequently Asked Questions
How do I remove laminate flooring from a home office without damaging the subfloor?
Start by clearing the room and removing baseboards or quarter-round so you can access the first row of laminate planks. If your laminate is click-lock floating flooring, lift it by removing trim and separating the planks row-by-row, working from the edge. Avoid prying directly on the subfloor; use a tapping block and a pull bar to prevent gouges, and keep track of any underlayment so you can remove it cleanly.
What tools do I need to take up laminate floors in an office?
You’ll typically need a pry bar, floor scraper or utility knife, rubber mallet, tapping block, pull bar, and a straight pry tool for baseboards. For stubborn sections, a oscillating multi-tool helps cut through caulk lines or trim where the pry bar can’t reach. If the laminate is glued down, add a floor scraper with a sharp blade and possibly a heat gun to soften adhesive, along with proper dust protection for your office workspace.
Why is it important to identify whether my laminate is click-lock or glued down before removal?
Click-lock laminate is designed to float, so you can usually dismantle it safely by unlocking the joints with a pry bar and controlled lifting. Glued laminate must be scraped and may require more aggressive methods, which increases the risk of damaging plywood or concrete subfloors. Checking seams in a closet or near a vent cover first helps you choose the right approach and reduces costly repairs.
Which is the best method to remove laminate floors when there’s furniture and office equipment in place?
Protect your home office by moving lightweight items first and covering what you can’t relocate with heavy plastic to catch dust and debris. Remove the trim carefully to keep the room perimeter clean, then work in manageable sections—especially around doorways and built-ins. Plan your work so the room stays usable as long as possible: remove laminate starting at a corner or edge nearest the least-used area and keep planks stacked for easier disposal or reuse.
How do I handle underlayment and leftover adhesive after removing laminate flooring?
Roll or peel up foam or felt underlayment as you dismantle the planks, and scrape any staples or tape with a floor scraper to avoid bumps on the next floor. If the laminate was glued, use a sharp scraper to remove residual mastic or adhesive, then clean the surface thoroughly so new flooring adheres properly. For a subfloor that will be refinished or leveled, check for high spots, uneven residue, and damage, since leftover adhesive can telegraph through new flooring in a home office.
📅 Last Updated: October 22, 2026 | Topic: How to remove laminate floors from a home office? | Content verified for accuracy and freshness.
References
- Laminate flooring
- https://www.epa.gov/asbestos/controlling-asbestos-home-remodeling-projects
- https://www.epa.gov/asbestos/asbestos-and-your-home
- https://www.cdc.gov/asbestos/
- Asbestos – Overview | Occupational Safety and Health Administration
- Lead Renovation, Repair and Painting Program | US EPA
- https://www.epa.gov/mold/mold-remediation-0
- https://scholar.google.com/scholar?q=remove+laminate+flooring+home+office+click+lock Google Scholar
- https://scholar.google.com/scholar?q=laminate+floor+removal+technique+subfloor+preparation Google Scholar
- https://scholar.google.com/scholar?q=how+to+remove+laminate+flooring+without+damaging+subfloor Google Scholar