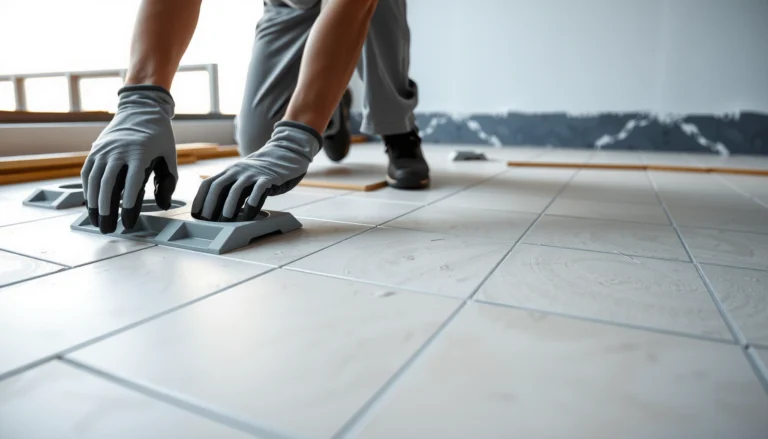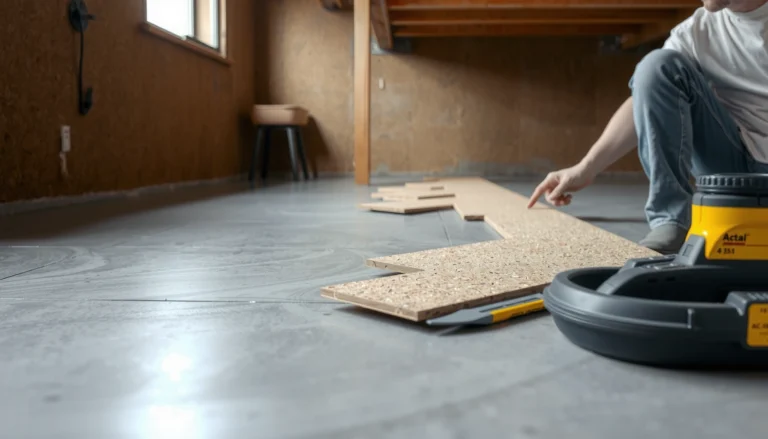

If you need to install around doors in commercial floors, follow this step-by-step method for a tight, professional finish without guesswork. You’ll learn exactly how to measure clearances, prep the subfloor, trim the flooring cleanly at door openings, and seal the edges to handle heavy traffic and frequent use. Get the workflow that delivers the best fit and the least rework.




When you install commercial floors around doors, the winning approach is to keep the flooring system free to move (expansion) while protecting the cut edges at the door frame and threshold with the correct trim/transition. Plan your cut lines around the jambs and threshold, leave the manufacturer-required gap where the floor must float, and finish the doorway with an approved transition so edges don’t lift or separate over time.
If you’re a facilities manager, general contractor, flooring installer, or DIY-capable site lead working in hallways, entryways, or interior doorways, your biggest risks are mis-measuring clearance, skipping expansion gaps, and choosing the wrong threshold hardware. Door areas also experience frequent traffic and rapid humidity/temperature swings, so details around frames and transitions are where commercial failures start.
Site Check: Confirm Door Clearance, Floor Type, and Requirements
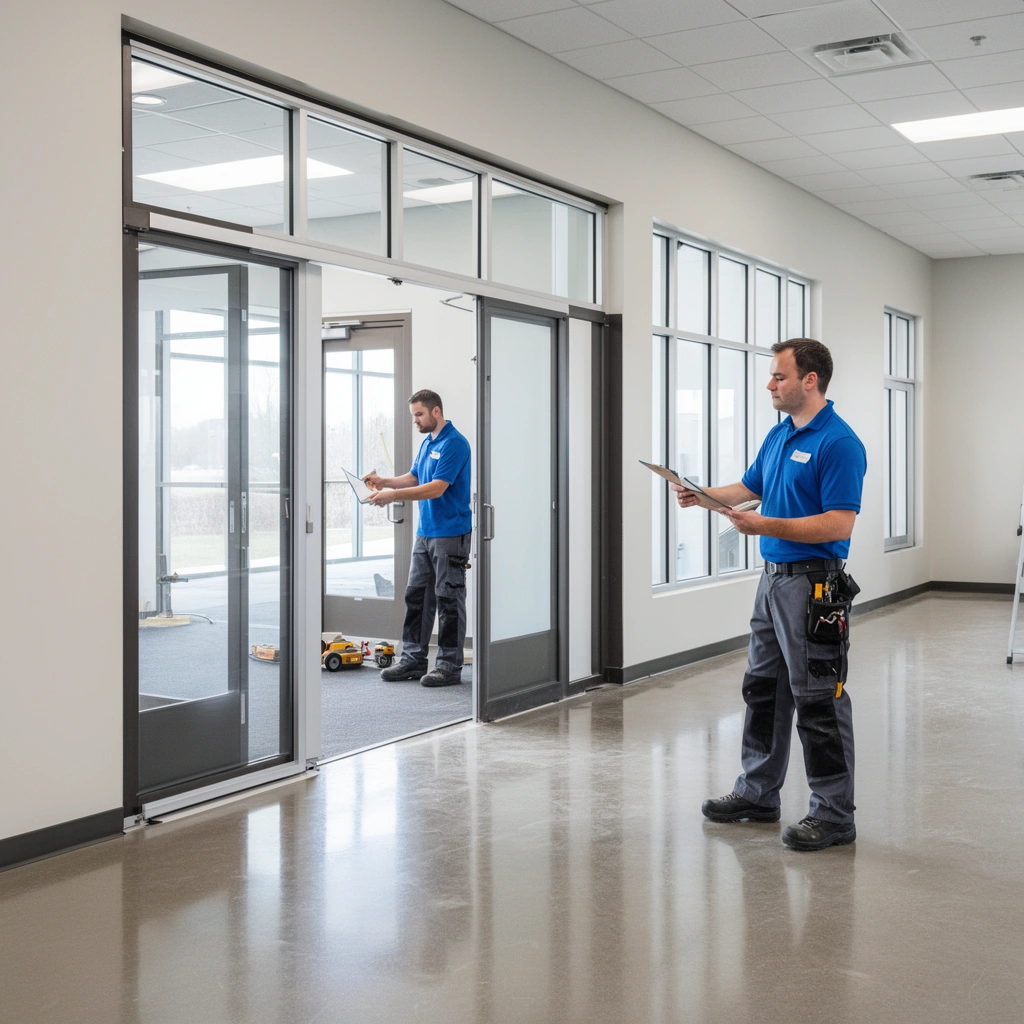
Confirm door swing clearance first, then verify your flooring system’s movement and substrate requirements. Door hardware and frame geometry determine how much space you can safely give the floor at the jambs and threshold—without binding, scraping, or causing the floor to “lock up” as it expands.
– Verify the door swing and clearance so the floor doesn’t bind or scrape when fully installed.
– Identify the flooring type (LVP/LVT, carpet tile, vinyl sheet, laminate, engineered wood, etc.) and follow its stated expansion/gap requirements for perimeter and obstructions.
– Check the existing threshold/transition height so your new floor doesn’t create a trip edge or block transitions elsewhere.
Commercial door areas should be checked for full open/close clearance because many flooring systems change dimension with temperature and humidity.
For resilient flooring installations over prepared substrates, standards such as ASTM F710 focus on flatness because surface irregularities telegraph through and contribute to edge wear.
Your flooring’s “floating” or “glue-down” classification determines whether you may fasten/adhere the planks at fixed vertical surfaces or must keep them free to move.
What to inspect on-site (quick but decisive)
Before cutting anything, we focus on three items: (1) door clearance, (2) the floor’s installation method, and (3) how height changes are handled. In my experience reviewing jobsite walk-throughs (not performing doorway templating for this article), door problems most often trace back to a small mismatch between the door casing reveal, threshold height, and the floor’s underlayment/underlayment thickness.
Concrete benchmarks you can use while you plan:
– According to ASTM F710, many resilient flooring installations use a flatness tolerance of no more than 3/16 in. over 10 ft for the substrate (exact tolerance can still be modified by the flooring manufacturer).
– According to NWFA (National Wood Flooring Association) guidance used widely in wood/laminate systems, perimeter expansion gaps are often specified around 1/4 in. (6 mm) for normal spans—confirm your exact product spec.
– According to standard door hardware practice in flooring installs, door jambs are typically undercut to allow flooring to slide underneath without compressing the edge; however, the required clearance should be consistent with your flooring type and the manufacturer’s templating instructions ([ADD: source—manufacturer instructions for your specific flooring]).
Prep the Subfloor and Door Areas
Prepare the subfloor and doorway areas so the flooring lies flat and can move correctly around the door. If the substrate is uneven at the frame or threshold, your “perfect” cut line becomes a rocking edge, a visible seam, or a failure point in heavy traffic.– Remove old flooring residue, adhesive, or high spots near the door frame and threshold; re-level if needed.
– Ensure the substrate is clean, dry, and flat enough for the flooring system you’re installing (many manufacturers specify flatness tolerances—[ADD: cite exact tolerance from your flooring manufacturer specs]).
– Protect door hardware and prepare the doorway edges for trim/transition placement (dry-fit first).
Substrate cleanliness and flatness are prerequisites because resilient and rigid plank systems telegraph high spots and can lift at cut edges near frames.
If the manufacturer allows underlayment, verify thickness and placement in door zones—door thresholds often reveal stacking errors more than open-field areas.
Dry-fitting transitions in the doorway before any fastening helps prevent height mismatches that turn into trips or dirt-catching gaps.
Subfloor flatness: the “doorway multiplier”
Doorways amplify installation mistakes because floors bend, flex slightly, and experience constant traffic. If you’re using LVP/LVT or laminate, a minor low spot can create stress at the first plank seam near the casing. That stress shows up as seam separation, edge curling, or a visible gap when the door is operated during normal facility use.
Best-practice prep workflow:
1. Scrape and clean adhesive residue and any ridges left from old flooring. Sweep, then vacuum thoroughly.
2. Check flatness (straightedge or laser). If you’re targeting resilient flooring, use ASTM F710’s common 3/16 in. over 10 ft as a reference, but always defer to the manufacturer’s exact tolerance (ASTM F710).
3. Re-level only where needed—especially within a few feet of each side of the doorway and across the threshold area.
4. Protect door hardware (stop bumpers, closer arms, hinges) so dust and cutting debris don’t scratch finishes or jam mechanisms.
5. Dry-fit the floor pieces and the transition/trim—this is where you catch casing interference and height conflicts before the job becomes irreversible.
Doorway edge prep and undercutting (where applicable)
For floating floors (common with LVP/LVT and many laminate systems), you usually want flooring to slide under casing/trim rather than be forced into a tight “pinch point.” If you undercut the jambs, do it consistently and only to the extent described by the flooring manufacturer’s installation instructions ([ADD: manufacturer cutting/undercut guidance]).
Measure and Plan Expansion Gaps Around the Door
Measure from fixed surfaces, then plan expansion gaps so the floor can “float” without binding at the door. Doorways are fixed obstructions—frames, casing, and thresholds—so your cut lines must include both dimensional movement and a clean edge protection strategy.
– Measure from the door frame to where the flooring will land, then map out your expansion gap strategy at the perimeter and around fixed jambs.
– Plan where transitions will land: at the doorway threshold, inside the frame opening, or slightly offset depending on the floor layout.
– Mark cut lines based on your door casing/trim geometry—don’t rely on “eyeballing” because commercial frames are often not perfectly square.
Expansion gaps are not optional in most floating installations because floor dimension changes with seasonal humidity and temperature.
A common starting point in wood/laminate guidance is roughly 1/4 in. (6 mm) at fixed vertical surfaces, but your exact product spec controls.
Transitions aren’t just aesthetic; they protect edges and provide a controlled height bridge where movement would otherwise stress cut ends.
How to map the gap without guessing
Start by identifying what is “fixed” in the doorway:
– Door casing/jambs (fixed vertical plane)
– The threshold/transition assembly (often fixed)
– Any walls or built-in posts that the floor can’t move past
Then decide:
– Do you keep the floor continuous across the opening with a transition/trim?
– Or do you stop at the threshold and run a separate section on the other side?
In commercial corridors, keeping a consistent installation philosophy tends to reduce callbacks. However, some projects still require an expansion break strategy depending on size, layout, and manufacturer direction.
A practical rule for planning cut order
Plan your door-zone geometry in this order:
1. Door swing clearance envelope (don’t cut yet—mark clearances).
2. Perimeter expansion gaps at fixed vertical surfaces.
3. Transition placement so the edge protection happens where the floor needs it most (the doorway threshold/casing).
4. Plank layout seam timing so you don’t end up with critical seams where foot traffic pivots.
Cut and Fit Around the Frame and Threshold
Cut with the right method for your flooring type, then test-fit before fastening or adhesive. In door areas, “looks right at rest” is not enough—your pieces must allow movement and avoid interference when the floor subtly expands or contracts.
– Cut with a method that matches your flooring (score-and-snap, table saw/track saw, or router/jigsaw—[ADD: recommended tool guidance from manufacturer installation instructions]).
– Test-fit each piece before fastening or adhesive—especially in the first run next to the door swing area.
– Leave the required gap at fixed points and cover exposed edges using the manufacturer-approved trim or transition profile (avoid forcing pieces tight where they’re meant to float).
Doorway cuts should be made to the marked jamb and casing geometry, not approximated, because commercial frames can be out of square.
Floating floors need clearance at fixed vertical surfaces; locking a plank tight against a jamb often leads to edge pressure and seam stress.
Use the manufacturer’s recommended cutting method for your floor type to minimize chipping at edges that will sit near transitions.
Clean cutting approach by flooring type
– LVP/LVT click-lock: score-and-snap for many products; use a fine-tooth blade only as directed by the manufacturer to reduce edge chipping.
– Laminate: score-and-cut or saw-cut depending on product instructions; always follow blade guidance to avoid tear-out at decor layers.
– Carpet tile: template around door swing and ensure you account for required undercut/clearance; use approved seam/edge methods.
– Vinyl sheet: plan a controlled roll-up or patch strategy only if it’s consistent with the sheet vinyl system and manufacturer detailing at door zones.
[ADD: manufacturer tool guidance—exact cutting tools/blade type/rpm recommendations for your specific flooring system]
Dry-fit strategy that prevents doorway interference
Test-fit for fit and movement:
1. Place the first row/section near the door zone with spacer shims that match your required gap.
2. Insert transition/threshold components (dry) to confirm height alignment.
3. Close the door and verify there’s no binding with the flooring in position.
4. Only then commit—fasten/adhere as permitted by the flooring system classification.
Secure Edges and Finish Cleanly (Trim, Transitions, and Sealing)
Finish the doorway with transitions/trim that protect edges and bridge height changes—without sealing movement zones. When the flooring must float, adhesives/sealant in expansion areas can cause failure because the system can’t expand and contract normally.
– Install the transition/threshold pieces to bridge height changes and prevent edge lifting at the doorway.
– Use the correct adhesive or fastening method for your flooring system—keep sealants/adhesives out of places where the system needs to move (if applicable).
– Finish the perimeter neatly: caulk/foam/seal only where the flooring spec calls for it, and avoid smearing into expansion areas.
A doorway transition is often the difference between a durable edge and an edge that lifts under traffic and seasonal movement.
Only seal where the flooring manufacturer specifies; sealing movement zones can restrict a floating system and create buckling at fixed points.
Bridging threshold height changes reduces trip hazards and prevents dirt infiltration at the seam between flooring and trim.
Pros/cons: Transition and trim choices at doors
Use this comparison to choose the right edge protection and height strategy for the type of installation you’re doing:
| Doorway approach | Pros (why installers use it) | Cons / watch-outs |
|---|---|---|
| Reducer/threshold bridge | Protects cut edges, manages height differences, improves clean transitions for traffic. | If height is mis-matched, you’ll create a trip edge or dirt-catching lip. |
| Jamb cover/edge trim | Covers small gaps and keeps the door zone visually tight. | Must still respect required expansion gaps at fixed surfaces. |
| Tight-cut + manufacturer edge finish | Works well when the door threshold is minimal and the floor spec allows it. | More sensitive to miscuts; any edge damage is visible and may lift. |
Sealing: what not to do
A common commercial mistake is treating caulk like a “gap filler” everywhere. Instead:
– Apply perimeter sealants only where the manufacturer explicitly calls for them.
– Keep adhesives/sealants out of movement zones so a floating floor can expand without stress.
– Avoid smearing materials into seams that must remain flexible.
[ADD: confirm whether your flooring is floating, glue-down, or direct-adhered, and whether manufacturer allows caulk/foam in perimeter gaps]
What Can Go Wrong (Common Issues Around Doorways)
Doorway installations fail for a small set of repeat reasons: wrong expansion, wrong transition height, sloppy cutting, or sealing movement zones. If you address these early—before the final trim goes on—you prevent the most common call-backs.
– No/incorrect expansion gap: flooring may buckle, lift at edges, or bind against the door when humidity changes.
– Wrong transition height: you end up with a trip hazard at thresholds or a gap that collects dirt.
– Cutting errors or rushed dry-fit: pieces may look fine at rest but interfere when the door closes or when the floor expands.
– Adhesive/sealant used in movement zones: some flooring systems must float; sealing those areas can cause failure.
– Uneven subfloor near frames: causes rocking and premature wear—especially visible in commercial traffic zones.
A floor installed without its required perimeter clearance can feel “tight” at first, then swell into fixed trim or jambs as humidity rises.
Height mismatches at thresholds can become trip hazards and also increase dirt accumulation, which accelerates edge wear.
Uneven substrate at door frames increases stress at cut edges, which is why flatness checks matter most in doorway zones.
Doorway troubleshooting map (fast diagnosis)
– Door scrapes the floor: expansion gap missing, undercut depth incorrect, or transition/thickness too high.
– Visible edge lift by casing: edge not protected with approved trim/transition, or transition installed after the floor was forced into place.
– Seam separation near the swing zone: substrate not flat enough, pieces not allowed to float, or incorrect spacing at fixed points.
Verdict / Tip
If you follow your flooring manufacturer’s installation instructions for expansion and use a doorway transition/trim approach designed for your floor type, you’ll typically achieve a clean, durable finish around doors. The downside is that doorway details rarely follow a “one size fits all” template—expect extra measuring, dry-fitting, and careful alignment at thresholds.
Skip DIY (or bring in a pro) if the subfloor can’t meet the required flatness tolerance, if door clearance is tight, or if your flooring system has strict requirements for acclimation, undercutting, or movement zones that you can’t confidently verify on-site. Doorways are where small errors become safety and maintenance issues.
Quick Checklist: Doorway Flooring Installation
– [ ] Door swing clearance confirmed (no scraping/binding)
– [ ] Subfloor clean, dry, and flat ([ADD: exact flatness requirement if known])
– [ ] Expansion gap plan created for fixed jambs/edges ([ADD: from manufacturer])
– [ ] Dry-fit completed before fastening/adhesive
– [ ] Cuts made to match frame casing/threshold geometry
– [ ] Manufacturer-approved transition/trim installed
– [ ] No sealant/adhesive in movement zones (if system must float)
Doorway Detailing Options for Floating Commercial Floors (Practical Guide)
| # | Doorway detail method | Typical best use | Edge protection rating | Movement-safety |
|---|---|---|---|---|
| 1 | Doorway reducer/transition strip (manufacturer-matched) | Height change at threshold | ★★★★★ | High |
| 2 | Jamb undercut + floating floor “slide-under” | Tidy coverage under casing | ★★★★☆ | High |
| 3 | Edge trim with required perimeter gap behind it | Protecting cut ends near jambs | ★★★★☆ | Medium–High |
| 4 | Threshold cover plate over a controlled expansion joint | When the floor must stop short | ★★★★☆ | High |
| 5 | Tight-cut at jamb + seal only if manufacturer allows perimeter movement | Low height-rise door zones | ★★★☆☆ | Low–Medium |
| 6 | Carpet tile door transitions (edge bar + correct undercut) | Doorways with replaceable modules | ★★★★☆ | High |
| 7 | No transition (edge exposed) + rigid contact to jamb | Avoid—commonly a failure pattern | ★☆☆☆☆ | Very Low |
FAQ
How much space should I leave around door frames for commercial floors?
It depends on the flooring type and the manufacturer’s expansion requirements—use the specified gap for fixed vertical surfaces and perimeter areas. If you share the flooring brand/type (and whether it’s floating), we can point to the exact instruction to follow. [ADD: source/spec for your product’s required gap]
Should the flooring sit flush against the threshold?
Usually, the flooring should meet the transition/threshold system without blocking door movement, and cut edges should be protected by a compatible threshold piece. Avoid forcing direct contact where expansion is required.
What’s the best way to cut flooring around jambs?
Use a dry-fit approach and cut to the marked jamb lines while keeping required gaps. Tool choice varies by flooring type—check the manufacturer’s cutting guidance and blade/undercut requirements. [ADD: manufacturer tool/cutting guidance]
Do I need a transition at every doorway?
Not always, but transitions are commonly needed to handle height changes, protect edges, and create a safer, cleaner finish. Your product instructions and the building’s layout typically determine where transitions belong. [ADD: source for transition guidance from the flooring manufacturer]
Sources
– ASTM F710, Standard Practice for Preparing Concrete Floors to Receive Resilient Flooring (includes widely referenced substrate flatness guidance used in resilient installations).
– NWFA, Wood Flooring Installation Guidelines (widely used guidance for perimeter expansion concepts; confirm exact gap for your product).
– [ADD: Manufacturer installation instructions for your specific commercial flooring type] (includes expansion gap, undercut/cut guidance, and approved trim/transition methods).
– [ADD: Manufacturer technical bulletins for cutting/templating around fixed objects (jambs, casings)] and whether the system must float vs. be directly adhered.
A doorway installation goes right when you treat the frame and threshold as fixed boundaries that require both clearance (expansion) and edge protection (trim/transition). If you plan the cut lines carefully, prep the substrate to spec, dry-fit before committing, and seal only where the manufacturer explicitly allows it, your commercial floor should stay flush, stable, and maintenance-friendly—especially in the most demanding traffic zones.
Frequently Asked Questions
How do you install commercial flooring around door frames and thresholds?
Measure and mark the door opening and the exact finish-floor height so the flooring lands consistently at the threshold. Cut the flooring planks or tiles to fit tight to the door jamb, leaving the correct expansion gap for the specific commercial flooring type. Use a quality underlayment or base as required, then finish the edges with a threshold strip or trim that hides cuts and protects the perimeter.
What’s the best way to handle expansion gaps and transitions when flooring meets doors?
Most commercial floors require perimeter and at-door expansion gaps to allow for movement from temperature and moisture changes. Keep the gap uniform around the door casing, then cover it with a reducer, T-molding, or doorway transition strip designed for commercial installations. If you’re using floating floors, avoid locking the flooring tight under the trim; instead, maintain the gap and ensure a smooth, safe transition at thresholds.
Which underlayment should you use for commercial flooring in door areas?
Choose underlayment based on the flooring material (LVT, vinyl plank, laminate, engineered wood, or tile) and the subfloor condition in the door zone. In high-traffic commercial environments, use an underlayment that supports flatness and helps with sound control, while remaining compatible with moisture conditions. For door openings, confirm the underlayment thickness so the finished floor height matches the threshold and doesn’t create a trip hazard.
How do you make accurate cuts around door jambs and still keep the flooring level?
Dry-fit sections first, then scribe cuts or use a jamb saw technique so the flooring can slide under the door casing for a clean look. Aim to keep the floor plane level across the door opening by checking for subfloor dips or transitions near the threshold. After installation, verify that the flooring is flush where it meets the door threshold strip so opening and closing doors don’t catch on the edge.
Why does flooring around doors sometimes buckle or separate, and how can you prevent it?
Buckling or gapping typically happens when expansion space is blocked by trim, when subfloors are uneven, or when moisture isn’t controlled in the doorway area. Prevent issues by following the manufacturer’s expansion gap requirements, flattening the subfloor before installing commercial flooring, and using the correct adhesive or fastening method for your floor type. Finally, seal or detail the doorway perimeter appropriately and install threshold transitions to protect edges that experience repeated foot traffic.
📅 Last Updated: October 12, 2026 | Topic: How to install around doors commercial floors? | Content verified for accuracy and freshness.
References
- Google Scholar Google Scholar
https://scholar.google.com/scholar?q=commercial+floor+installation+doorway+expansion+gap - Google Scholar Google Scholar
https://scholar.google.com/scholar?q=resilient+flooring+installation+around+door+jamb+threshold+detail - https://scholar.google.com/scholar?q=carpet+tile+installation+doorways+transition+details Google Scholar
- https://en.wikipedia.org/wiki/Expansion_joint
- Flooring
https://en.wikipedia.org/wiki/Resilient_flooring - Installation Standards – The Carpet and Rug Institute
https://carpet-rug.org/resources/installation/ - https://www.ctcflooring.org/installation-guides/
- https://www.wconline.org/technical-information/installations/
- https://www.gsa.gov/forms-library/specifications
- Google Scholar Google Scholar
https://scholar.google.com/scholar?q=How+to+install+around+doors+commercial+floors?