Fixing gaps in SPC floors is easiest when you identify the cause first—most commonly shrinkage from moisture/temperature swings or an incorrect installation gap. This guide lays out the practical repair steps that actually close SPC flooring seams, from checking subfloor conditions and releasing pressure points to reinstalling planks or using the right filler and transition details. You’ll get a clear, do-this-next workflow so the gaps stop spreading and the floor stays locked and level.




Gaps in SPC floors usually tighten up when you fix the real cause—most often blocked perimeter expansion, an out-of-flat subfloor, or moisture movement—then re-seat or replace only the affected planks. The fastest path is to (1) confirm perimeter expansion space, (2) verify subfloor flatness, and (3) use the right repair method for the gap size and locking-joint condition (re-space, re-seat, or plank replacement).
If your SPC planks are separating, peeking at the tongue-and-groove, or leaving visible lines between rows, this is for you—especially if the issue appeared after a seasonal humidity change or a recent install. It also helps if you’re dealing with small cosmetic gaps vs. gaps that keep widening.
Identify the real cause of the gaps
The quickest way to fix SPC floor gaps is to determine whether the movement is perimeter-driven (expansion/installation clearance) or seam-driven (subfloor flatness or locking-joint alignment). Once you can “classify” the gap location and behavior, you can pick the correct repair route instead of repeatedly forcing click-lock edges together.
If gaps start at the perimeter or near fixed objects, the most common driver is insufficient expansion clearance that prevents the floating floor from expanding/contracting.
If gaps appear consistently between rows and worsen when walked on, the subfloor may be out of flatness for the SPC’s click-lock system.
Look for pattern and movement behavior
Start with a simple map: walk the floor and note where the gaps show up first and where they grow.
– Perimeter gaps (along walls, cabinets, posts, around doorframes): These often point to missing expansion space or molding/baseboard that was installed tight to the planks.
– Row-to-row seam gaps (running across the room): These more often indicate subfloor flatness issues, plank misalignment, or a partially failed locking joint.
– Edge lift and flex when stepped on: If you can feel “bounce” at the seam, the subfloor is frequently the root problem—not the plank itself.
Confirm the subfloor condition before touching the planks
SPC is a floating floor system. The click-lock design depends on the base being stable and flat so the tongue-and-groove engages and stays engaged. If the subfloor has dips (low spots), planks can separate at the seam because the joint is no longer fully supported.
Also consider moisture-driven movement. Moisture doesn’t always present as visible water; it can still drive dimensional change in a slab/subfloor and show up later as widening seams—especially after seasonal shifts.
According to ASTM F710, resilient flooring installations use flatness requirements such as no more than 3/16 in. over 10 ft (common industry acceptance criterion referenced for resilient flooring).
According to ASTM F1869, moisture testing via MVER (calcium chloride) uses acceptance limits that are often ≤ 3 lb/1000 sq. ft. in 24 hours for many flooring systems.
According to ASTM F2170, in-situ RH (relative humidity) testing uses acceptance limits often around ≤ 75% RH depending on the flooring/adhesive system.
> [ADD: If you have a specific SPC brand, insert that manufacturer’s subfloor flatness and moisture acceptance tolerances from their installation guide.]
Verify expansion space and remove installation “lock-ups”
The most effective quick fix is to ensure the floor has room to move: perimeter expansion space, plus clearance around posts and doorframes. When a plank can’t “slide” or expand normally, it may relieve stress by opening gaps between rows.
Floating SPC floors require an expansion gap at walls and fixed vertical surfaces to accommodate seasonal dimensional movement.
Baseboards and shoe molding should not be installed in a way that clamps the floating planks—otherwise click-lock joints can separate over time.
Measure the perimeter gap (using the manufacturer’s spec)
Use a ruler/tape and measure at multiple points around the perimeter. SPC flooring typically needs a deliberate expansion gap at:
– walls and baseboard boundaries
– around pipes/posts
– at doorframes and transitions
– any fixed cabinets that don’t move with the floor
Your manufacturer’s installation instructions control the exact expansion width (it can vary by brand and thickness). If you don’t have the printed spec, look for it in the purchase documentation or brand website.
Remove anything that “locks” the floor in place
Check whether baseboards/moldings were installed tightly against the planks. If the molding is nailed through the plank or effectively trapping the edge, loosen/remove it so the flooring can expand and contract.
– If baseboards are present: confirm the planks can still move under/behind them (they should float).
– If perimeter caulk or adhesive was used: removal may be necessary. Caulked seams can prevent controlled movement.
Re-space before you force boards together
If the issue started shortly after installation, the simplest explanation is often that the perimeter clearance wasn’t sufficient. In many cases, the safest first step is:
1. restore perimeter expansion
2. re-seat any slightly separated joints
3. avoid “pulling” planks tight beyond the system’s intended movement
Check subfloor flatness and fix dips or high spots
If gaps keep opening after perimeter clearance is corrected, focus on the subfloor’s flatness and stability. SPC planks can only lock reliably when the base supports the entire click-lock plane—dips cause separation; high spots cause stress and edge-joint problems.
Click-lock SPC joints rely on even support; subfloor low spots can force the joint to unload and then separate.
Repair any dip or high point before you attempt to re-seat the locking edges, or the gap often returns.
Decide whether you need patching vs. leveling
If you feel bounce or see unevenness, don’t assume the planks are the problem. Depending on the base:
– Low areas (dips): patch/skim or use an appropriate patch or self-leveling underlayment designed for that subfloor type.
– High spots: grind down carefully and vacuum thoroughly.
> [ADD: the correct flatness verification method you use—e.g., a 6–10 ft straightedge per installer practice—and any exact flatness tolerance from your SPC/underlayment guide.]
Remove affected sections only as far as needed
Often, correcting flatness requires partial teardown:
– remove planks in the affected zone
– inspect underlayment (if used)
– correct the base
– reinstall underlayment and planks exactly as specified
When re-installing, ensure the click-lock method (angle-and-drop vs. tap-and-lock—brand-specific) is followed precisely.
Don’t “shim random spots”
Shimming can create new high points or uneven pressure. That’s why manufacturer guidance typically emphasizes correcting the base surface, not compensating with ad-hoc wedges.
Repair small gaps without full replacement
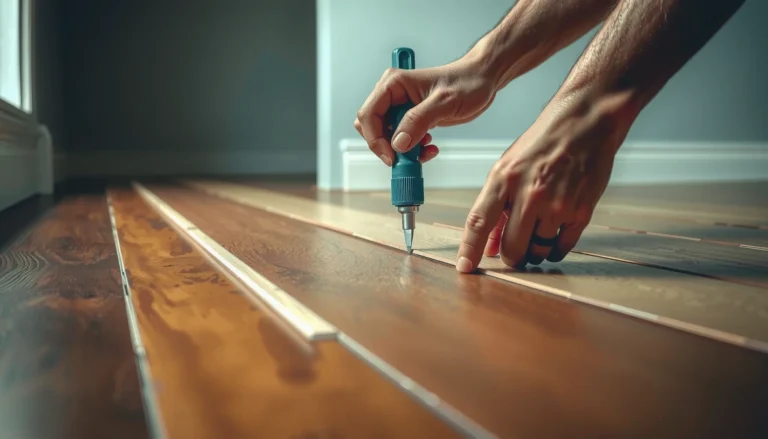
Small SPC gaps are often fixable by re-seating joints and correcting alignment—especially when the damage is cosmetic or limited to an early seam failure. The key is to avoid damaging the tongue-and-groove while you re-engage the click-lock.
Hairline separation can sometimes be corrected by re-seating the click-lock joint rather than replacing the whole floor.
Misalignment of preceding rows can prevent a plank from locking fully, which keeps gaps from closing even after tapping.
Re-seat hairline separation carefully
For minor separation:
– gently pull the planks together where safe
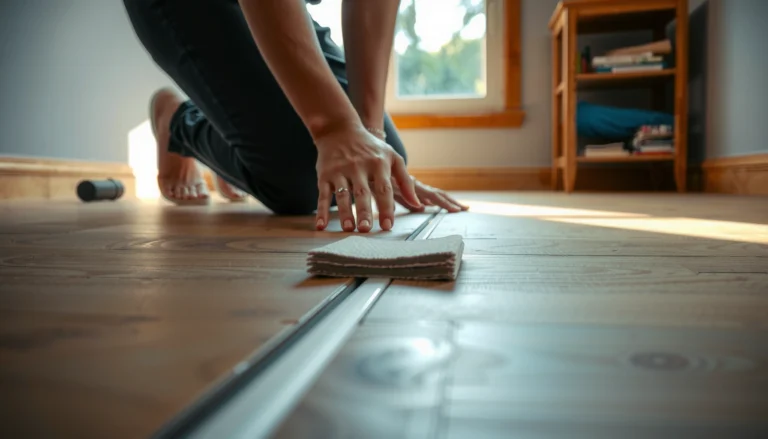
– use a tapping block to apply force through the correct surface area
– avoid direct hammer contact on edges (direct impacts can chip the tongue or groove)
From my experience, the most common “almost works” scenario happens when someone taps hard enough to move the plank but also micro-damages the joint—then the gap returns a few weeks later as the floor moves seasonally. If the joint isn’t cleanly engaging, stop and inspect rather than forcing it.
Check alignment of the prior row
If the gap sits at a row seam, confirm the previous rows are:
– straight (not subtly “walking” off line)
– correctly locked
– not shifted due to debris under the joint
Even a small misalignment at the starting edge can cause repeated seam gaps every few boards.
Spot repair when the joint is damaged
If you see chipped/broken tongue-and-groove elements, re-seating may never hold. In that case, spot replacement of affected planks is typically safer than repeatedly forcing a failing joint.
Quick decision guide:
– If the joint looks intact and the gap is minor → try re-seat after fixing expansion/flatness.
– If the joint is deformed, cracked, or repeatedly opens → replace the plank(s).
Fix larger gaps or failed locking joints (when to replace planks)
Larger, widening gaps usually mean the locking joint has failed (or the base is still wrong), so replacement is often the cleanest long-term fix. If the tongue/groove is visibly chipped, bent, or cannot lock fully, forcing the boards together just postpones the next separation.
A widening gap with damaged locking edges is a strong indicator that replacement of affected planks is the durable solution.
When you remove planks, inspect underlayment—compressed or torn layers can contribute to recurring movement.
Replace in controlled sections
Work in sections so you don’t disturb perfectly installed areas:
1. remove the damaged planks carefully
2. inspect underlayment and base for debris, creases, or unevenness
3. correct the cause (expansion clearance and/or subfloor flatness)
4. reinstall underlayment (replace if damaged or compressed)
5. reinstall planks using the manufacturer’s locking approach
Underlayment matters—especially when it got creased
If underlayment was torn, creased, or compressed during removal, it may no longer provide consistent support. Many manufacturers recommend replacing underlayment that is damaged during install or repair.
Pros/cons: re-seat vs. replace (what to choose)
| Option | Pros | Cons |
|---|---|---|
| Re-seat / re-space | Less teardown; faster for hairline cosmetic gaps; avoids plank sourcing if joints are intact. | May fail if joint edges are chipped or if subfloor flatness is still out of tolerance. |
| Replace affected planks | Most durable for widening gaps; restores locking integrity; lets you correct base/underlayment issues. | More labor; requires matching planks (color/lot variation can be noticeable); may require larger teardown. |
What can go wrong (common mistakes and edge cases)
Even when you choose the right method, small mistakes can reintroduce the problem. These are the failure points we most often see during troubleshooting.
If perimeter gaps were sealed tight, a “temporary fix” may hold until the next seasonal movement forces separation again.
Direct hammering on click-lock edges can chip tongues/grooves, turning a small gap into a joint failure.
– Missing expansion space: Repairs may appear successful immediately, then gaps return after humidity/temperature changes.
– Forcing boards together: Over-clamping or hitting edges directly can crack or deform the locking profile.
– Ignoring subfloor problems: Re-locking planks on uneven support often fails again within weeks or months.
– Moisture problems: If gaps started after spills, wet mopping, or suspected subfloor moisture, repair without moisture correction can keep repeating.
– Wrong underlayment (or double-underlayment): Incompatible layer thickness/firmness can change how the click-lock system supports and releases stress.
> [ADD: your recommended moisture testing plan if you suspect moisture—e.g., ASTM F1869 MVER and/or ASTM F2170 RH, including pass/fail criteria from the flooring manufacturer.]
Verdict: what to do first (and who should skip DIY)
Start with the least disruptive checks: restore/verify perimeter expansion, inspect alignment, and confirm the subfloor is flat enough. DIY spot repairs can work for small, isolated gaps—but if the subfloor is out of flat, moisture is suspected, or the locking joints are visibly damaged, it’s smarter to replace affected planks (or hire help) rather than repeatedly forcing the system back together.
Skip DIY if you’re unsure about moisture/subfloor conditions or if you can’t access the perimeter expansion without major teardown—those cases usually need more careful diagnosis. Also consult a pro if you can’t rule out slab/subfloor moisture using your flooring’s required tests and acceptance criteria.
[ADD: when/where you’ll consult a professional—e.g., if moisture readings exceed ASTM F2170 or F1869 thresholds for your SPC system.]Moisture & Flatness Checks That Prevent SPC Gap Recurrence
| # | Test / Verification | Standard | Common Acceptance Target | Why It Matters for SPC |
|---|---|---|---|---|
| 1 | Concrete moisture vapor emission (MVER) | ASTM F1869 | ≤ 3 lb/1000 ft²/24 hr | Moisture-driven expansion/contraction can open seams. |
| 2 | In-situ relative humidity (RH) | ASTM F2170 | ≤ 75% RH (system-dependent) | High RH can lead to recurring plank movement. |
| 3 | Subfloor flatness/level verification | ASTM F710 | ≤ 3/16 in over 10 ft | Low/high spots unload click-lock joints at seams. |
| 4 | Straightedge/visual inspection for high ridges | Installer method | No ridges that prevent full contact | High spots create stress that chips lock edges. |
| 5 | Underlayment integrity after teardown | Manufacturer instructions | Replace if torn/creased/compacted | Compacted underlayment can reintroduce dips. |
| 6 | Expansion gap confirmation around fixed edges | SPC manufacturer spec | Perimeter clearance (varies) | Blocked edges force stress release as seam gaps. |
| 7 | Locking-joint engagement check | Click-lock method guide | No visible step or open seam after locking | Failed engagement causes repeat separation. |
Quick checklist you can scan
– [ ] Are the gaps near walls (perimeter) or running across the room (between rows)?
– [ ] Is there a proper expansion gap per the SPC floor manufacturer’s instructions? [ADD: manufacturer expansion gap spec]
– [ ] Is the subfloor flat and solid where the gap occurs? [ADD: flatness tolerance spec if available]
– [ ] Do planks flex or lift when stepped on?
– [ ] Are tongue/groove edges chipped or deformed?
– [ ] Did you install baseboards/moldings tightly to the floor?
– [ ] Fix cause first (expansion/subfloor/moisture), then re-seat or replace.
FAQ
How big of a gap is “too big” to ignore in SPC floors?
If the gap is growing over time or the planks aren’t properly locking, treat it as a needs-repair issue. For exact thresholds, follow your specific SPC manufacturer’s guidance. [ADD: source for “acceptable gap size” from your SPC brand/spec sheet.]
Why do my SPC floor gaps show up after winter or summer?
Temperature and humidity changes cause SPC to expand/contract. If expansion space is insufficient or the perimeter is blocked, the floor has nowhere to move—so gaps can appear. The fix is to restore the correct expansion clearance.
Can I fix gaps by adding more underlayment or shims?
Usually no—extra layers can change how the click-lock system performs, and shims can create new uneven points. Fix the base/subfloor and reinstall using the manufacturer’s recommended layers and setup.
Do I need to replace the whole floor if gaps keep returning?
Not necessarily. If only a section is affected and the rest locks normally, you may be able to replace only the damaged/poorly locked planks after correcting the underlying cause (expansion and/or subfloor flatness).
Sources
– [ADD: SPC floor manufacturer installation guide for expansion gap and click-lock repair/replacement steps]
– ASTM F710 (resilient flooring installation standard referenced for flatness/level and related acceptance criteria)
– ASTM F1869 (calcium chloride moisture vapor emission testing)
– ASTM F2170 (in-situ relative humidity testing)
– [ADD: Underlayment manufacturer instructions for thickness/compatibility with SPC]
– [ADD: Subfloor flatness/levelness requirement from the SPC or LVP/SPC installation standard or manufacturer documentation—name the standard if you use one]
Gaps in SPC floors are rarely a “mystery defect”—they’re usually the floor reacting to blocked expansion, uneven support, or moisture movement. Start by correcting perimeter expansion and verifying subfloor flatness, then re-seat joints if the locking edges are intact; if the gap is widening or the tongue-and-groove is damaged, replace only the affected planks and (critically) re-check the base so the repair doesn’t repeat.
Frequently Asked Questions
What are the most common causes of gaps in SPC (stone plastic composite) floors?
Gaps in SPC floors usually come from moisture or humidity imbalance, improper acclimation before installation, and subfloor movement or unevenness. Expansion and contraction are normal with temperature changes, so poorly planned expansion gaps at walls or around fixtures can make gaps appear. Loose plank locking mechanisms from incorrect installation or debris in the click joints can also create visible seams. Finally, point loading or failed leveling can cause SPC flooring to shift and separate at edges.
How do you fix small gaps between SPC floor planks without replacing the whole floor?
Start by cleaning the click-lock edges thoroughly—vacuum and remove any dust, underlayment debris, or old adhesive that prevents tight engagement. If the floor is slightly out of alignment, gently lift the affected planks and re-seat the locking system, using a tapping block and rubber mallet to ensure full interlock. For minor perimeter gaps, you can trim or adjust transition pieces and confirm the floor has adequate expansion space. After corrections, let the area sit under stable temperature for 24–48 hours before walking or moving heavy furniture.
How do you fix SPC floor gaps at the walls, doorways, or transitions?
Check whether the required expansion gap was left around walls and vertical objects like cabinets, posts, and door frames. If gaps are caused by insufficient spacing, the floor may buckle later—remove skirting/trim carefully, reinstall the trim with correct clearance, and add transitions that allow movement. If the issue is a missing or undersized expansion joint, install matching expansion trims or T-molding to cover the gap while maintaining a functional movement zone. Ensure the subfloor is flat under transitions so the planks don’t separate when doors open or furniture is placed.
Which tools and materials are best for sealing or repairing gaps in SPC flooring?
For SPC floor gap repair, use a tapping block, rubber mallet, spacers (or expansion wedges), and a flooring pull bar for re-locking planks safely. For cosmetic perimeter coverage, use manufacturer-approved trim, transition strips, or baseboards rather than rigid fillers that can block expansion. If you’re using a filler, choose products specifically designed for LVP/SPC movement joints and follow the flooring contractor’s guidance. Avoid thick caulk or epoxy in the middle of floating floors because it can prevent expansion and create future buckling or more separation.
Why do gaps in SPC floors keep coming back, and how can you prevent them?
Recurring gaps often indicate an underlying installation or environmental problem—most commonly improper acclimation, incorrect subfloor moisture levels, or an uneven substrate that causes plank movement. Verify that the concrete or subfloor has acceptable moisture, the underlayment is correct for your SPC system, and the installation includes the proper expansion gap. Re-check that the click-lock joints were fully engaged during installation and that no debris sits in the seams. Maintaining stable indoor humidity and temperature, using proper transitions, and addressing subfloor flatness can prevent gaps from returning.
📅 Last Updated: October 08, 2026 | Topic: How to fix gaps in SPC floors? | Content verified for accuracy and freshness.
References
- Google Scholar Google Scholar
https://scholar.google.com/scholar?q=SPC+floor+gaps+how+to+fix+expansion+gap - Google Scholar Google Scholar
https://scholar.google.com/scholar?q=stone+plastic+composite+flooring+installation+gaps+click+lock+recommended+clearance - Google Scholar Google Scholar
https://scholar.google.com/scholar?q=vinyl+flooring+installation+expansion+gap+prevention+of+gapping - Google Scholar Google Scholar
https://scholar.google.com/scholar?q=resilient+flooring+installation+guide+subfloor+flatness+and+gap+formation - Google Scholar Google Scholar
https://scholar.google.com/scholar?q=LVP+click+lock+flooring+seams+separating+how+to+repair - Google Scholar Google Scholar
https://scholar.google.com/scholar?q=rigid+core+flooring+spacers+expansion+gap+instructions - Google Scholar Google Scholar
https://scholar.google.com/scholar?q=SPC+flooring+gap+between+planks+moisture+humidity+effects+study - Google Scholar Google Scholar
https://scholar.google.com/scholar?q=how+to+install+rigid+core+flooring+correct+underlayment+and+subfloor+requirements - Google Scholar Google Scholar
https://scholar.google.com/scholar?q=resilient+flooring+subfloor+flatness+tolerance+ASTM+guideline - Google Scholar Google Scholar
https://scholar.google.com/scholar?q=does+underlayment+cause+gaps+in+rigid+core+vinyl+flooring